• About
  • Online Card Classes
  • Card Making Ideas
  • Stampin' Up! Catalogs
  • Card Tutorials
  • Contact
  • Shopping Rewards
  • Shop
  • Join Stampin' Up!
ON Y GO! STAMPING
  • About
  • Online Card Classes
  • Card Making Ideas
  • Stampin' Up! Catalogs
  • Card Tutorials
  • Contact
  • Shopping Rewards
  • Shop
  • Join Stampin' Up!

Berry Blessings from a Card Sketch

12/17/2020

0 Comments

 
Simple Card Making Idea using the Berry Blessings stamp set and Berry Delightful patterned paper from Stampin' Up! Earn these items for FREE during Sale-A-Bration in January and February!
I had so much fun with yesterday's card sketch that I decided to make another card! This time, I used the new Berry Blessing stamp set and coordinating patterned paper that you can get FREE during Sale-A-Bration. All you have to do is order at least $100 in Stampin' Up! products in January or February and choose the Berry Blessings Stamp set and Berry Delightful Designer Series Paper bundle as your FREE item. Plus, there is another coordinating stamp set and punch in the NEW January-June Mini Catalog!
See the Additional Supplies Needed for this Berry Blessings Card Idea
Picture
0 Comments

Quick Cards With a Simple Card Sketch

12/16/2020

0 Comments

 
3 easy card ideas from a simple card sketch. All three use the soon-to-be discontinued Plaid Tidings patterned paper and new rubber stamp sets from the upcoming 2021 January-June Mini Catalog!
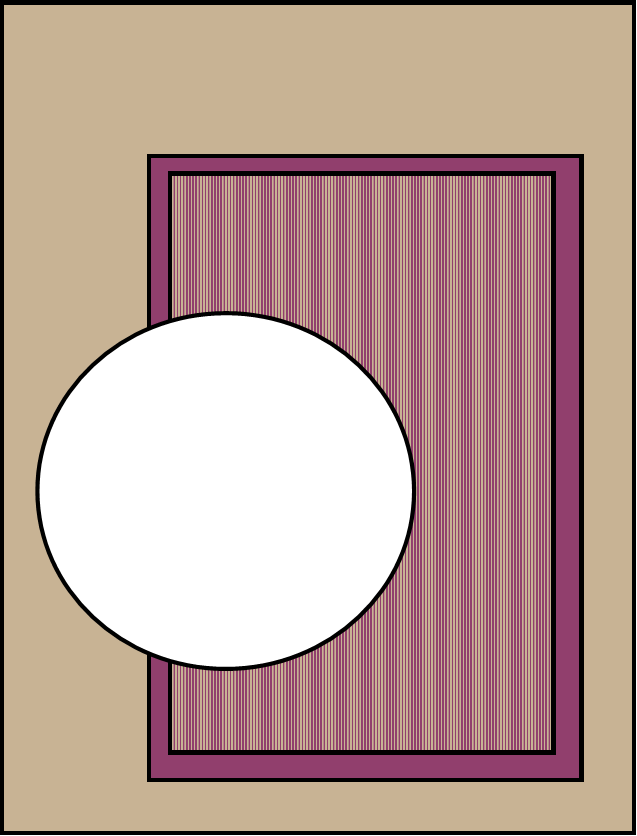
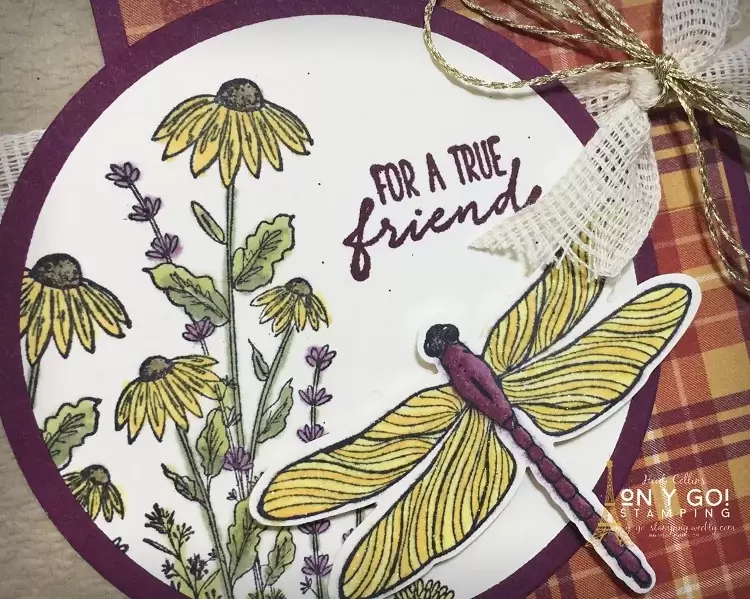
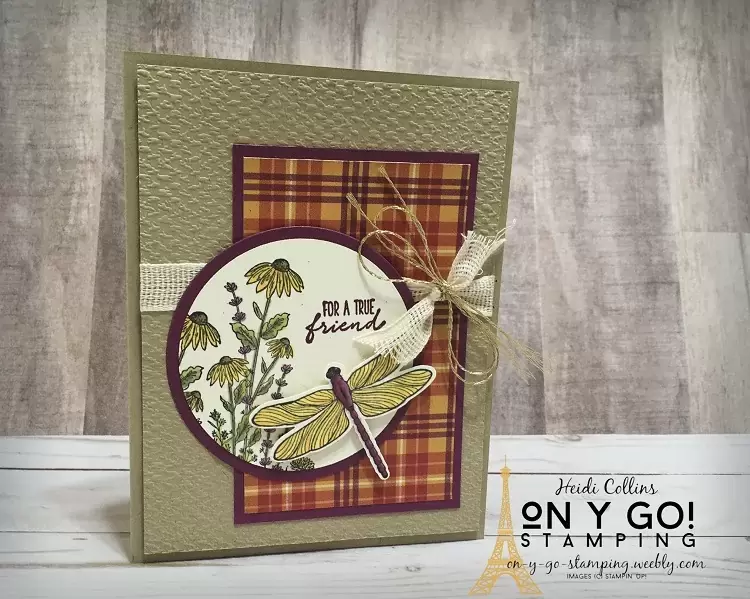
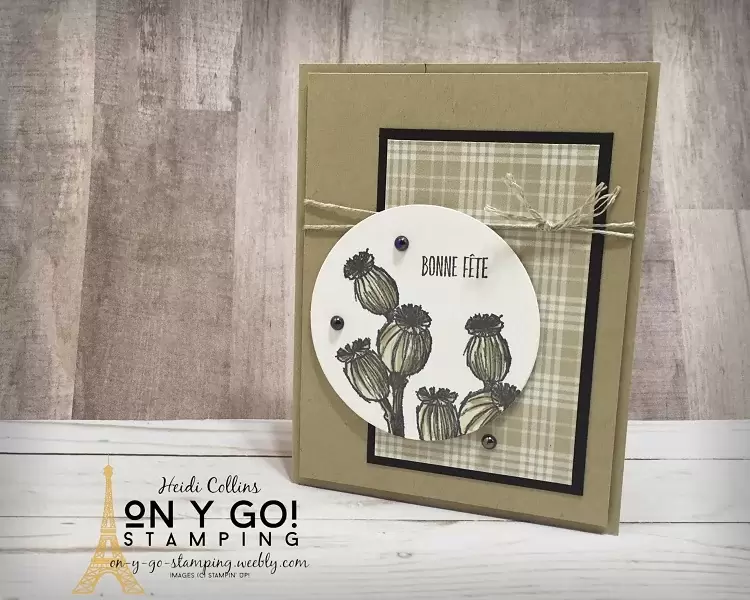
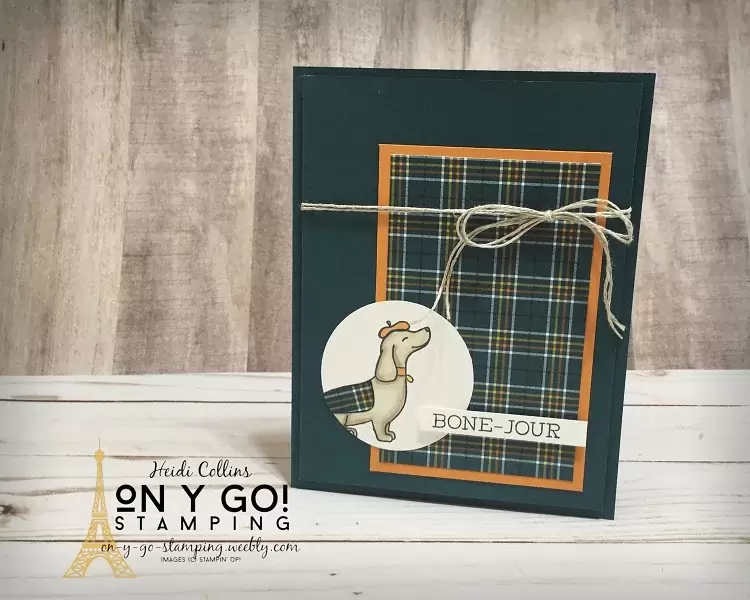
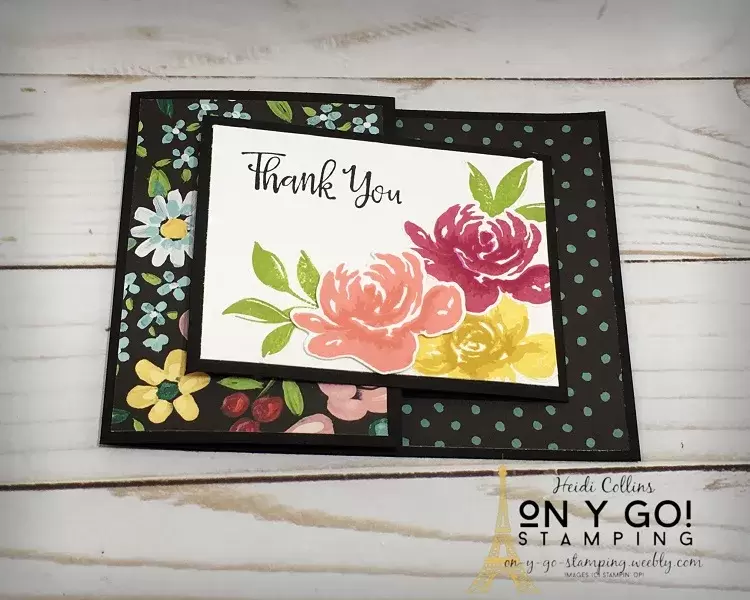
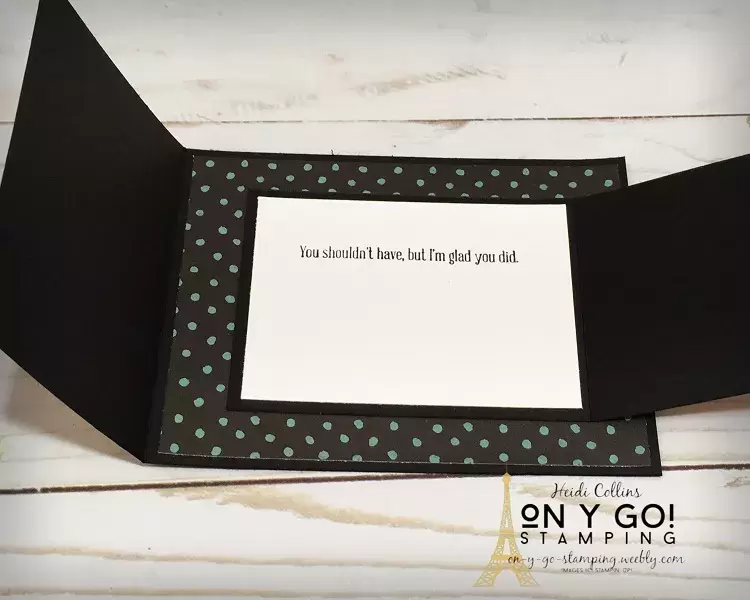
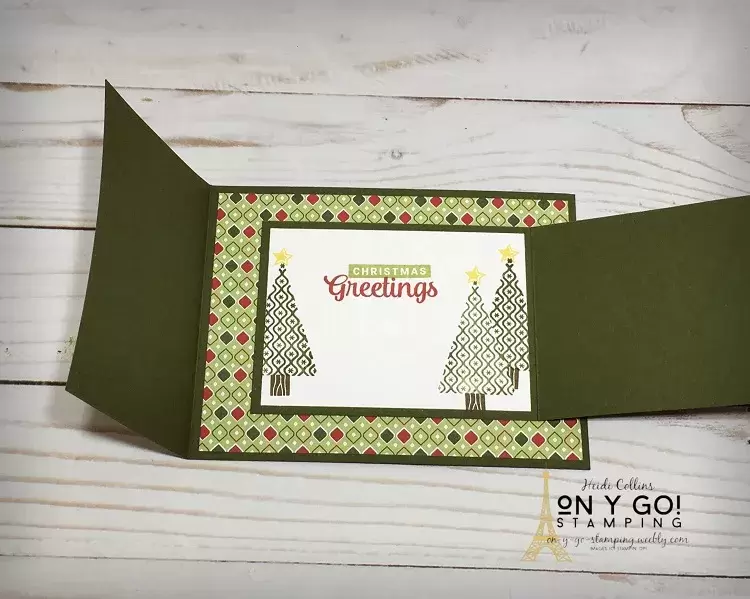
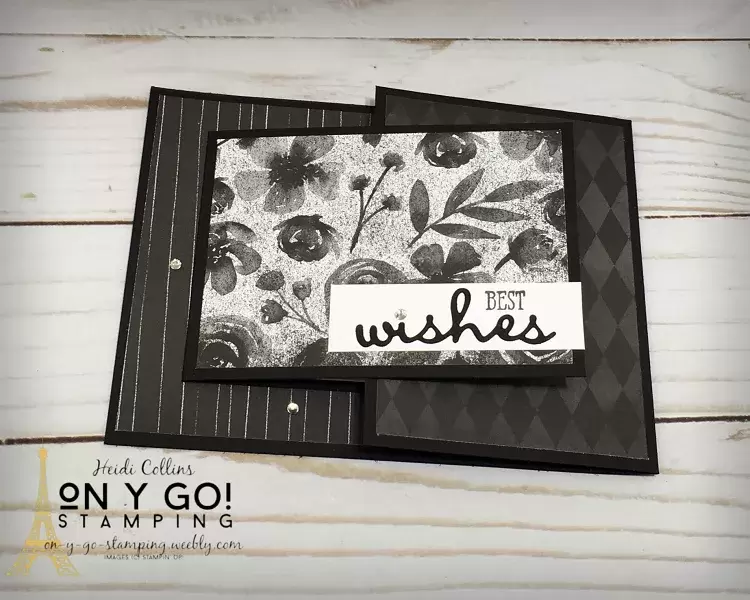
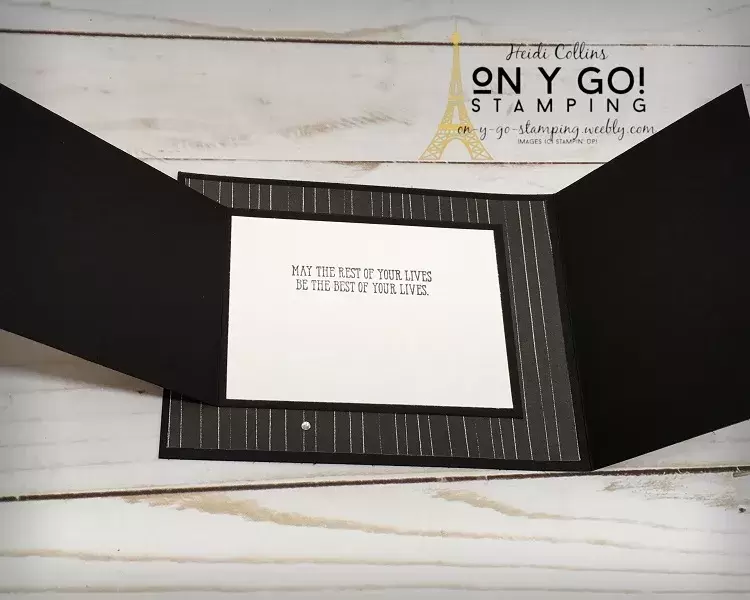
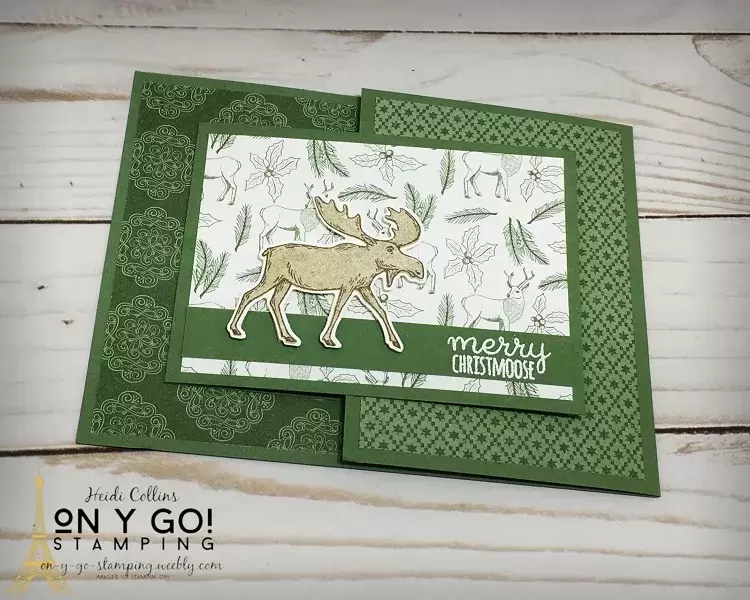
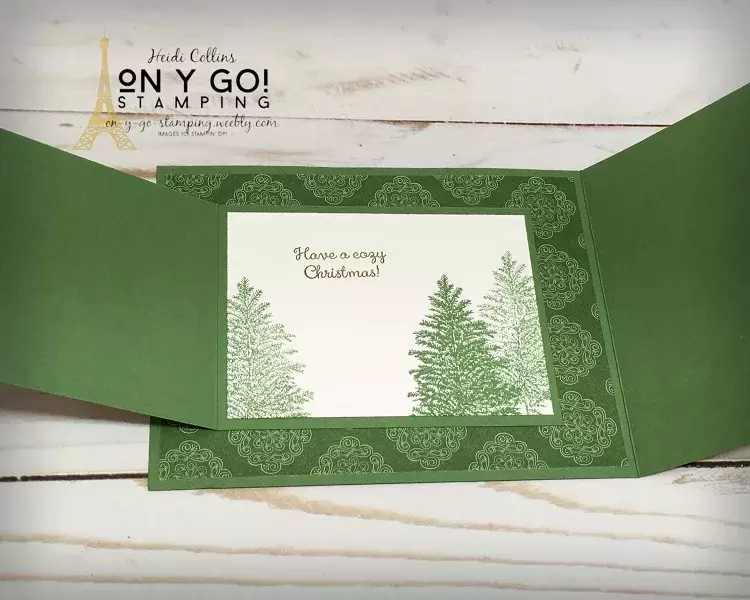
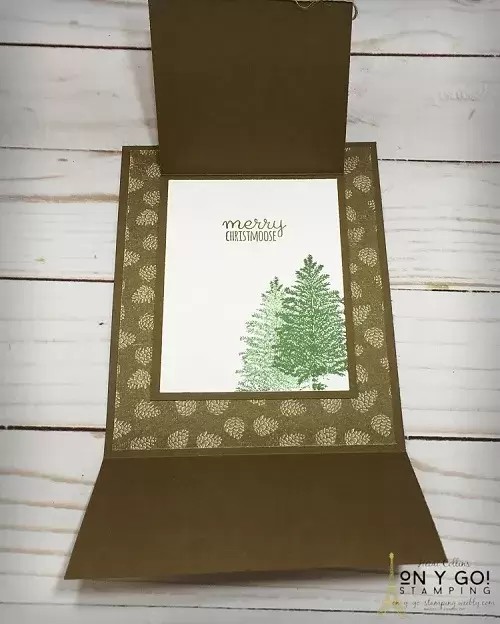
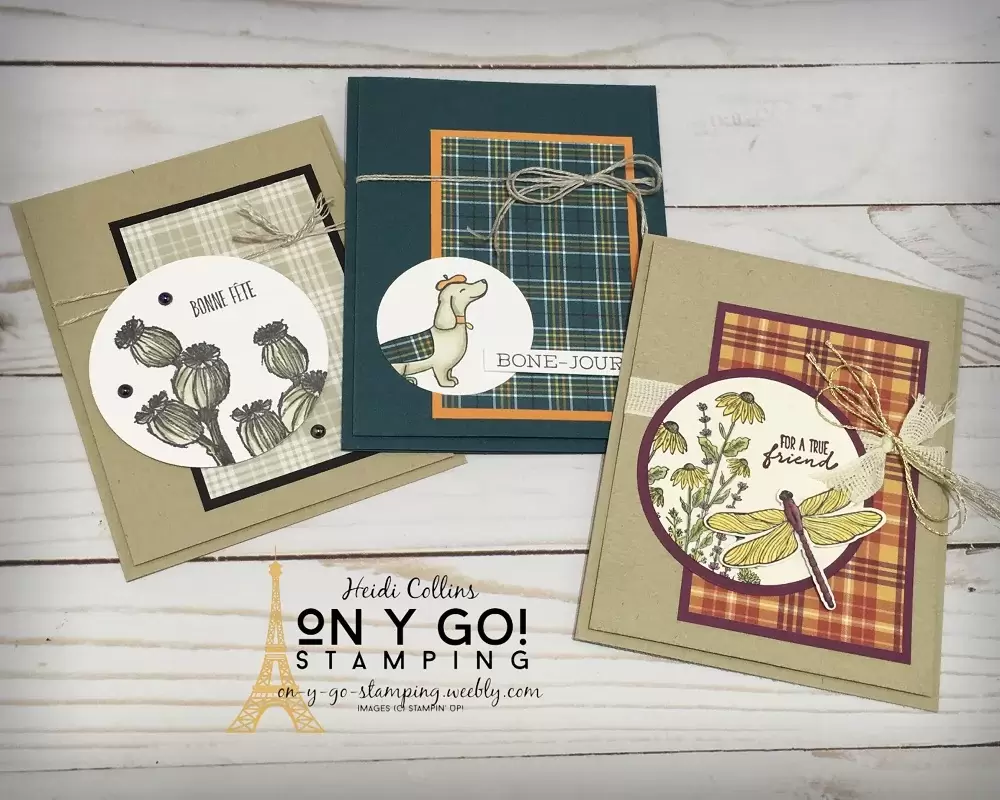
I created a simple card sketch for last night's Mystery Stamping event. Then, I created these samples quickly and easily using a combination of retiring product, the Plaid Tidings patterned paper, and new stamp sets from the upcoming January-June Mini Catalog. So, on y go! Let's get stamping.

Cutting Dimensions for this Simple Card Sketch

  • Cardstock: 8 ½” x 5 ½”, scored at 4 ¼”
  • Cardstock: 5 ¼” x 4”
  • White or Vanilla Cardstock: 2” to 3” circle or another shape
  • Patterned Paper: 2 ½” x 4”
  • Coordinating cardstock: 2 ¾” x 4 ¼”
Card sketch for a simple card design.
Card making idea using the *NEW* Dragonfly Garden stamp set and the *Retiring* Plaid Tidings patterned paper. Be sure to get this gorgeous paper before it's gone!
Simple card design idea using the *NEW* Dragonfly Garden stamp set and the *RETIRING* Plaid Tidings patterned paper. This paper works so well with so many stamps and designs. Be sure to get some before it is discontinued on January 4.
My first card sample uses the new Dragonfly Garden stamp set. All of the stamps I used for these projects will be available in the upcoming 2021 January-June Mini Catalog. The Dragonfly Garden is part of a larger suite that includes a punch for the dragonfly and patterned paper. I cut the circles using the Layering Circle dies and stamped the images using Tuxedo Black Memento ink. I colored with Stampin' Blends in Mango Melody, Mossy Meadow, Old Olive, and Rich Razzleberry. The card base is Crumb Cake and I've embossed it with the Tasteful Textile embossing folder. The bow is created with the Forever Greenery Ribbon Combo pack. And of course, I add a little Wink of Stella to the dragonfly wings so that they have a little sparkle!

Step-by-step Instructions for completing this easy card idea

  1. Adhere the piece of 2 ½” x 4” patterned paper to the piece of 2 ¾” x 4 ¼” cardstock.
  2. Adhere the layered piece of 2 ½” x 4” patterned paper towards the lower right of the piece of 5 ¼” x 4” cardstock, leaving about a ¼” border on the right and bottom.
  3. Tie a piece of ribbon around the piece of 5 ¼” x 4” cardstock with the knot or bow towards the upper left of the piece of patterned paper.
  4. Stamp a small sentiment in the upper right quadrant of your circle (or other shape).
  5. Stamp an image on the open area of your circle. It can extend off the circle. Color if needed.
  6. Adhere the circle to the piece of 5 ¼” x 4” cardstock towards the bottom left. It should overlap the piece of patterned paper and the ribbon. 
  7. Fold the piece of 8 ½” x 5 ½” cardstock in half on the score line.
  8. Adhere the piece of 5 ¼” x 4” cardstock to the card front.

Enjoy the Moment Card Idea

My 2nd card idea uses the Enjoy the Moment stamp set, also from the upcoming mini catalog. While my set is in French, this set is also available in English, bien sûr. I stamped with the Tuxedo Black Memento ink pad and colored with the Crumb Cake Stampin' Blends to match the Crumb Cake card base. The Plaid Tidings patterned paper is mounted on Basic Black cardstock. I added a few iridescent pearls for a little bling. These fun embellishments are being discontinued at the end of December!
Simple card design based on a card sketch using the *NEW* Enjoy the Moment stamp set and the *RETIRING* Plaid Tidings patterned paper from Stampin' Up!
Easy card making idea using the *NEW* Hot Dog stamp set and the soon-to-be *DISCONTINUED* Plaid Tidings patterned paper from Stampin' Up!

Bone-Jour Card Design

The Hot Dog stamp set is one of my absolute favorite stamp sets in the new Mini Catalog. It has 3 adorable dogs and all sorts of add-ons to dress them up with - bowtie, beret, party hat, cone of shame. Plus, a variety of sentiments. So much fun! Here, colored the puppy with Crumb Cake Stampin' Blends and added an Pumpkin Pie Beret. The card base is Pretty Peacock with Pumpkin Pie to match the Plaid Tidings patterned paper. The circle for the dog is punched with the 2" circle punch. I can't wait to make more cards with this stamp set because it's just too much fun!

Supply List for these Easy Card Ideas

Sadly, the Plaid Tidings is being discontinued at the end of December. Click here to see the rest of the supply list for these cards. To order any of the supplies used in these card samples, simply check the supplies needed and then click "Add to Cart." Be sure to enter the host code (from the sidebar) on the second screen under the pink "Checkout" button to earn Stampin' Rewards.
0 Comments

Brightly Gleaming Scrapbook Page and Card Ideas

12/14/2020

2 Comments

 
Holiday card and scrapbook page idea using the elegant Brightly Gleaming patterned paper from Stampin' Up!
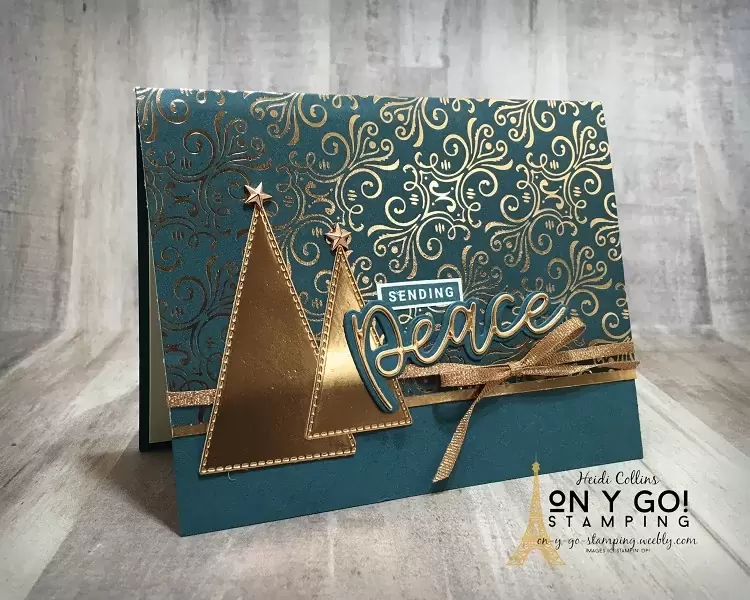
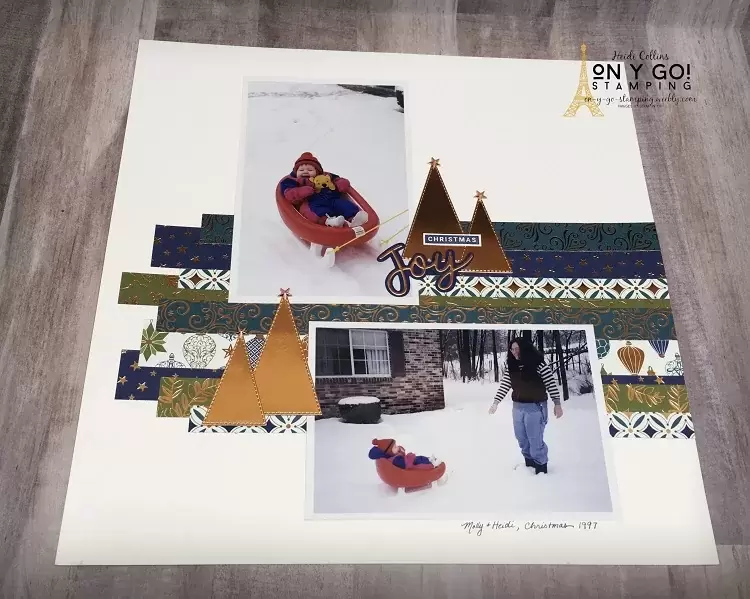
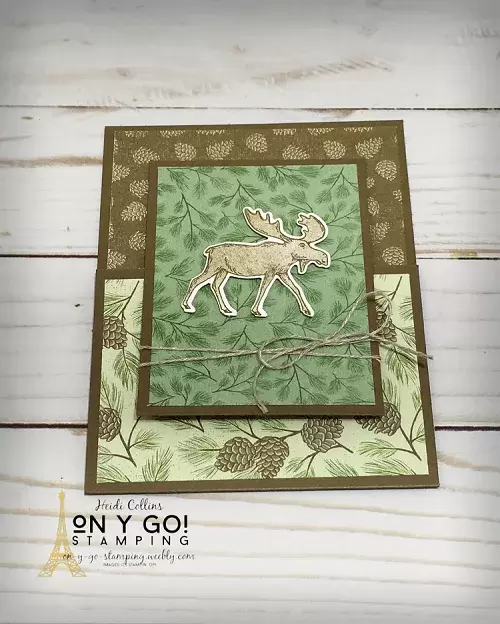
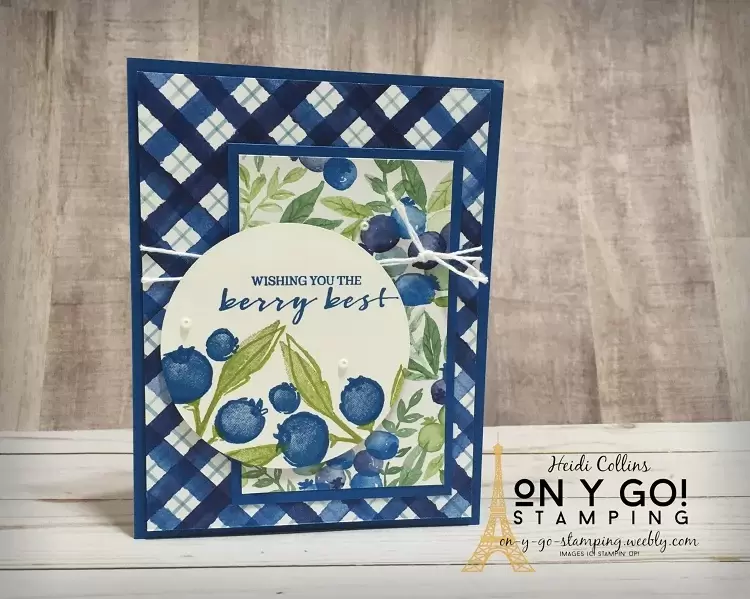
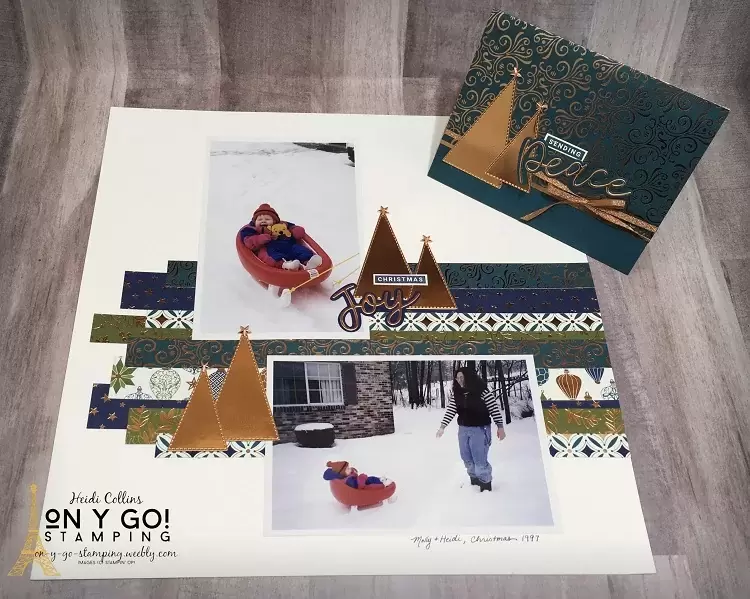
Have you taken advantage of the Giant Year-End Closeout yet? Nearly all of the beautiful stamps, papers, dies, and embellishments in the 2020 August-December Mini Catalog will be discontinued at the end of the year. Many of the items are on sale up to 50% off, but they are only available while supplies last and things are selling out already. So, if you want some of this awesomeness, better get it soon. 

One of the items in the August-December Mini Catalog that is retiring is the Brightly Gleaming patterned paper. This specialty designer series paper is absolutely gorgeous with its fabulous copper accents! If you haven't already gotten a package of this paper, what are you waiting for? And if you have gotten some, are you sure you don't need a little more? Lol. It's just so elegant and stunning. 

So, on y go! Let's get stamping.
Elegant Christmas card design with the Brightly Gleaming patterned paper and the Joy and Stitched Triangle dies from Stampin' Up!
Simply elegant holiday card idea using the Brightly Gleaming patterned paper and the Joy and Stitched Triangle dies from Stampin' Up!

Elegant Holiday Card Design

This elegant holiday card is so simple to make. It maximizes the effect of the Brightly Gleaming patterned paper by adding copper Christmas trees cut with the Stitched Triangle dies. Each tree is topped with a copper star. Copper ribbon from the Basket Weave Ribbon combo pack graces the front below the sentiment cut from Pretty Peacock and Copper paper with the Joy dies. The sentiment is stamped in Pretty Peacock on Very Vanilla cardstock with a stamp from the Peace & Joy stamp set. This stamp set and coordinating dies will also be discontinued at the end of the month!

Simply stunning Scrapbook Page idea

While it might be a little late for starting your Christmas cards for this year, soon you'll be snapping lots of pictures. This is the perfect time to stock up on scrapbooking paper, like the Brightly Gleaming Designer Series Paper, so you're ready to scrapbook all of those fabulous holiday photos. 

This scrapbook page uses all of the same supplies as the card except that I substituted Night of Navy cardstock and ink instead of Pretty Peacock. Like the card, this page is simple to create. I layered a variety of strips of cardstock that range in width from 1/2" to 1 1/2" across the center of a piece of 12" x 12" Very Vanilla cardstock. 

The best part? This absolutely beautiful patterned paper is on sale!
shop the sale
Scrapbook page idea using the Brightly Gleaming scrapbook paper and Joy and Stitched Triangle dies from Stampin' Up!
Scrapbook elements made with the Joy and Stitched Triangle dies from Stampin' Up!
Picture

See the full Supply List for these Elegant ideas

Click here to see the full supply list for this card and scrapbook page idea. If you need any of the supplies to recreate these projects, simply check the items you need and click "Add to cart." Be sure to use the host code (in the sidebar to the right or below on mobile) and add it on the second page under "Checkout."
2 Comments

Down and Dirty Bullet Journaling

12/11/2020

0 Comments

 
See how to make this ridiculously awesome journal with the Flowers and Field patterned paper and Ridiculously Awesome and All Things Fabulous stamp sets from Stampin' Up!
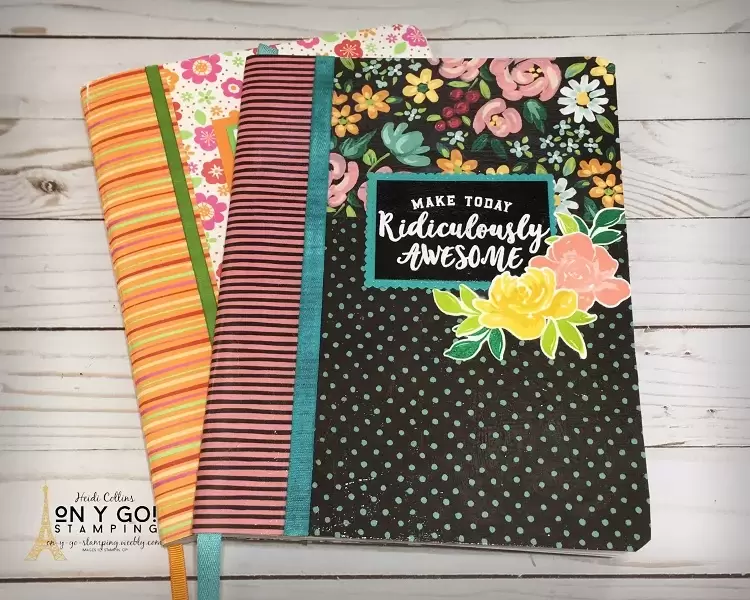
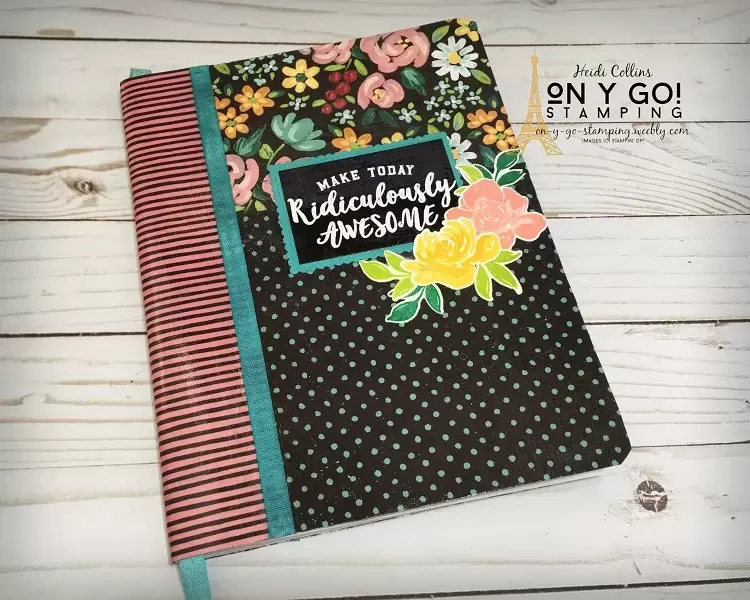
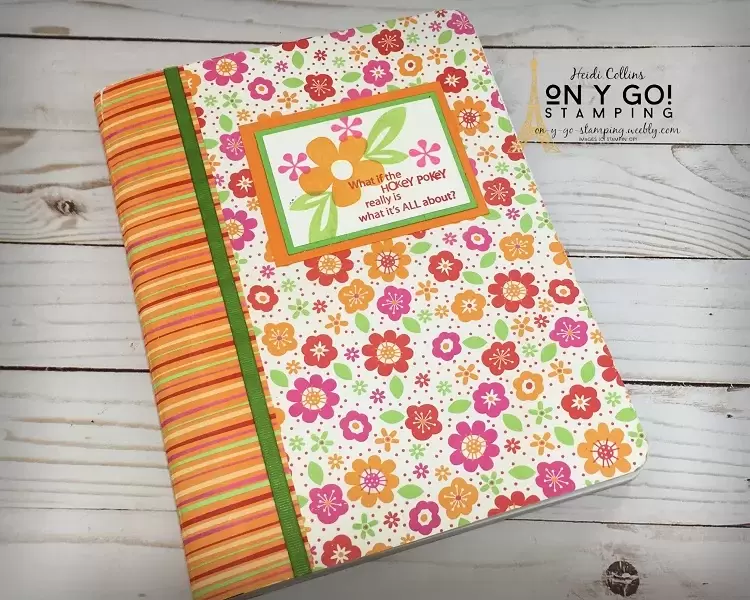
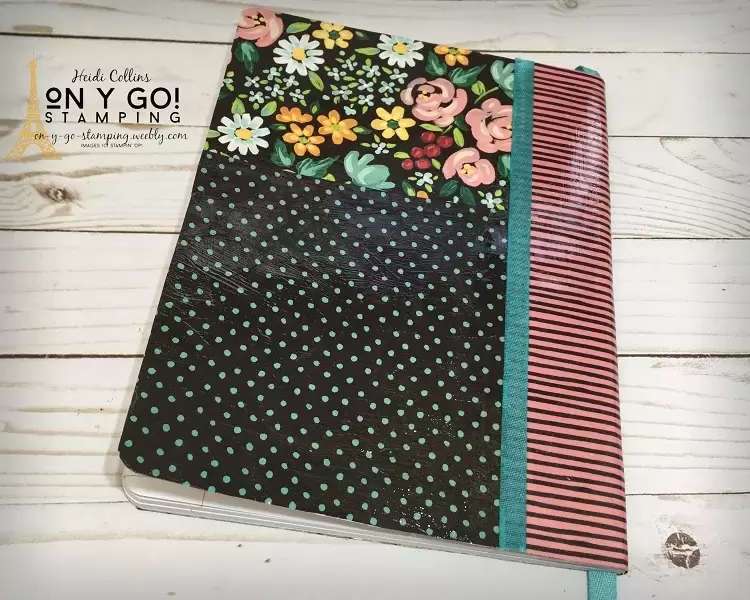
Bullet journals set me free, but probably not in the way you'd normally think. Never heard of bullet journaling? It's a way to keep a combination daily planner, calendar, diary, and sketch book in one. There are people making amazing bullet journal pages! They make beautiful artistic masterpieces of their mundane everyday lives. Yes, I do paper crafting. I make cards, I stamp. I color. Sometimes, I think I even make art. But, not in my bullet journals. My bullet journals are a mess of functionality. Still, bullet journals set me free. So, on y go! Let's talk a little about the freedom of bullet journaling and see my newest journal. 
Composition notebooks covered with patterned paper from Stampin' Up! make fabulous messy bullet journals.

What is Bullet Journaling and how is Freedom?

Raise your hand if you really like the idea of keeping a planner, you know it totally helps you keep your life straight, but somehow, you just can't keep up with it. Me, me, me! I do really good writing things in my planner for a few days, weeks, or months and then, it sits idly by for months on end before I get serious about getting my life organized again.
This means that I bought lots of planners and at the end of the year, I would find I had only used a small fraction of it. I beat myself up for the waste of money and my inability to keep up with a planner. 

Then, I read about bullet journaling. It's just a blank notebook. You fill it in as you go. At the true heart of it, you create a code for your to-do lists, number the pages, and keep an index of the pages so that you can quickly go back and review things. Sometimes, I do those things, but mostly I don't. The freedom of a bullet journal is that I can write as little or as much as I want for each day. I can create a weekly spread if I'm up to it. And when my journal gets set aside for three months, I just pick up where I left off. I can add to-do lists, or meeting notes, or ideas that I have on the next page, even though it means my journal is a complete mess. I'm free! I can write down what I need to when I need to. I definitely have a down and dirty style of bullet journaling. 
My new bullet journal covered with the Flowers and Field patterned paper and the All things Fabulous and Ridiculously Awesome stamp sets from Stampin' Up!

Making a Beautiful (on the Outside) Bullet Journal

Even though the inside is a hot mess, I like the outside to be super pretty. I want to love my bullet journal; I want it to inspire me so that I pick it up and use it. So, I like to create my own using my favorite papers, like the Flowers & Field patterned paper.


I recently came to the last page in my bullet journal and had to make a new one. I picked the absolutely fabulous Flowers & Field patterned paper. This paper is going to be FREE with a $50 order in January and February during Sale-A-Bration. I love, love, love this paper! The colors really pop on the black backgrounds. I added a greeting from the Ridiculously Awesome stamp set that I embossed with white embossing powder and some flowers from the All Things Fabulous stamp set that I stamped in Daffodil Delight, Mango Melody, and Flirty Flamingo. 
​
This handmade journal has held up well thanks to a coating of Mod Podge. It is made with patterned paper from Stampin' Up! circa 2007.
I used the same process that I shared with you this summer when I made this journal with the Whale of a Time Suite. I start with a common composition notebook and use Mod Podge to decorate the outside with patterned papers and stamped images. The Mod Podge makes the journal nearly indestructible. This orange and pink beauty is the one I've been using for the last year and a half. You can see that it is still in great shape thanks to the durability of the Mod Podge. 
The backside of a composition notebook journal covered with the Flowers and Field patterned paper from Stampin' Up! This paper will be FREE during Sale-A-Bration in January and February.
The back of my new bullet journal.

A new Year, a New Messy Bullet Journal

On the inside of my journal, I'll start by adding a few months of calendar pages so that I can start writing down my schedule. I'll transfer some important info from my last bullet journal like the list of friends' birthdays. I'll add some important reminders. And then, I'll start adding to-do lists and whatever else that I need to write down. I'll mark important pages with a piece of washi tape on the edge. This makes it a little easier to find things. 
Maybe I'll make goals. Maybe I'll add some sketches or doodles. Who knows, but my new bullet journal is beautiful and ready to get down and dirty!

Supply List to create your own down and Dirty Bullet Journal

Click here to see the complete supply list for this Flowers & Field Journal, except for the Flowers & Field patterned paper because it won't be available until January when you can get it FREE with a $50 purchase. If you need any of the supplies to create your own journal, simply check the items you need and click "Add to Cart." Be sure to add the host code (in the sidebar to the right) on the second page under the pink box that says "Checkout."
0 Comments

A Quick and Easy Fun Fold for any Occasion

12/8/2020

0 Comments

 
Picture
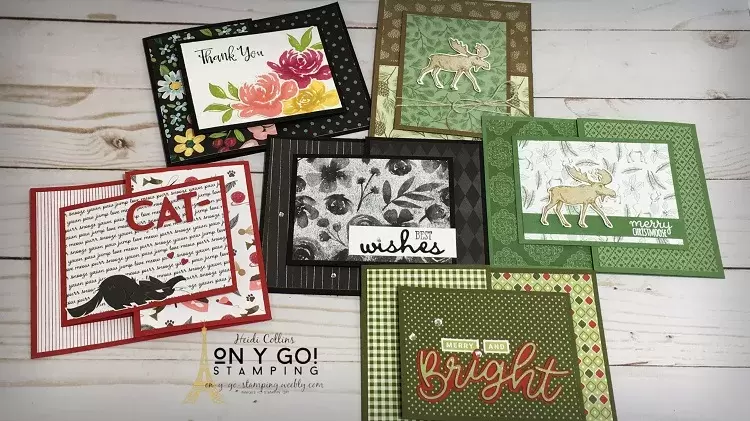
For last night's Mystery Stamping, we made this quick and easy fun fold card that is perfect for any occasion and works with all sorts of patterned paper. If you haven't joined me for Mystery Stamping yet, I hope you'll pop over to the On Y Go! Stamping Facebook Group next Tuesday night at 8:00 and check it out. Each week, I give step-by-step clues to create a card. Everyone uses different papers and stamps, so each card turns out differently. That is what makes it so much fun! So, on y go! Let's get stamping.
Fancy fold card design with the Flower and Field patterned paper from Stampin' Up! Get this patterned paper free with a $50 purchase in January and February!
Inside of a fancy fold card design using the Flower and Field patterned paper from Stampin' Up! Get his paper free with a $50 purchase in January and February during Sale-A-Bration!

Cutting Dimensions for This easy Fun Fold Card Idea

  • ​Cardstock: 8 ½” x 4 ¼”, scored at 5 ½”
  • Cardstock: 8” x 3”, scored at 4”
  • White or Vanilla Cardstock: (2) 2 ¾” x 3 ¾”
  • Patterned Paper: 5 ¼” x 4”
  • Patterned Paper: 4” x 2 ¾”

Instructions for creating This Quick Fancy Fold Card Design

  • Fold the piece of 8 ½” x 4 ¼” cardstock on the scored line at 5 ½”.​
  • Adhere the piece of 5 ¼” x 4” patterned paper to the inside of the folded piece of 8 ½” x 4 ¼” cardstock.
  • Adhere the piece of 4” x 2 ¾” patterned paper to the front of the 3” flap on the folded piece of 8 ½” x 4 ¼” cardstock.
  • Fold the piece of 8” x 3” cardstock in half on the score line.
  • Adhere this folded piece of 8” x 3” cardstock over the piece of 5 ¼” x 4” patterned paper on the inside of the folded piece of 8 ½” x 4 ¼” cardstock.
  • The fold for this smaller folded piece of cardstock should be on the opposite side as the fold on the larger folded piece of cardstock.
  • Stamp an image or multiple images on one piece of 2 ¾” x 3 ¾” Whisper White or Very Vanilla Cardstock. 
  • Adhere the stamped piece of 2 ¾” x 3 ¾” White or Vanilla cardstock to the front of the folded piece of 8” x 3” cardstock.
Fun fold card making idea using the Playful Pets patterned Paper from Stampin' Up! and the Playful Alphabet dies.
Fun fold card making idea using the Playful Pets patterned paper and Well Said stamps from Stampin' Up!
Fancy fold card making idea with the Heartwarming Hugs patterned paper and the Joy dies from Stampin' Up!
Inside of a fun fold card design using the Tree Angle stamp set and Heartwarming Hugs patterned Paper from Stampin' Up!
  • Stamp the other piece of 2 ¾” x 3 ¾” Whisper White or Very Vanilla cardstock with a sentiment. 
  • ​Adhere the second piece of stamped Whisper White or Very Vanilla cardstock to the inside of the piece of 8” x 3” folded cardstock.​
  • Embellish as desired.
Create a fancy fold card with the Magic in the Night patterned paper from Stampin' Up!
Picture
Say Merry Christmas with this fun fold card making idea using the Merry Moose stamp set and 'Tis the Season patterned paper from Stampin' Up!
Inside a fancy fold card design using the Merry Moose stamp set and 'Tis the Season patterned paper from Stampin' Up!
Merry Moose fun fold card making idea for a fun Christmas card.
Inside of a fancy fold card design using the Merry Moose stamp set and Poinsettia Place patterned paper from Stampin' Up!
0 Comments
<<Previous
Forward>>
    Heidi Collins, Independent Stampin' Up! Demonstrator with On Y Go! Stamping
    Get updates and ideas on my Facebook group
    Heidi Collins, Independent Stampin' Up! Demonstrator and Owner of On Y Go! Stamping
    Picture
    Picture
    On Y Go! Stamping YouTube channel with Card Making Videos on how to do rubber stamping, card making, scrapbooking, and paper crafting

    Archives

    May 2025
    April 2025
    March 2025
    February 2025
    January 2025
    December 2024
    November 2024
    October 2024
    September 2024
    August 2024
    July 2024
    June 2024
    May 2024
    April 2024
    March 2024
    February 2024
    January 2024
    December 2023
    November 2023
    October 2023
    September 2023
    August 2023
    July 2023
    June 2023
    May 2023
    April 2023
    March 2023
    February 2023
    January 2023
    December 2022
    November 2022
    October 2022
    September 2022
    August 2022
    July 2022
    June 2022
    May 2022
    April 2022
    March 2022
    February 2022
    January 2022
    December 2021
    November 2021
    October 2021
    September 2021
    August 2021
    July 2021
    June 2021
    May 2021
    April 2021
    March 2021
    February 2021
    January 2021
    December 2020
    November 2020
    October 2020
    September 2020
    August 2020
    July 2020
    June 2020
    May 2020
    April 2020
    March 2020
    February 2020
    January 2020
    December 2019
    November 2019
    October 2019
    September 2019
    August 2019
    July 2019
    June 2019

Proudly powered by Weebly
  • About
  • Online Card Classes
  • Card Making Ideas
  • Stampin' Up! Catalogs
  • Card Tutorials
  • Contact
  • Shopping Rewards
  • Shop
  • Join Stampin' Up!