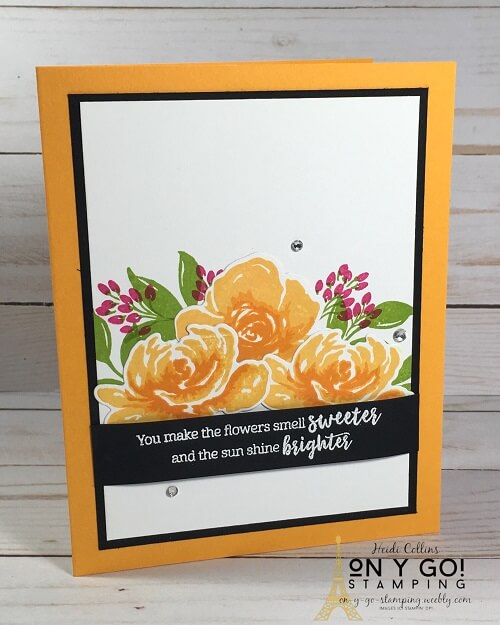
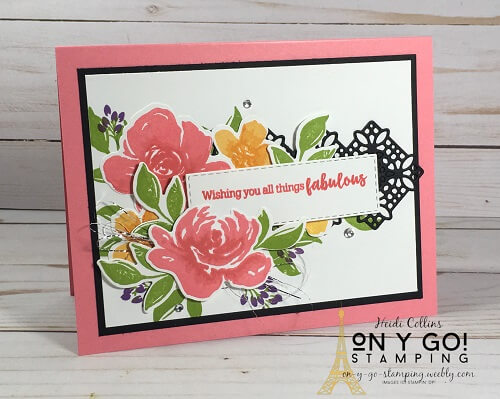
 Today I have a three beautiful card ideas using the same basic card design and the All Things Fabulous stamp set from Stampin' Up! This stamp set lives up to its name - it's absolutely fabulous! It is the perfect rubber stamp set for beginner stampers and advanced stampers as well. It's filled with gorgeous flowers and wonderful sentiments. As a three-step stamping set, it may seem a little daunting for first-time stampers, but the awesome thing about this stamp set is that you don't have to use all three stamps to create a fabulous flower. I have an easy card making idea as well as two more stepped-up card designs. So, on y go! Let's get stamping.
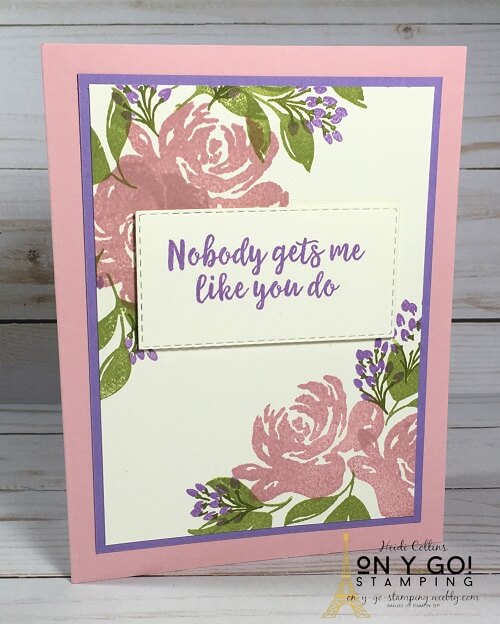
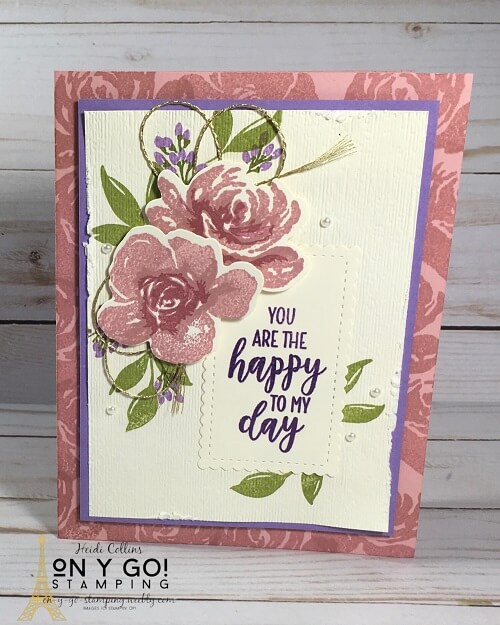
Advanced Card Making Idea In Flirty FlamingoMy final card of the three is the most intricate. It's not really any harder to make, it just has more parts and pieces and takes a little more time. In the video, I shared how I used the Stamparatus to help layout the placement of the leaves under the die-cut flowers. This is a great way to get the placement just right. I also show how to heat emboss with dye inks. With the Stamparatus, you can use the Classic Stampin' Pads for heat embossing. It's pretty cool!  Even more fabulous cards with the All Things Fabulous stamp set. I just couldn't stop myself! I made three more cards using a color combination of Blushing Bride, Highland Heather, and Granny Apple Green.
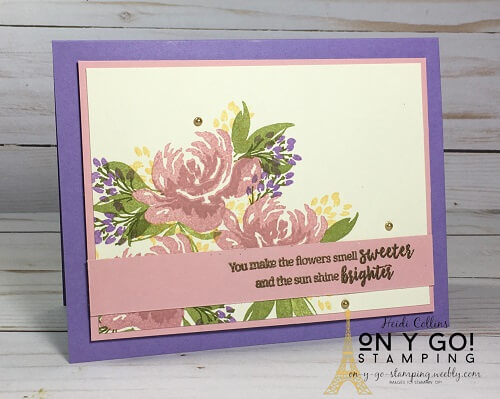
And, I just really couldn't stop. I made one more using Petal Pink, So Saffron, Pear Pizzazz, and Highland Heather. This card is similar to one of the original designs, but I pushed it even farther. I distressed the edges, added splatters, and inserted a layer of Petal Pink cardstock embossed with the Tasteful Textile 3D embossing folder. To finish it off, I added some gold cord and a few Champagne Rhinestone Basic Jewels. This card idea is truly fabulous! 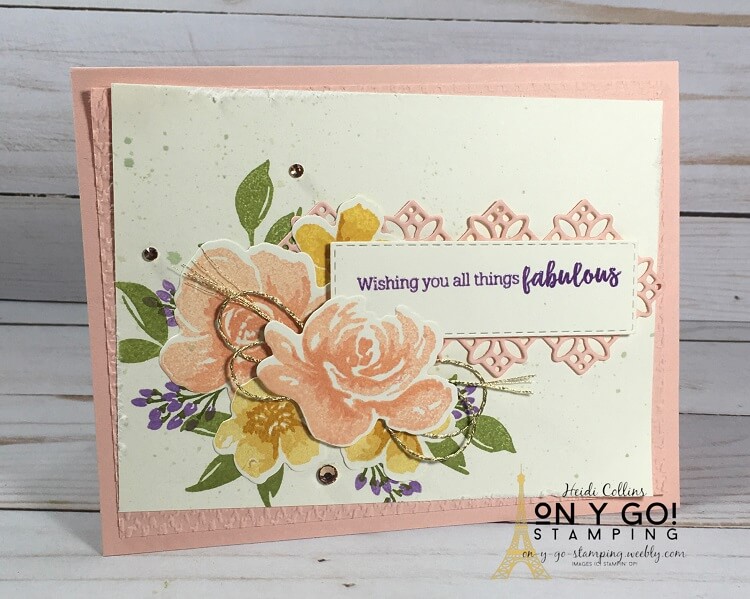
0 Comments
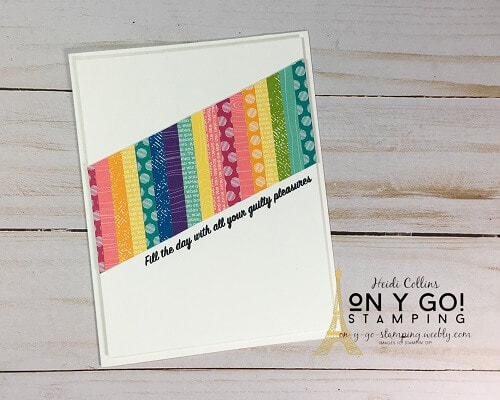
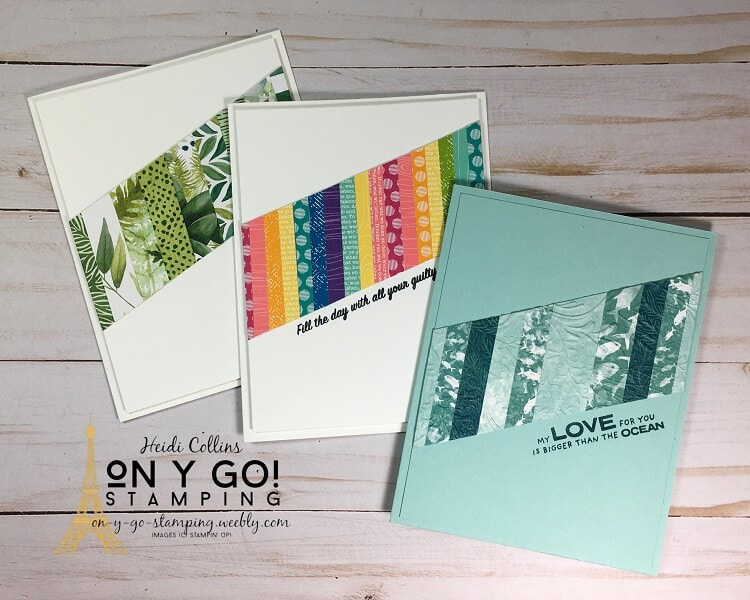 Today, I have easy card making ideas for what to do with paper scraps. I've shared ideas for using scraps before, but it's always good to have more card making ideas for patterned paper. Do you have lots of bits of patterned paper? Perhaps you do scrapbooking and have lots of pieces left from your beautiful scrapbook paper. Or maybe you just have lots of paper scraps from cardmaking. These clean and simple cards (or CAS cards) are easy cards to make and use up lots of patterned paper scraps. So, on y go! Let’s get stamping.
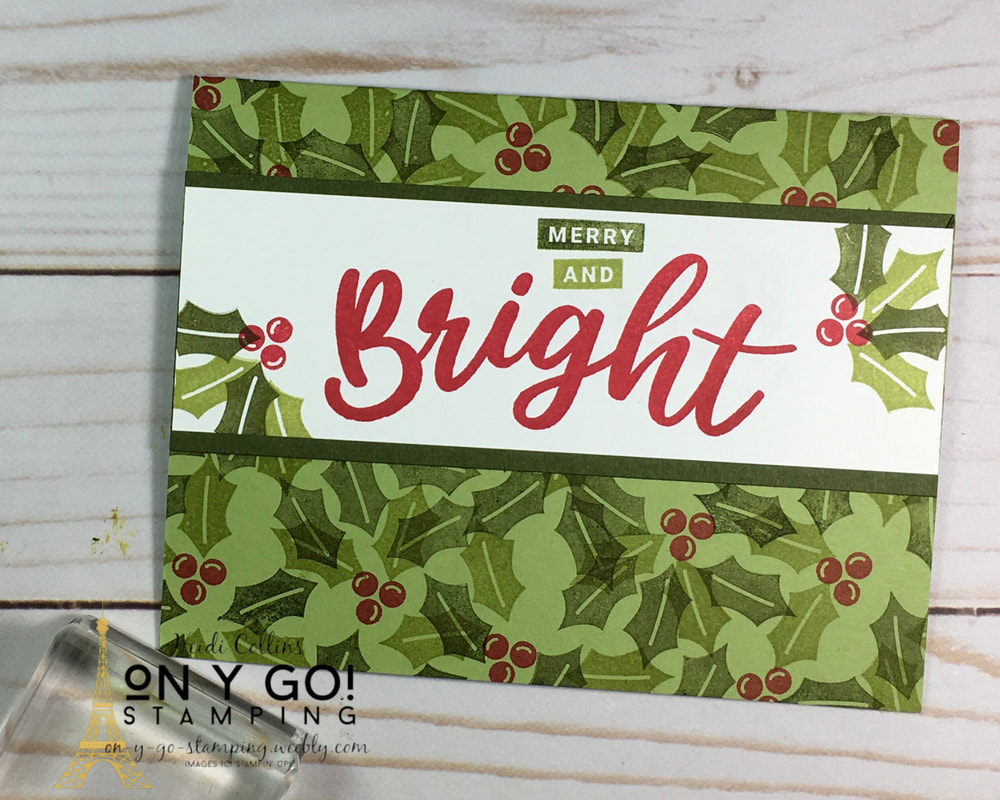
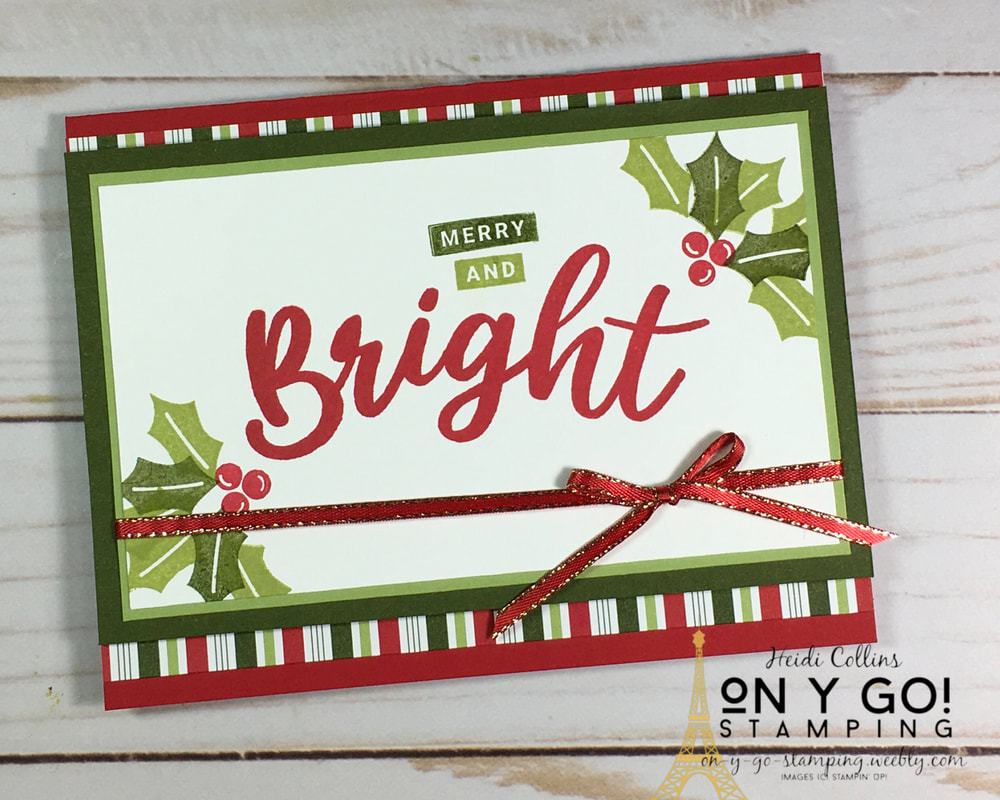
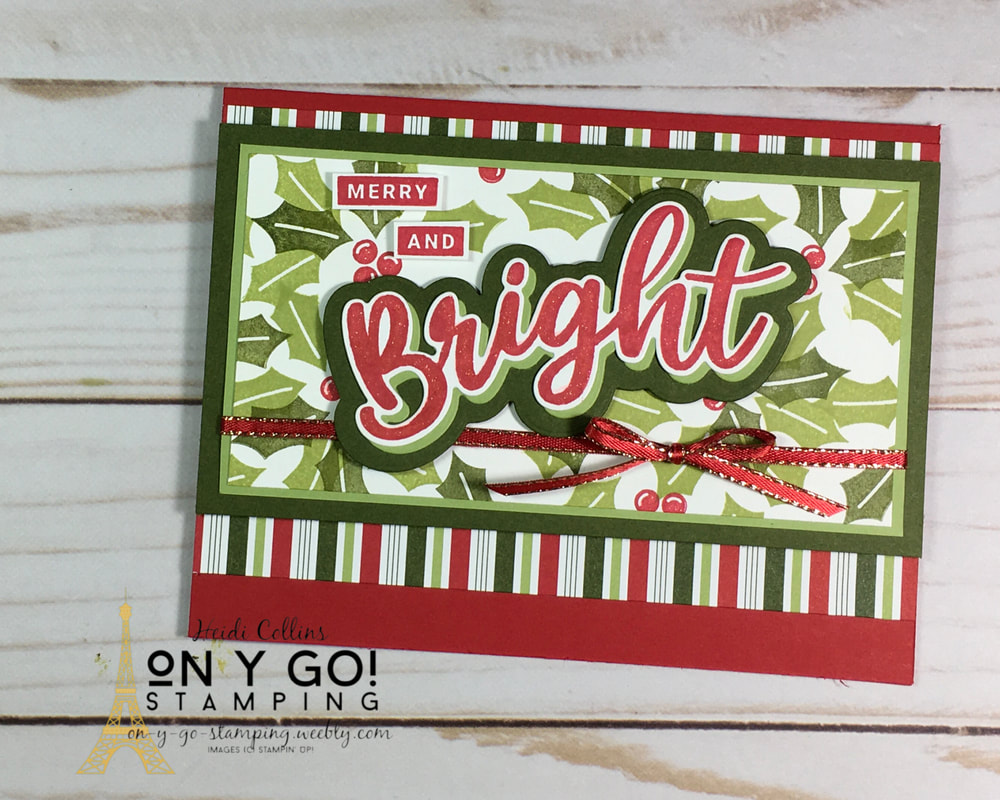
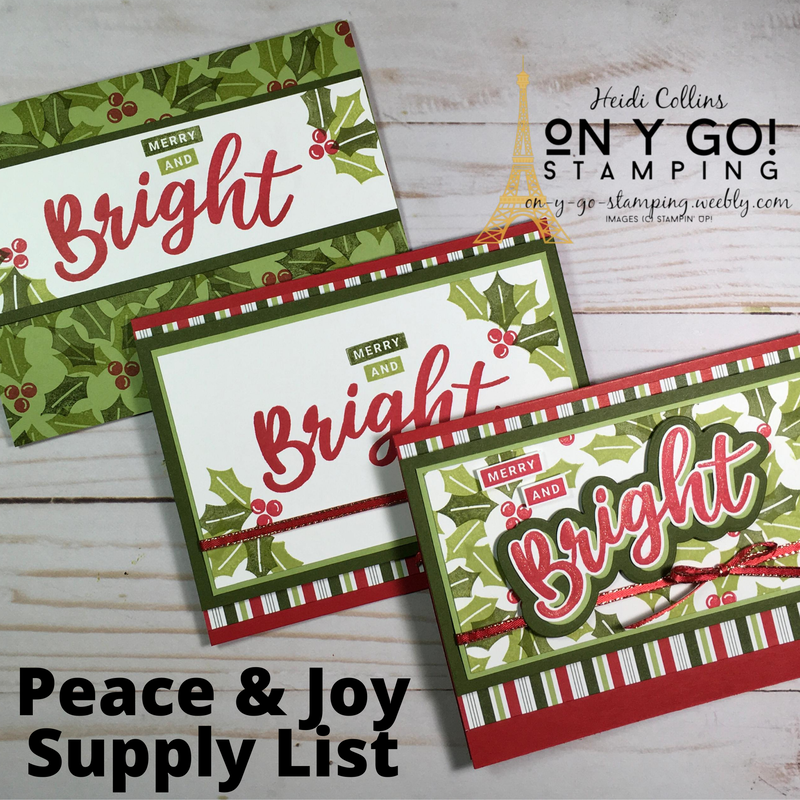
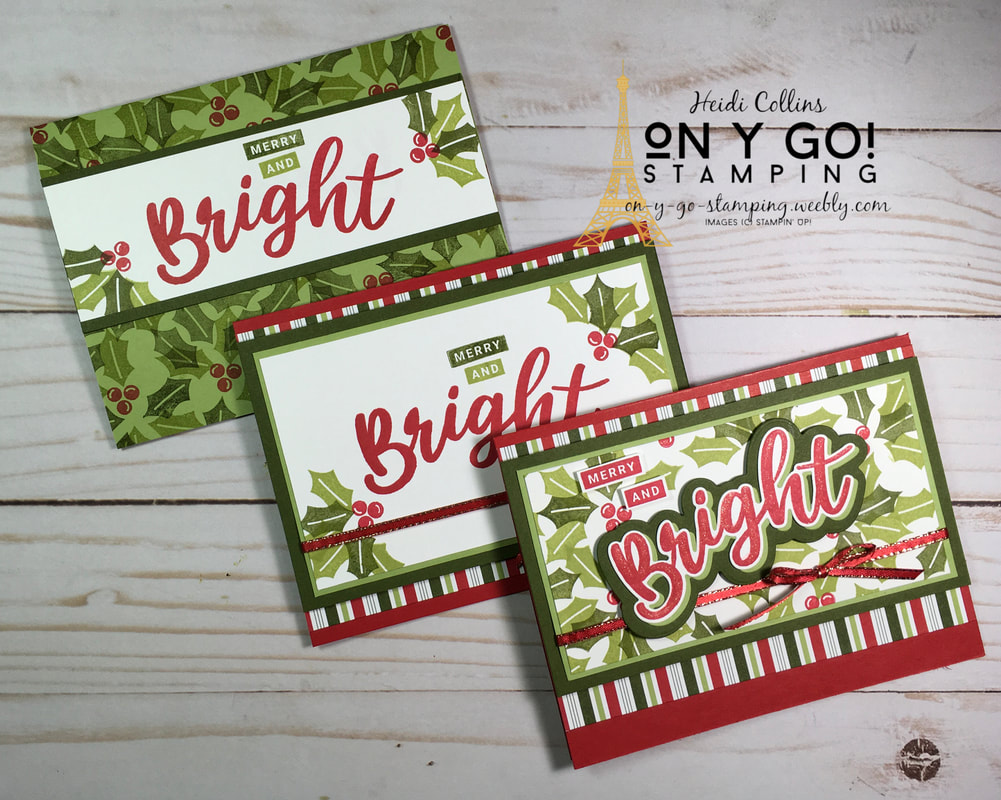 It's only August, but Christmas will be here before you know it! So, it's never to early to start making Christmas Cards. Today, I have three cards for you using the new Peace & Joy stamp set from Stampin' Up! I started with a very simple card that uses only stamping and minimal layering. Then, I stepped it up using a little ribbon and some Heartwarming Hugs Designer Series Paper. Finally, I stepped it up again by using the coordination Joy dies. Whether you want a super quick and easy card or something fancy, there's a design for you! So, on y go! Let's get stamping.
Casual Card Dimensions: Real Red: 8 1/2" x 5 1/2", scored at 4 1/4" Heartwarming Hugs DSP: (2) 3/4" x 5 1/2" Whisper White: 3" x 5" Pear Pizzazz: 3 3/16" x 5 3/16" Mossy Meadow: 3 1/2" x 5 1/2"
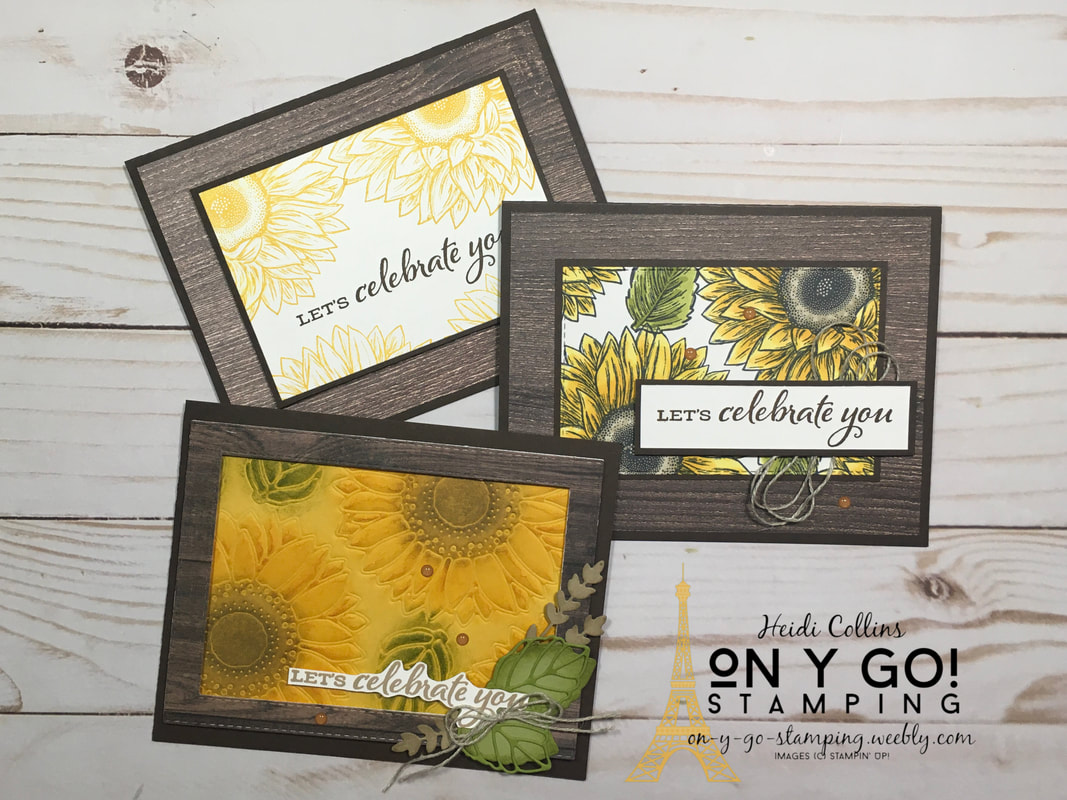
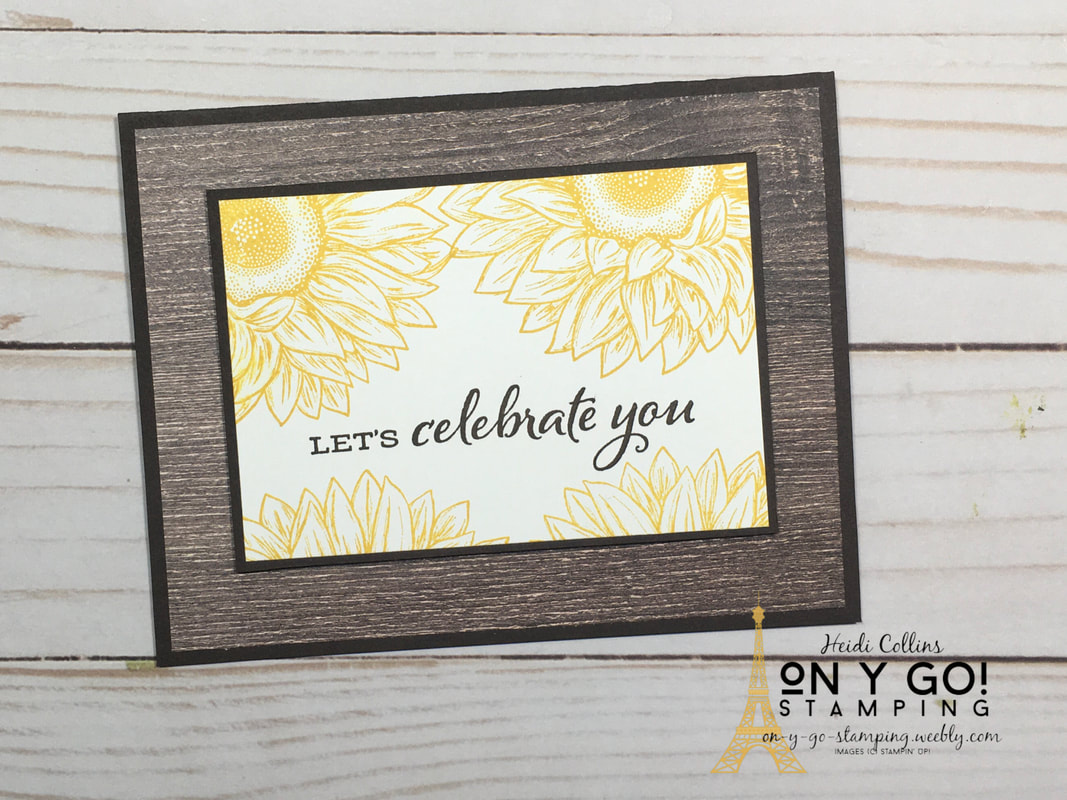
From simple to chic to oh là là, I have 1 basic card design done in 3 different styles. Each card has been slightly stepped up from the last card. Each of the cards use the Celebrate Sunflowers stamp set and the final card uses the matching Sunflower dies as well. None of them were difficult to create though, it's just a matter of spending more time. So, on y go! Let's get stamping.
Cardstock Dimensions:
Early Espresso:
In Good Taste DSP: 5 1/4" x 4"
Cardstock Dimensions:
Early Espresso:
Oh là là:
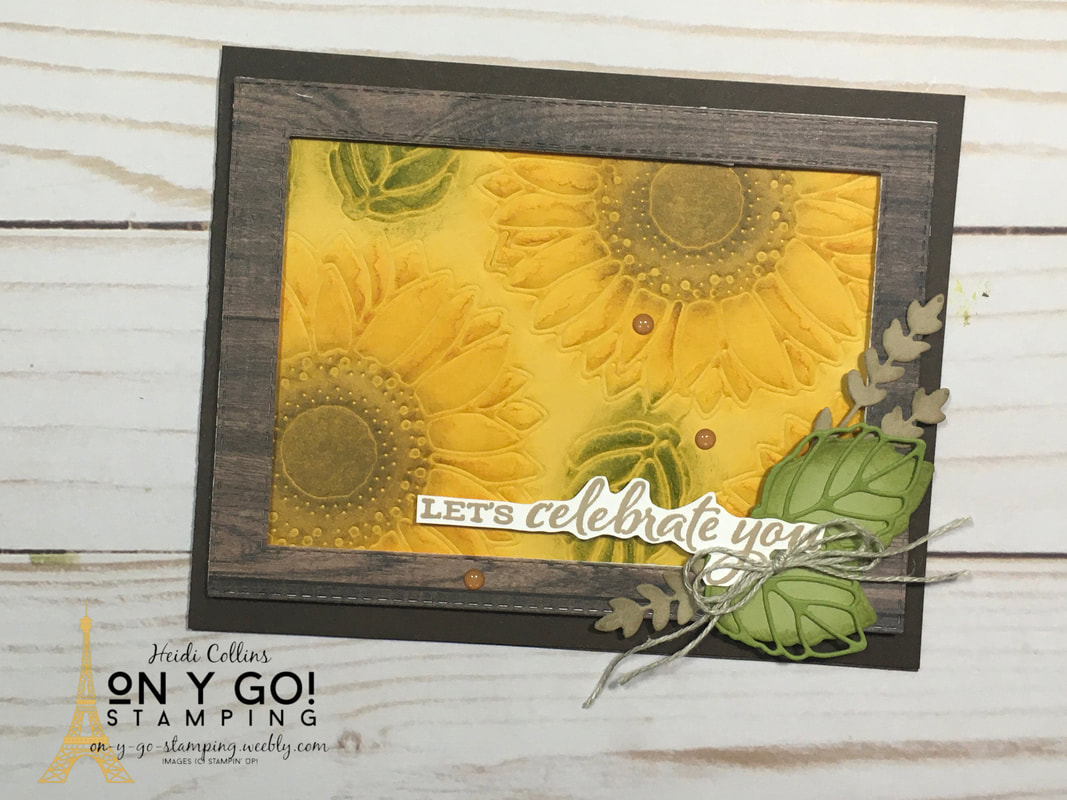
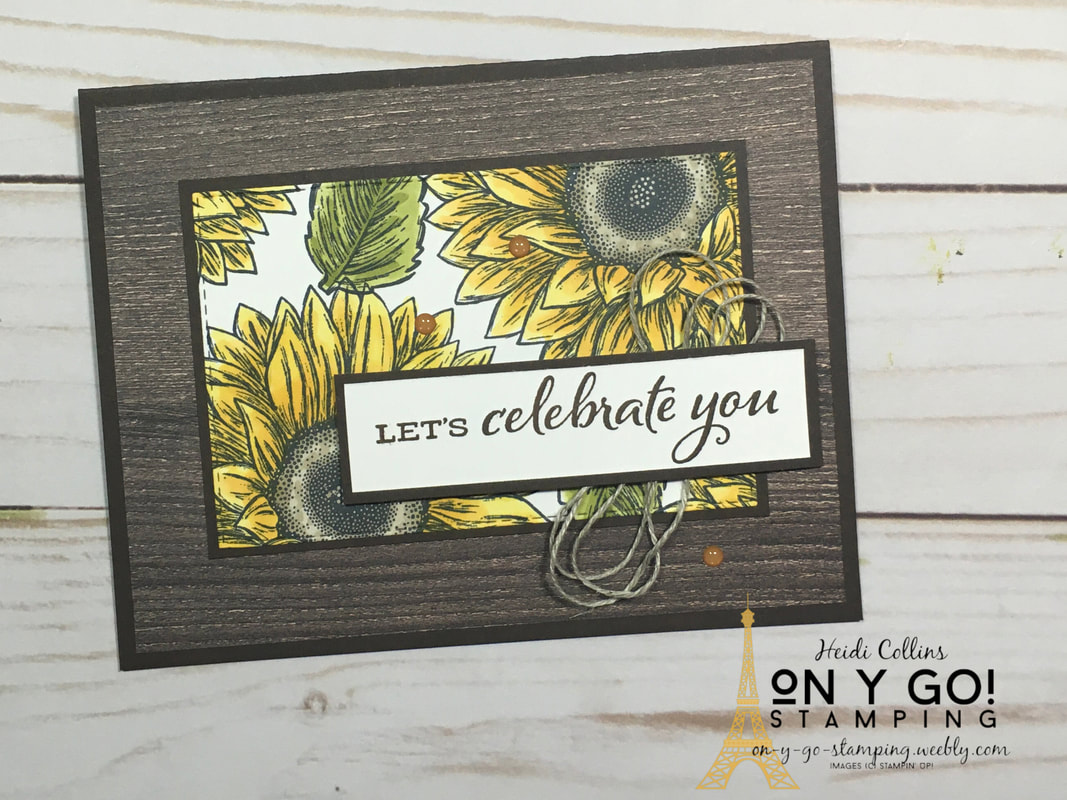
My final card uses the Sunflower dies extensively. I started by using the impressions mat for my Big Shot. (The new Stampin' Cut & Emboss machine will also have an impressions mat!) Using this special rubber mat, I was able to use the dies to emboss the sunflower images on Bumblebee cardstock. Then, I sponged on Crushed Curry, Crumb Cake, and Old Olive ink. The ink really helps the embossed images pop. I cut a frame from the In Good Taste DSP using the Stitched Rectangle dies. Before cutting the frame, I mounted the DSP on Whisper White cardstock. This way, when I mounted it to my card using Stampin' Dimensionals, it wasn't too flimsy. I cut leaves from Pear Pizzazz and Old Olive cardstock and wheat from Crumb Cake cardstock. I sponged the edges with the same colors to help match the feel of the embossed panel. I stamped the greeting with Crumb Cake ink on Whisper White cardstock and cut around it with Paper Snips leaving a small border. I added a double bow of Linen Thread and a few Bumblebee enamel dots to tie it all together. Cardstock Dimensions: Early Espresso: 8 1/2" x 5 1/2", scored at 4 1/4" Bumblebee: 4 3/4" x 3 1/2" In Good Taste DSP: approximately 3 3/4" x 5 1/8" Whisper White, Pear Pizzazz, Old Olive, & Crumb Cake: Scraps
Product List


Big Shot Embossing Mats
[146327]
$15.00
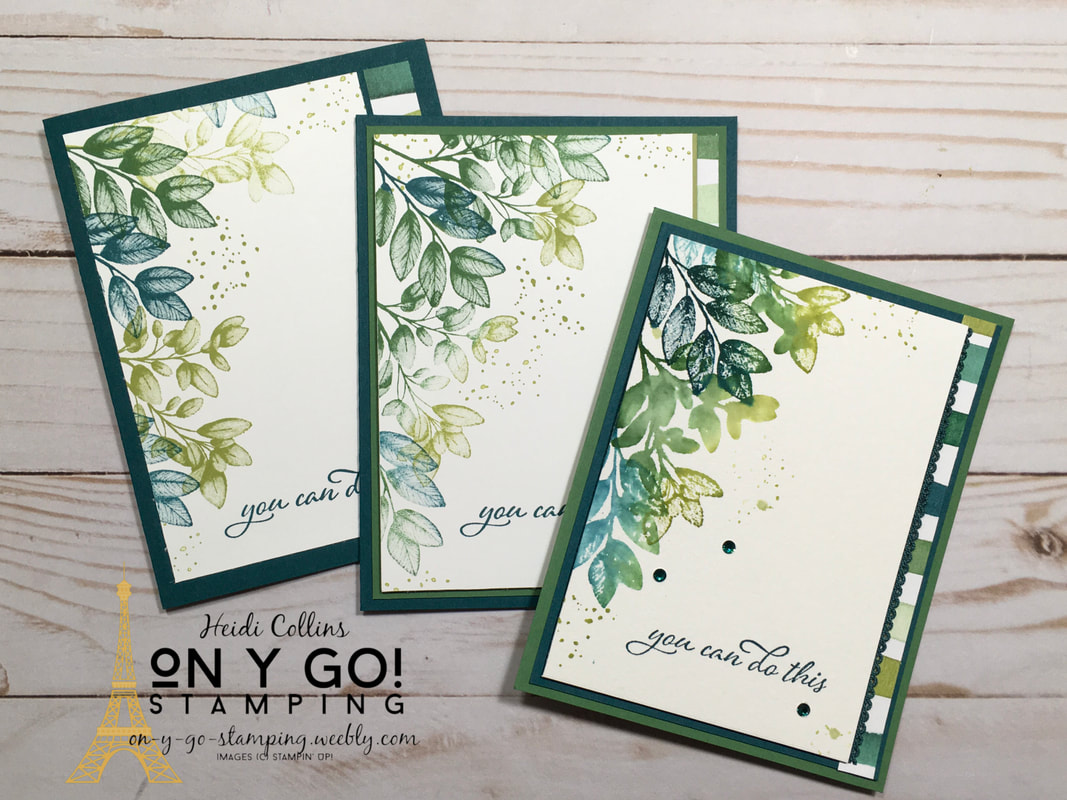
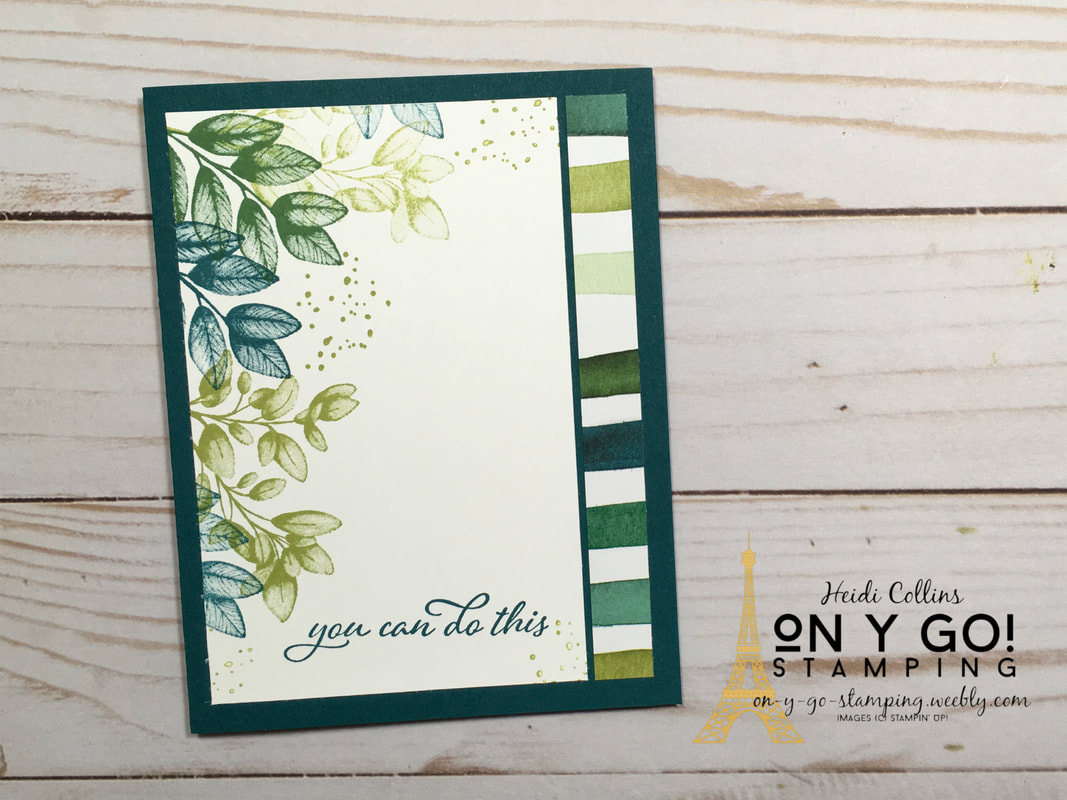
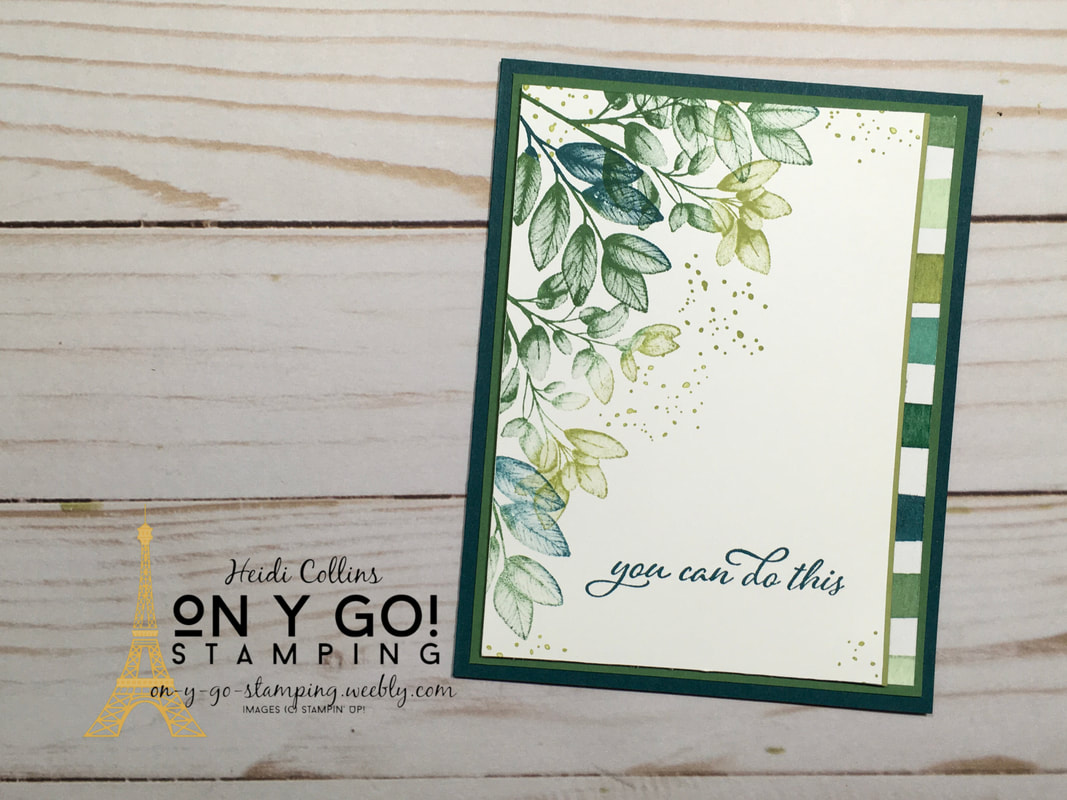
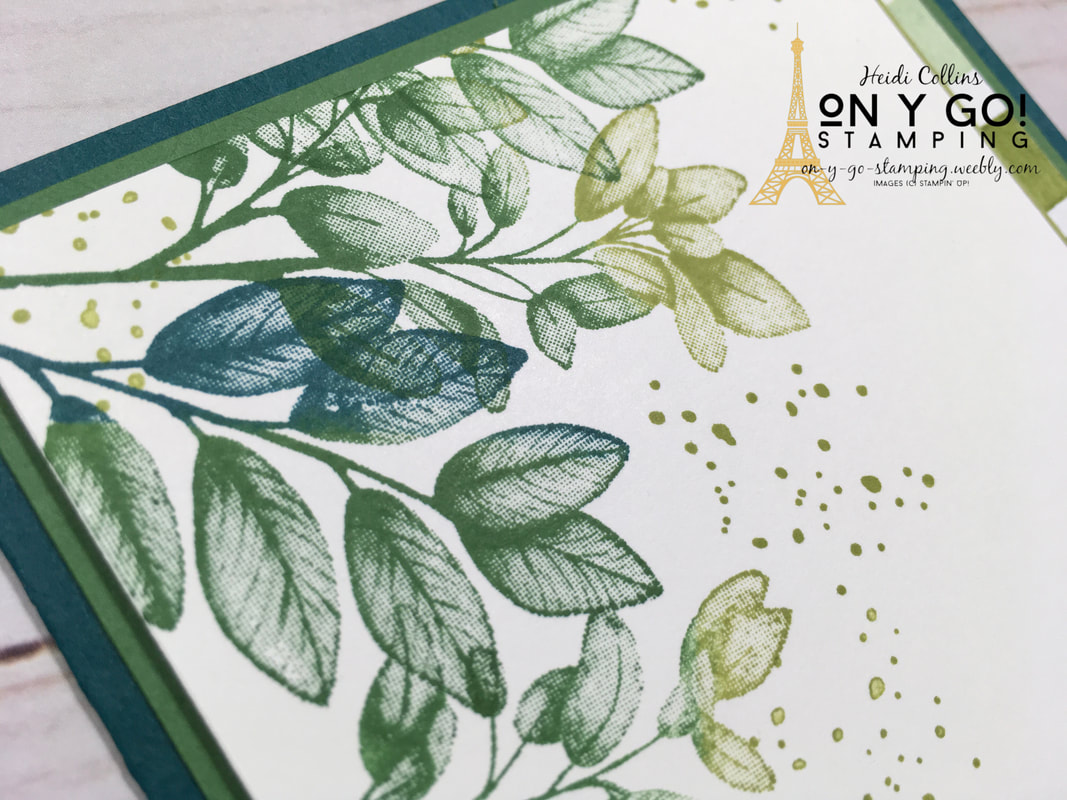
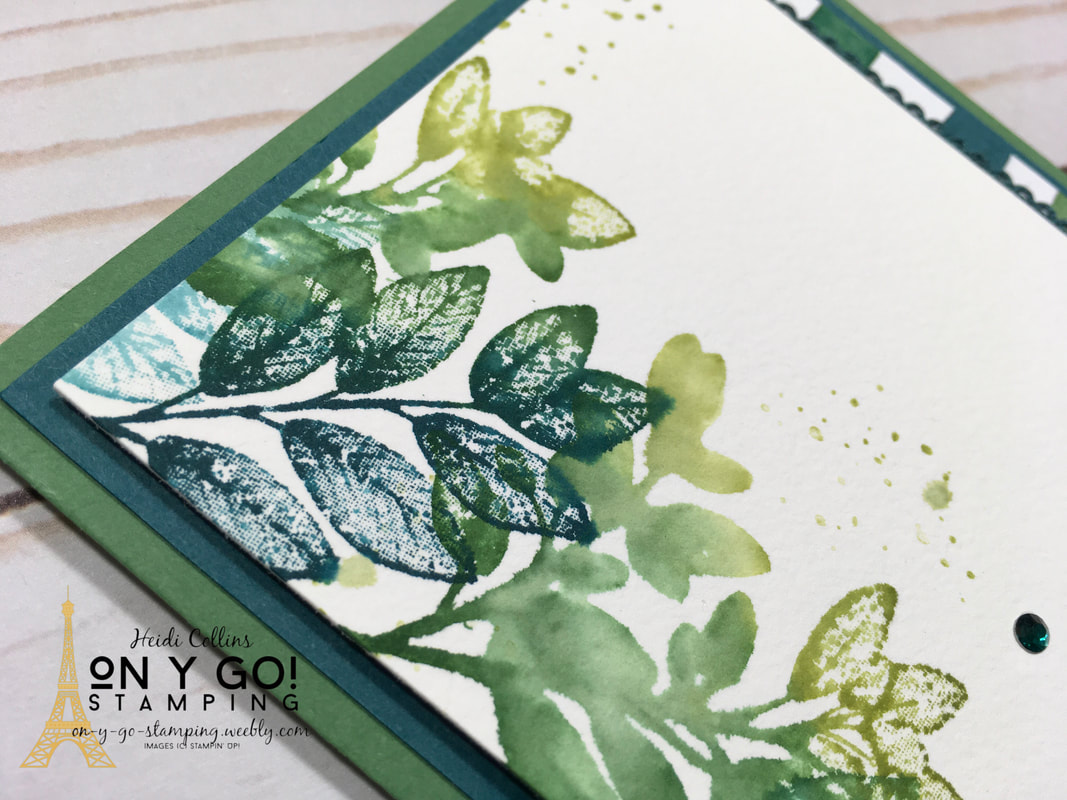
I have more samples using the Forever Fern stamp set today. This time, I am using the same card design to make three cards, from simple to chic to oh là là! Each card uses the color scheme of Pear Pizzazz, Garden Green, and Pretty Peacock, but each card has been slightly stepped up. So, on y go! Let's get stamping.
I layered the stamped piece of Whisper White cardstock onto a Pretty Peacock card base and added a strip of the Forever Greenery Designer Series Paper to the edge. Quick and easy!
Card Dimensions:
Pretty Peacock: 8 1/2" x 5 1/2", scored at 4 1/4" Garden Green: 5 1/4" x 4" Whisper White: 5" x 3 3/8" Pear Pizzazz: 5" x 1/2" Forever Greenery DSP: 5 1/4" x 1/2"
Card Dimensions:
Garden Green: 8 1/2" x 5 1/2", scored at 4 1/4" Pretty Peacock: 5 1/4" x 4" Fluid 100 Watercolor Paper: 5" x 3 3/8" Forever Greenery DSP: 5 1/4" x 1/2" 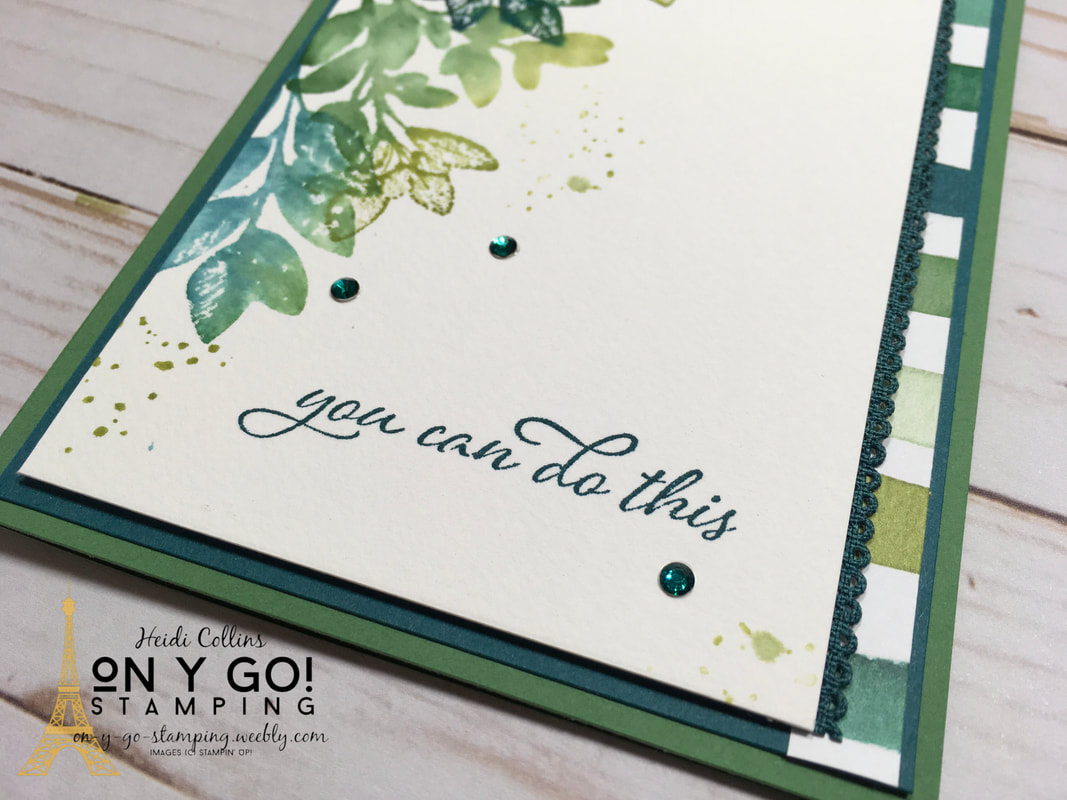
Product List


Noble Peacock Rhinestones
[149494]
$5.50
|


Archives
April 2024
|
")
")


")


 Scalloped Linen Ribbon")

