About
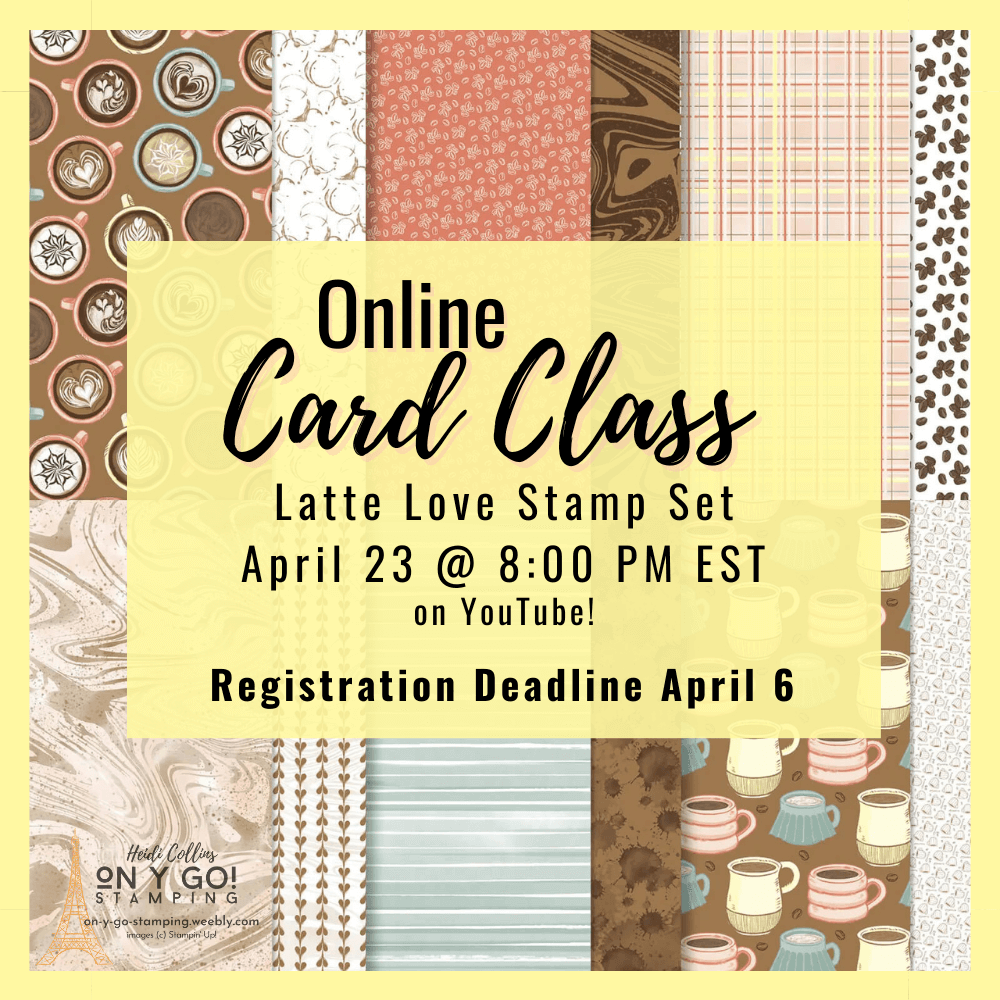
Online Card Classes
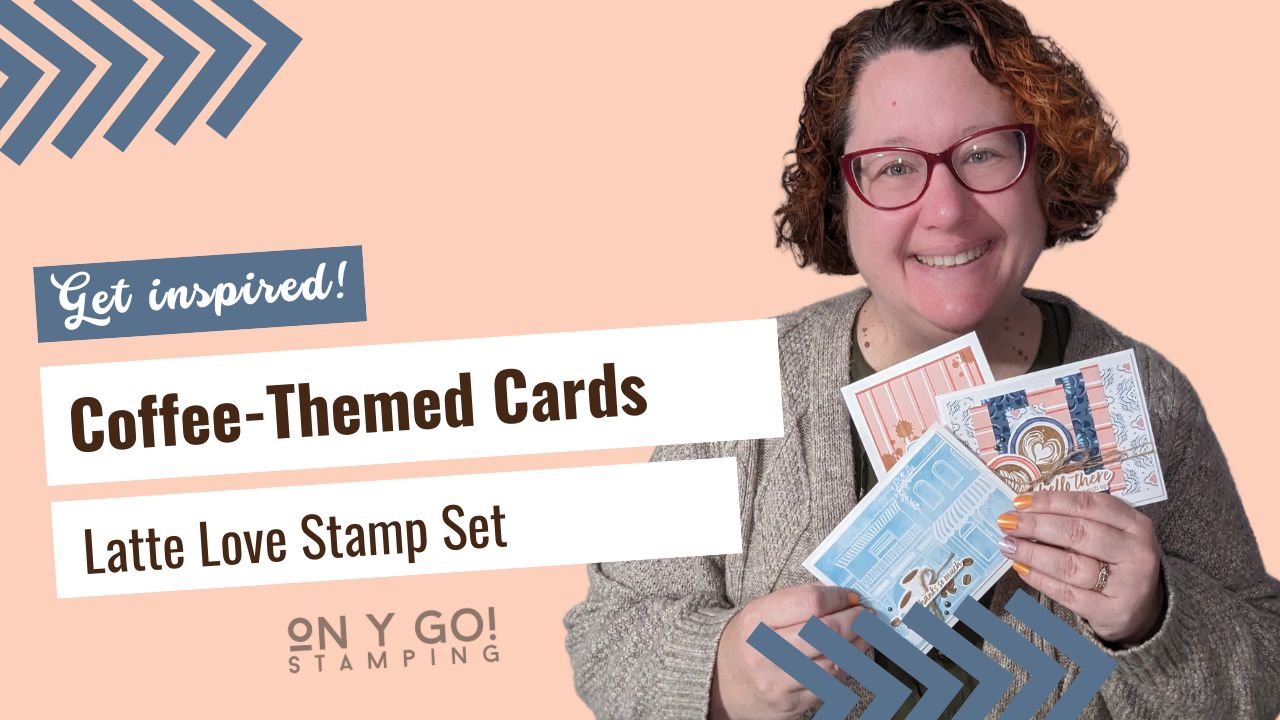
Card Making Ideas
Stampin' Up! Catalogs
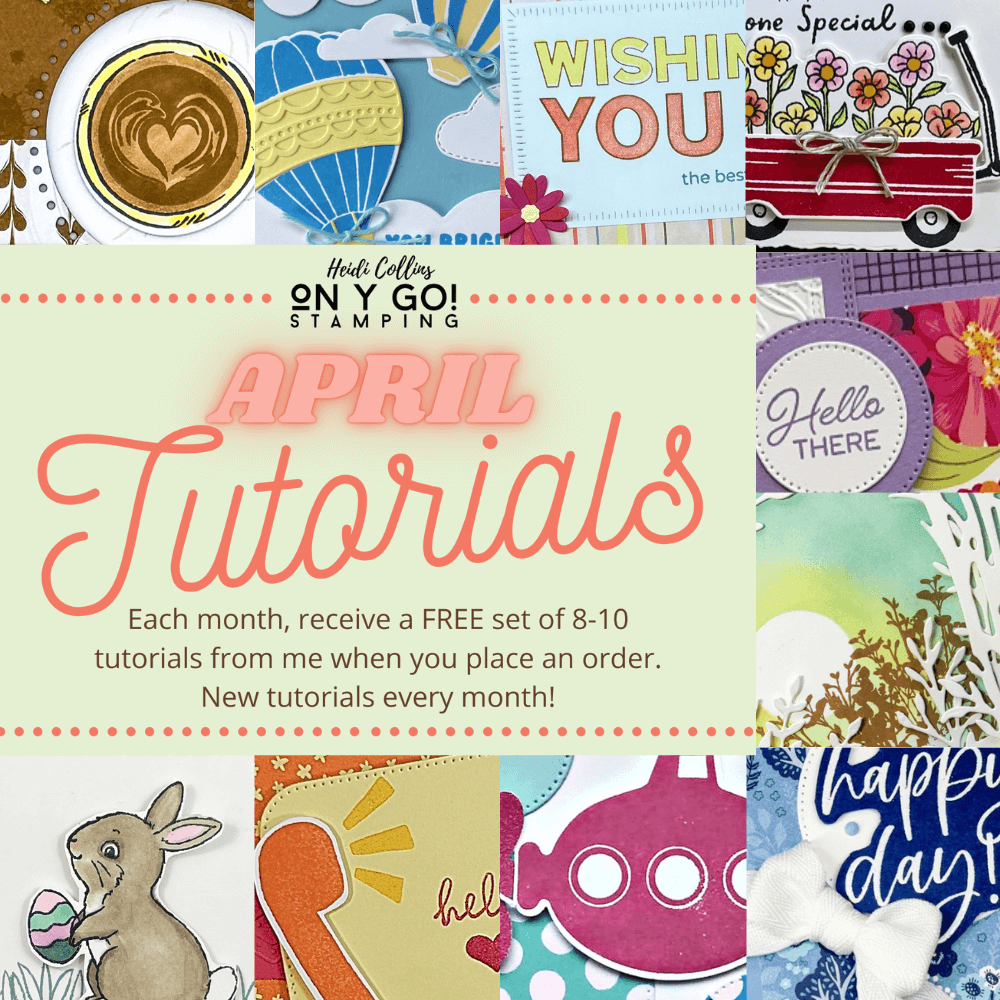
Card Tutorials
Contact
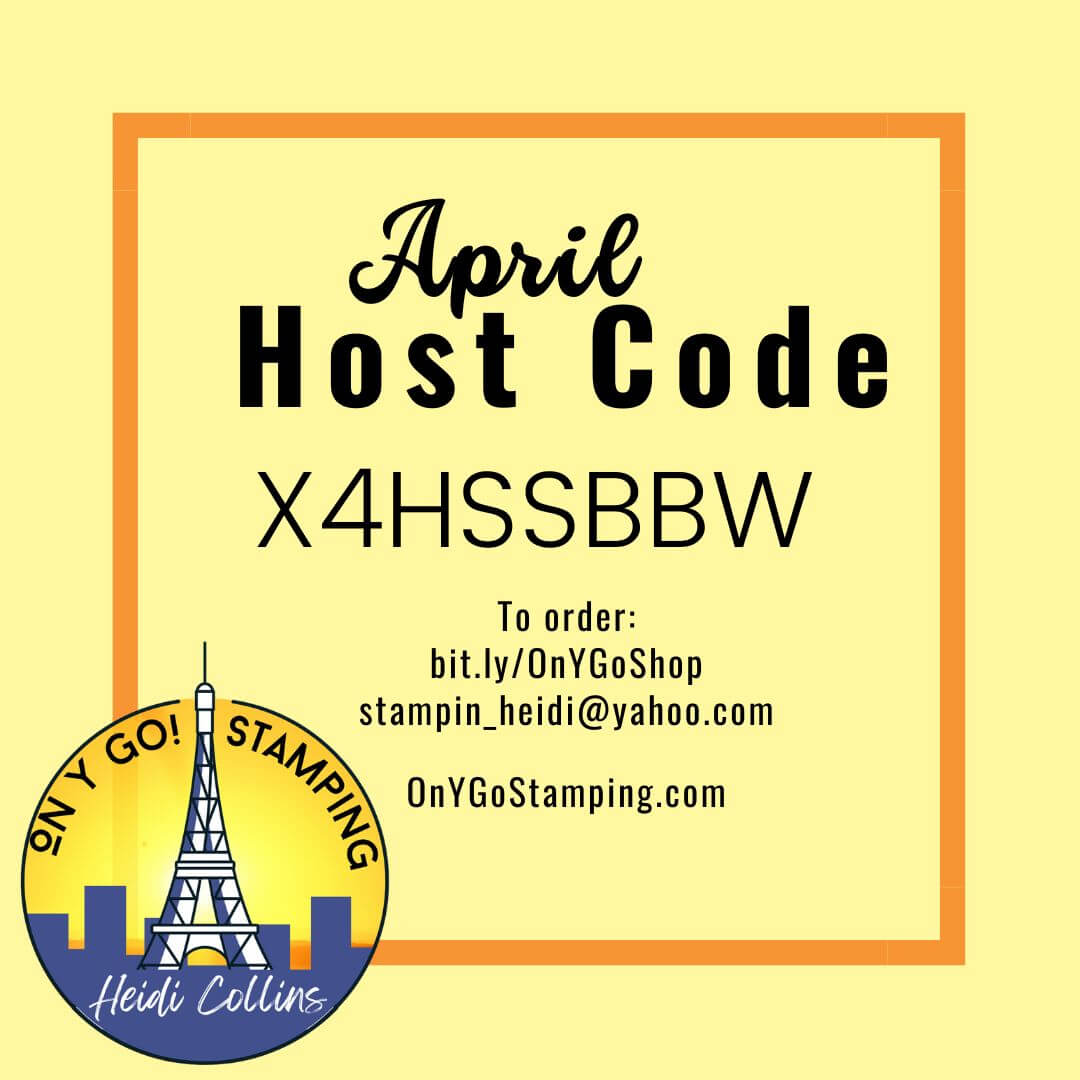
Shopping Rewards
Shop
Join Stampin' Up!
Menu
ON Y GO! STAMPING
About
Online Card Classes
Card Making Ideas
Stampin' Up! Catalogs
Card Tutorials
Contact
Shopping Rewards
Shop
Join Stampin' Up!
About
Online Card Classes
Card Making Ideas
Stampin' Up! Catalogs
Card Tutorials
Contact
Shopping Rewards
Shop
Join Stampin' Up!