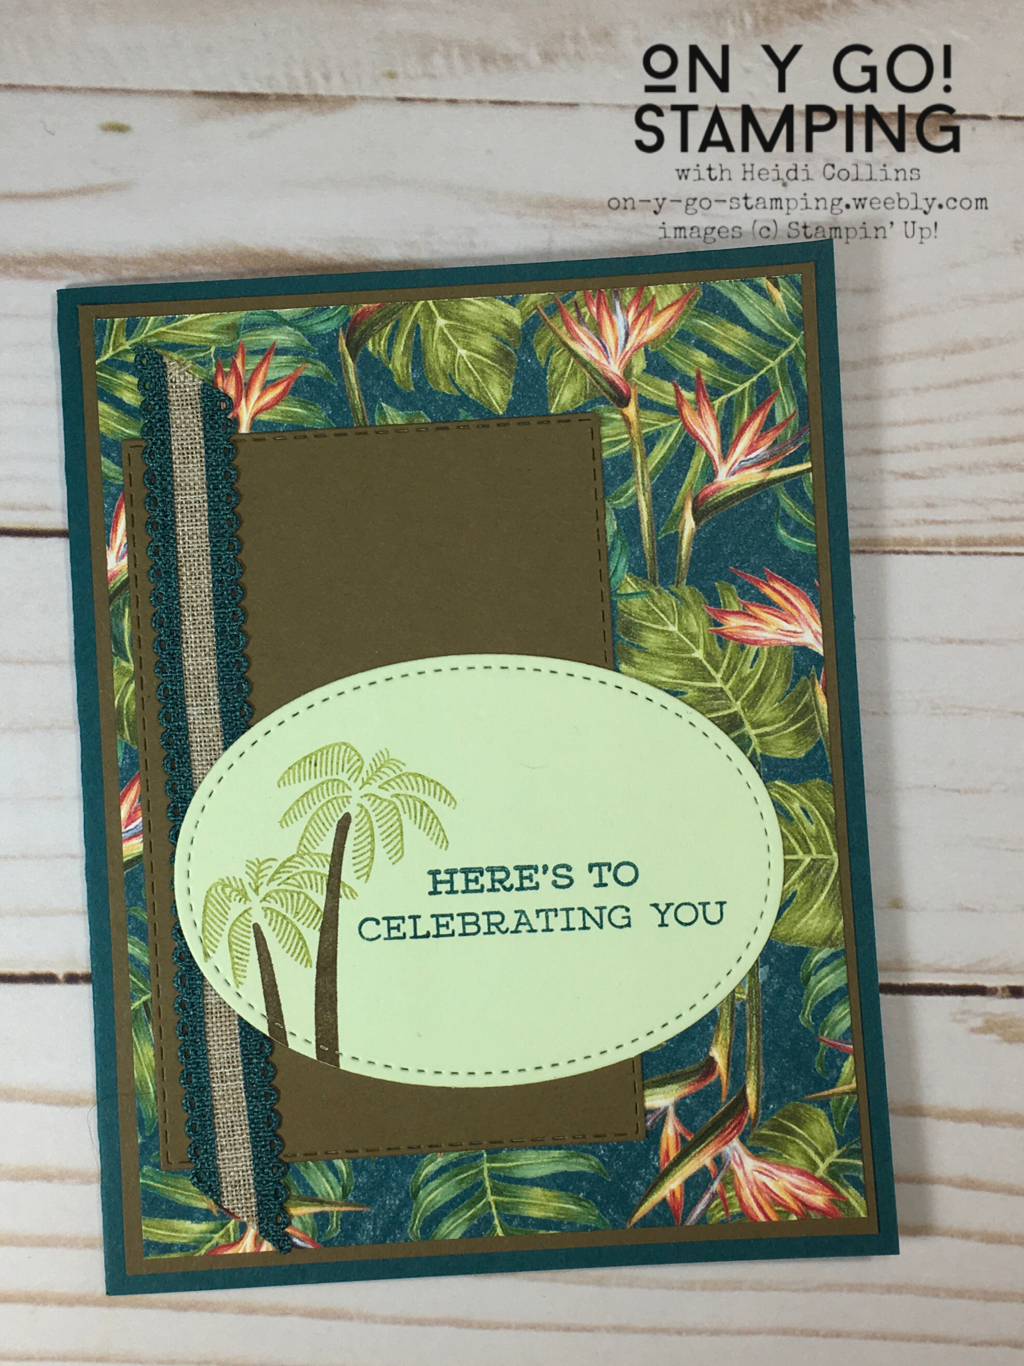
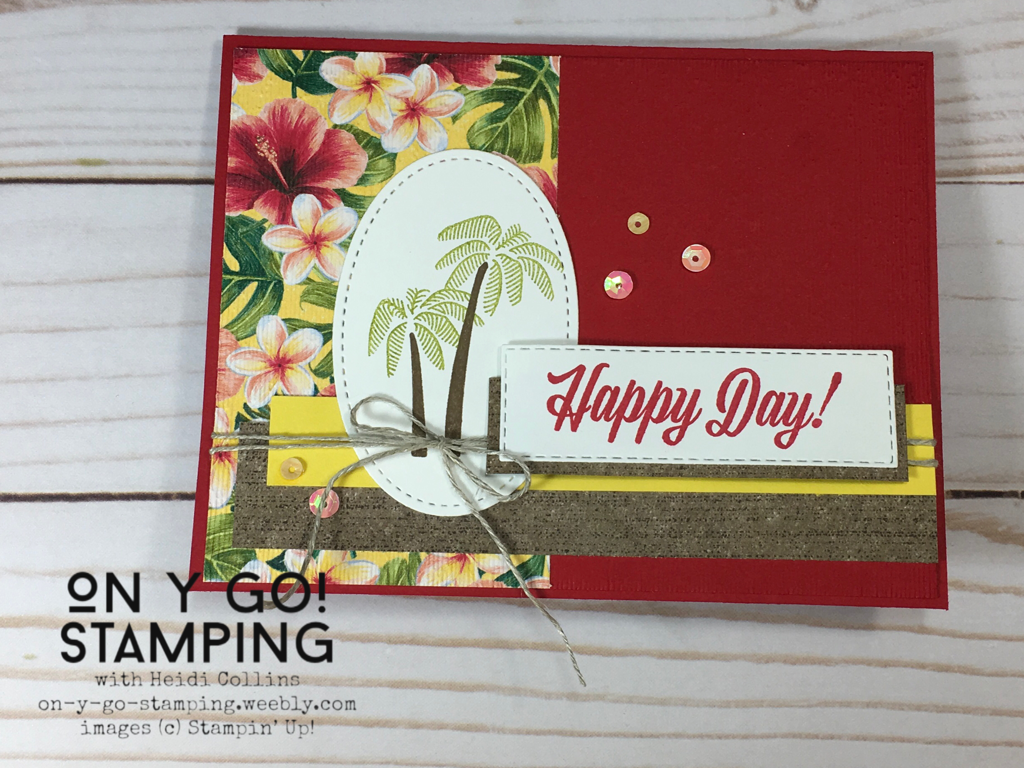
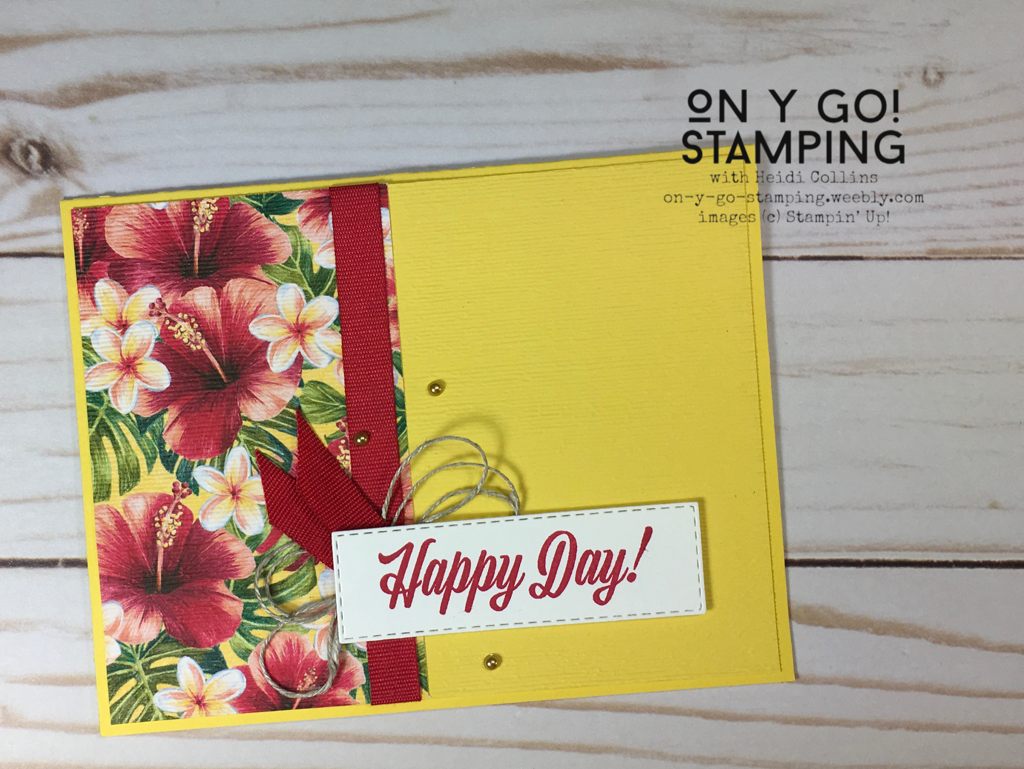
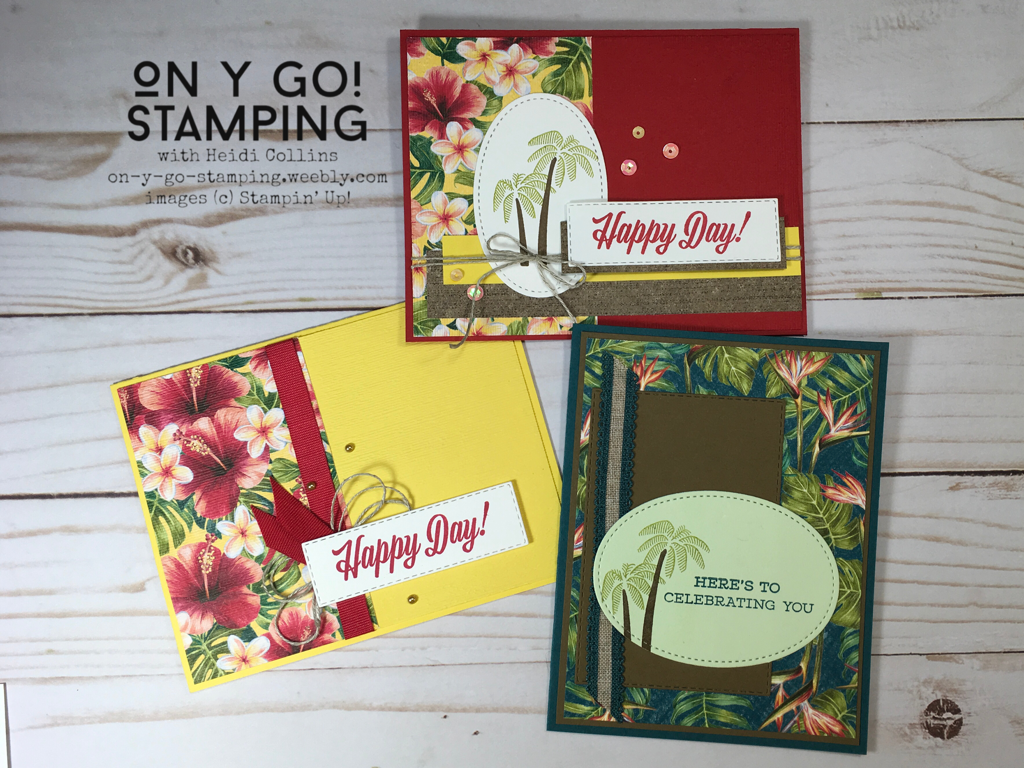
 Last Friday, I shared cards using the Friend Like You stamp set with the Lily Impressions Designer Series Paper. Today, I am using the same stamp set with the Tropical Oasis Designer Series Paper. Both of these sets of Designer Series Paper are beautiful! And did you know that the pieces I am using are part of the special sample pack of 6" x 6" Designer Series Paper available when you purchase the Stampin' Up! starter kit? This paper pack is an extra freebie during Sale-A-Bration along with an additional FREE stamp set of your choice and a mini guillotine paper cutter. All this in addition to your choice of $125 worth of product of your choice for only $99 and NO shipping fees! It is an amazing deal and there is no obligation to sell anything or place any future orders.
Ink: Accessories:
0 Comments
 Are you new to stamping? My next virtual class is the perfect opportunity for you to plunge into the world of stamps, ink, and paper! March 11, 2020, I will be demonstrating 3 cards and 1 mystery project featuring the Witty-Cisms stamp set. If you're a seasoned stamper, don't worry - these cards and project are perfect for you too! I'm sharing photos of the cards with you today, but because I'll be demonstrating everything on the 11th, there are no instructions in today's blog post. You can stamp along with me on March 11 - all you need to do is place an order of at least $40 (before S&H and tax) that includes the Witty-Cisms stamp set before Saturday, February 29, and I will send you a complete Make-N-Take kit. There are only a couple of other supplies you will need for this class including the watercolor pencils assortment #1, a Jet Black Stazon ink pad, adhesive, and a clear block or two. That's it! I will send you all the cardstock and accessories already pre-cut and ready to go. Click the button below to order all the supplies or just the ones you need. And don't forget, every $50 includes a FREE Sale-A-Bration item of your choice! 
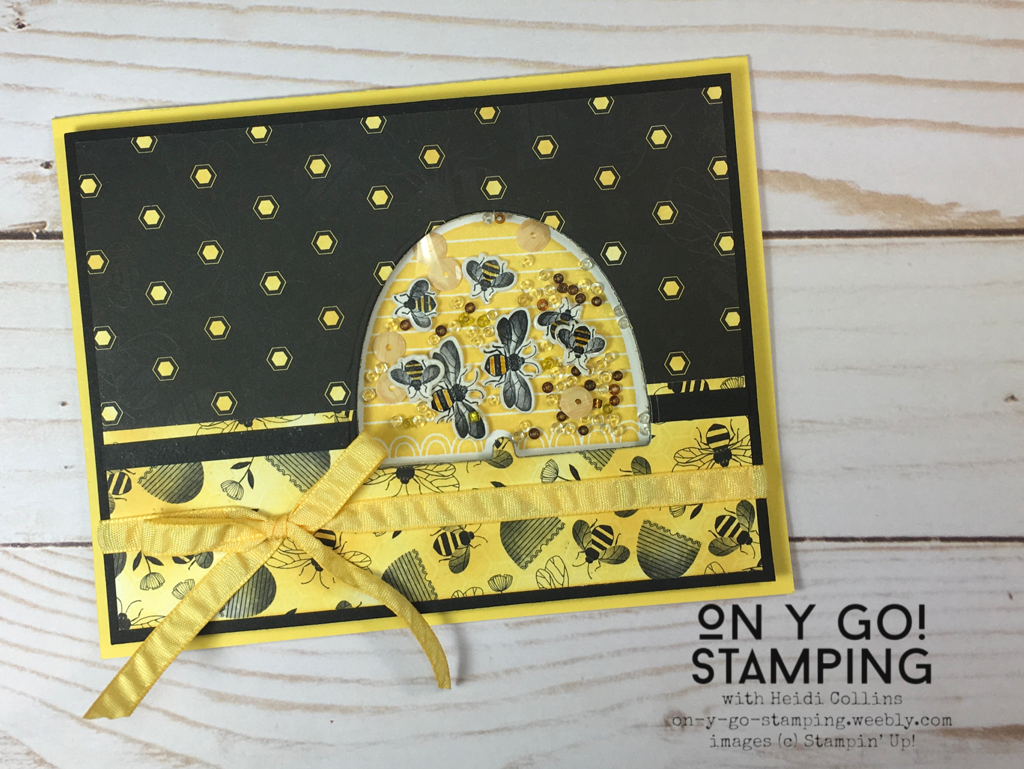
 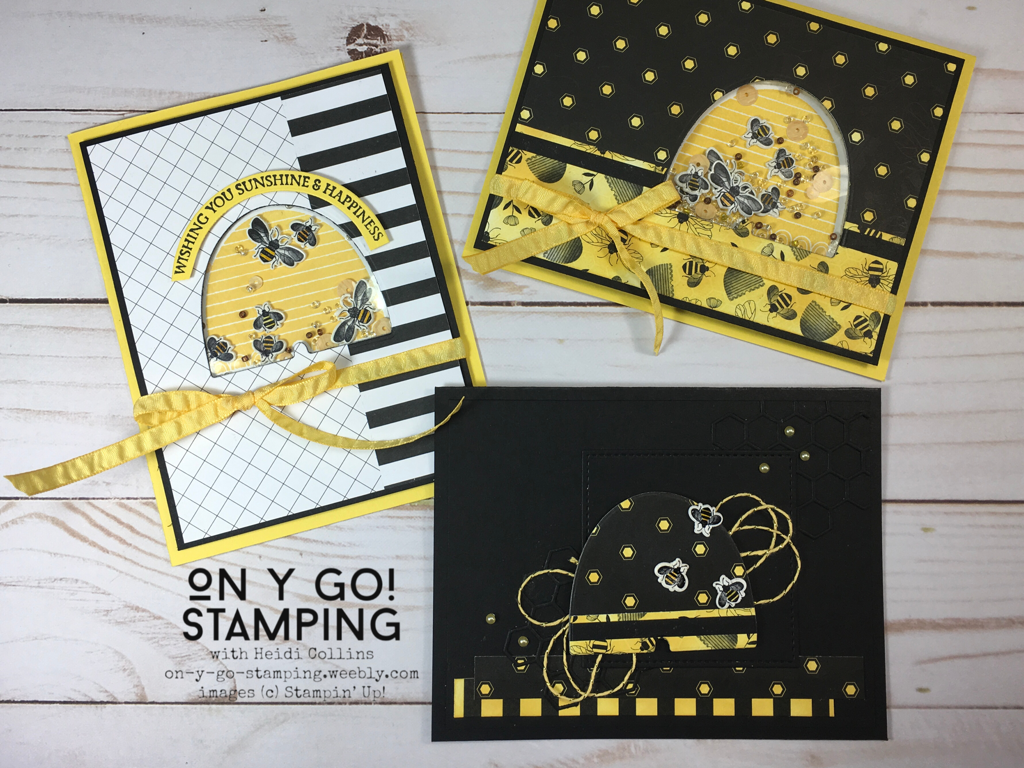 Do you remember shrinky dinks? Those plastic images that you could color and then shrink in your oven? They're just as much fun as a grown-up as they were when I was a kid! Stampin' Up! used to carry shrink plastic years and years ago. I still have a partial package in my drawer and the Honey Bee stamp set from the 2020 January-June mini catalog was just begging to be stamped and shrunk. While SU! doesn't carry it anymore, you can still find it in craft stores and online.
I adhered the patterned paper from the Golden Honey DSP to a piece of Basic Black cardstock. Then, I used the beehive die from the Detailed Bee dies to cut a hole through this card front. I used sticky strip to attach a piece clear plastic to the back of the card front. Years ago, I bought a package of overhead projector (remember those?!) sheets on clearance. I use these for shaker cards, but you can also purchase window sheets. On a separate piece of Whisper white cardstock, I stamped the beehive in Daffodil Delight ink. When you purchase SU! cling stamps, they come still stuck in the full sheet of rubber and you have to punch them out. I have some of these saved and used some for the foam between the card front and the beehive. I simply peeled the red rubber off the foam cushion and used adhesive to attach it carefully around the edges of the beehive that I had stamped on Whisper White cardstock. I was very careful not to leave any holes, but I also tried to stay fairly close to the edge because I didn't want all my bling to wind up outside the frame where you couldn't see it. I put the shrinky dink bees, some seed beads in clear and a golden brown, and a few sequins on top of the bee hive. Then I put more adhesive on the top of the foam and adhered the card front over the beehive so that the opening aligned with the stamped beehive. This created an enclosed compartment filled with bling that shakes. Finally, I added a piece of Daffodil Delight ribbon and adhered the card front to a Daffodil Delight card base. I stamped the greeting on Daffodil Delight cardstock and used two circle dies to cut it out before adhering it to my card front to finish the card.
Supplies: Cardstock:
I used the colors from the Birthday Bonanza Designer Series Paper which coordinates well with the Metallic Baker's Twine and Sequins combo pack available FREE during Sale-A-Bration. The colors aren't technically the same, but they could be! That's how well they match. Cardstock:
The layering of Whisper White on Whisper White adds that little extra touch to take this card from basic to elegant. Cardstock:
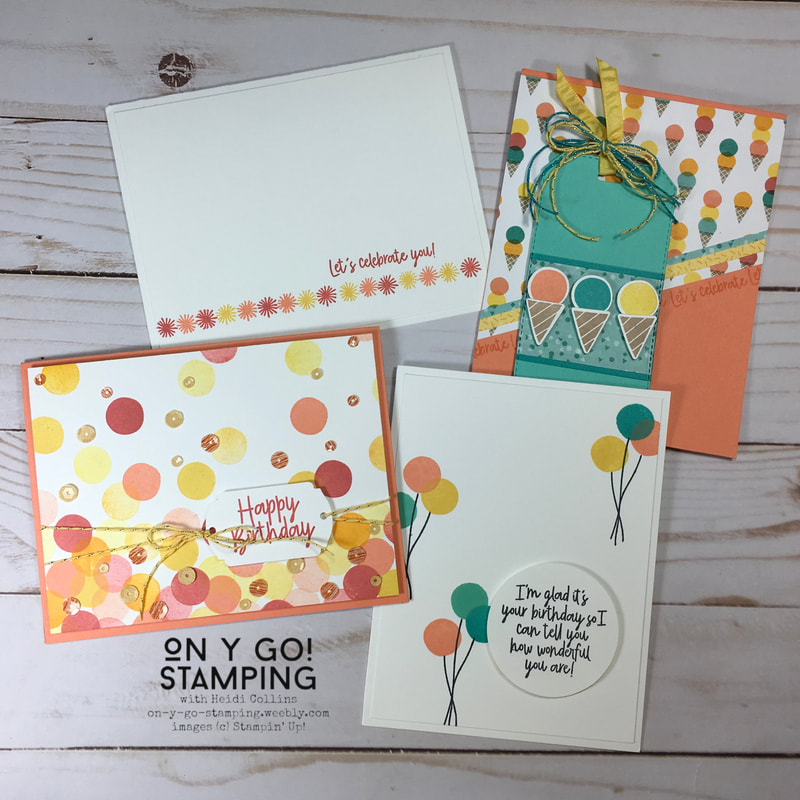
For the diagonal cut on the DSP, I simply took a piece of the ice cream DSP that was 4 1/4" x 5" then I sliced off the end at a diagonal that looked good. I then laid 1/4" strips along the angle cut and trimmed the sides to create the stripes at the bottom. Cardstock:
Accessories:
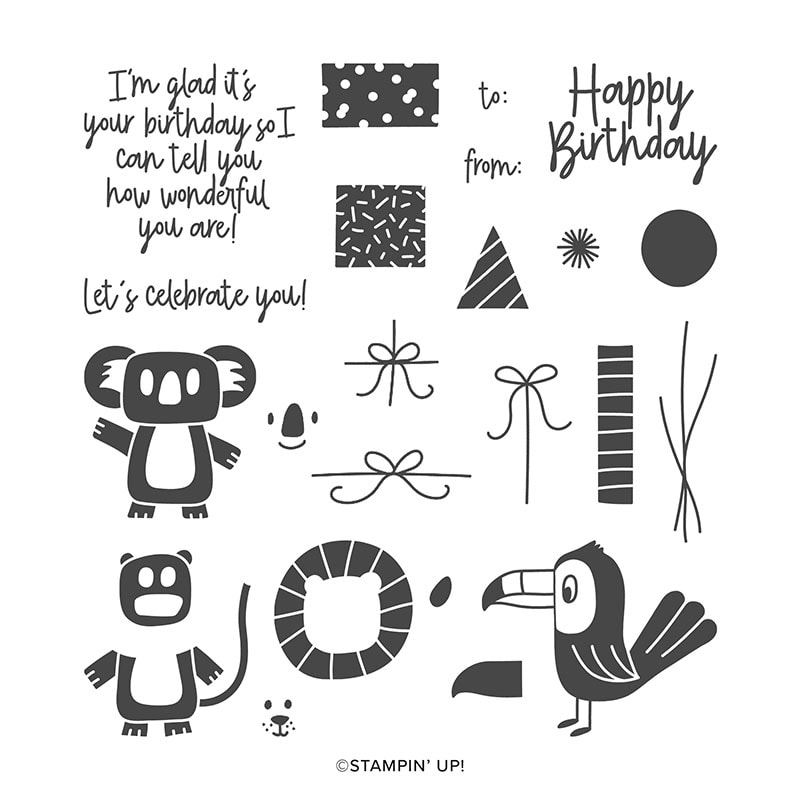
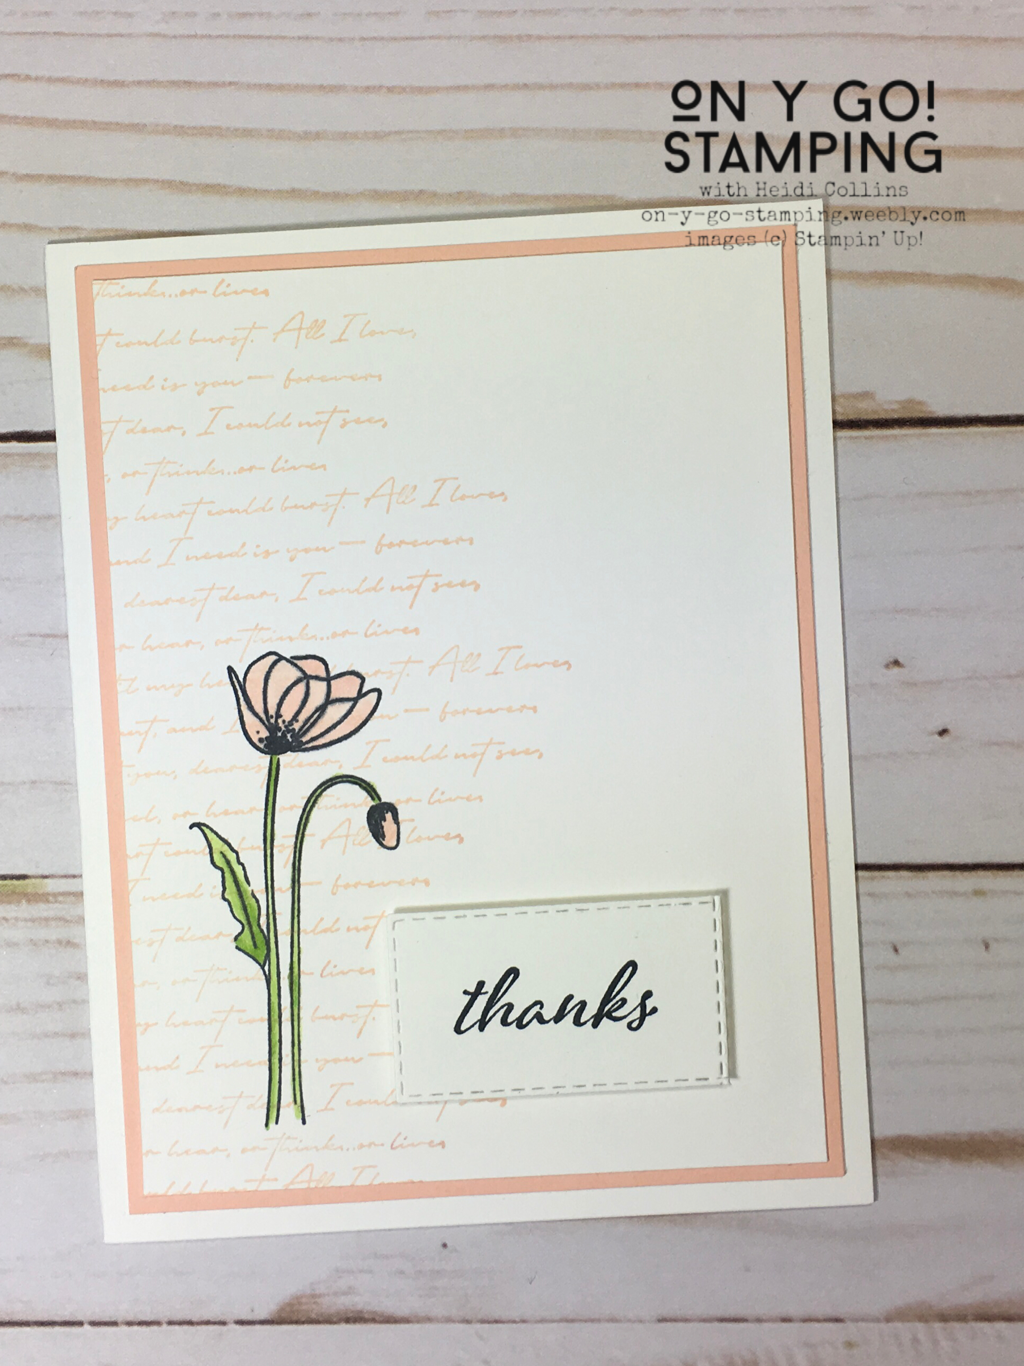
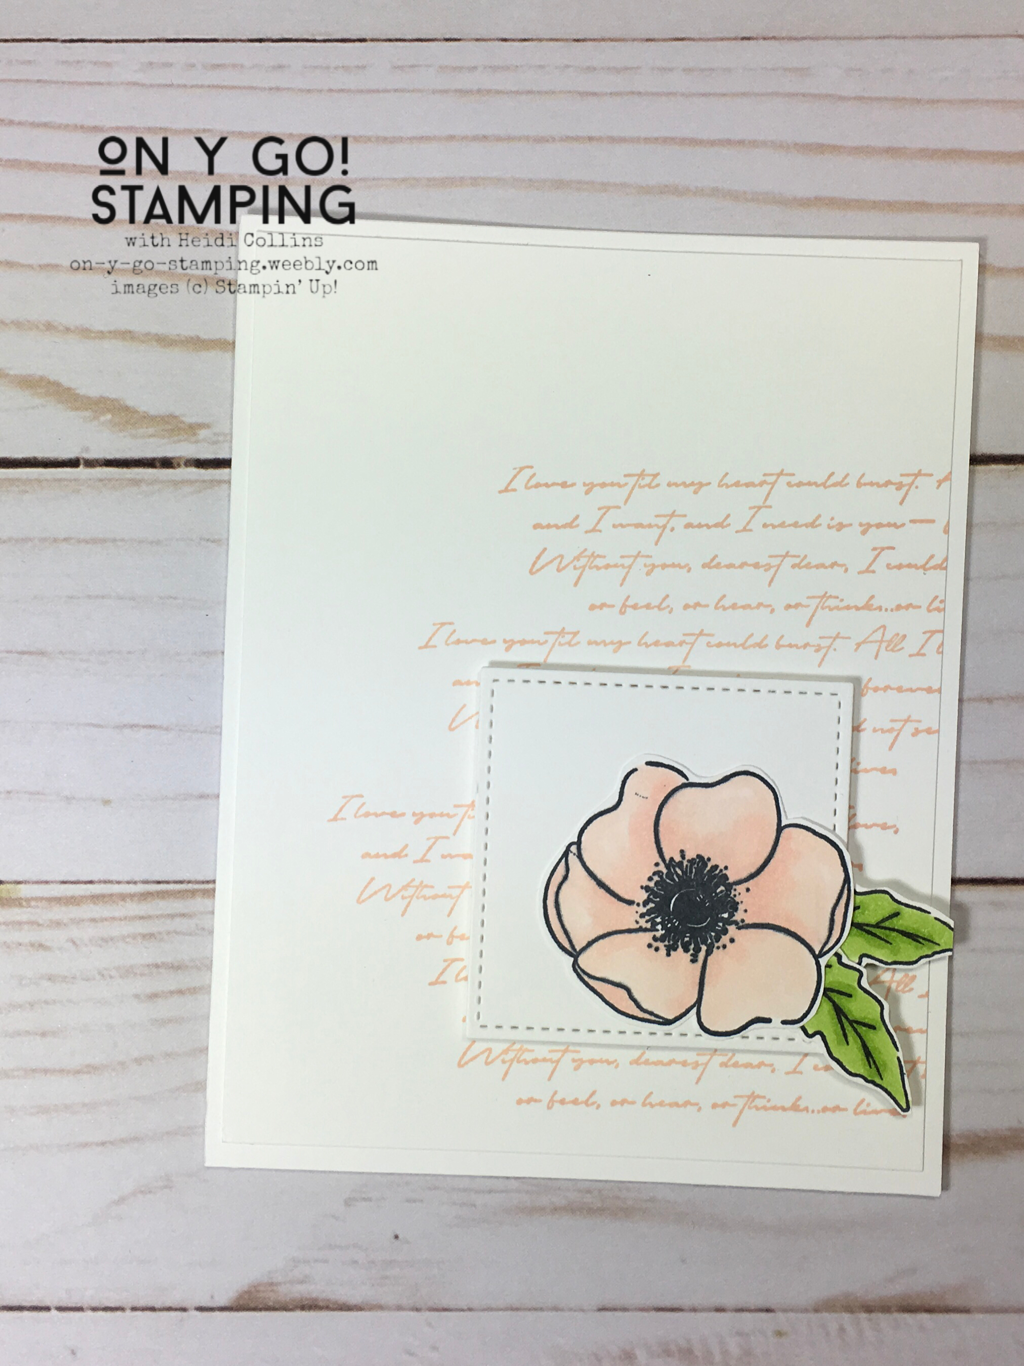
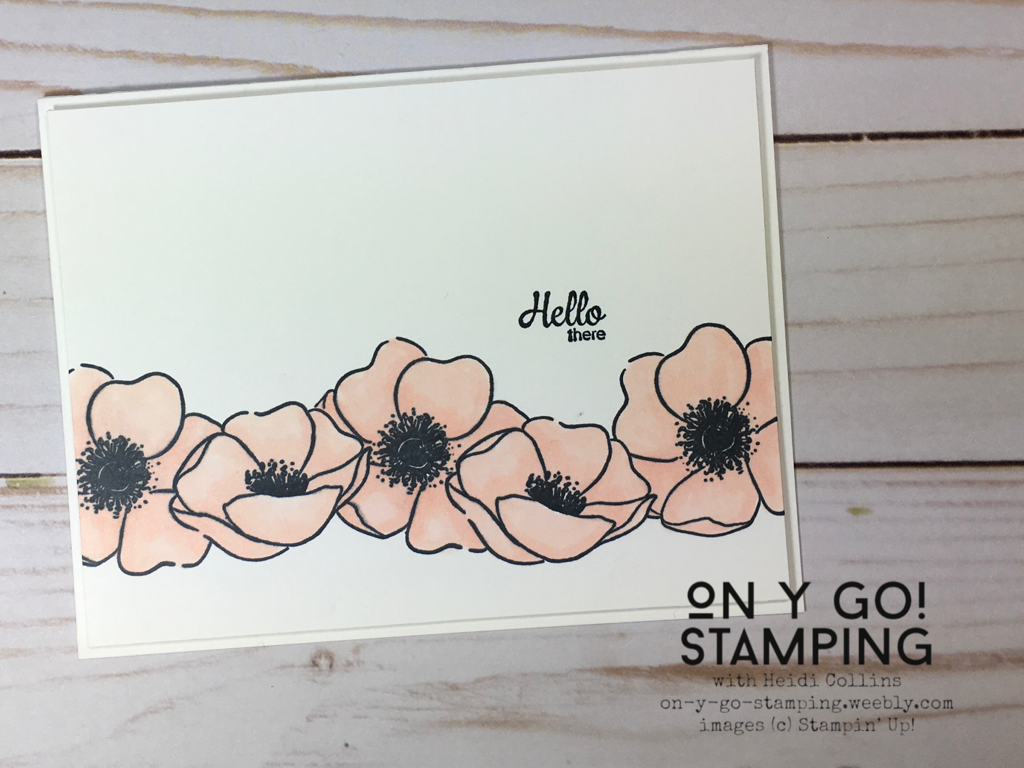
This Bonanza Buddies stamp set is so much fun and has so many possibilities, that I'm sure you'll see a couple more blog posts focused on different ways to use it in the coming weeks! 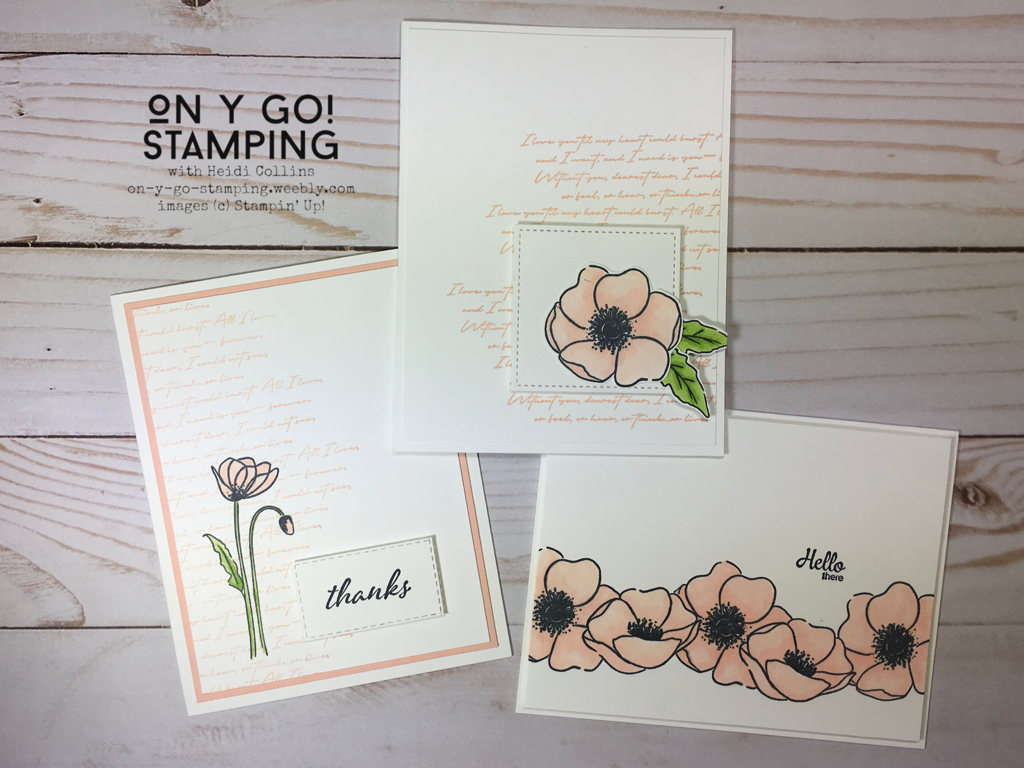 When I think of poppies, the red poppies in the fields in France come to mind. But these light pink poppies exude elegance. Paired with a primarily white on white color scheme, these cards are stunning in their simplicity. Not only that, but they were quick and easy to put together too! All of these cards use the following supplies:
Tips:
This card uses the masking technique. I stamped profile poppy on two post-it notes and cut them out on the outline. Then, I stamped two of these profile poppies on the card front. I covered them with the cut-out ones on sticky notes. I then stamped the other poppies over top of the post-it notes. Finally, I removed the sticky notes to reveal the line of poppies. |


Archives
April 2024
|