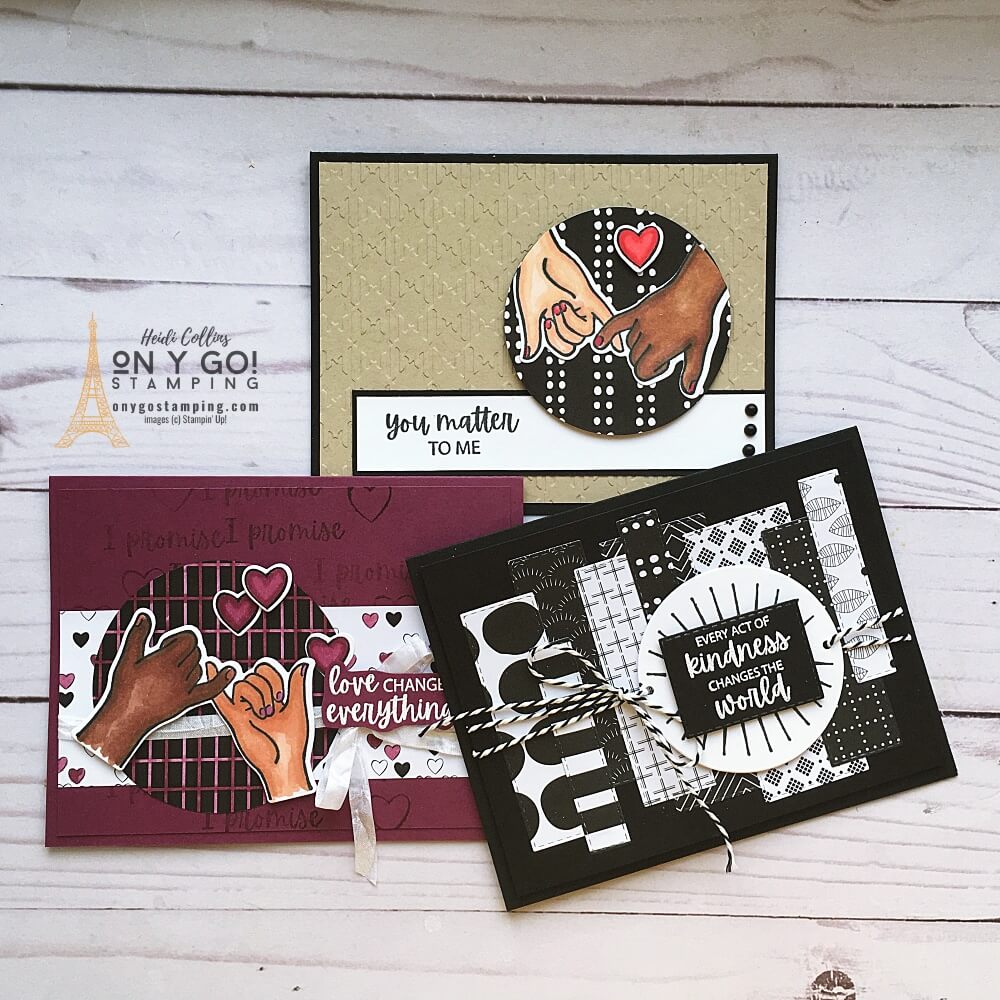
• Home
  • About
  • Contact
  • Shopping Rewards
  • Shop
  • Join Stampin' Up!
  • Stampin' Up! Catalogs
  • Online Card Classes
  • Ideas & Inspiration
  • Tutorial Store
On y go! Stamping
  • Home
  • About
  • Contact
  • Shopping Rewards
  • Shop
  • Join Stampin' Up!
  • Stampin' Up! Catalogs
  • Online Card Classes
  • Ideas & Inspiration
  • Tutorial Store

Card Making Technique: Pointillism Coloring

9/21/2020

0 Comments

 
Elegant handmade card design using the To a Wild Rose stamp set from Stampin' Up! and the card making technique: coloring with pointillism.
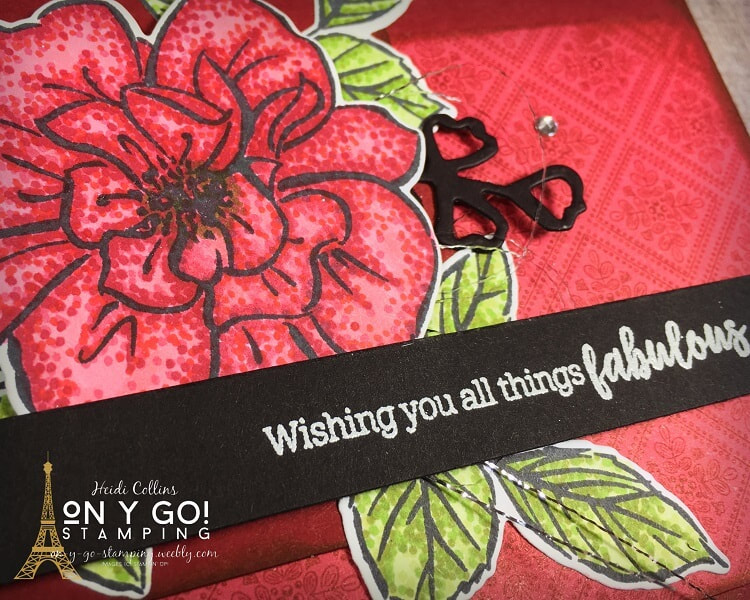
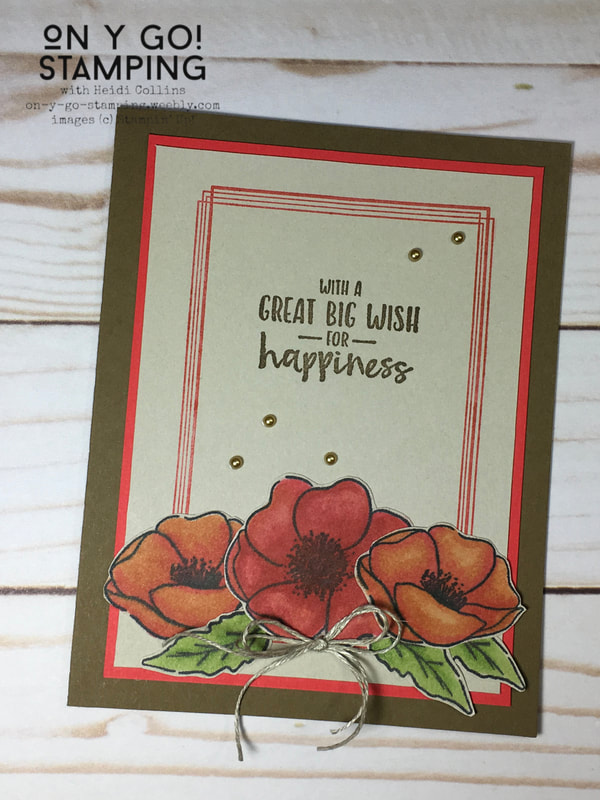
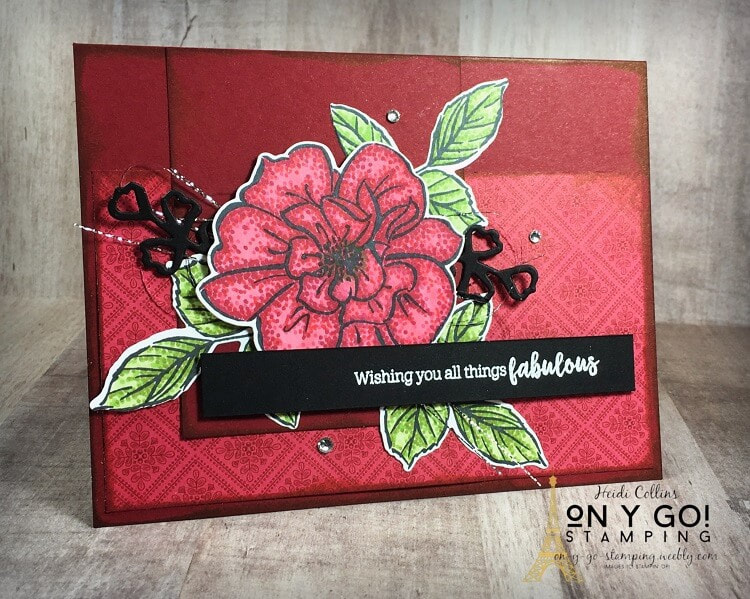
Last Thursday, I shared this unique pointillism coloring technique. If you missed it, go back and check out that post to learn exactly how to do it or watch the video. I just couldn't stop the dots! Here is another card design featuring the To a Wild Rose stamp set and the 'Tis the Season 6" x 6" patterned paper. So, on y go! Let's get stamping.

Cutting Dimensions for this beautiful Card Making Idea

Cherry Cobbler:
  • 8 1/2" x 5 1/2", scored at 4 1/4"
  • 2 3/4" x 3 1/2"
'Tis the Season Designer Series Paper: 5 5/16" x 3"
Basic Black: 1/2" x 4 1/4" & Scraps
​Whisper White: Scraps
Gorgeous card making idea using the To a Wild Rose stamp set from Stampin' Up! and the pointillism coloring technique.

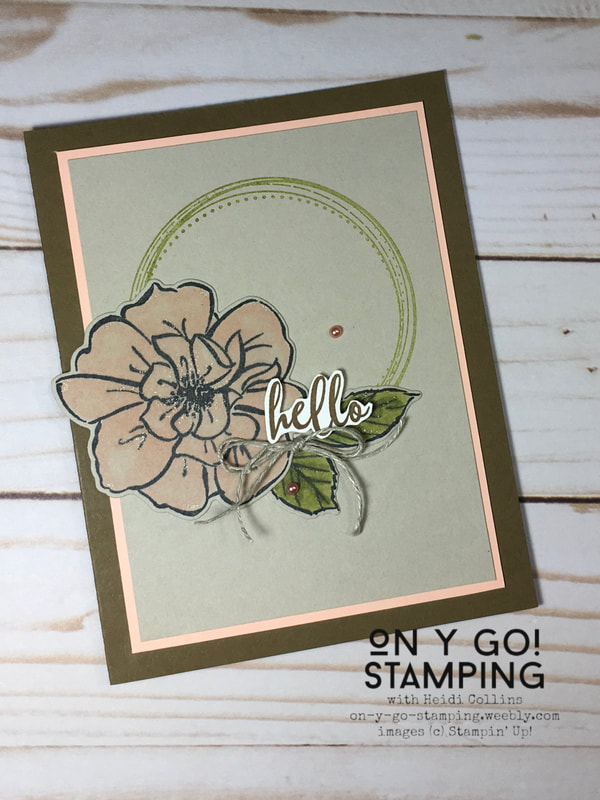
Putting this Beautiful Card Design Together

to start, I swiped my Cherry Cobbler ink pad along the edges of my cardstock and patterned paper to created a slightly distressed edge. 

I stamped the images using Tuxedo Black Memento Ink. Then, I used the pointillism coloring technique to color the rose using the Poppy Parade and Cherry Cobbler Stampin' Blends alcohol markers. For the leaves, I used Granny Apple Green and Old Olive alcohol markers. I love the way this technique really shows up on the larger flower image! 

I grabbed a greeting from the All Things Fabulous stamp set, embossed it with white embossing powder on a strip of Basic Black cardstock. I trimmed the silver edge from a piece of Silver Metallic Ribbon and pulled the fine silver threads to add behind the rose by twisting them in a circle and taping them with a little piece of tape. A few rhinestone basic jewels finished the card with a little sparkle!
Supply list for all of the rubber stamps, ink pads, cardstocks, patterned paper, and embellishments needed to create a beautiful handmade card design with the To a Wild Rose stamp set from Stampin' Up!

See the Complete Supply List for this Elegant Card Making Idea

Click here to see all of the supplies used for today's gorgeous To a Wild Rose card idea. If you need any of the rubber stamps, ink pads, cardstocks, patterned papers, or embellishments, simply select them and then click add to cart. Be sure to grab this month's Host Code (to the right above) and use it with your order to earn Frequent Shopper Points.
Thank you so much for stopping by the website today. If you have any questions or need help with anything, please leave a comment or send an email (stampin_heidi@yahoo.com). I would love to hear from you!
0 Comments

Stampin' Blends on Sahara Sand

3/6/2020

0 Comments

 
Picture
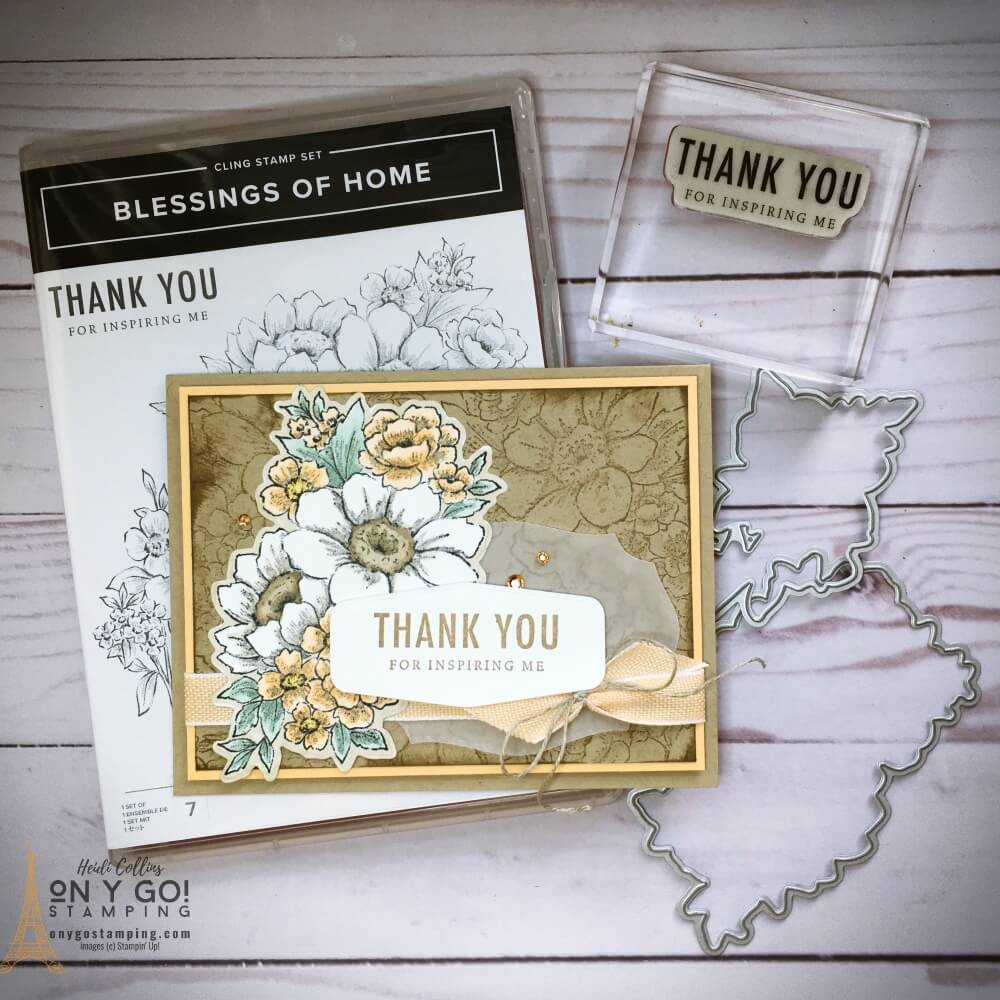
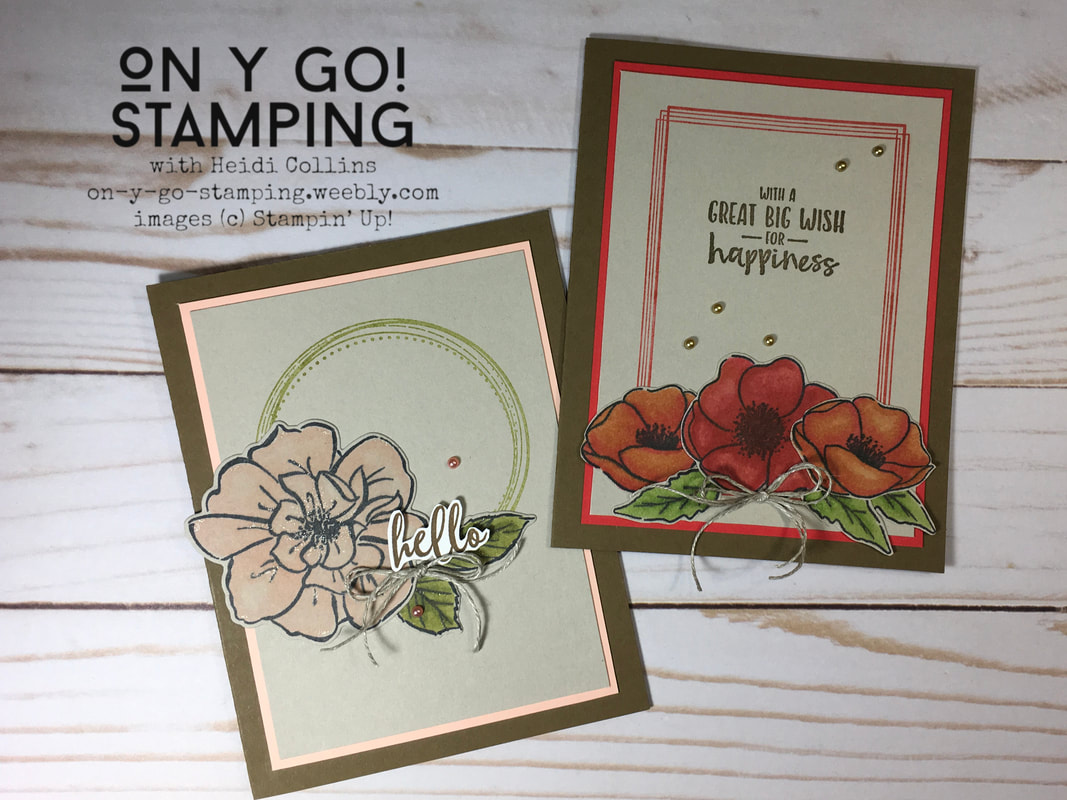
Usually when I color with the Stampin' Blends, I use Whisper White or Very Vanilla cardstock, but today, I'm coloring on Sahara Sand cardstock which gives it a more rustic feel. The wonderful thing about the Stampin' Blends is that the color shows up even on the slightly carker cardstock. When you first color the image, it looks very brown, but as the alcohol evaporates, the color begins to pop. It's so much fun to watch!
Picture
Hello Wild Rose
This first card uses the To a Wild Rose and Swirly Frames stamp sets. The color combination of Petal Pink, Sahara Sand, Old Olive, and Soft Suede is soft and sweet. It's almost country looking. I stamped the "hello" on Whisper White to really make it pop. I added just a little Wink of Stella to the flower and leaves as well as some pearls for a little bling on this card.
Cardstock:
  • Soft Suede: 8 1/2" x 5 1/2" folded in half
  • Petal Pink: 3 11/16" x 4 15/16"
  • Sahara Sand: 3 1/2" x 4 3/4" plus scraps
  • Whisper White: scrap
Inks:
  • Tuxedo Black Memento
  • Soft Suede
  • Old Olive
Accessories:
  • Petal Pink Stampin' Blends light & dark
  • Old Olive Stampin' Blends light & dark
  • Linen thread
  • Share What You Love Artisan Pearls (retired)
  • Wink of Stella
  • Mini Stampin' Dimensionals
  • Mini Glue dots to hold the ribbon in place.
  • Wild Rose dies
Notes:
  • Don't worry if your flower looks brown when you begin to color it. As the ink dries and the alcohol evaporates, it will turn pink.
  • I used mini Stampin' Dimensionals under the "hello." However, these still aren't small enough and I had to cut a couple of them in half.
Poppy Happiness
My second card uses the Painted Poppies, Swirly Frames, and Sending You Thoughts stamp sets. The Sending You Thoughts stamp set is available FREE with a $50 order through the end of March as part of the Sale-A-Bration promotion.
Cardstock:
  • Soft Suede: 8 1/2" x 5 1/2" folded in half
  • Poppy Parade: 3 11/16" x 4 15/16"
  • Sahara Sand: 3 1/2" x 4 3/4" plus scraps
Inks:
  • Tuxedo Black Memento
  • Poppy Parade
  • Soft Suede
Picture
Accessories:
  • Poppy Parade Stampin' Blends light & dark
  • Pumpkin Pie Stampin' Blends light & dark
  • Granny Apple Green Stampin' Blends light & dark
  • Linen Thread
  • Metallic pearls
  • Mini glue dots to adhere the linen thread
Notes:
  • For the orange poppies, I colored them with light and dark Pumpkin Pie Stampin' Blends. Then, I used the light Poppy Parade Stampin' Blend and added a little red in the darker areas. I colored over the whole thing with the light Pumpkin Pie Stampin' Blend to blend the colors together.
0 Comments

Birds of a Feather Flocked Together

10/23/2019

0 Comments

 
Picture
Today, I have four adorable cards to show you using the Birds of a Feather stamp set. This set is in the 2019 Holiday Catalog by Stampin' Up! and is a 4-season set as it has four different birds - a duck, a chick, a turkey, and a hen - for four different holidays - Halloween, Christmas, Thanksgiving, and Valentine's Day. I used my Stampin' Blends on the cards for some quick and easy coloring and the Brights 6" x 6" Designer Series Paper. So easy and so fun!
Supply List for all 4 Cards

​First up is the pirate duck. All set for Halloween, this cute little duck is dressed as a pirate. I simply stamped the duck on white cardstock, added a couple layers, and then put it on the Daffodil Delight card front. I stamped a few stars from the set behind the duck to add a little background interest and added strips of the Designer Series Paper at the bottom to pull in the colors from the duck.

Picture
Coloring these images with the Stampin' Blends is so easy! The Blends are available in a light and a dark version of each color. I simply colored the image with the light version, then went around the outside and where there should be shadows with the dark version. Then I switched back to the light version again to smooth out the lines. 

It's hard to see in the photo, but I used the light Crumb Cake Stampin' Blend around the outside edges of the image. This gives it a slight shadow all around and helps it pop out from the page. 
Picture

The next card features a cute little chick decked out with a Santa hat and a star. You'll notice I used the same layout on all four of these cards. I simply changed the orientation. But each one features strips of the patterned paper along the bottom or side and the image stamped on white and mounted on coordinating cardstock.
For each one, I also stamped something on the card front using the same color ink as the cardstock. For the chick and duck, it was the stars, but for the turkey and the hen, I did something a little different. The set contains greetings for each season as well. For Thanksgiving, there is a stamp that says: "give THANKS." I carefully  inked up just the "THANKS" portion of the stamp and stamped it on my card front. (It actually wasn't hard!) I stamped it three times each inking to give different densities of color. 
Picture
Picture
I did the same on the Valentine's Day card, but instead of using one color, I used Poppy Parade, Gorgeous Grape, and Flirty Flamingo to tie in all of the colors of the card. 

These cards really were quick, easy, and fun to make!
0 Comments
Forward>>
    Heidi Collins, Independent Stampin' Up! Demonstrator with On Y Go! Stamping
    Get updates and ideas on my Facebook group
    Heidi Collins, Independent Stampin' Up! Demonstrator and Owner of On Y Go! Stamping
    Get a 6 x 6 sample of all of the new patterned papers from the 2022-2023 Annual Catalog. Plus, a free invitation to a Sneak Peek Virtual Pajama Party to see card making demonstrations using all new products.
    Shop for Stampin' Up! stamps, inks, paper, tools, and embellishments with Heidi Collins and earn points towards FREE stamps!
    Picture
    On Y Go! Stamping YouTube channel with Card Making Videos on how to do rubber stamping, card making, scrapbooking, and paper crafting

    Archives

    August 2022
    July 2022
    June 2022
    May 2022
    April 2022
    March 2022
    February 2022
    January 2022
    December 2021
    November 2021
    October 2021
    September 2021
    August 2021
    July 2021
    June 2021
    May 2021
    April 2021
    March 2021
    February 2021
    January 2021
    December 2020
    November 2020
    October 2020
    September 2020
    August 2020
    July 2020
    June 2020
    May 2020
    April 2020
    March 2020
    February 2020
    January 2020
    December 2019
    November 2019
    October 2019
    September 2019
    August 2019
    July 2019
    June 2019

Powered by Create your own unique website with customizable templates.
  • Home
  • About
  • Contact
  • Shopping Rewards
  • Shop
  • Join Stampin' Up!
  • Stampin' Up! Catalogs
  • Online Card Classes
  • Ideas & Inspiration
  • Tutorial Store