• About
  • Online Card Classes
  • Card Making Ideas
  • Stampin' Up! Catalogs
  • Card Tutorials
  • Contact
  • Shopping Rewards
  • Shop
  • Join Stampin' Up!
ON Y GO! STAMPING
  • About
  • Online Card Classes
  • Card Making Ideas
  • Stampin' Up! Catalogs
  • Card Tutorials
  • Contact
  • Shopping Rewards
  • Shop
  • Join Stampin' Up!

A Star Welcome

9/30/2019

0 Comments

 
Picture
This card is for another Color Throw Down Challenge. This week (ctd562) the colors given were cobalt blue, aqua, gray, and black. From my Stampin' Up! arsenal I chose: Pacific Point, Coastal Cabana, Smoky Slate, and Basic Black. 

Complete Supply List
I used the Stitched Stars dies from the 2019 Holiday Catalog to cut various stars from Coastal Cabana and Pacific Point cardstock. I inked an acrylic block directly with Smoky Slate ink, spritzed it with water, and stamped it on a piece of old naturals cardstock I had in my stash to create a gray bar in the background. (I wrote an entire blog post on this technique a while back.) Then I layered the stars on top. 
Picture

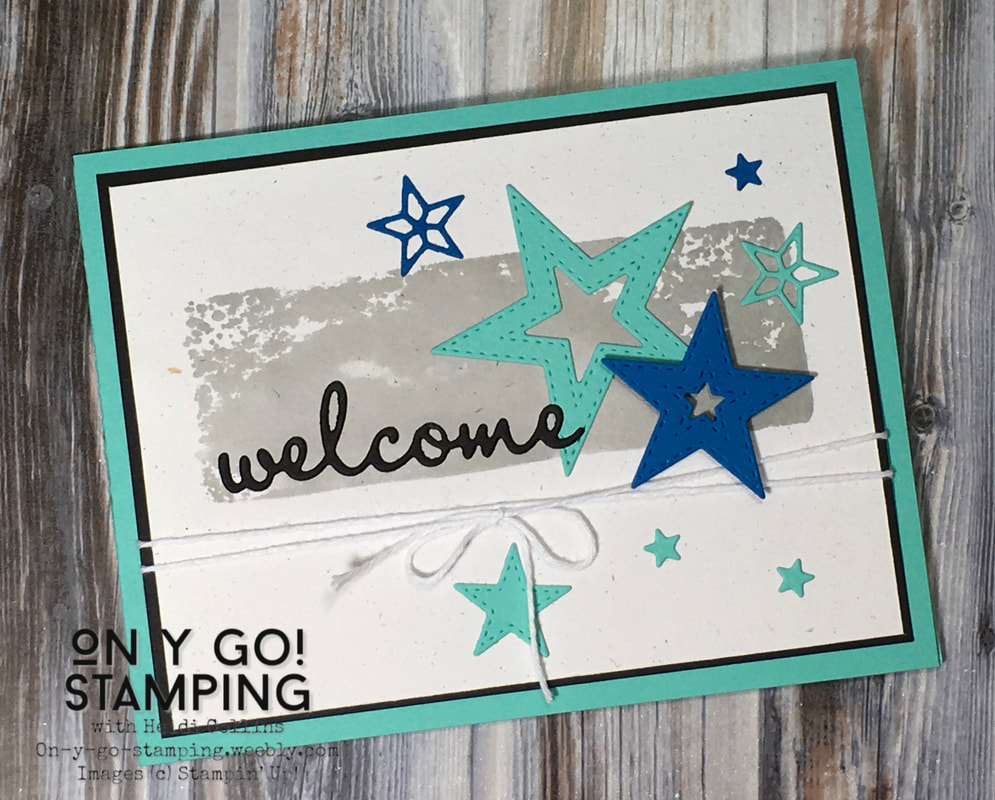
I used the Well Written dies from the Annual Catalog to cut the "welcome" greeting from Basic Black cardstock. I lined this up with the bottom left edge of the gray bar to balance the stars that are grouped on the right side of the card. Finally, I tied a simple bow using White Baker's Twine and mounted my image on Basic Black cardstock and then on a Coastal Cabana card base.

When I finished, I realized I hadn't used a single rubber stamp! Dies are wonderful for creating dramatic cards quickly and easily. I think I'll make another rubber stamp-free card for Wednesday - maybe I can keep the trend up all week!

I'd love to see cards you made without using rubber stamps or cards inspired by this color challenge. Leave your comments below. 
0 Comments

A Cup of Holiday Thyme

9/27/2019

0 Comments

 
Picture
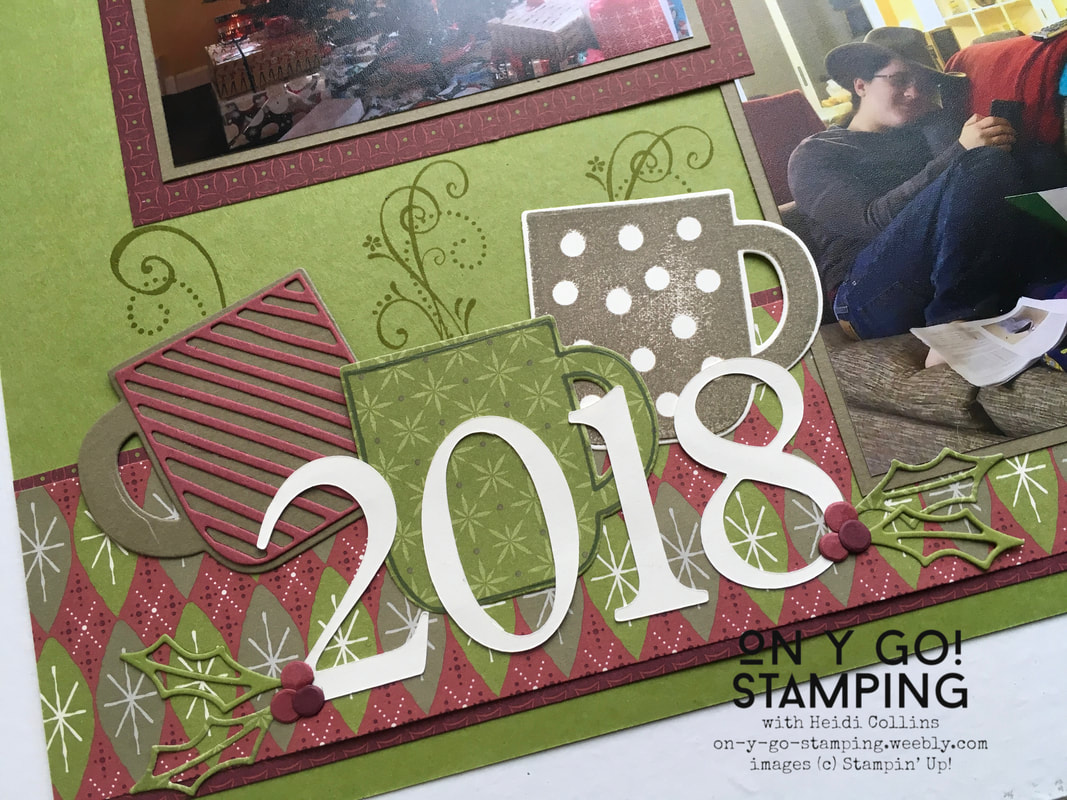
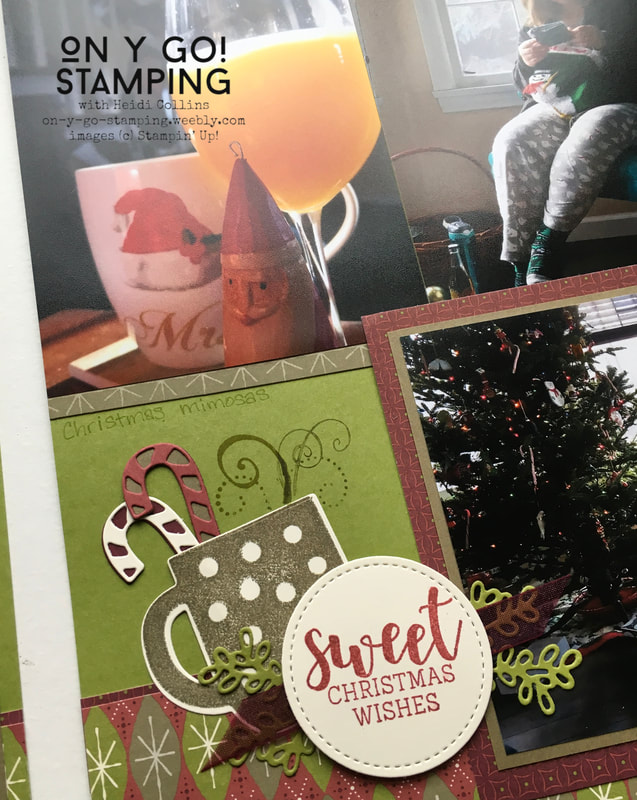
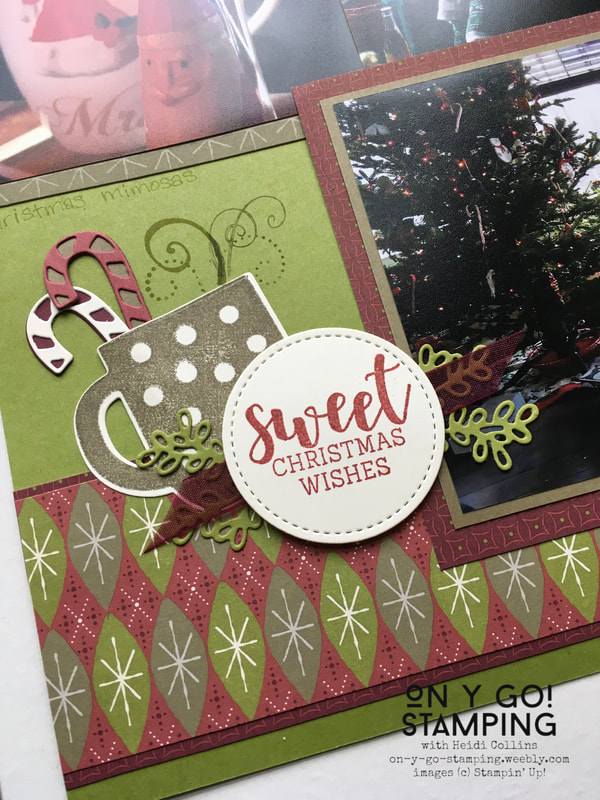
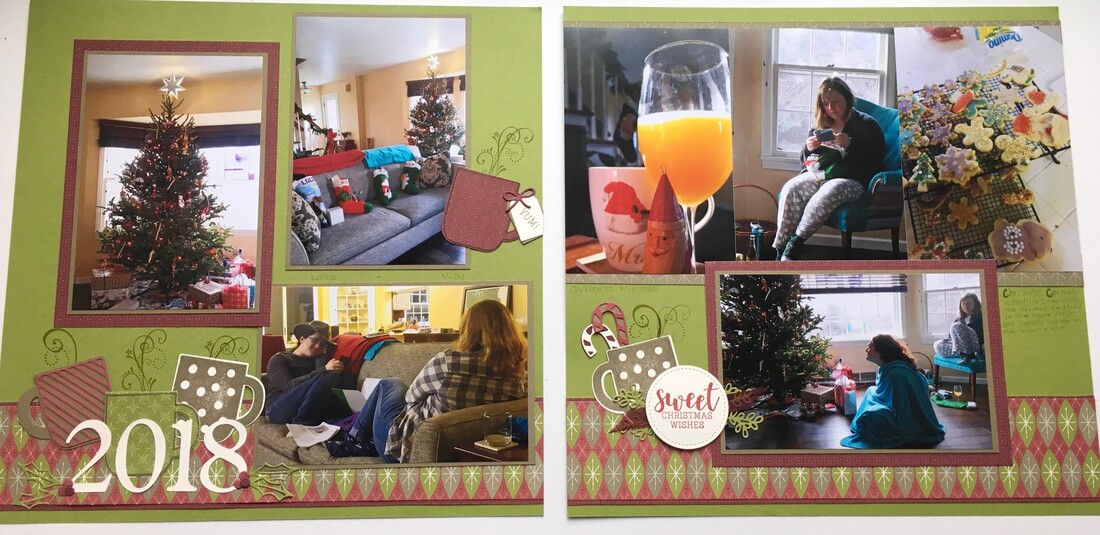
The weather is chilly and perfect for remembering last Christmas. The Cup of Christmas stamp set (2019 Holiday Catalog) was perfect to highlight these pictures and I'm back to trying to use up my stash with the Holiday Thyme Designer Series Paper. I used the retired In-Colors Cranberry Crisp and True Thyme as well as the current Old Olive for this page. Additionally, I used my Cricut to cut the numbers and the retired Priceless stamp set for the steam flourishes coming out of the cups. Quick and easy page of Christmas memories!
Picture
Picture
Picture
Picture
0 Comments

Simple Stamping for Christmas

9/25/2019

0 Comments

 
Picture
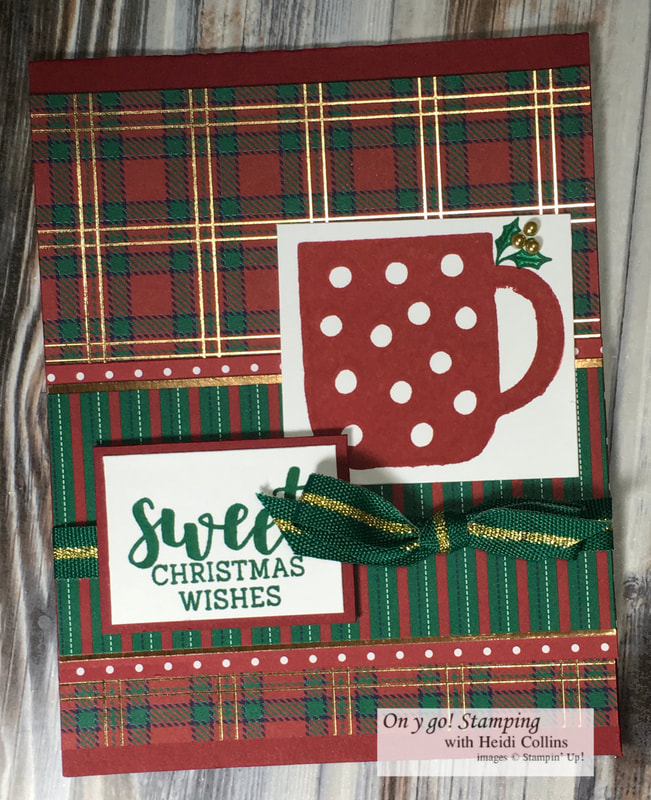
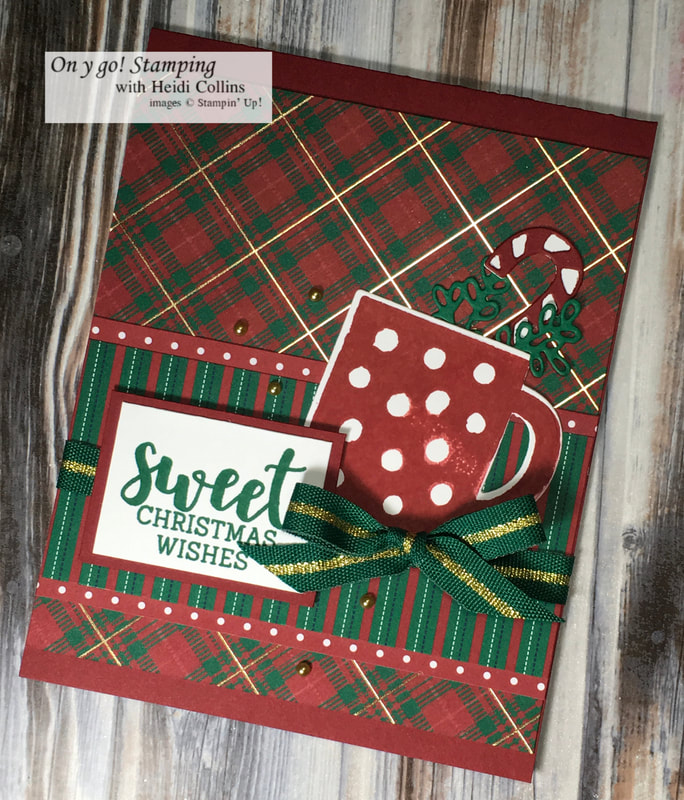
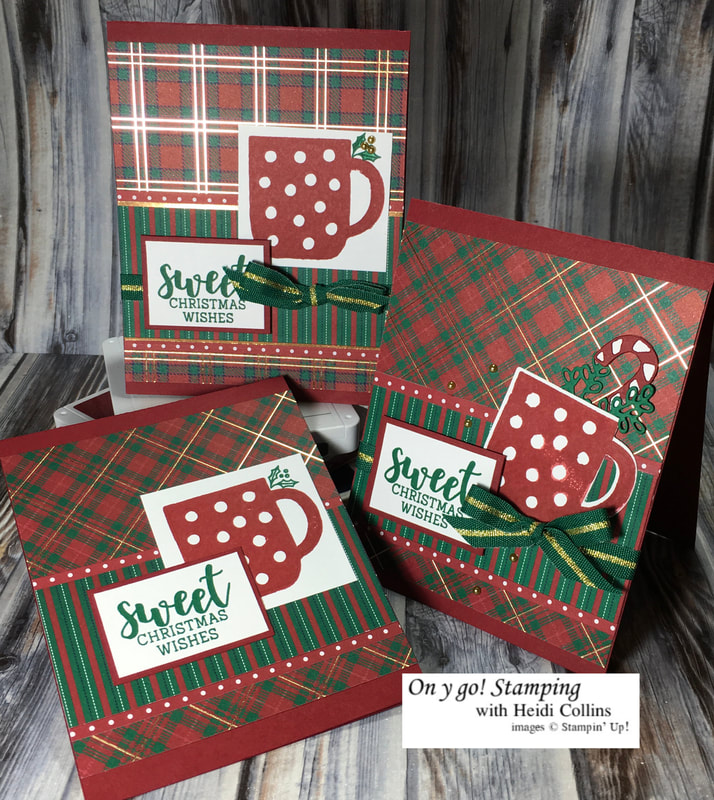
Today, I have three card ideas to share with you. A very easy, Simple Stamping card using only stamps, ink, and paper; a card with a little bling added on; and a third card for those of you who like die cutting. All three cards use the Cup of Christmas stamp set and the Wrapped in Plaid 6"x6" Designer Series Paper. 
​

Card #1: Simple

This card uses only stamps, ink, and paper. I stamped the mug in Cherry Cobbler and the sprig of holly and the greeting in Shaded Spruced on Whisper White cardstock. I trimmed them both and layered the greeting with Cherry Cobbler. I layered papers from the Wrapped in Plaid 6"x6" Designer Series Paper stacks on the card base and then added my stamped images on top. 
Complete Supply List
Picture
Picture

Card #2: A Little More

For the second card, I kept the same basic card design but added some extras. I layered in some gold foil cardstock between the layers of patterned paper, added some metallic pearls to the holly sprig, and tied on a piece of Shaded Spruce/Gold 3/8" striped ribbon. With just a few simple steps, I gave the card a little more texture and interest.
​
Complete Supply List

Card #3: all the Way

My final card has a little of everything! One of the great things about the Cup of Christmas stamp set is that it has matching dies. Two of the dies combine to create a striped candy cane. I made one with Whisper White and Cherry Cobbler cardstock. I also cut a sprig of leaves from Shaded Spruce cardstock. Instead of cutting my mug in a square, I used the dies to cut it out. 

The rest is the same from the previous cards. Since I no longer had the stamped sprig of holly, I added the metallic brads as simply an accent on the front of the card. 
Complete Supply List
Picture
All three cards were easy and fun to make! Whether you have limited supplies or a full craft room, beautiful holiday cards can be simple to make. 
0 Comments

Color Challenge Christmas

9/23/2019

2 Comments

 
Picture
 The last couple of weeks, I have participated in the TGIF Challenges, but this week, I decided to mix it up a little and do the Color Throwdown Challenge #561. They challenged followers to use the colors purple, light green, teal, and ivory. So I stepped up to the plate and threw down Soft Sea Foam, Coastal Cabana, Rich Razzleberry, and Very Vanilla by Stampin' Up!

Complete supply list
Picture
Picture
For this card, I used the stamp set Country Home. This set is generally geared towards Thanksgiving, but I thought that if I colored the floral spray in the given colors it would have a Christmas feel. 

I stamped the sprays on Very Vanilla cardstock in Tuxedo Black Memento ink. I then colored them in using aquapainters and my ink pads. The aquapainters make watercoloring so easy! I added Soft Suede to the colors given for the challenge in order to color the cattails. I tapped my acrylic blocks on my ink pads to get a little ink on them, then dipped the aquapainters in the ink and colored the leaves, berries, and cattails. 

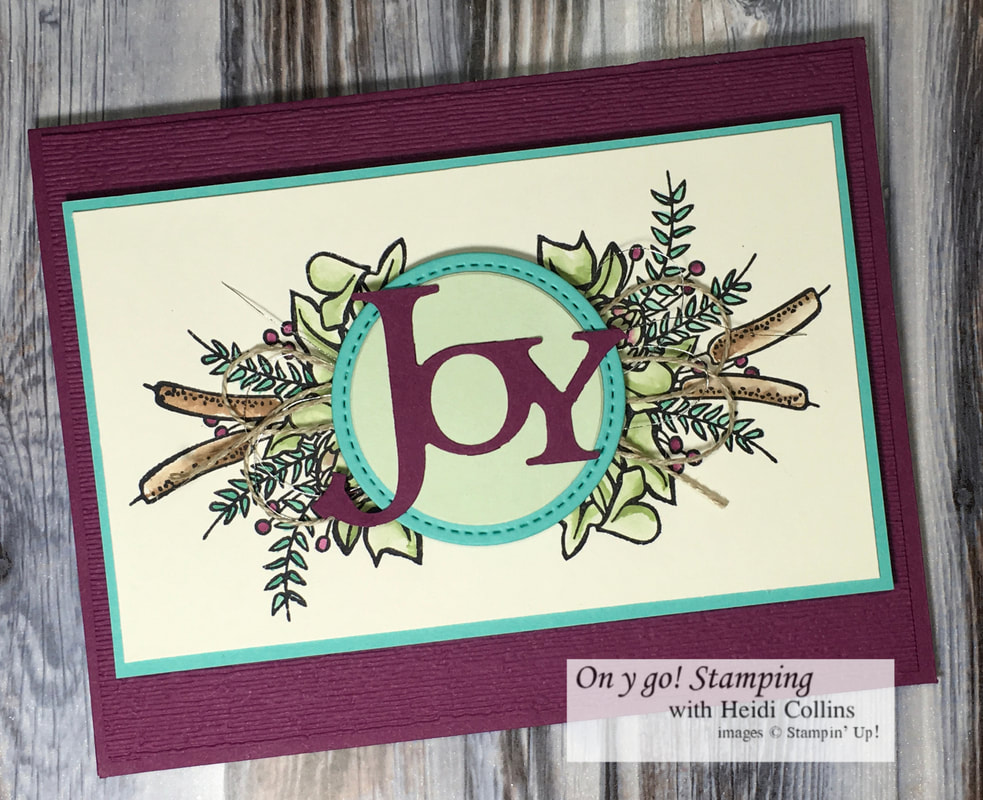
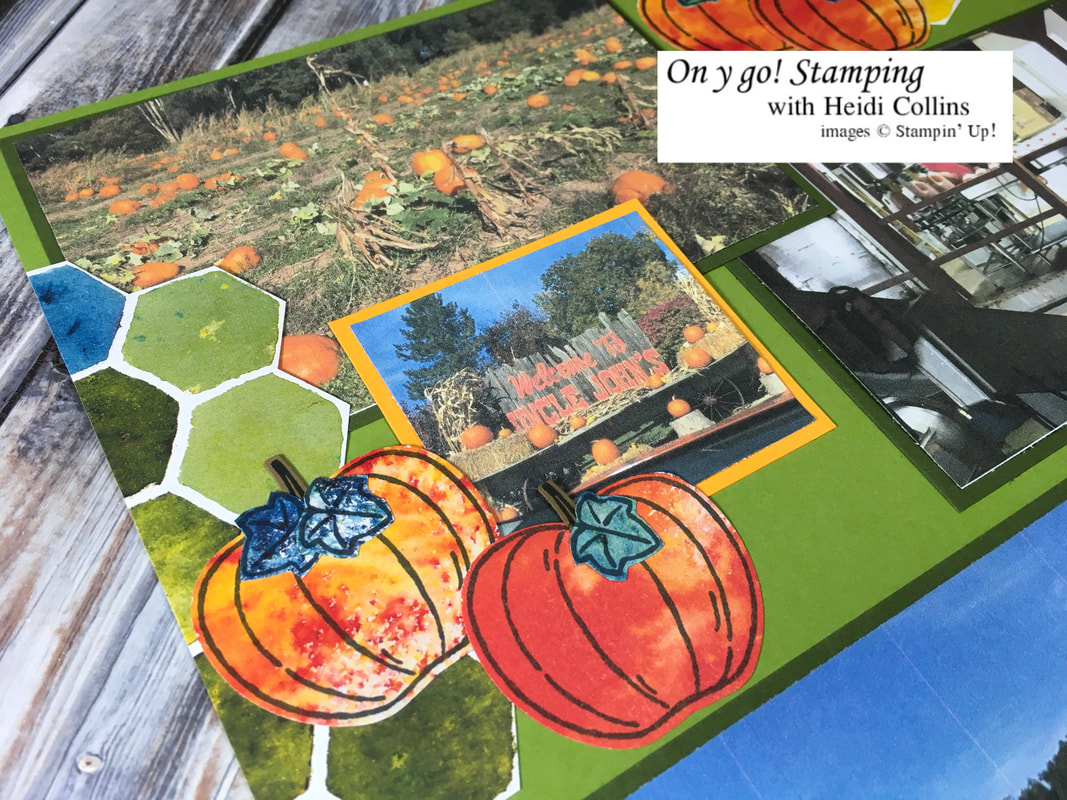
I cut a circle using the Layering Circles dies from Soft Sea Foam cardstock and a slightly larger circle using the Stitched Shaped dies from Coastal Cabana cardstock. I wrapped some Linen Thread and Silver Metallic Thread around my fingers and then twisted it behind the circle. I secured the thread with a glue dot and then put dimensionals on the back of the circles to pop them up. I used an old die from Stampin' Up! to cut the "Joy" from Rich Razzleberry, but you could use the Hand-lettered Prose dies to assemble the word "Joy."

I layered the whole thing on Coastal Cabana cardstock and then Rich Razzleberry cardstock. I embossed the layer of Rich Razzleberry with the Subtle embossing folder before attaching it to a Rich Razzleberry card base. 

This non-traditional color scheme and non-Christmas stamp set combine to form an elegant Christmas card. 
2 Comments

Falling Back in Love with Scrapbooking

9/20/2019

0 Comments

 
Picture
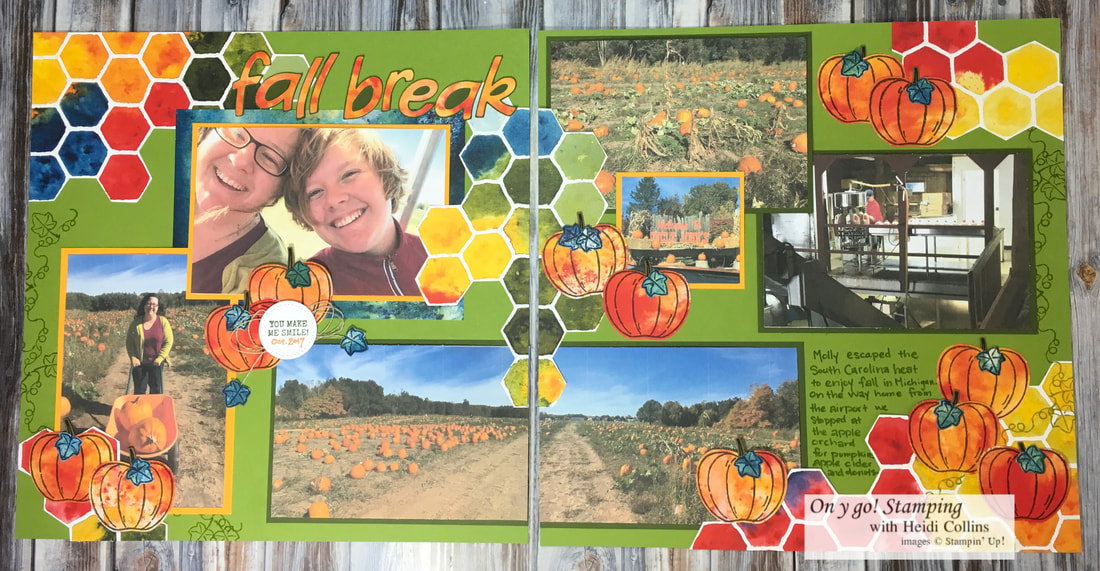
When I first started the On Y Go! Stampng blog back in June, my sister asked me if I would share scrapbook ideas. Of course I said "Yes!" And yet, three months later, today is my first scrapbook-centered post. 

Scrapbooking was my first papercrafting adventure. I love to create beautiful things, and scrapbooking gave me a reason to create and keep what I'd made. Scrapbooking serves a long-term purpose of allowing me to preserve my memories and have an inviting way to share them with my kids, relatives, and friends. When I started stamping, I eventually moved more heavily into cards, but scrapbooking still holds a special place in my heart.

However, except for the school albums I finished for each of my kids when they graduated high school, I haven't done much scrapbooking in recent years. I've been overwhelmed by the idea of organizing all my old boxes of photos and figuring out where I left off. And, since getting a smartphone with a decent camera, I haven't been doing a very good job of saving and organizing my digital photos either. It's a little overwhelming!

So, I decided I just needed to jump into chronicling some recent events. I pulled my vacation photos from this summer and my photos from last Christmas, and I ordered prints from Shutterfly. Then I realized, it's fall and I really wanted to do a fall page. Not wanting to place another Shutterfly order for a handful of prints, I printed these myself on copy paper and will replace them after I make my next print order. 
​
Picture
These images from a trip to the Apple Orchard with my daughter in 2017 were perfect for a fall spread. And all photo credit goes to her as she snapped all of these images. I chose to use the Harvest Hellos stamp set from the 2019 Holiday Catalog by Stampin' Up! and the See a Silhouette Designer Series Paper for my two-page spread. I thought the watercolor look of the paper in reds, yellows, and oranges created the perfect ambiance of fall leaves, even if there weren't any fall leaves on the page.
​ 
Complete Supply List
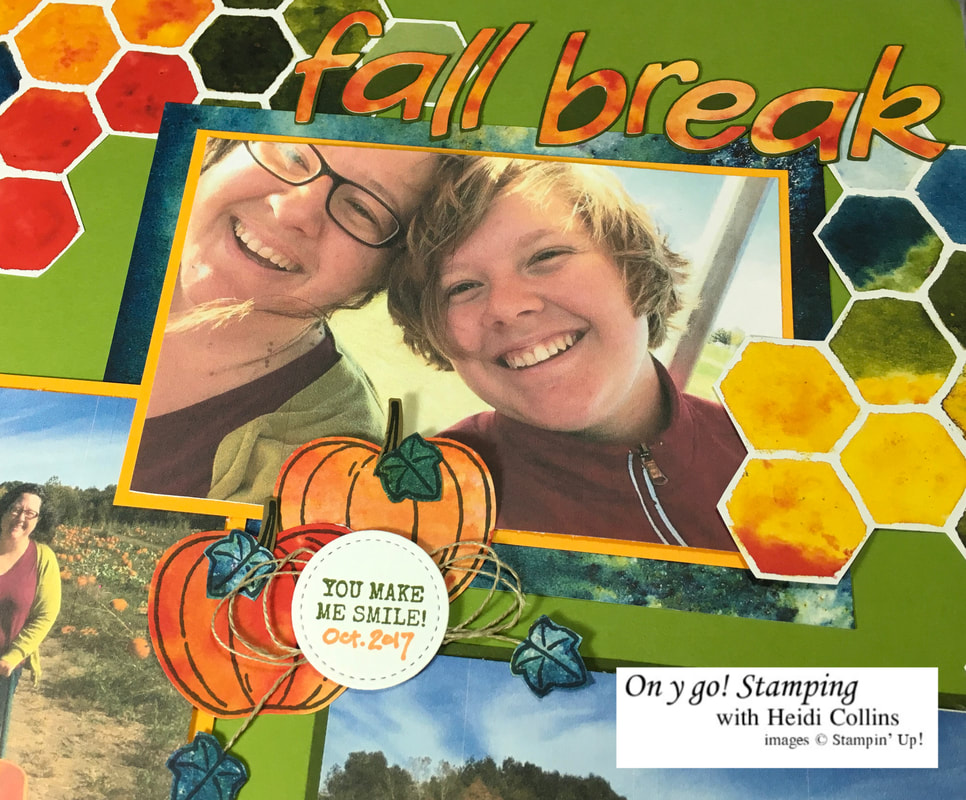
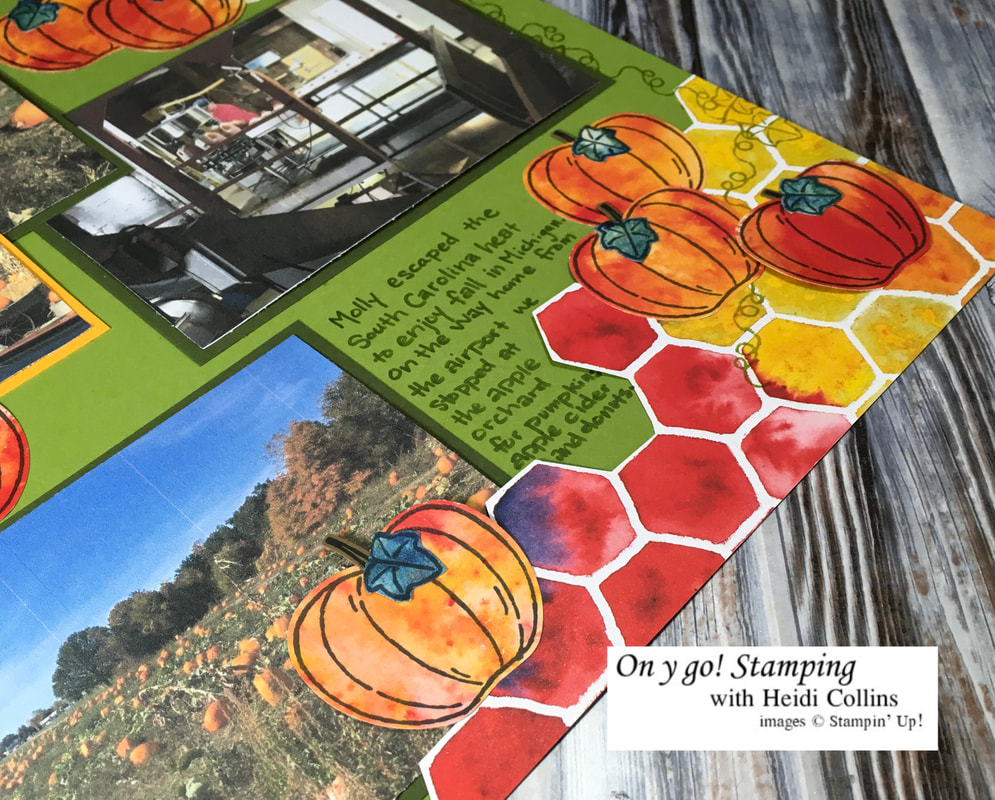
This summer, my sister passed down her Cricut which she had gotten as a handy-me-down from my Mom. I finally pulled it out and used it for the first time to create the title with the Printing 101 cartridge. I cut the letters from the See a Silhouette background paper and I cut the shadow from Mossy Meadow cardstock. I trimmed pieces of the honeycomb background paper in the See a Silhouette Designer Series Paper pack and added it as texture on the corners and center of the pages. 

I stamped the pumpkins using Memento ink on the same paper that I used for the title. I love the orange watercolor look for these pumpkins. The leaves were cut from a similar blue and green sheet of paper from the same Designer Series Paper pack. It seems a little odd to have so much blue in the leaves, but this paper worked really well as a frame for the focal image of my daughter and I, and I really wanted to carry this color throughout the rest of the page. While it seems  a little odd when you think about it, I think it works visually on the page and you don't really notice that the pumpkin leaves are blue instead of green. While I had to cut the pumpkin leaves by hand, I punched the pumpkins using the Build an Apple punch that matches the Harvest Hellos stamp set.

For the subtitle, I grouped two pumpkins and a circle with the "You Make Me Smile!" sentiment from the Harvest Hellos stamp set. I added the date under the saying with a Pumpkin Pie Blends alcohol marker. I twisted some linen thread under the circle with the saying using dimensionals under the circle so there was room for the thread. I attached a pumpkin leaf to each end of the thread.

Picture
Picture
Picture
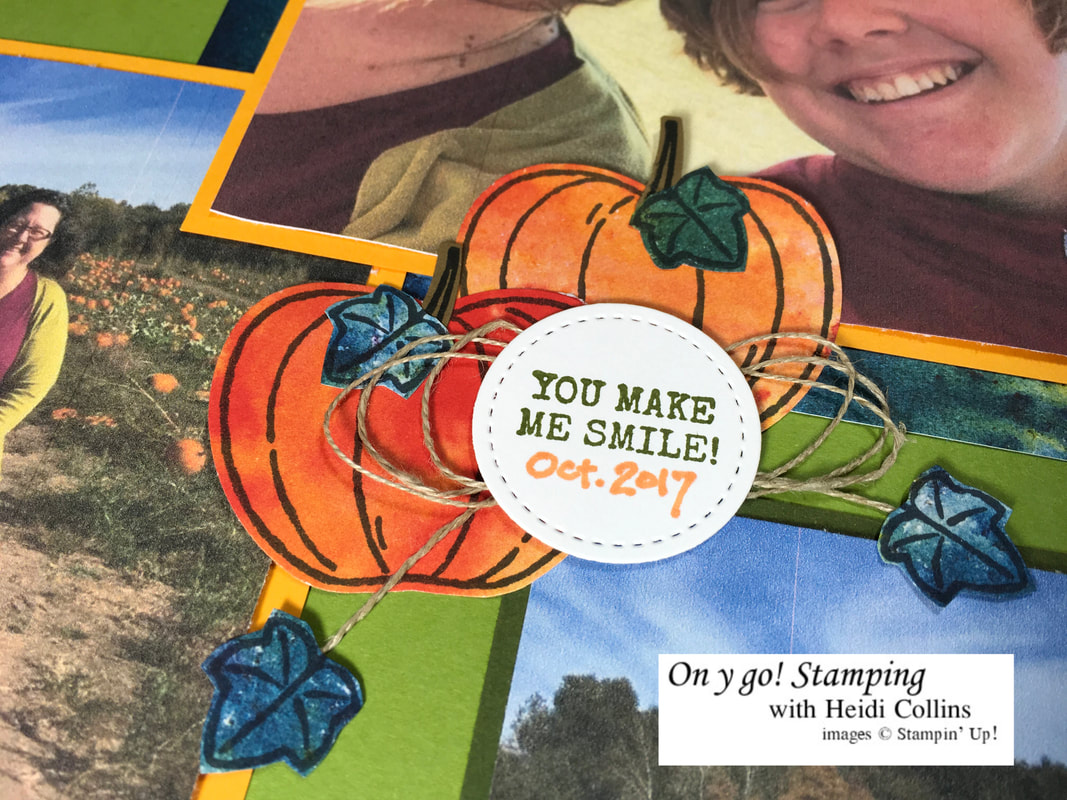
I had a lot of fun making this two page spread and remembering this fun trip to the orchard with my grown-up kiddo. Now on to getting those vacation and Christmas photos onto pages!
0 Comments
<<Previous
    Heidi Collins, Independent Stampin' Up! Demonstrator with On Y Go! Stamping
    Get updates and ideas on my Facebook group
    Heidi Collins, Independent Stampin' Up! Demonstrator and Owner of On Y Go! Stamping
    Shop for Stampin' Up! stamps, inks, paper, tools, and embellishments with Heidi Collins and earn points towards FREE stamps!
    Picture
    Picture
    On Y Go! Stamping YouTube channel with Card Making Videos on how to do rubber stamping, card making, scrapbooking, and paper crafting

    Archives

    January 2023
    December 2022
    November 2022
    October 2022
    September 2022
    August 2022
    July 2022
    June 2022
    May 2022
    April 2022
    March 2022
    February 2022
    January 2022
    December 2021
    November 2021
    October 2021
    September 2021
    August 2021
    July 2021
    June 2021
    May 2021
    April 2021
    March 2021
    February 2021
    January 2021
    December 2020
    November 2020
    October 2020
    September 2020
    August 2020
    July 2020
    June 2020
    May 2020
    April 2020
    March 2020
    February 2020
    January 2020
    December 2019
    November 2019
    October 2019
    September 2019
    August 2019
    July 2019
    June 2019

Powered by Create your own unique website with customizable templates.
  • About
  • Online Card Classes
  • Card Making Ideas
  • Stampin' Up! Catalogs
  • Card Tutorials
  • Contact
  • Shopping Rewards
  • Shop
  • Join Stampin' Up!