• About
  • Online Card Classes
  • Card Making Ideas
  • Stampin' Up! Catalogs
  • Card Tutorials
  • Contact
  • Shopping Rewards
  • Shop
  • Join Stampin' Up!
ON Y GO! STAMPING
  • About
  • Online Card Classes
  • Card Making Ideas
  • Stampin' Up! Catalogs
  • Card Tutorials
  • Contact
  • Shopping Rewards
  • Shop
  • Join Stampin' Up!

Sale-A-Bration 2020 Ends March 31!

3/30/2020

0 Comments

 
Picture
Only 2 more days and Sale-A-Bration will be over for another year. This is honestly the best sale that Stampin' Up! offers all year with free stamps and accessories and extra goodies in the demonstrator starter kit. If one of the Sale-A-Bration items is on your wish list, be sure to order today so that you don't miss out! 

All of the cards I have to share with you today use one (or more!) Sale-A-Bration items.
Order Stamps and Accessories
Well Worn Thanks:
The Well Worn stamp set is FREE with a $50 order and features a hat, shoes, an umbrella, a tie, keys, a pen, and more. Great images for masculine cards! I used it with the "thank you" sentiment from the Check You Out stamp set.
Cardstock:
  • Soft Suede: 8 1/2" x 5 1/2" folded in half
  • Crumb Cake: 5 3/16" x 3 15/16"
  • Whisper White: 5" x 3 3/4"
Picture
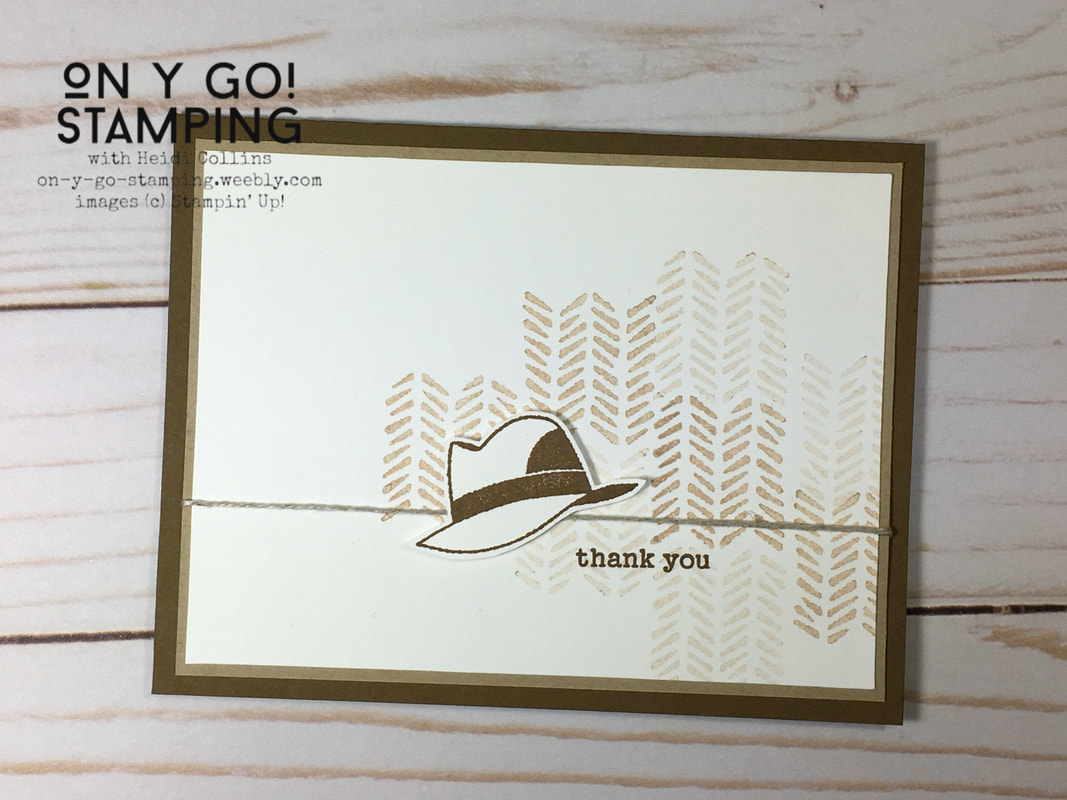
Inks: Crumb Cake, Soft Suede
Accessories: Linen Thread
Picture
Foil Thoughts:
For this card, I used the Flowering Foils Specialty Designer Series Paper which is FREE with a $50 order. This awesome paper is white with designs in copper and silver foil. For this card, I colored it with Stampin' Blends and I combined it with a sentiment from the Rooted in Nature stamp set.
Cardstock:
  • Granny Apple Green: 8 1/2" x 5 1/2" folded in half
  • Daffodil Delight: 5 3/16" x 3 15/16", plus circle cut with Layering Circle dies
  • Flowering Foils DSP: 5" x 3 3/4"
  • Copper Foil cut with Layering Circle dies
  • Whisper White cut with Layering Circle dies
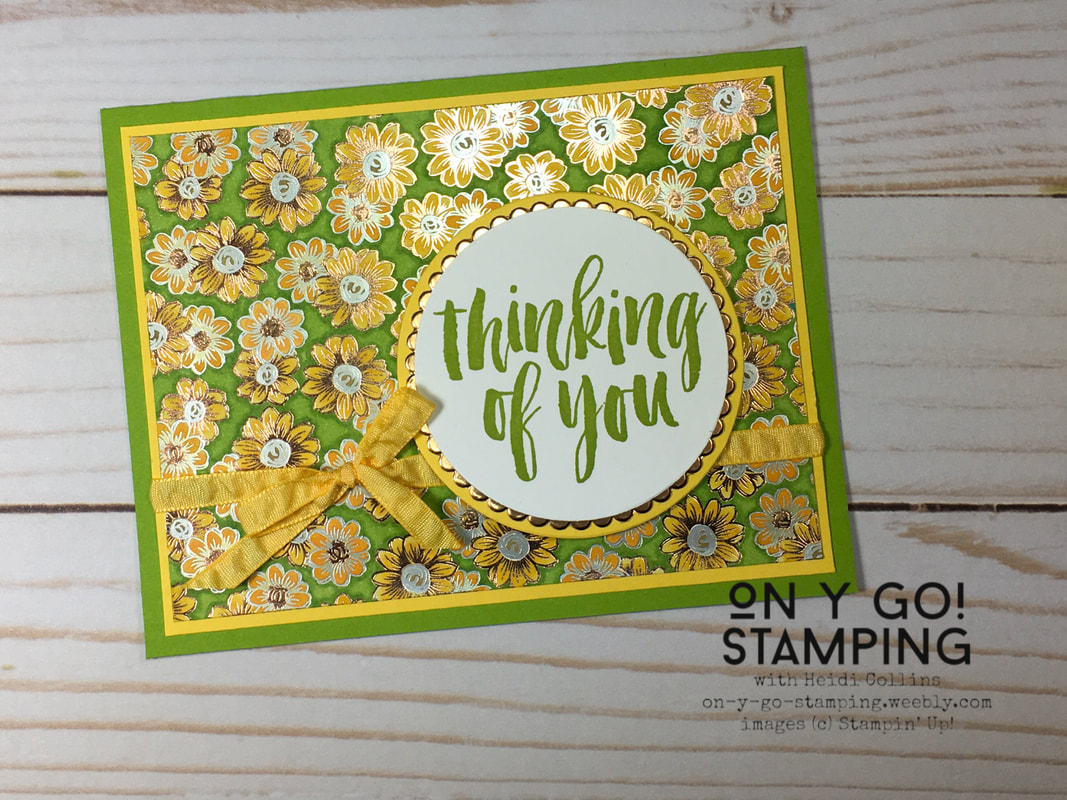
Inks: Granny Apple Green
Accessories:
  • Granny Apple Green Stampin' Blends combo pack
  • Daffodil Delight Stampin' Blends Combo pack
  • Mango Melody Stampin' Blends combo pack
  • Daffodil Delight Rushed Ribbon
  • Layering circle dies
Scrappy Birthday:
I used the scrappy strip technique again for this card using the Woven Threads Designer Series Paper. While the Woven Threads DSP is in the 2019-20 Annual Catalog and will be available until June, it is FREE with a $50 order during Sale-A-Bration. Here, I used it with the Sending You Thoughts stamp set, also FREE with a $50 order. The greeting is mounted on paper cut with the Stitched So Sweetly dies.
Picture
Cardstock:
  • Purple Posy: 8 1/2" x 5 1/2" folded in half, plus a piece cut with the Stitched So Sweetly dies
  • Rococo Rose: 5 3/16" x 3 15/16", 5" x 3 3/4"
  • Whisper White: cut with the Stitched So Sweetly dies
  • Woven Threads DSP: strips cut from different patterns
Inks: Rococo Rose
Accessories: 
  • Stitched So Sweetly dies
  • Whisper White Crinkled Seam Binding
Picture
Birthday Rose:
This card also uses the Woven Threads DSP. This time, I used the To a Wild Rose and Well Said stamp sets with it. The Rose dies that match the To a Wild Rose stamp set are currently FREE with a $100 order. Like the paper, these dies will still be available after Sale-A-Bration ends, but they will no longer be available for free.
Cardstock:
  • Sahara Sand: 8 1/2" x 5 1/2" folded in half, plus a piece cut with the Wild Rose dies
  • Rococo Rose: 5 3/16" x 3 15/16"
  • Woven Threads DSP: 5" x 3 3/4"
  • Whisper White: pieces cut with the Wild Rose dies
  • Soft Suede: cut with the Wild Rose dies and the Well Written dies
  • Pear Pizzazz: cut with the Wild Rose dies
Inks:
  • Rococo Rose
  • Terracotta Tile
  • Pear Pizzazz
  • Soft Suede
Accessories:
  • Wild Rose dies
  • Well Written Dies
  • Linen Thread
  • Retired Pearls
0 Comments

Scrappy Strips

3/28/2020

0 Comments

 
Picture
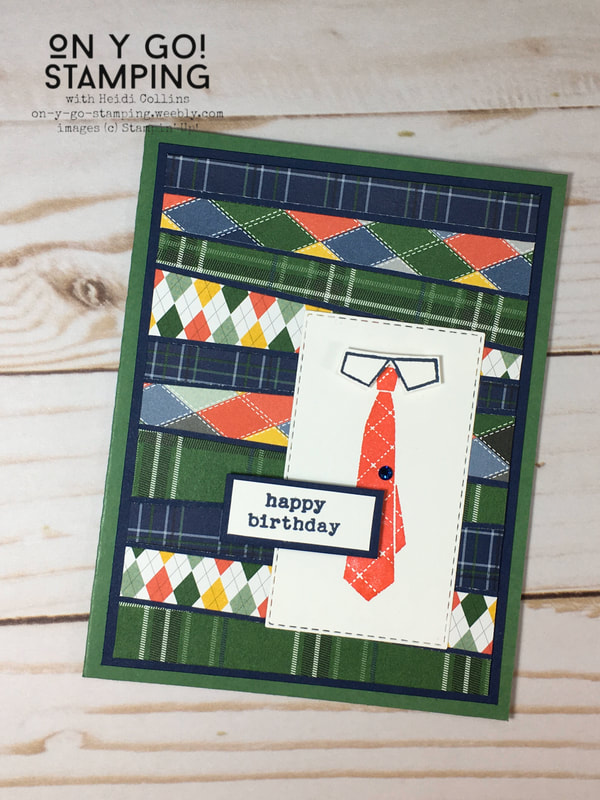
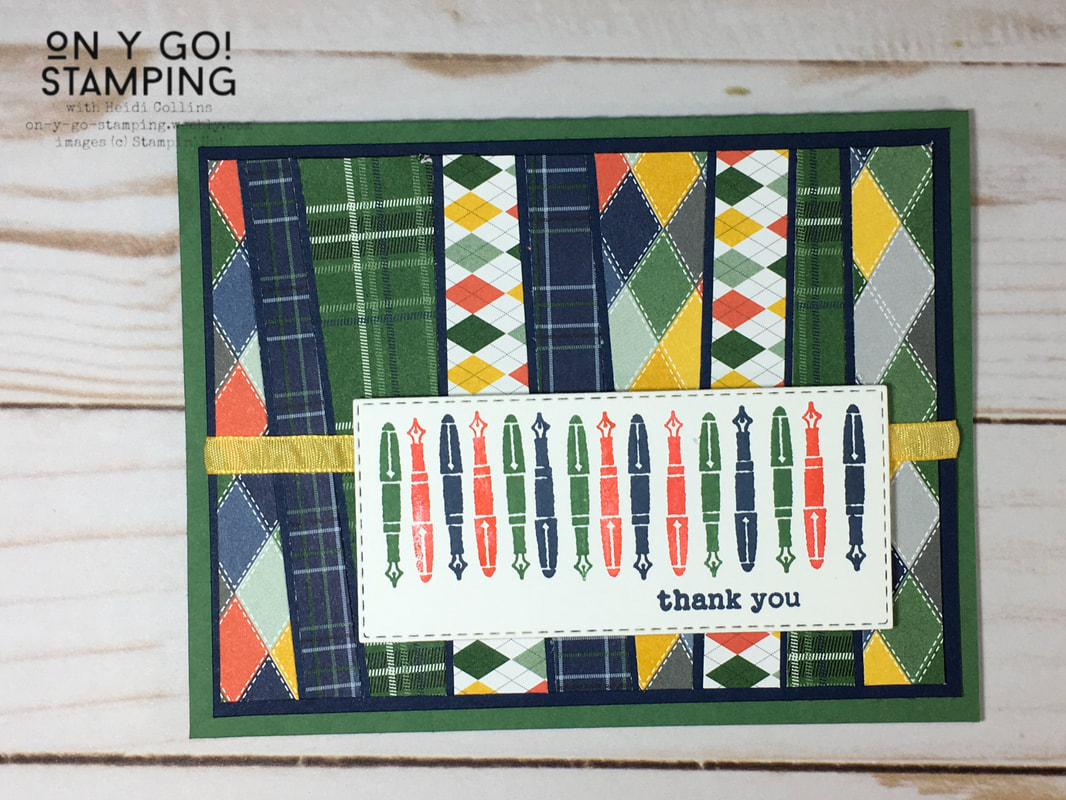
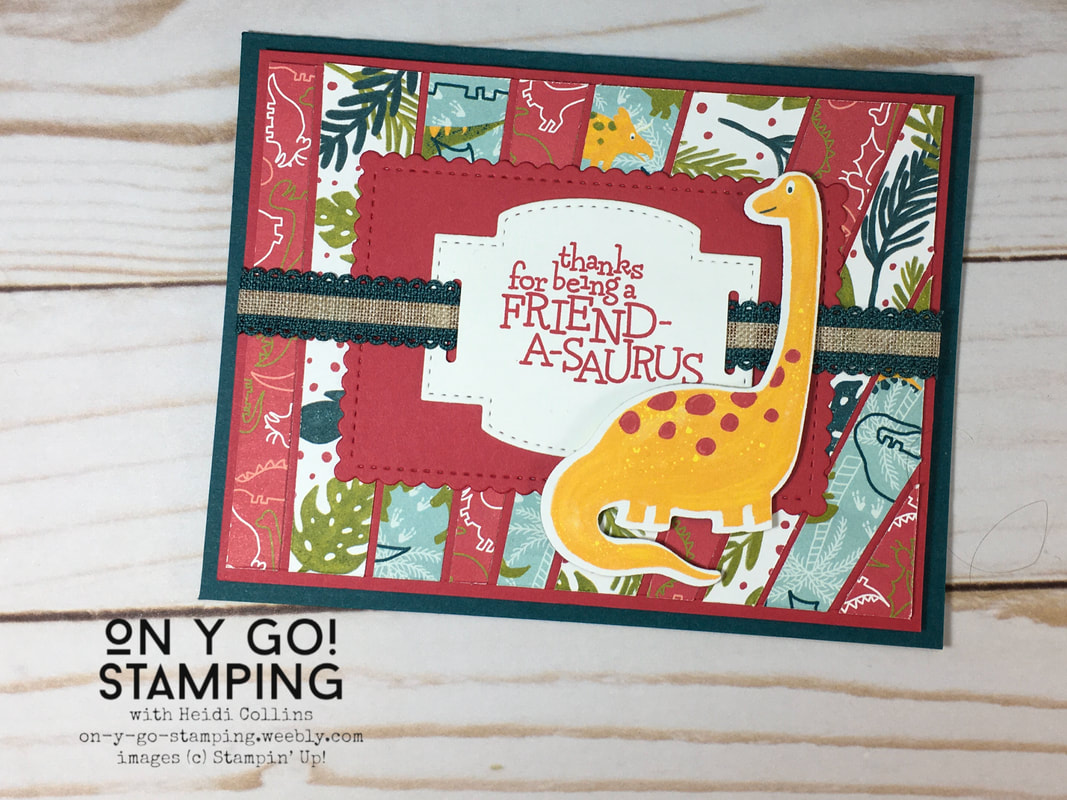
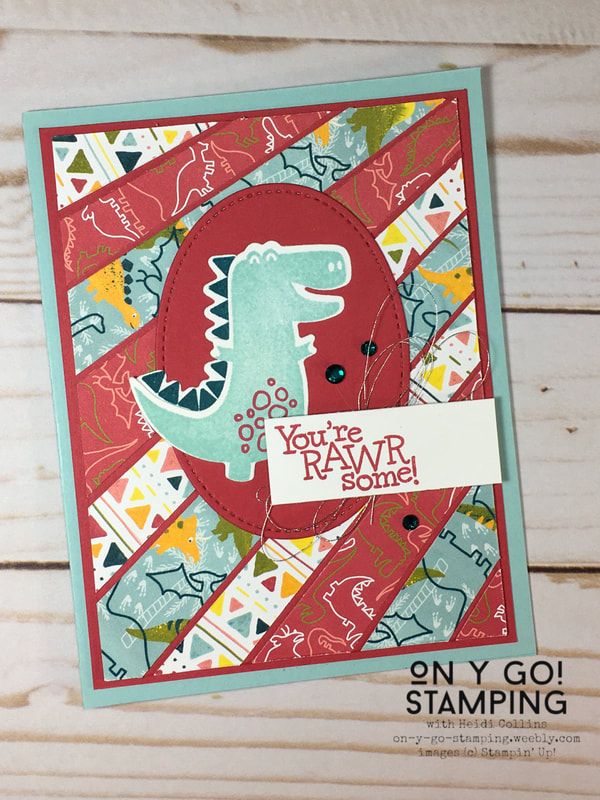
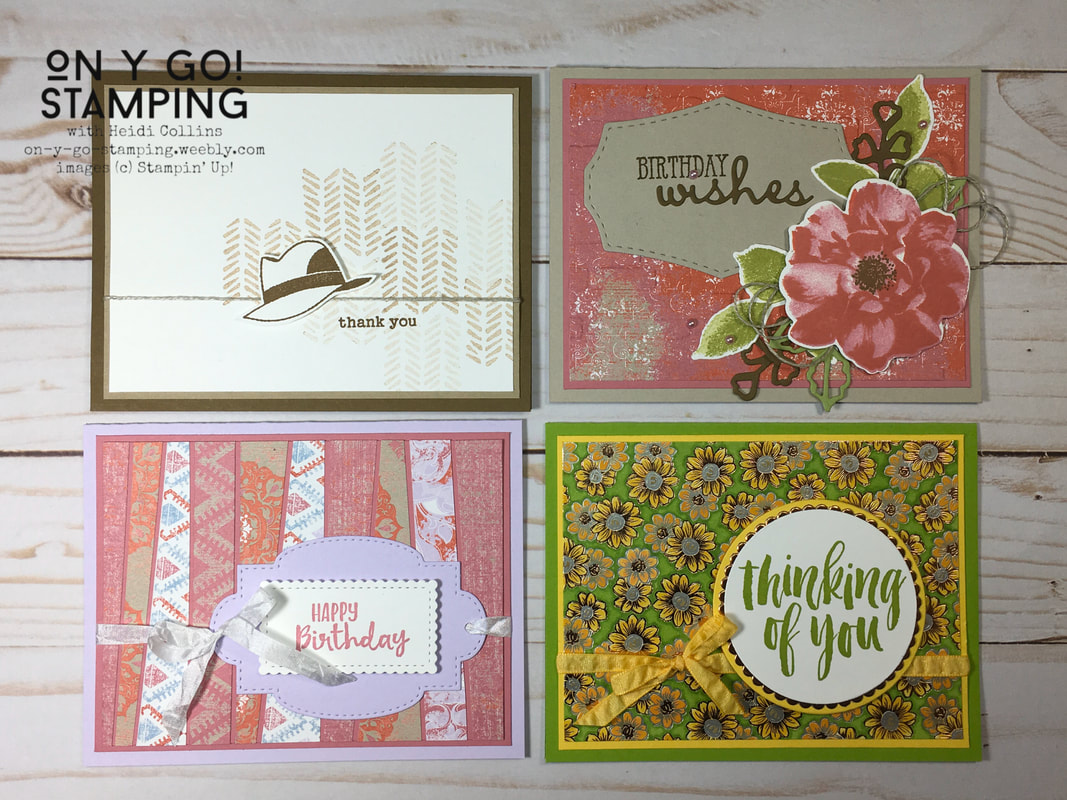
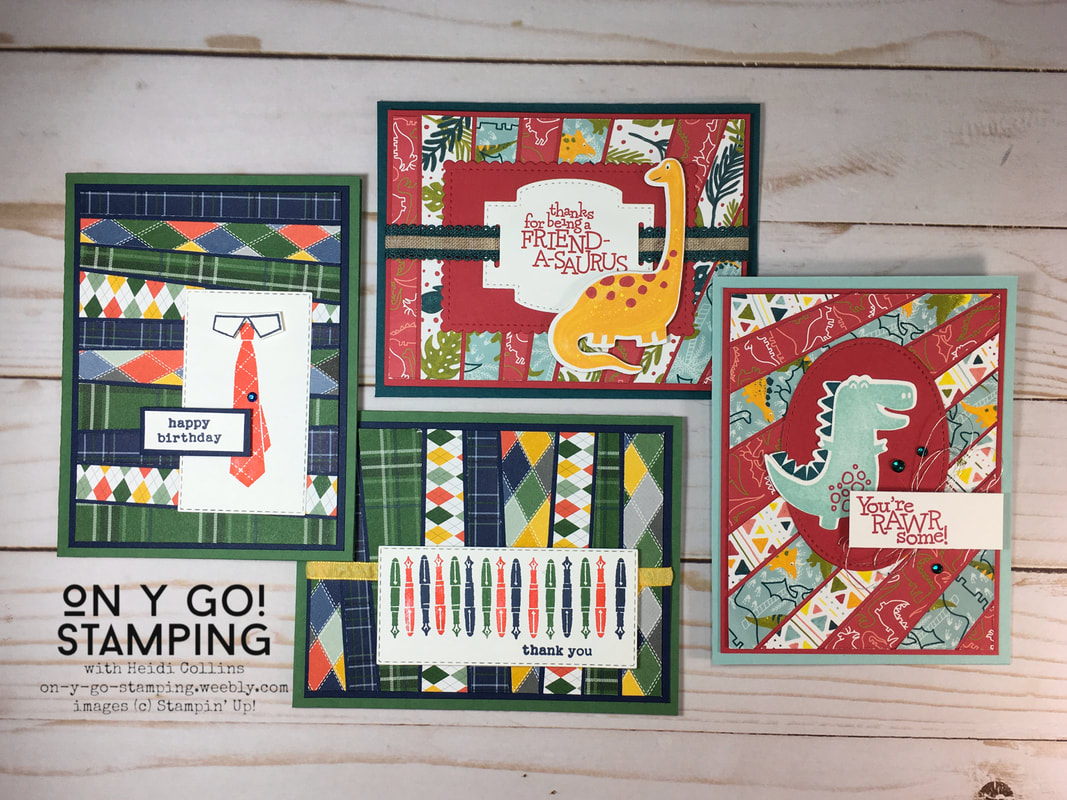
Since Bruno Bertucci introduced his scrappy strip technique a couple of weeks ago, the Stampin' Up! world has been crazy about scrappy strips, even Sara's (Stampin' Up!'s CEO) husband got in on the trend last week. So, I decided I'd better try it too. I combined the Country Club DSP with the Well Dressed stamp set (Sale-A-Bration Freebie!) and the Dinoroar DSP (currently FREE with a $50 order!) with the Dino Days stamp set. 

This technique is quick and easy! Start by cutting strips of DSP that are at least 4 1/2" long. You could cut them straight, but it's fun to cut the strips at an angle. Then, cut a piece of coordinating cardstock to be 3 3/4" x 5". Glue the strips to the cardstock leaving a thin gap between each strip. Go ahead and let the ends hang off your cardstock. After all of the strips have been attached and your glue has dried if you're using liquid adhesive, turn the cardstock over and trim the edges of the DSP strips to match the edges of the cardstock. Finally, adhered DSP covered cardstock to a 3 15/16" x 5 3/16" piece of cardstock in the same color and adhere it to your card front.

Once your background is finished, you can finish the card however you want. It can be as simple as adding a sentiment or you can add an image. I didn't have any large sentiments, so I chose to use an image as well. It's a quick and easy way to make multiple cards!
Order Stampin' Up! Stamps, Paper, and Accessories
A Scrappy Tie:
Cardstock:
  • Garden Green: 8 1/2" x 5 1/2" folded
  • Night of Navy: 5 3/16" x 3 15/16", 5" x 3 3/4", 1 5/8" x 11/16"'
  • Whisper White: 3 1/4" x 1 7/8" cut with the Stitched Rectangle die, 1 3/8" x 9/16", scrap
Ink: Night of Navy, Poppy Parade
Stamps:
  • Well Dressed (Sale-A-Bration)
  • Check You Out (sentiment)
Accessories:
  • Stitched Rectangle dies
  • Noble Peacock Rhinestones
  • Mini Stampin' Dimensionals
Picture
Tips: I stamped the tie with Poppy Parade ink on the piece of Whisper White cardstock that I had cut with the Stitched Rectangle die. Then, I stamped it again with Night of Navy ink on a scrap of Whisper White. I cut out the shirt color and adhered it over the Poppy Parade tie using mini dimensionals. The sentiment is also attached with Stampin' Dimensionals. Finally, I added a small blue rhinestone to mimic a tie clip. 
Picture
Scrappy Pens:
Cardstock:
  • Garden Green: 8 1/2" x 5 1/2" folded in half
  • Night of Navy: 5 3/16" x 3 15/16", 5" x 3 3/4"
  • Whisper White: 3 3/4" x 1 3/4" cut with a Stitched Rectangle die
Inks: Night of Navy, Garden Green, Poppy Parade
Stamps: Well Worn (Sale-A-Bration), Check You Out (for the sentiment)
Accessories: 
  • Ruched Daffodil Delight ribbon
  • Stitched Rectangle dies
  • Stampin' Dimensionals
Scrappy Friend-A-Saurus:
Cardstock:
  • Pretty Peacock: 8 1/2" x 5 1/2" folded in half
  • Lovely Lipstick: 5 3/16" x 3 15/16", 5" x 3 3/4", 3 3/4" x 2 1/2" cut with a Stitched So Sweetly die
  • Whisper White: 2 1/2" x 2" cut with a Stitched So Sweetly die, 3 1/4" x 2" cut with a Dino die
Picture
Inks: Lovely Lipstick
​Stamps: Dino Days
Accessories: 
  • Pretty Peacock Scalloped Linen Ribbon
  • Stitched so Sweetly dies
  • Dino dies
  • Label Me Fancy punch
Tips: I cut the dinosaur image from one of the pieces of Dinoroar Designer Series Paper using the Dino dies. This paper is awesome because the dies will cut all of the dinosaur images! 
Picture
Rawrsome Scrappiness:
Cardstock:
  • Pool Party: 8 1/2" x 5 1/2" folded in half
  • Lovely Lipstick: 5 3/16" x 3 15/16", 5" x 3 3/4", 3 1/4" x 2 1/2" cut with a Stitched Shape die
  • Whisper White: 2 1/8" x 13/16", 2 1/4" x 2 1/4" plus another scrap cut with the Dino dies
Inks: Pool Party, Pretty Peacock, Lovely Lipstick
Stamps: Dino Days
Accessories:
  • Dino dies
  • Stitched Shapes dies
  • Noble Peacock Rhinestones
  • Silver Metallic Thread
  • Stampin' Dimensionals
Tips: To attach the Silver Metallic Thread, I put Stampin' Dimensionals on the back of the sentiment and peal the backs off. Then, I wrap the thread around 3 of my fingers 3 times. I slide it off, twist it and attach the twisted center area to one of the Stampin' Dimensionals. Then I attach the sentiment to the card front.
0 Comments

From Simple to Oh là là! Thoghtful Blooms

3/20/2020

0 Comments

 
Picture
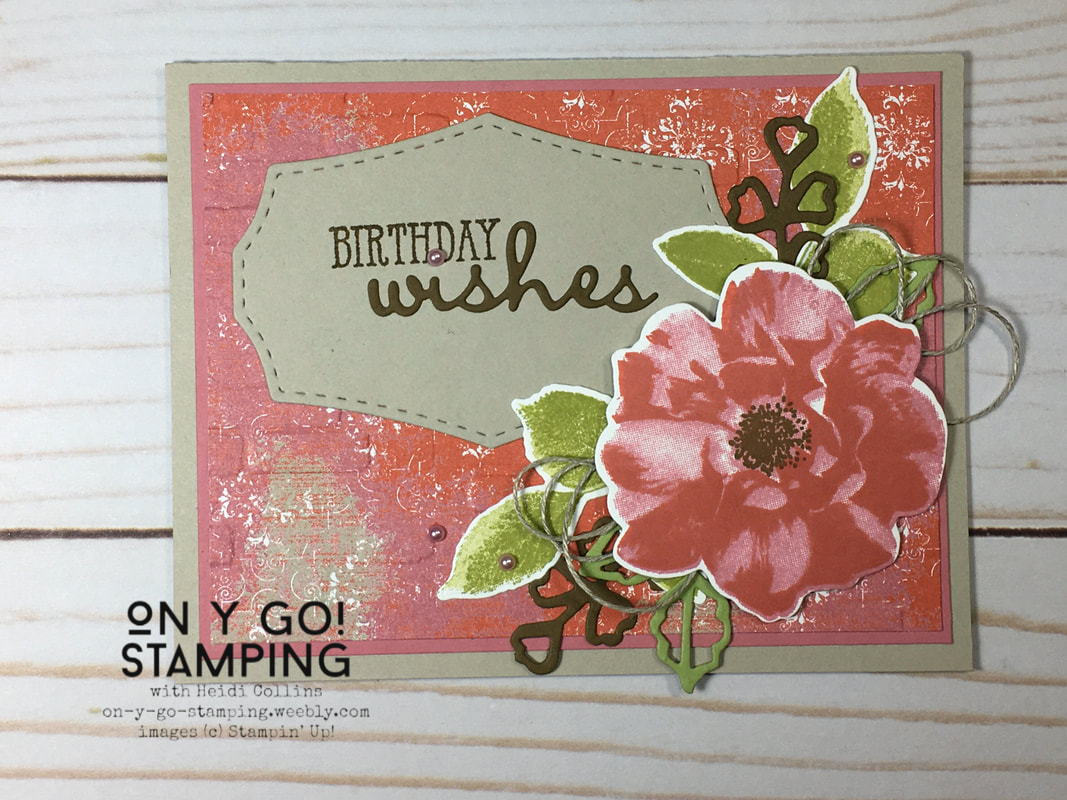
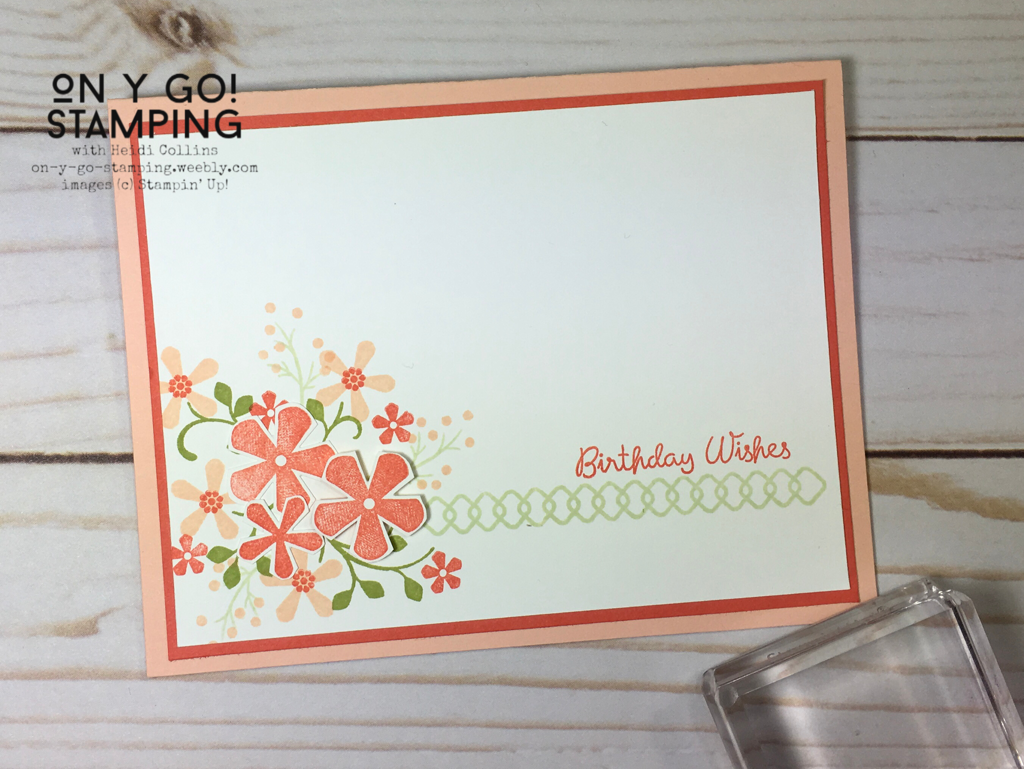
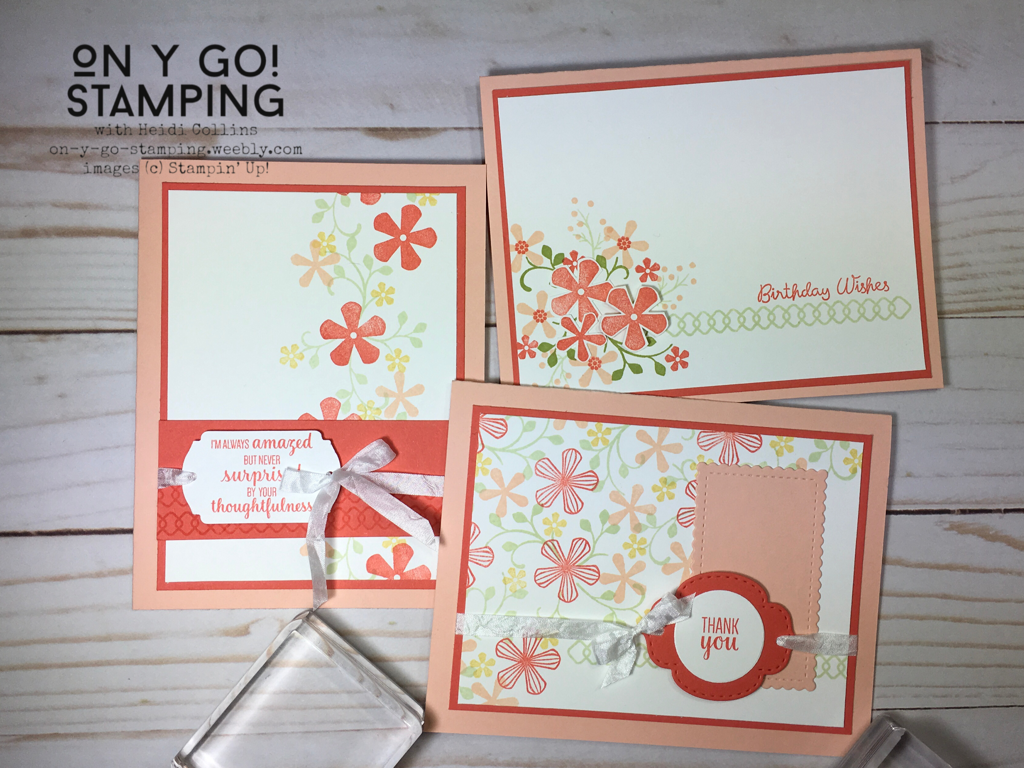
Spring has sprung! Even though it doesn't feel like it yet here in Michigan. To celebrate, I made three cards using the Thoughtful Blooms Sale-A-Bration stamp set. From Simple using only stamps, inks, and paper, to Chic using punches and ribbon, all the way to Oh là là adding the Stitched So Sweetly dies. All of the cards use cardstock in Petal Pink, Calypso Coral, and Whisper White as well as Petal Pink, Calypso Coral, Soft Sea Foam, Pear Pizzazz, and So Saffron ink. 
Picture
Simple
This first card is what is often called Simple Stamping or a SIP card because all you need to complete it are stamps, ink, and paper. In addition to the Thoughtful Blooms stamp set, I used the Varied Vases stamp set for the greeting. I cut out a couple of the flowers and layered them. 
Cardstock:
Whisper White: 3 3/4" x 5"
Calypso Coral: 3 15/16" x 5 3/16"
​Petal Pink: 8 1/2" x 5 1/2" folded in half
Chic
This second card uses a few more products including the Label Me Fancy punch and the Whisper White Crinkled Seam Binding. This punch is great because it includes the label as well as a small hole and a slot punch to make the holes in the label. The seam binding is wonderful to work with and easy to tie.
Cardstock:
Whisper White: 3 1/2" x 4 3/4", plus scraps
Calypso Coral: 3 11/16" x 4 15/16", 1 3/8" x 3 11/16"
Petal Pink: 8 1/2" x 5 1/2" folded in half
Picture
Picture
Oh là là
The last card steps up the design even further and uses the Stitched So Sweetly dies and the Layering Circle dies. I love the Stitched So Sweetly dies because they have fun shapes and a beautiful stitched edging that gives the die cuts a finished appearance.
Cardstock:
Whisper White: 3 1/2" x 4 3/4", plus scraps
Calypso Coral: 3 11/16" x 4 15/16", plus scraps
Petal Pink: 8 1/2" x 5 1/2" folded in half, plus scraps
0 Comments

Hershey Bar Wrapper

3/19/2020

0 Comments

 
Picture
Picture
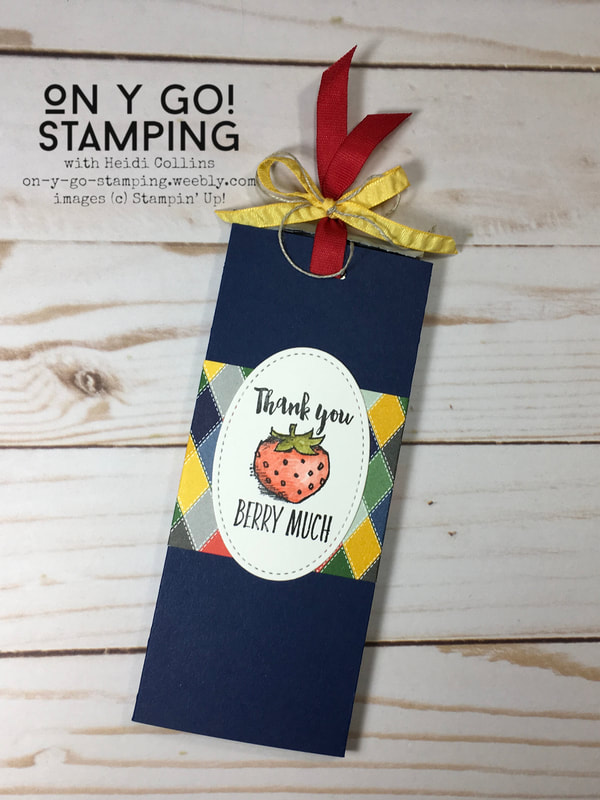
Wow! It's been a crazy time these last few days, hasn't it? I have been pretty quiet on the blog because I have been busy transitioning my college class to online learning. I'm hoping to step-it-up a bit though in the next few days and bring you lots of great ideas for stamping and crafting while we're all hunkered down at home.

Last week (was it only last week!?), during my Facebook Virtual Stamp Class, I shared how to make this cute candy bar wrapper. It'd make a great little gift for someone and is very easy to make. 
Picture
I started with a piece of Night of Navy cardstock that was 6" x 6 1/4". I scored it at 1", 1 1/4", 3 3/4", and 4". Next, I also scored a  2 1/4" x 6 1/4" piece of Country Club DSP at 1", 1 1/4", 3 3/4", and 4".

I cut a piece of Whisper White cardstock using the Stitched Shapes dies. I stamped this piece with an image from the Witty-Cisms stamp set and colored it with watercolor pencils and a blender pen. 


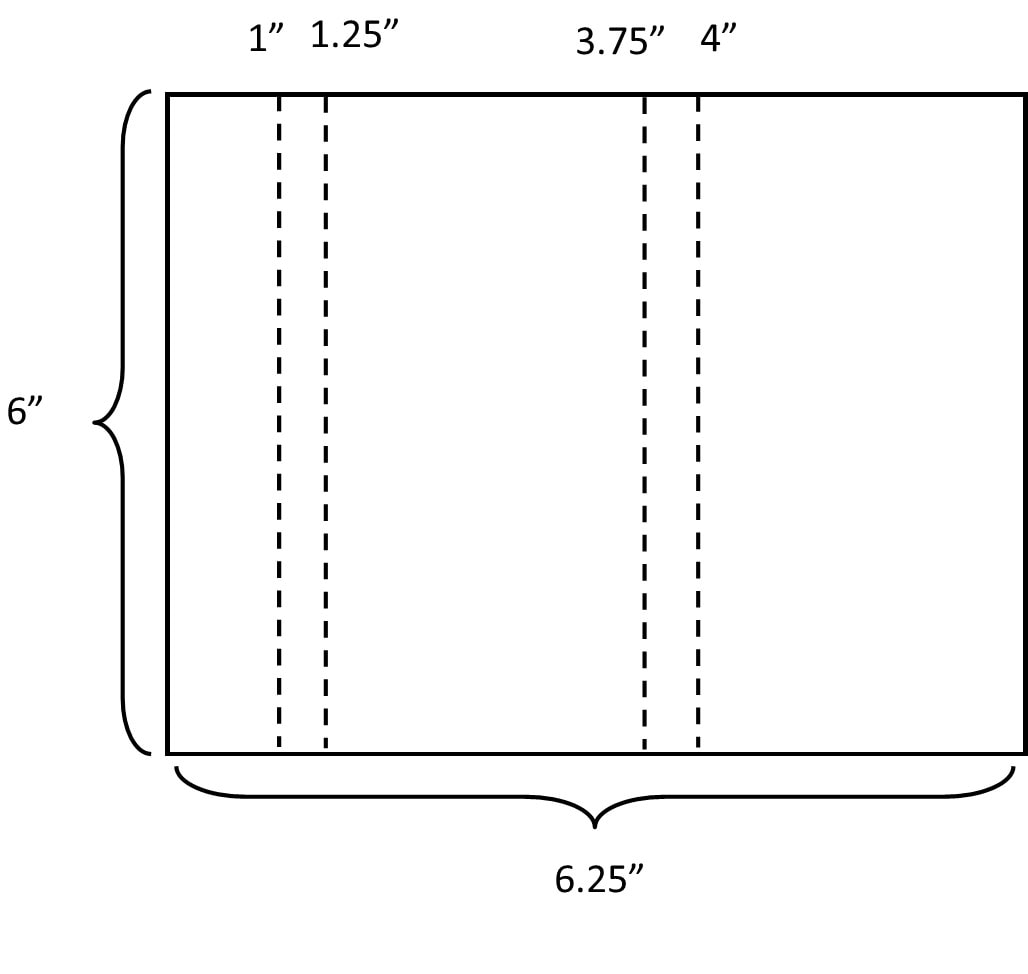
I adhered the Country Club DSP to the piece of Night of Navy and folded and scored both. Then I attached the back flaps to each other using Tear & Stick tape. I adhered the stamped oval to the front. 

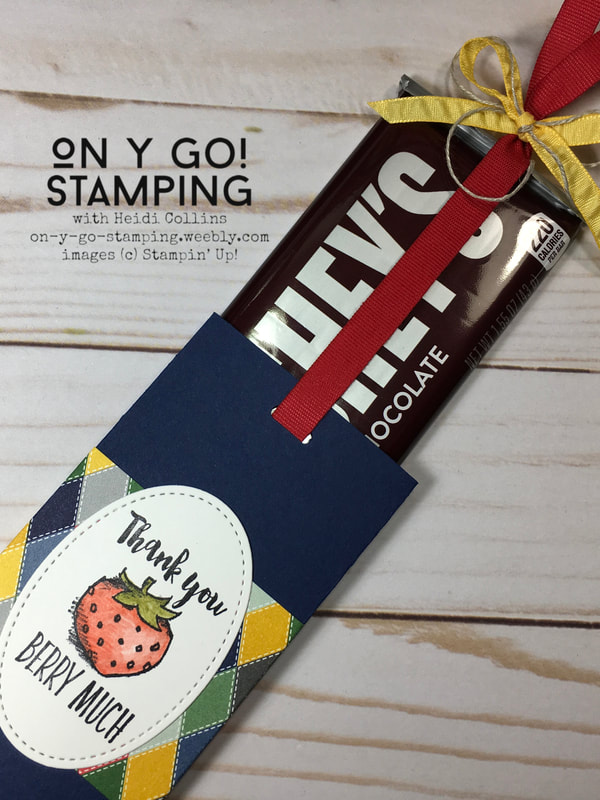
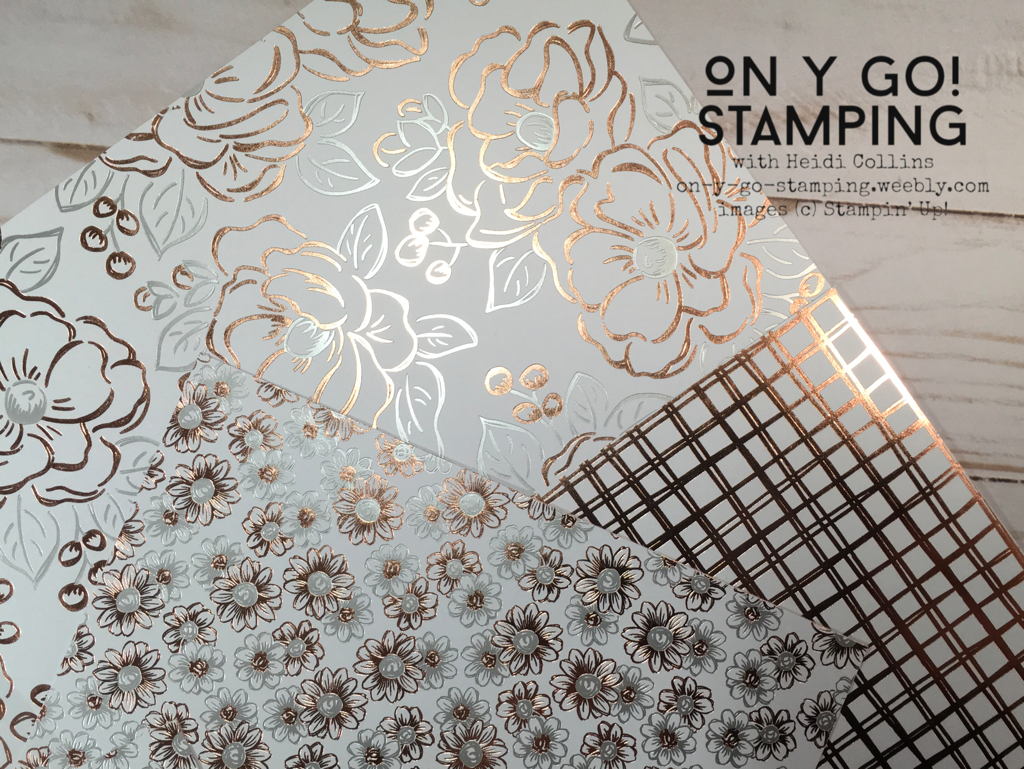
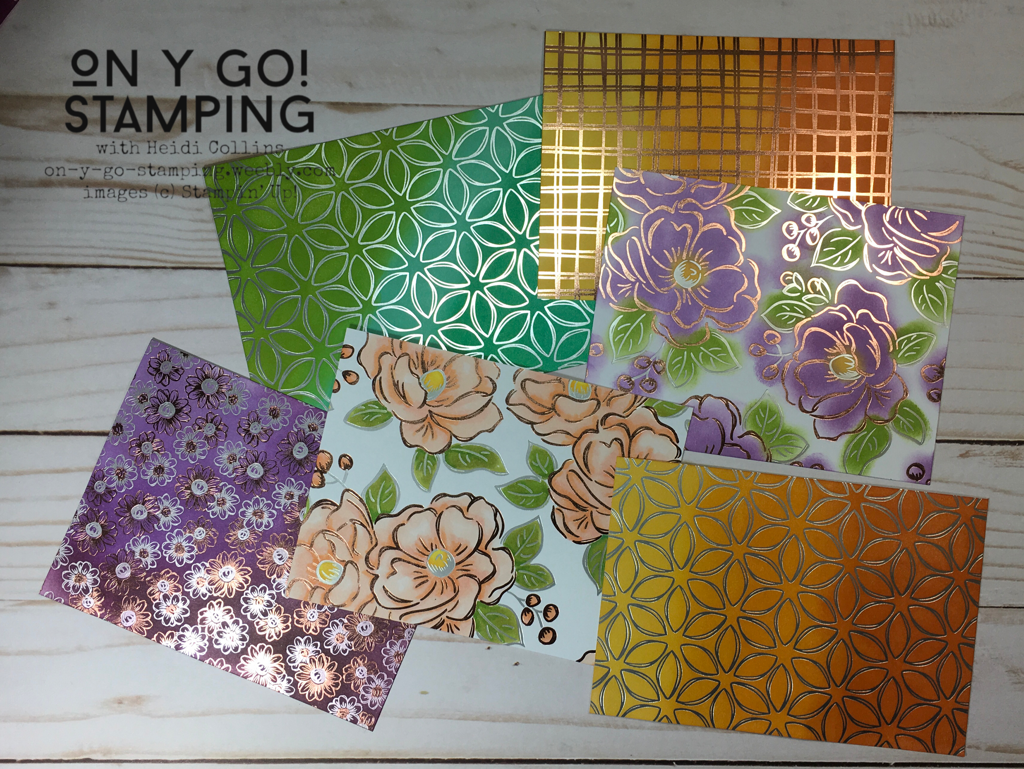
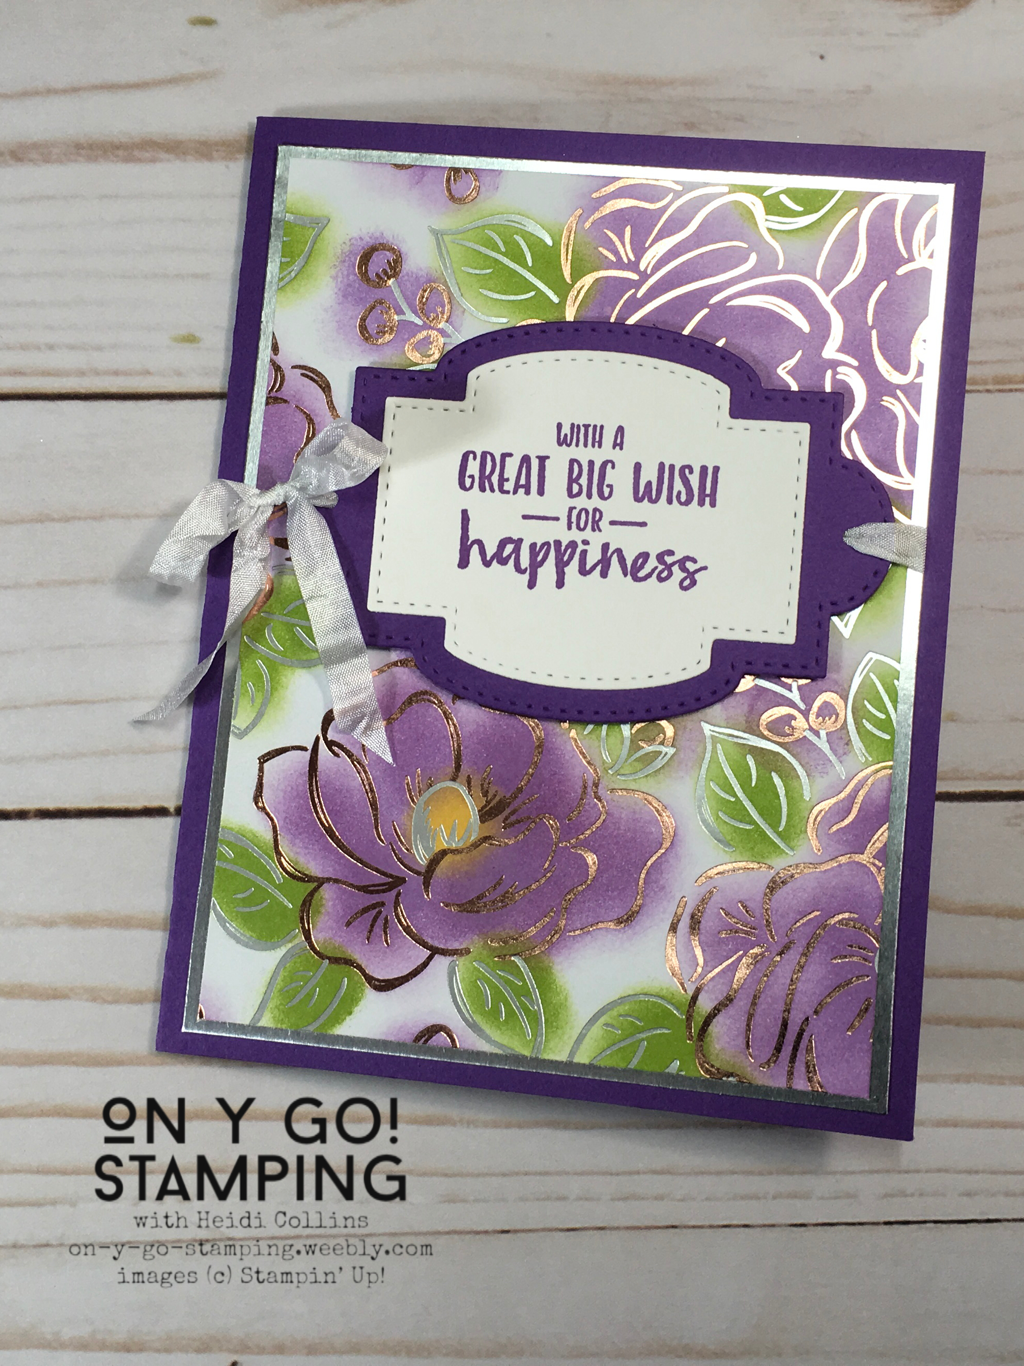
Next, I punched a hole through the front and back layers of the Night of Navy cardstock using the retired slot punch. You could use a 1/2" circle punch instead. I threaded a piece of Real Red cotton ribbon through both holes going from front to back. Then, I began to slide my Hershey's candy bar into the wrapper so that the red ribbon that passed between the front and back was pushed down to the bottom of the wrapper. When the candy bar was fully inserted in the wrapper, I tied the ends of the ribbon with rushed Daffodil Delight ribbon and Linen Thread. 

The directions may sound a little complicated, but I think when you are putting it together it will all make sense. 
Purchase Stampin' Up! Product
0 Comments

Colorful Flowering Foil

3/9/2020

0 Comments

 
Picture
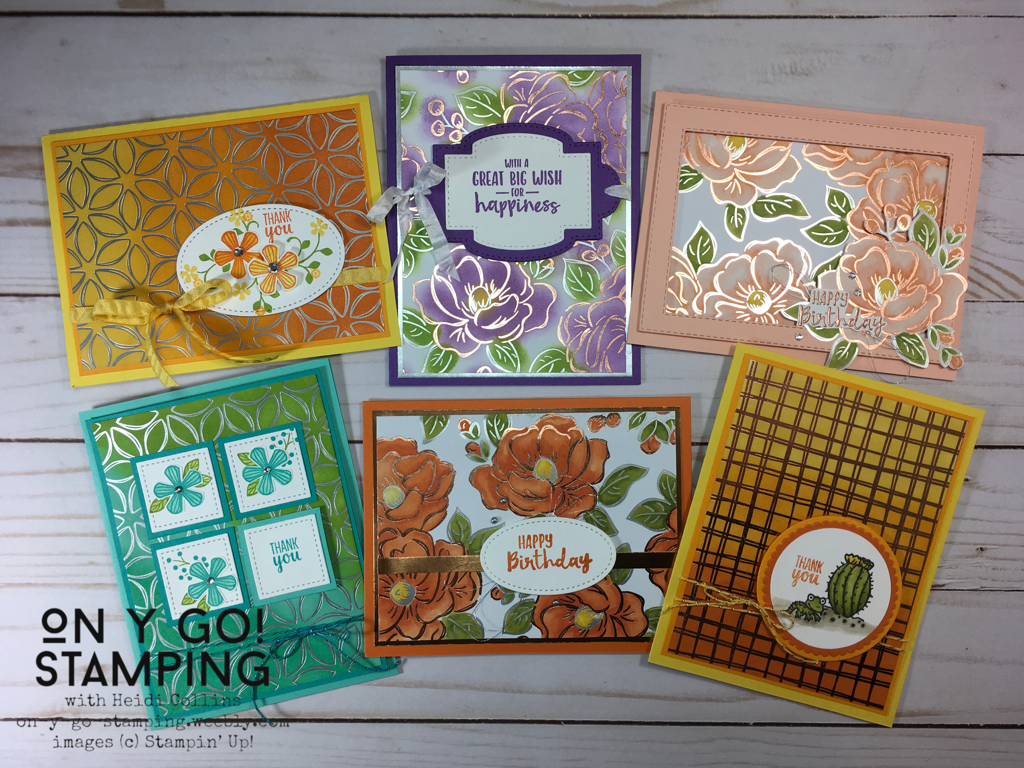
Have you seen the NEW Flowering Foil Specialty Designer Series Paper? This awesome paper is available FREE through the end of March with any $50 order. It is white with foil designs that you can leave white or color to match your project. I've been having so much fun coloring it that I couldn't stop at 2 or 3 cards. All of these cards feature Sale-A-Bration stamp sets that you could also choose FREE with a $50 order through the end of March, The Gang's All Meer, Sending You Thoughts, and Thoughtful Blooms. I love Sale-A-Bration because you can order paper, ink, and accessories and get the stamps for FREE.

Remember that Sale-A-Bration items are only available while supplies last. Accessories, like DSP, are especially prone to selling out. If this DSP is on your wish list, I wouldn't wait to order!
​
Picture
On the left you can see what the paper looks like when it arrives. On the right are a number of pieces that I have colored. You can color them with Stampin' Blends, sponge brayers, or sponge daubers with ink.
Picture
Picture
Thank You Lizard
This little lizard from The Gang's All Meer sits on a sunny grid. I used a sponge brayer to roll on three colors of ink: Daffodil Delight, Mango Melody, and Pumpkin Pie. I overlapped the colors so that they appear to bleed into one another. I swiped the greeting from the Thoughtful Blooms stamp set. The lizard and cactus are colored with Stampin' Blends.
Cardstock:
  • Daffodil Delight
  • Mango Melody
  • Pumpkin Pie
  • Whisper White
  • Flowering Foils DSP
Inks: Daffodil Delight, Mango Melody, and Pumpkin Pie
Accessories:
  • Old Olive Combo Stampin' Blends
  • Daffodil Delight Combo Stampin' Blends
  • Pumpkin Pie light Stampin' Blends
  • Crumb Cake light Stampin' Blends
  • Metallic Baker's Twine and Sequins Combo pack (sold out Sale-A-Bration item)
  • 2" Circle Punch
  • Layering Circle dies
Thank You Blooms:
Once again, I colored the Flowering Foils DSP with sponge brayers using Bermuda Bay, Coastal Cabana, and Granny Apple Green ink. I rolled on a diagonal this time so the colors change from one corner to the other. 

I stamped the images with the Thoughtful Blooms stamp set, available FREE with $50 order. I cut the flowers by hand, but there is a punch to match that you can earn for FREE with a $100 order through the end of March or while supplies last.

Cardstock:
  • Coastal Cabana
  • Bermuda Bay
  • Whisper White
  • Flowering Foils DSP
Picture
Inks: Coastal Cabana, Bermuda Bay, Granny Apple Green
Accessories:
  • Rhinestone Basic Jewels
  • Stitched Shapes dies
  • Metallic Baker's Twine & Sequins combo pack (sold out Sale-A-Bration item)
Picture
Sunny Thank You
This piece of Flowering Foils DSP was colored with sponge brayers as well. Like the first card, I used Daffodil Delight, Mango Melody, and Pumpkin Pie ink. Once again, I used the Thoughtful Blooms stamp set for the focal image.

Cardstock:
  • Daffodil Delight
  • Mango Melody
  • Whisper White
  • Flowering Foils DSP
Inks: Daffodil Delight, Mango Melody, Pumpkin Pie, Granny Apple Green
Accessories: 
  • Daffodil Delight Ruched Ribbon
  • Stitched Shape dies
  • Rhinestone Basic Jewels
Lavender Happiness
For this card, I colored the Flowering Foils DSP using Sponge Daubers dipped in ink and rubbed on the paper. Using a circular motion gives a more solid color near the middle that lightens towards the outside of the image. I used Gorgeous Grape, Daffodil Delight, and Granny Apple Green ink. 

For the greeting, I used the Sending You Thoughts stamp set, also a FREE Sale-A-Bration item. I stamped the sentiment with Gorgeous Grape ink and cut it out using the Stitched So Sweetly dies from the 2020 January-June Mini Catalog. I punched the holes for the ribbon with the Label Me Fancy punch from the same mini catalog. 
Picture
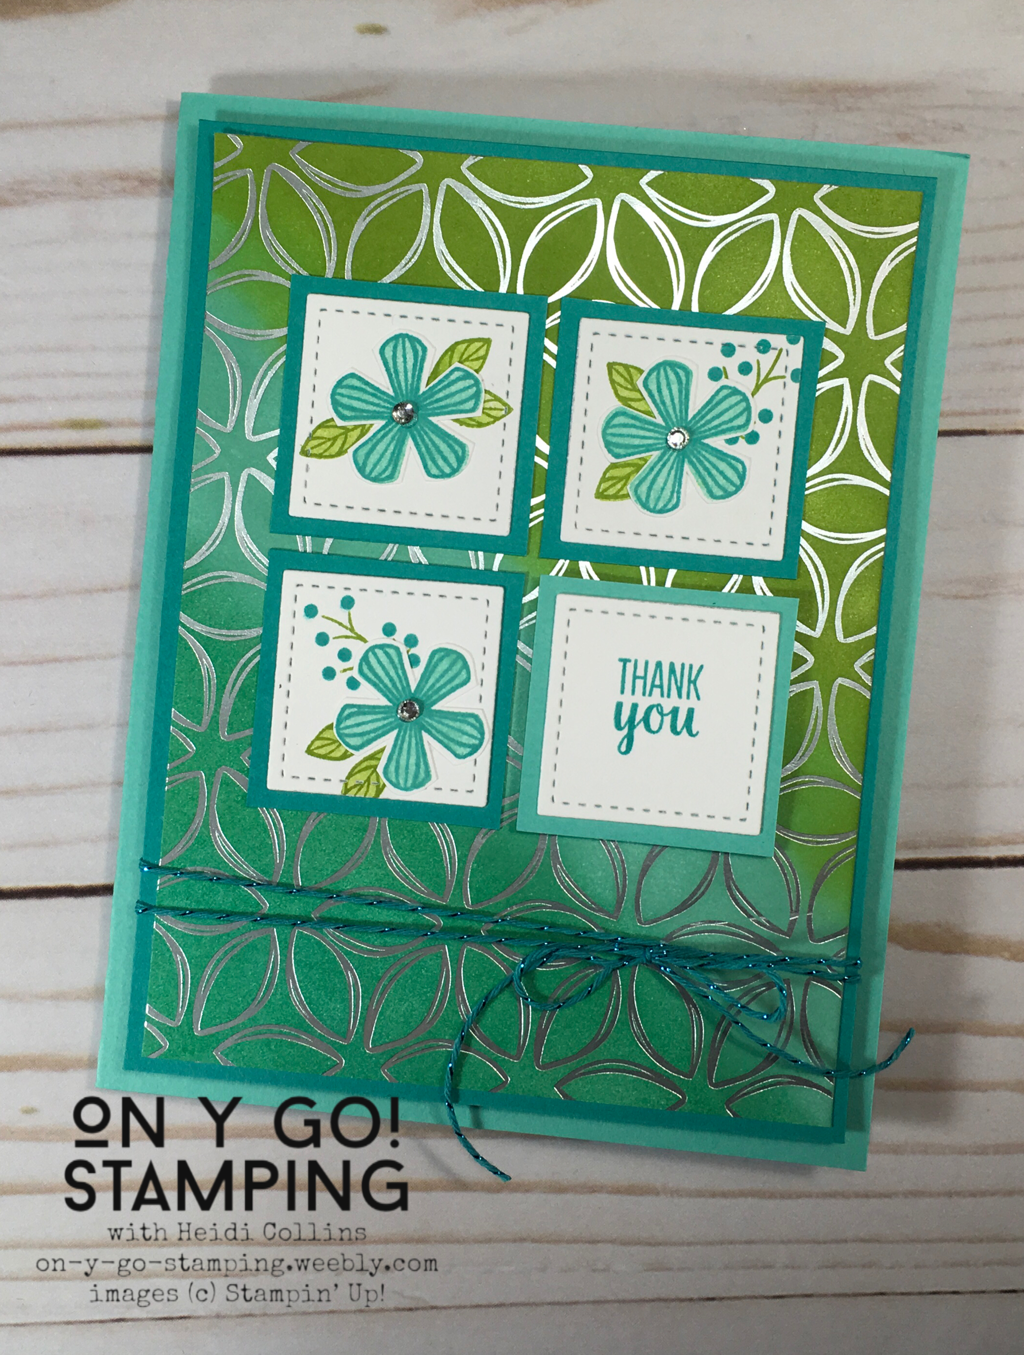
Cardstock: Gorgeous Grape, Silver Foil, Flowering Foils DSP, Whisper White
Inks: Gorgeous Grape, Granny Apple Green, Daffodil Delight
Accessories:
  • Stitched So Sweetly dies
  • Label Me Fancy punch
  • Whisper White Crinkle Seam Binding
  • Sponge Daubers
Picture
Soft Rose Birthday
This time, I colored the Flowering Foils DSP with Stampin' Blends. I used Petal Pink Light & Dark and the Light Pumpkin Pie Blends for the flowers. For the leaves, I used Light Old Olive and Light & Dark Granny Apple Green. The Centers are Light & Dark Daffodil Delight with just a touch of Light Mango Melody. 

I cut an additional flower and layered it on top of the frame that I had cut using two sizes of Stitched Rectangle Dies. The greeting is from the Sending You Thoughts stamp set and I embossed it with Copper embossing powder on Whisper White cardstock.
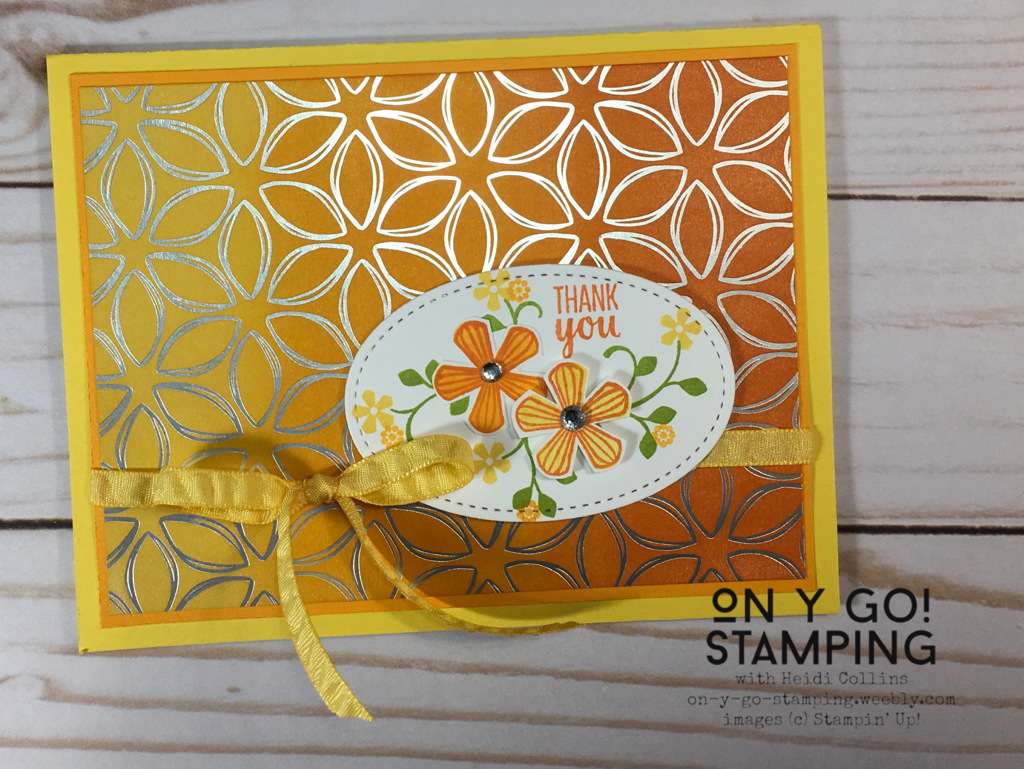
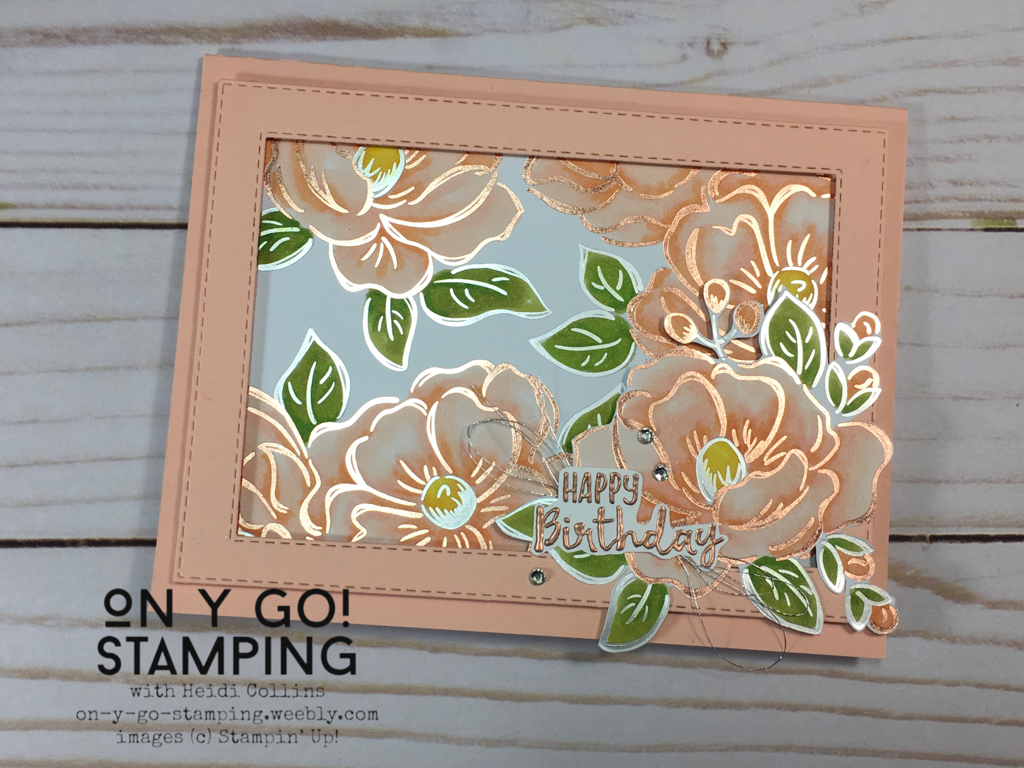
Cardstock: Petal Pink, Flowering Foils DSP, Whisper White
Inks: Versamark
Accessories:
  • Petal Pink Combo Stampin' Blends
  • Light Pumpkin Pie Stampin' Blend
  • Light Old Olive Stampin' Blend
  • Granny Apple Green combo Stampin' Blend
  • Copper embossing powder
  • Stitched Rectangle Dies
  • Rhinestone Basic Jewels
  • Stampin' Dimensionals
Roses for your Birthday
For my last card, I also colored the flowers using Stampin' Blends. This time, I used the light & dark Pumpkin Pie for the flowers, light & dark Old Olive for the leaves, and light & dark Daffodil Delight Stampin' Blends.

Once again, the greeting is from the Sending You Thoughts stamp set and cut with an oval from the Stitched Shapes dies.
Picture
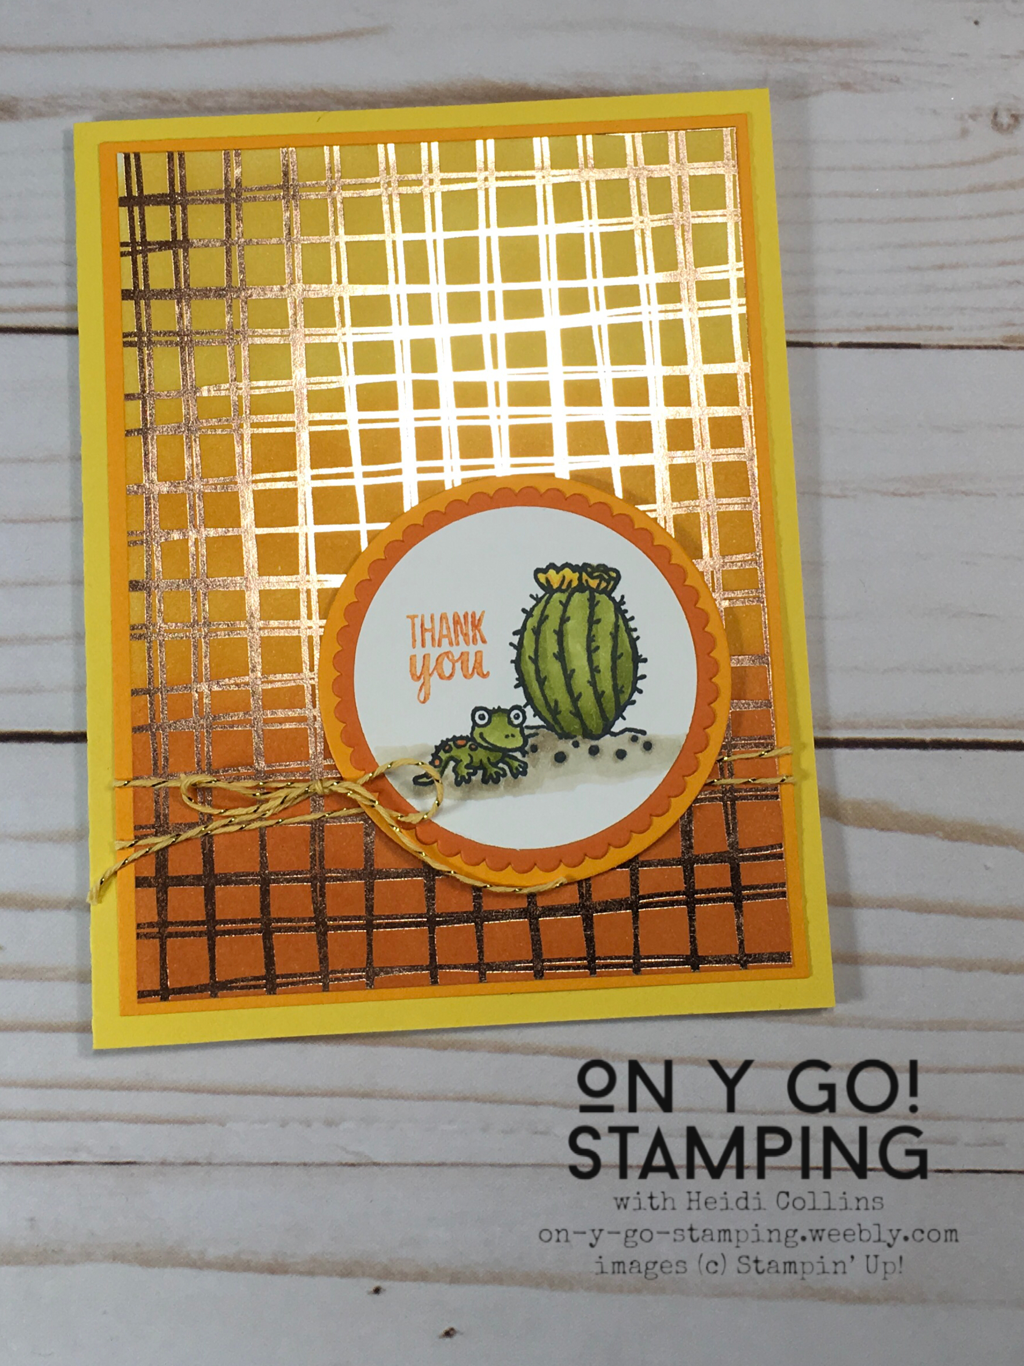
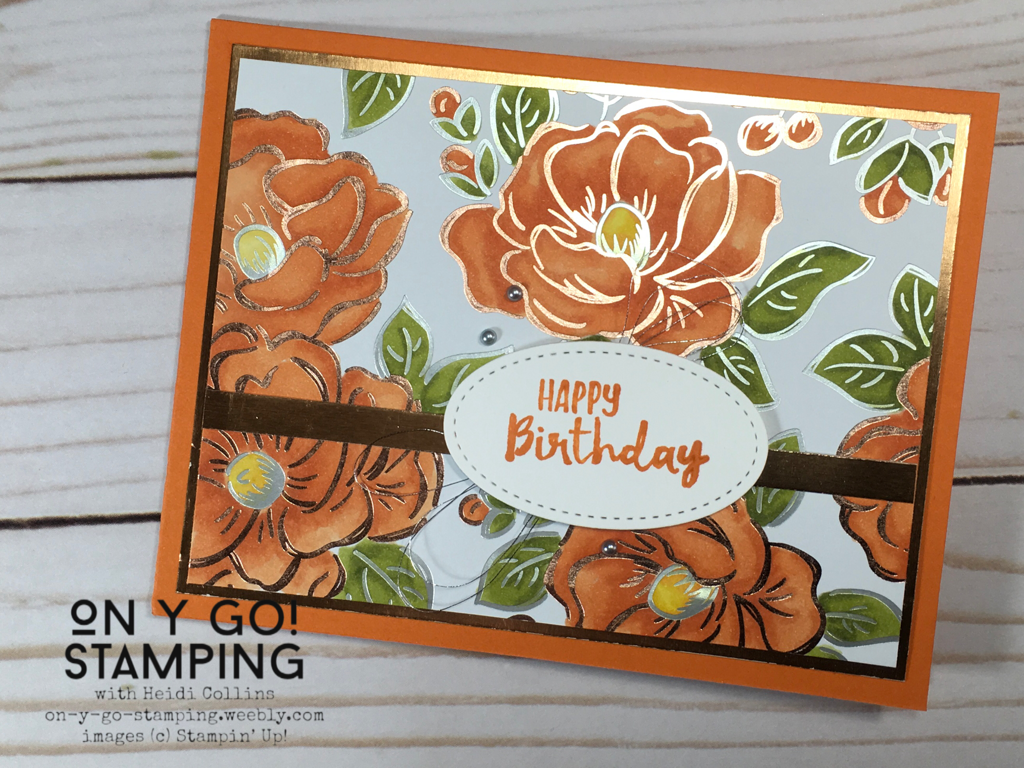
Cardstock: Pumpkin Pie, Copper foil, Flowering Foils DSP, Whisper White
Inks: Pumpkin Pie
Accessories:
  • Pumpkin Pie Combo Stampin' Blends
  • Old Olive Combo Stampin' Blends
  • Daffodil Delight Combo Stampin' Blends
  • Stitched Shapes dies
  • Silver Metallic Thread
  • Rhinestone Basic Jewels
  • Stampin' Dimensionals

To order any of these products, click the button below or contact me via e-mail for help, stampin_heid@yahoo.com. 
Order stamps, paper, and accessories
0 Comments
<<Previous
    Heidi Collins, Independent Stampin' Up! Demonstrator with On Y Go! Stamping
    Get updates and ideas on my Facebook group
    Heidi Collins, Independent Stampin' Up! Demonstrator and Owner of On Y Go! Stamping
    Shop for Stampin' Up! stamps, inks, paper, tools, and embellishments with Heidi Collins and earn points towards FREE stamps!
    Picture
    Picture
    Picture
    On Y Go! Stamping YouTube channel with Card Making Videos on how to do rubber stamping, card making, scrapbooking, and paper crafting

    Archives

    May 2023
    April 2023
    March 2023
    February 2023
    January 2023
    December 2022
    November 2022
    October 2022
    September 2022
    August 2022
    July 2022
    June 2022
    May 2022
    April 2022
    March 2022
    February 2022
    January 2022
    December 2021
    November 2021
    October 2021
    September 2021
    August 2021
    July 2021
    June 2021
    May 2021
    April 2021
    March 2021
    February 2021
    January 2021
    December 2020
    November 2020
    October 2020
    September 2020
    August 2020
    July 2020
    June 2020
    May 2020
    April 2020
    March 2020
    February 2020
    January 2020
    December 2019
    November 2019
    October 2019
    September 2019
    August 2019
    July 2019
    June 2019

Powered by Create your own unique website with customizable templates.
  • About
  • Online Card Classes
  • Card Making Ideas
  • Stampin' Up! Catalogs
  • Card Tutorials
  • Contact
  • Shopping Rewards
  • Shop
  • Join Stampin' Up!