• About
  • Online Card Classes
  • Card Making Ideas
  • Stampin' Up! Catalogs
  • Card Tutorials
  • Contact
  • Shopping Rewards
  • Shop
  • Join Stampin' Up!
ON Y GO! STAMPING
  • About
  • Online Card Classes
  • Card Making Ideas
  • Stampin' Up! Catalogs
  • Card Tutorials
  • Contact
  • Shopping Rewards
  • Shop
  • Join Stampin' Up!

C.A.S.E - Copy and steal everything

7/29/2019

0 Comments

 
Picture
It's just another Manic Monday!

When you need a quick card or are stuck for ideas, use someone else's card design as inspiration. Commonly referred to as C.A.S.E.ing (Copy and Steal Everything), this is an often used strategy for creating cards. Lots of ideas can be found online on websites like Pinterest and Instagram. 
You can copy the ideas exactly, or put your own spin on it. I find that the more I CASE other stampers' cards, the more I start to formulate my own ideas. If you're new to stamping, it's a great way to get started. When I find myself with a little Stamper's Block, I CASE some cards and quickly find myself stamping away again. 
​
For my Crushed Curry Happy Day! card, I borrowed an idea from Cards by Rita. She used Melon Mambo and Old Olive, I decided to change it up and use Crushed Curry, Pear Pizzazz, and Rich Razzleberry. Also, Rita's card is a few years old and uses a stamp set I don't own. No problem! I just switched it out with the Friend Like You stamp set from the current Stampin' Up! catalog. I love how Rita tied a button on her ribbon and made sure to include this detail. Instead of having two layers of torn cardstock at the top, I sponged some Crushed Curry ink on the torn edge of my Whisper White cardstock. 
Picture
Picture
To finish the card off, I did a little stamping on the inside. 

So, the next time you need a quick idea for a card, look for inspiration and copy away!
0 Comments

scrap paper cards

7/27/2019

0 Comments

 
Today's tip for the weekend seems like a no brainer, and maybe all of you are already doing this, but it was a light bulb moment for me while making cards yesterday. 

I CASE (Copy And Steal Everything) a lot of cards, but I also like to design my own. I do a lot of trial and error when designing cards, and I have a giant stack of scrap paper that I use for stamping off, checking colors, etc. Anytime I have documents that I no longer need, I just cut the piece of paper in half and add it to the stack. ​Scrap paper is always handy. 
​
Picture
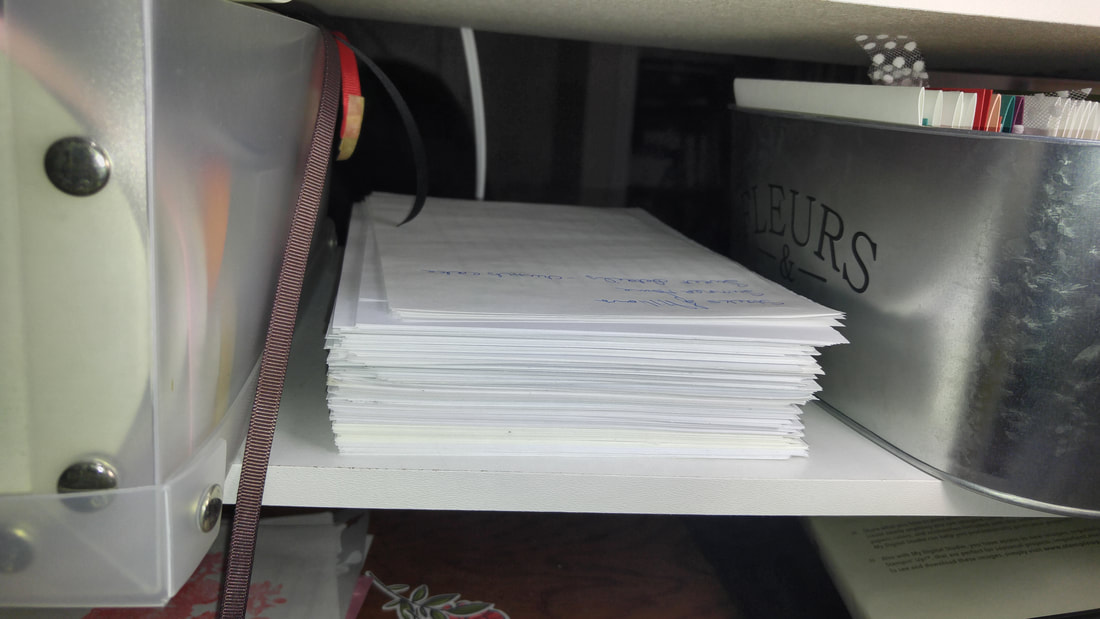
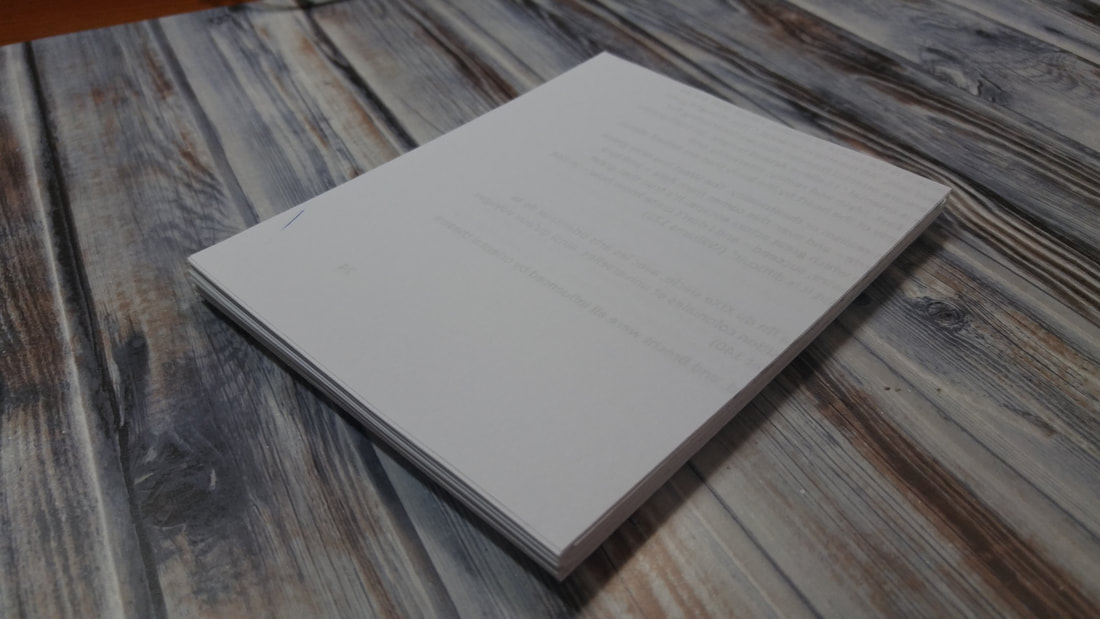
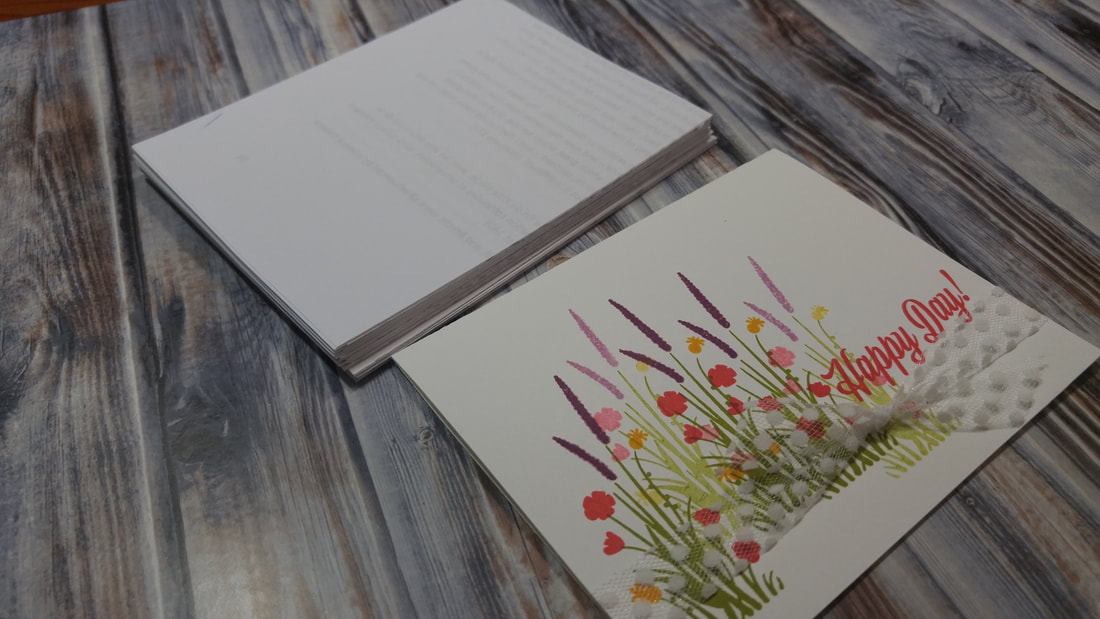
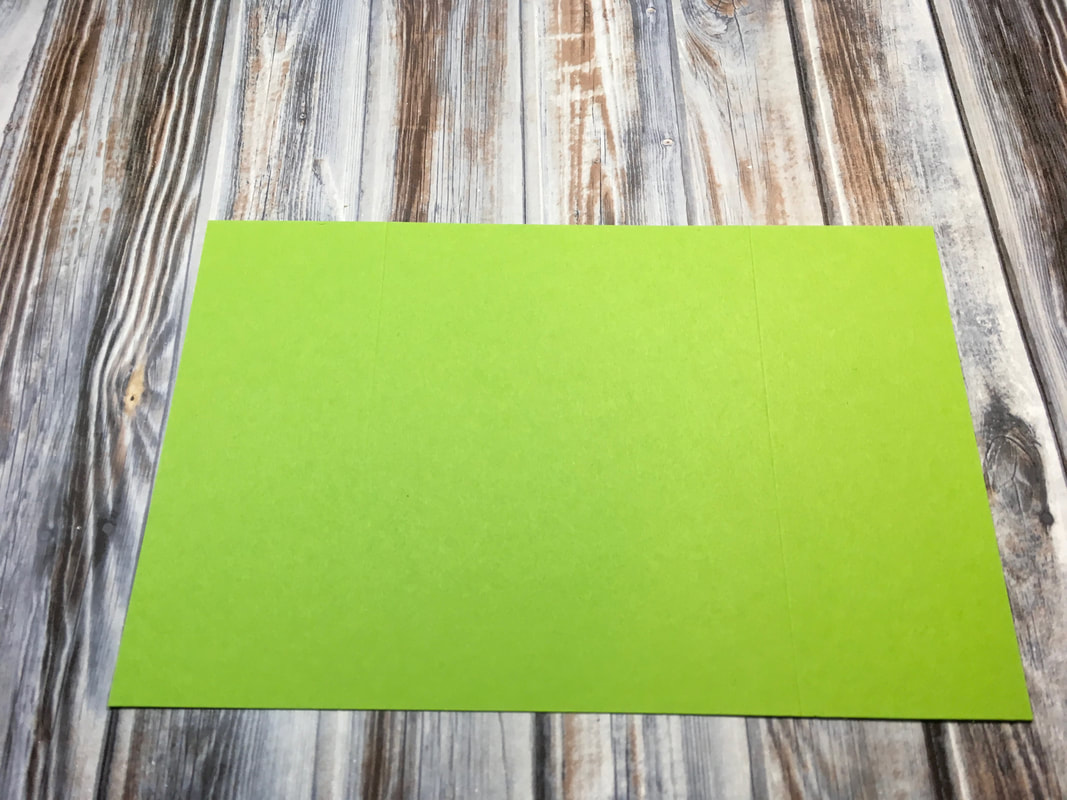
However, when designing cards, proportions are really important. I always want to know how an image or a group of images will fill the card front. Since I was designing some single-layer cards, this was particularly pertinent yesterday. Then it dawned on me, why not cut down my scrap paper to card front size. Then I could try out a card design before I stamped in on card stuck. Well, duh, why had I never thought of this before? 

Since copy paper is so thin, I could cut multiple pieces at once, and with just a few swipes of my paper cutter, I had a small stack of 5.5 x 4.25 inch pieces of scrap paper, perfect for practicing card fronts. 
Picture
Stack of scraps. 
Picture
Same size as a card front. 
Picture
Trial runs.

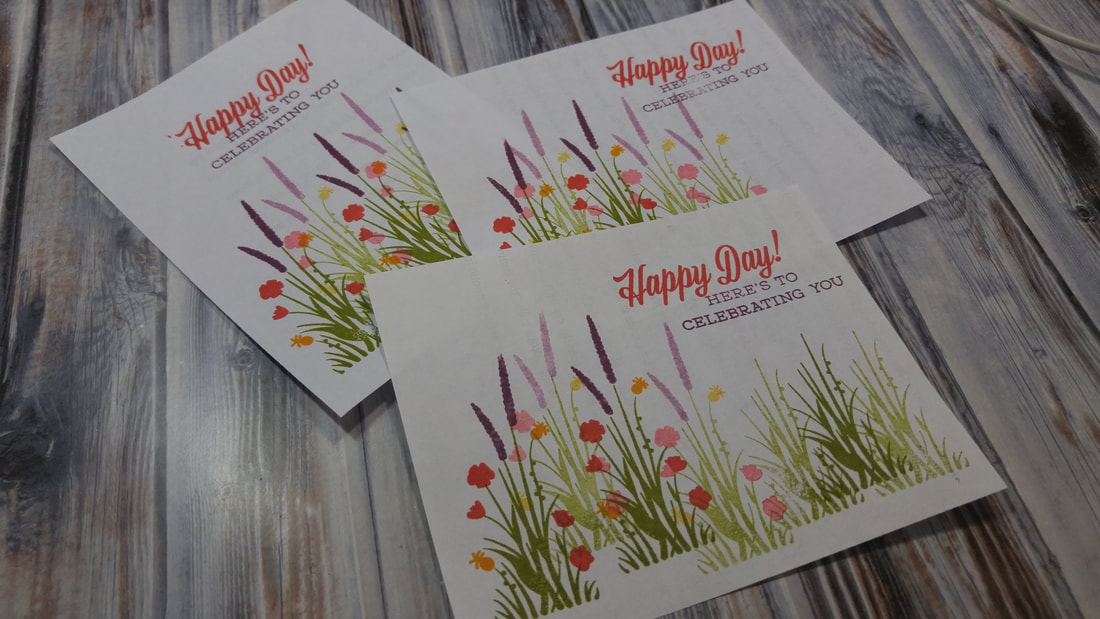
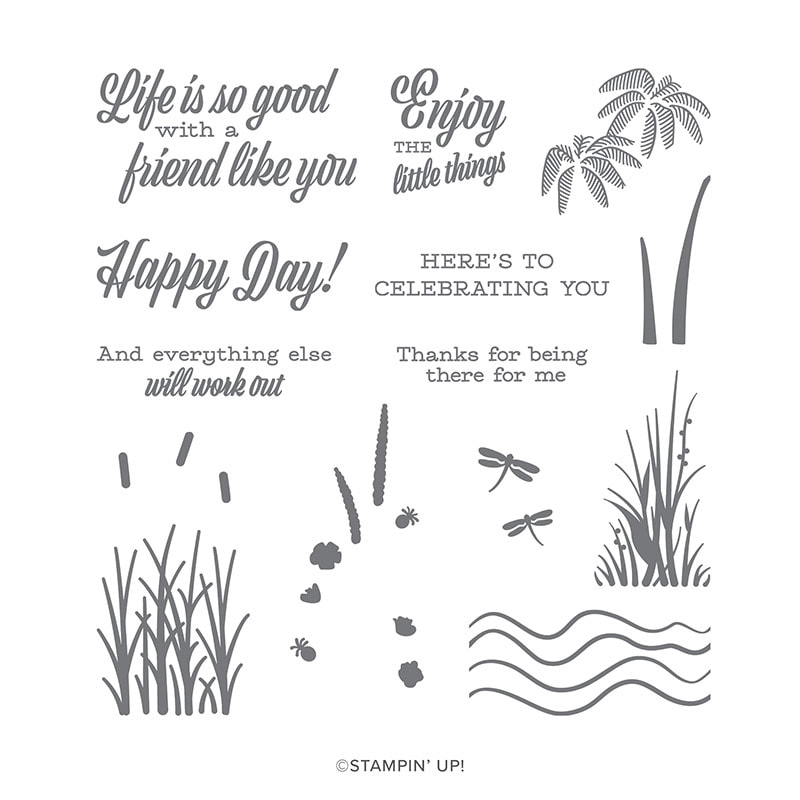
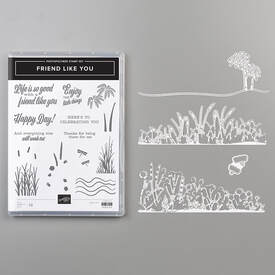
So, have you had any "well, duh" moments while stamping? I'd love to hear about them!
0 Comments

From Simple to WOW!

7/25/2019

0 Comments

 
Picture
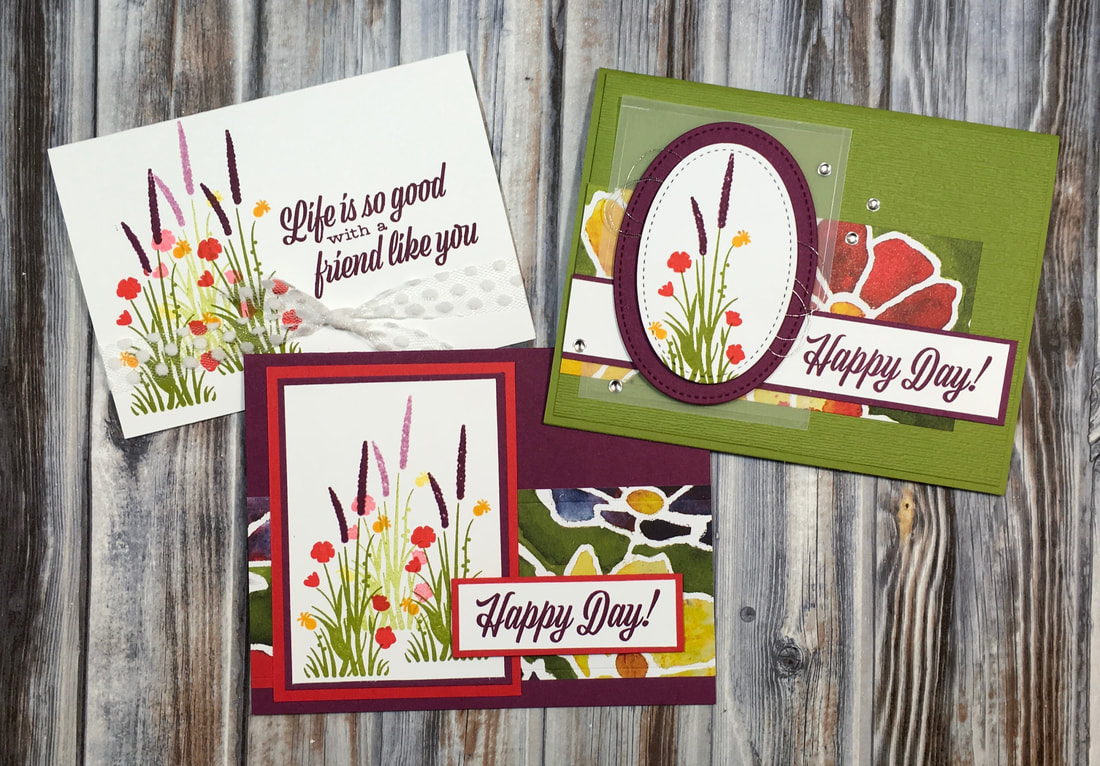
I recently received the beautiful Friend Like You stamp set from a fellow stamper. I was so excited when it arrived in the mail, but I was knee deep in some other projects at the time and had to set it at the back of the stamp table. But today I pulled it out and made three awesome cards that go from simple to Wow!

All stamps and supplies used for these cards are available from Stampin' Up! If you are not already working with a demonstrator, I would love to help you purchase these supplies for your own craft room. Just send me a note.
Picture
The Friend Like You stamp set is made for two-step stamping with 14 photopolymer stamps. Included in the set is a palm trunk and palm leaves, cattail stems and cattail tops, and a clump of leaves and stems and their tops. There are also some cute dragonflies, some squiggly lines that look like water, and 6 greetings, three of which are more what I like to call "outside greetings" and three which are "inside greetings" that match. All in all, it's a pretty awesome set and very versatile! 
There is also a coordinating die set, Friendly Silhouettes, that makes matching silhouettes of palm trees, cattails, and wildflower clumps. 

For the first Simple Stamping card, I used one of Stampin' Up!'s pre-cut note cards. At the smaller 3.5 x 5 inch size, these are perfect to go along with gifts. 
Picture
Picture
The first card is very simple and has no layering, just stamps, paper, and ink. (Ok, and a little bit of ribbon - I just couldn't resist!) You don't even need a paper cutter for this card. 

I used the same colors and inking techniques on each of the three cards. The colors used are Old Olive, Rich Razzleberry, Mango Melody, and Poppy Parade.


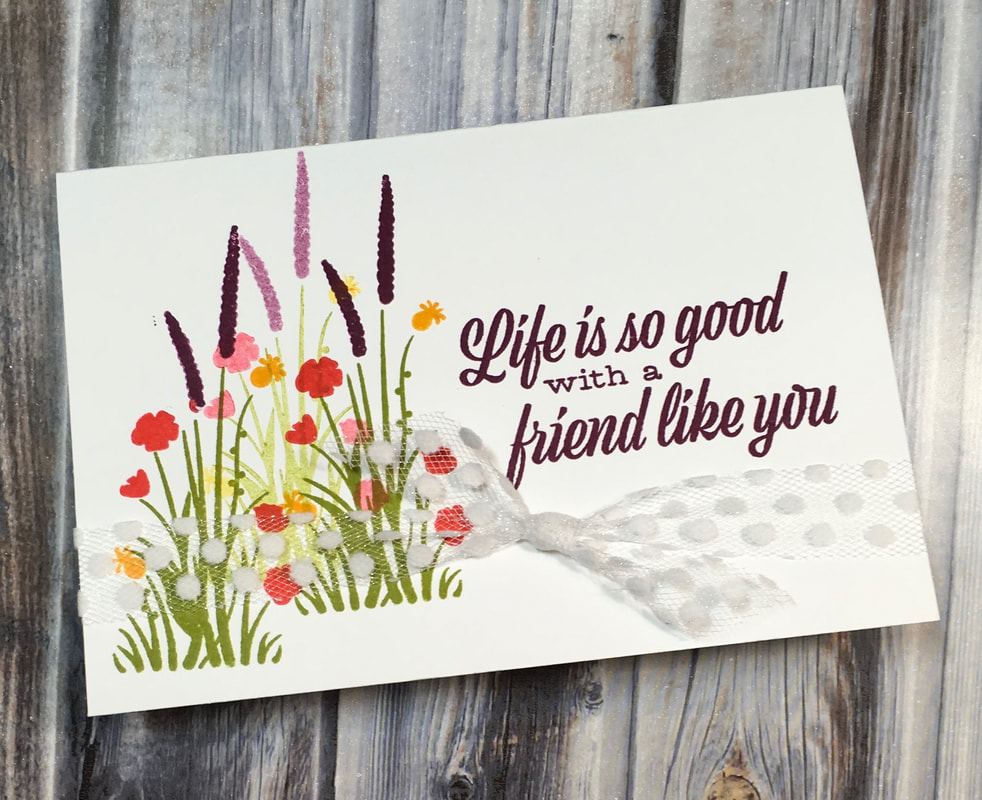
First, I stamped the clump of leaves and stems using Old Olive ink. I stamped once and then stamped a second time further up and to the right to create a more faded image. Then I re-inked the stamp and stamped a third time, again, further to the right, but this time at a height between the first two. ​

To ink the flowers, I very carefully used the corner of my ink pad to ink the flowers in the desired color. This seems tricky, but with this set, it was pretty easy and I didn't experience trouble with ink on the wrong flowers. However, I don't think you could use this technique to get the flowers that are the same color in the samples in two different colors. They are just too close together.

I carefully lined up the images over the leaves I had already stamped. Since these are clear photopolymer stamps, it's easy to see through them to get perfect - or nearly perfect - placement. This stamp set is very forgiving, and if the flowers and the stems don't line up exactly, you won't really notice. Like the leaves, I stamped the flowers a second time to get the more pastel version you see in the back. Then I re-inked and stamped a third time.

Finally, I added the greeting in Rich Razzleberry and tied on a little ribbon. The polka dot tulle adds a great touch and is very easy to tie. I absolutely love it and find it works on so many projects. 

The second card maximizes the ability of layers to add interest and create a really pulled together card. 

I used Rich Razzleberry and Poppy Parade cardstock as well as the See a Silhouette Designer Series Paper. This patterned paper is so vibrant! It is absolutely gorgeous with a beautiful watercolored look to it. 


Picture
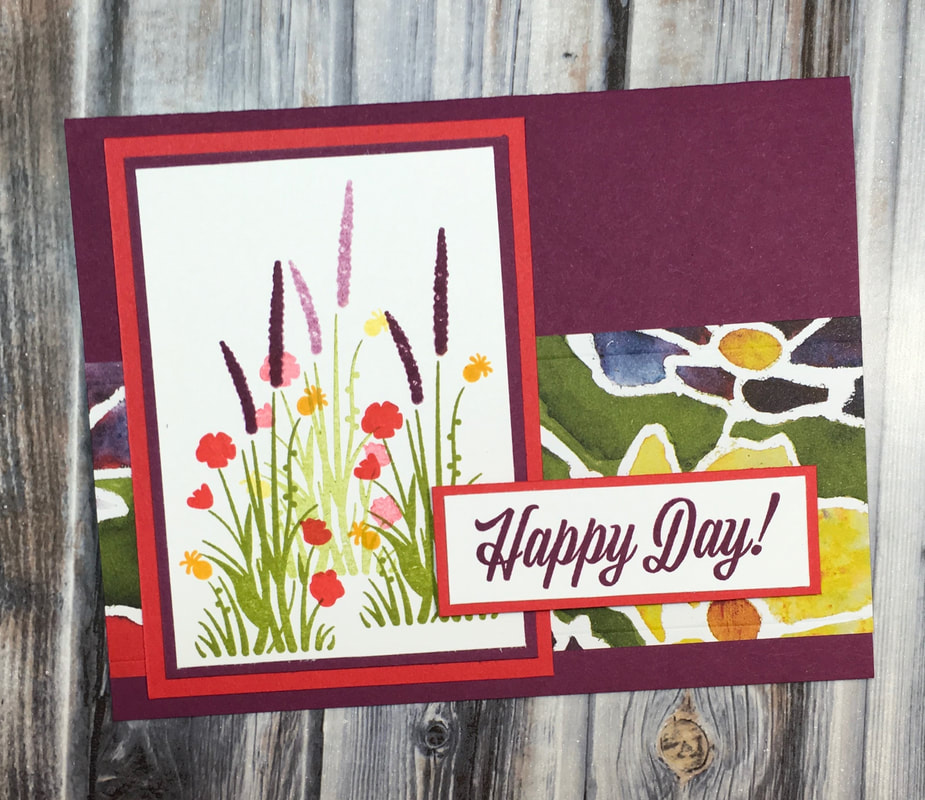
I used a 8.5 x 5.5 inch piece of cardstock folded in half for the base. Then, I layered a 2.25 inch piece of DSP. I stamped the flowers and trimmed the card stock. The Rich Razzleberry layer is 3/16 inch longer and wider than the trimmed floral image, and the Poppy Parade layer is 5/16 inch longer and wider than the Rich Razzleberry.
Picture
The final card uses the stitched shaped dies, the Subtle embossing folder, some metallic silver thread, a piece of vellum, and some clear epoxy droplets. 

I used Old Olive cardstock as the base. Like the previous card, it is 8.5 x 5 inches and then folded in half. It is hard to see, but I then added a 4 13/16 inch x 3 15/16 inch piece of Old Olive cardstock that I had embossed using the Subtle embossing folder. This just adds some nice texture to the background.
The DSP and the greeting strip are trimmed to match the edge of this embossed cardstock on the left. As you can see, on the right, they are staggered in length. 

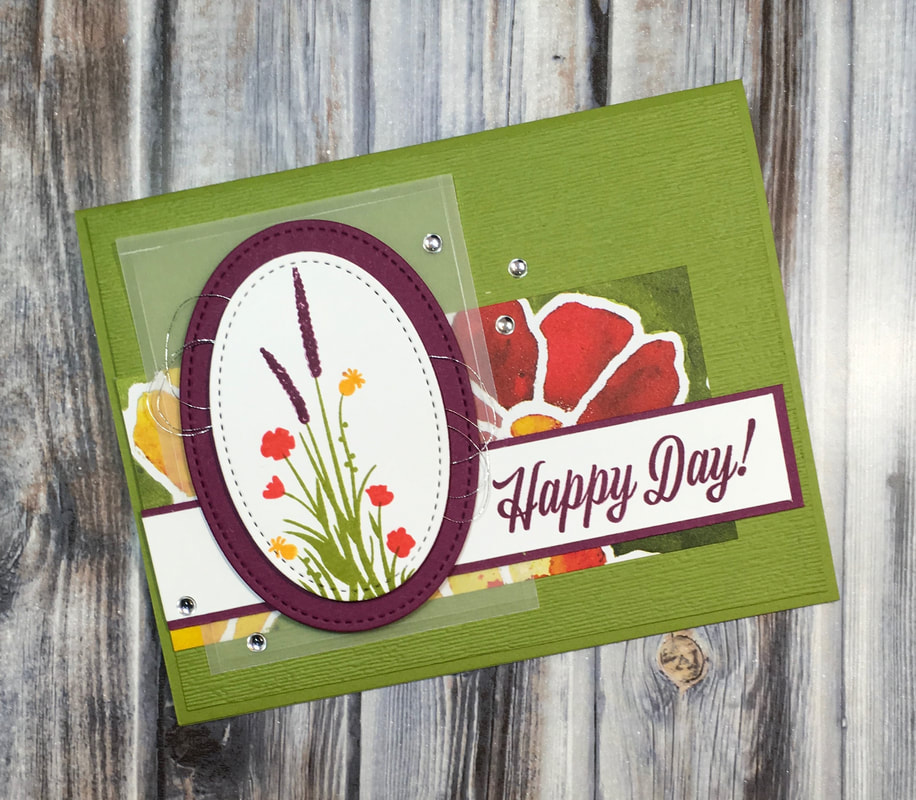
On the piece of vellum, I very carefully scored a line 1/4 inch from each side. Then I flattened the vellum back out because it tended to curl up. This left a very subtle line framing the outside of the layer. 

Whether you're short on time or supplies or you want to go all out and make a Wow! card, the Friend Like You stamp set is a perfect vehicle for you creative juices!
0 Comments

WOW Wednesday: gate-fold card

7/10/2019

2 Comments

 
Picture
Picture
You may have noticed this card in my blog detailing a hack to create your own enamel dots. What you might not have realized is the really cool gate fold the card uses to stay closed.

​Today, I have all the instructions for making this fun card. 
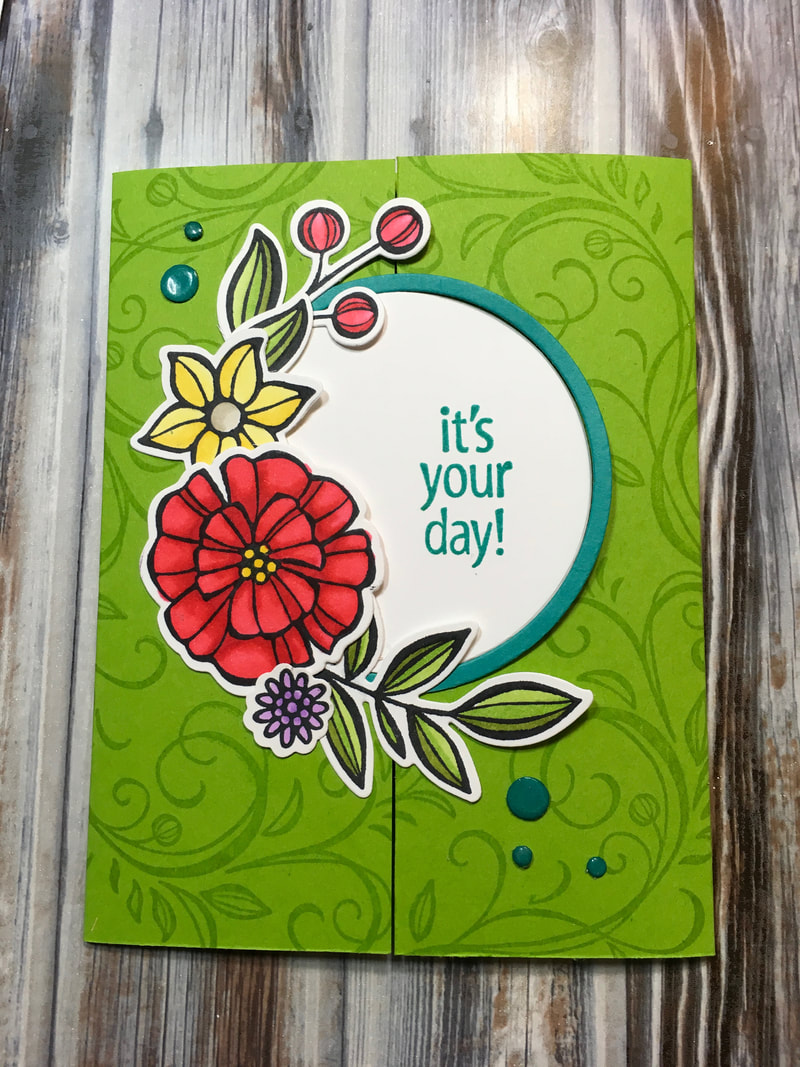
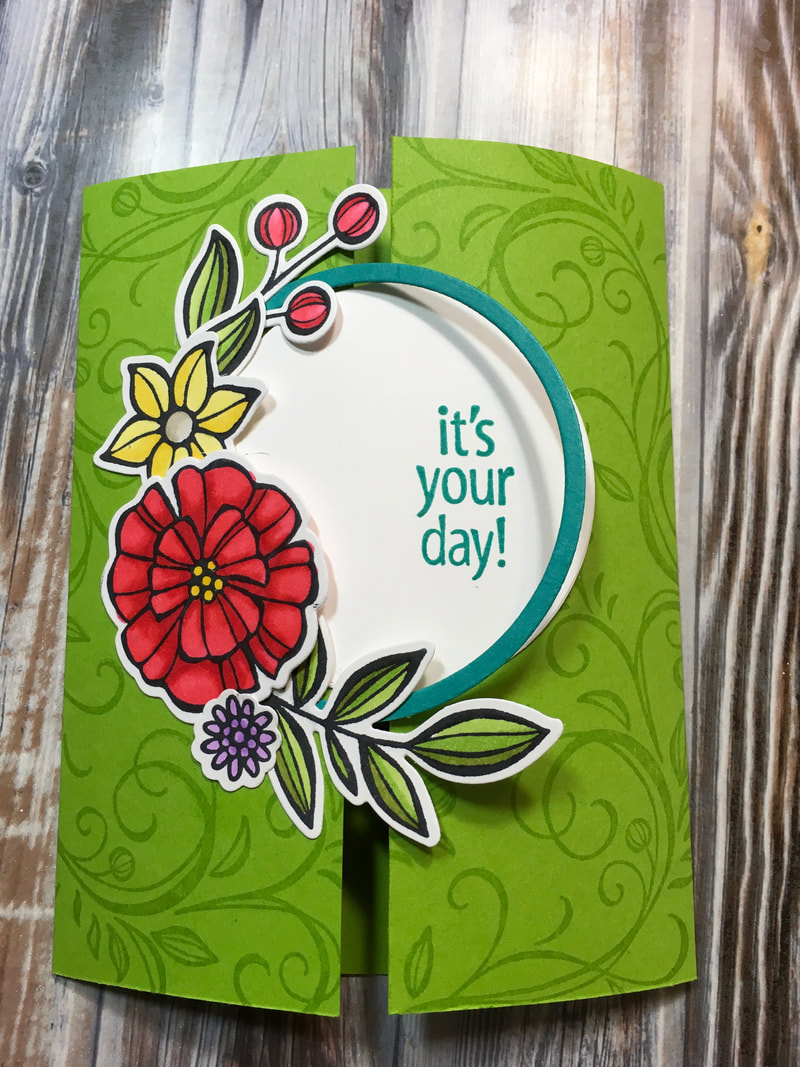
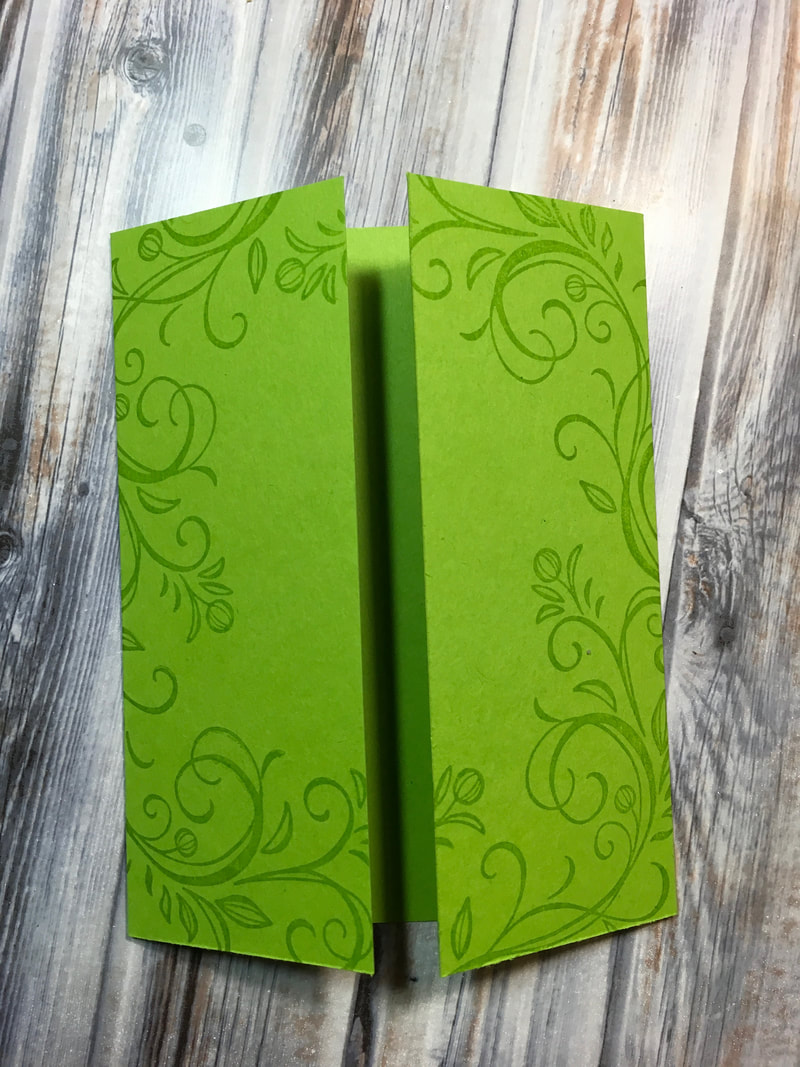
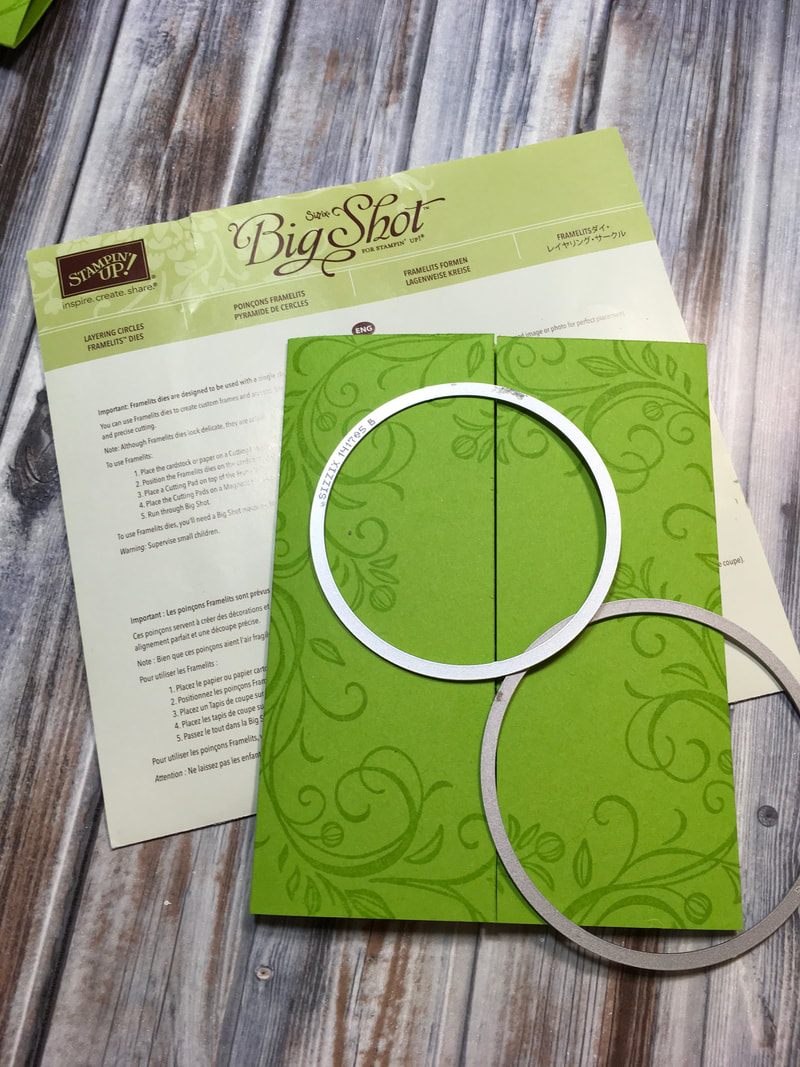
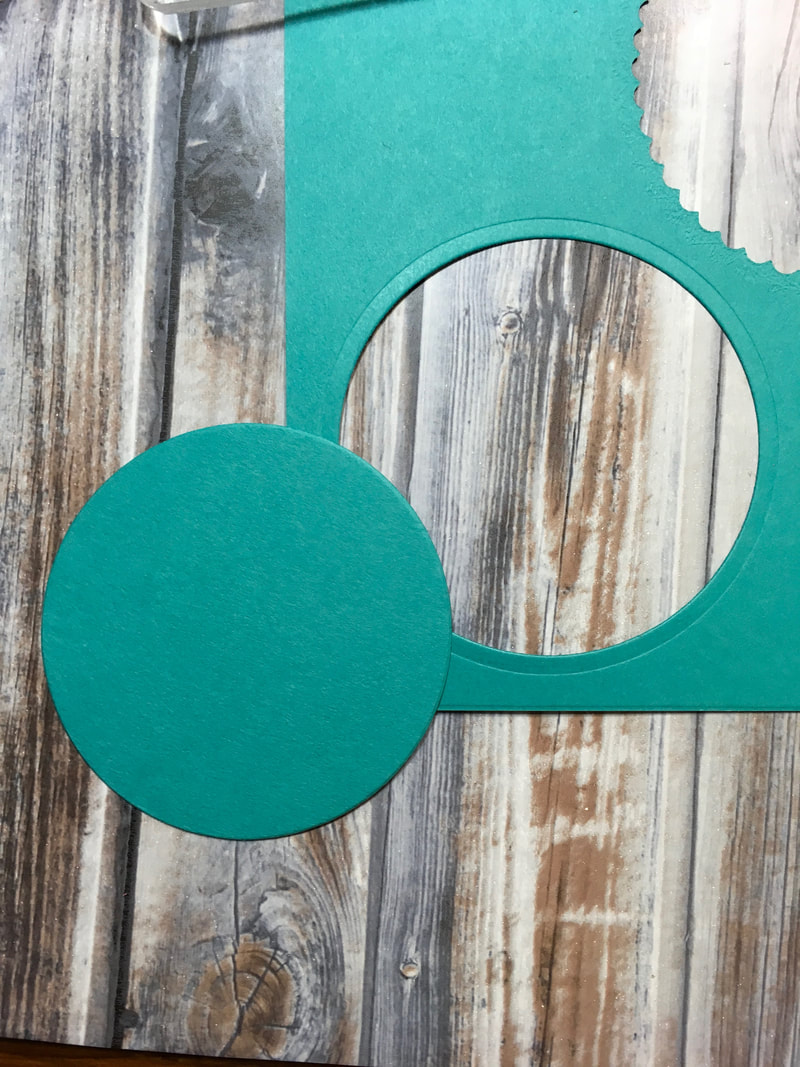
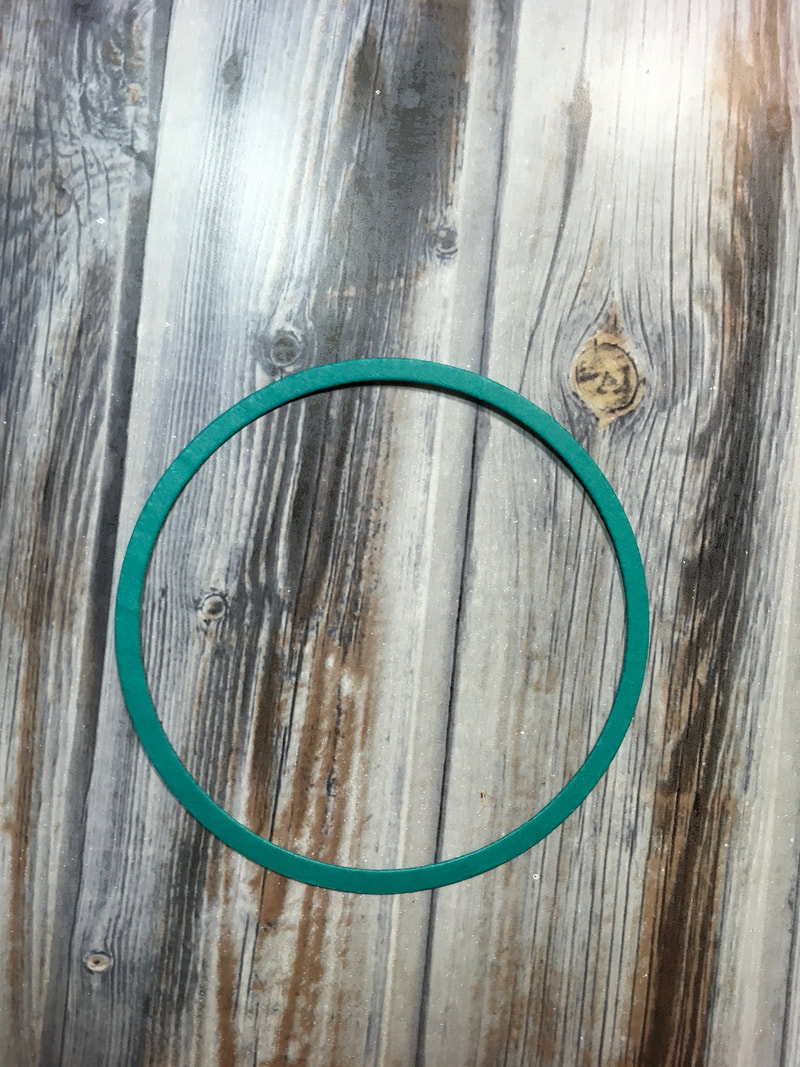
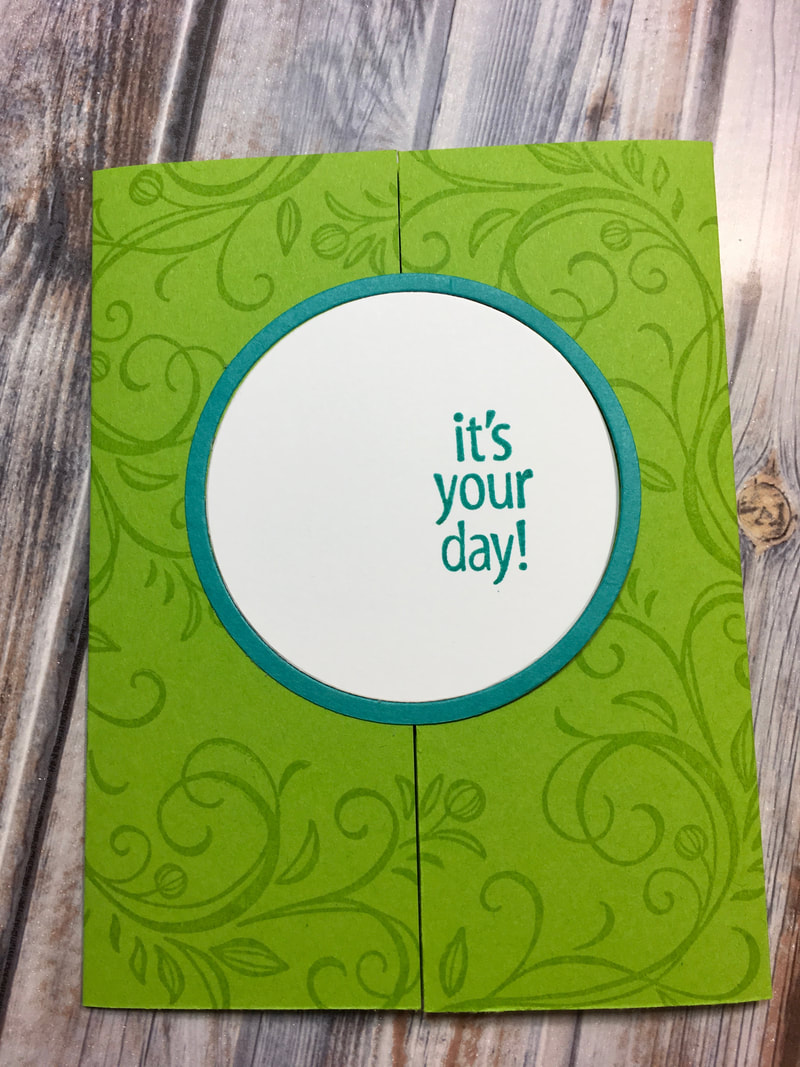
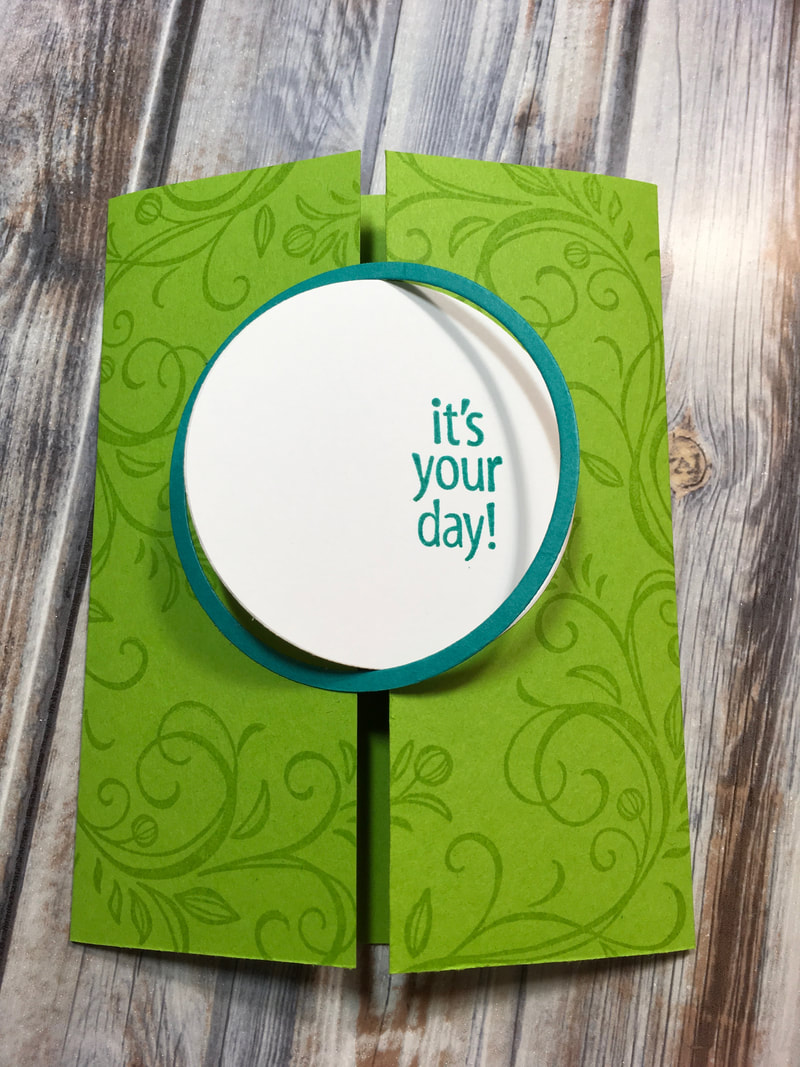
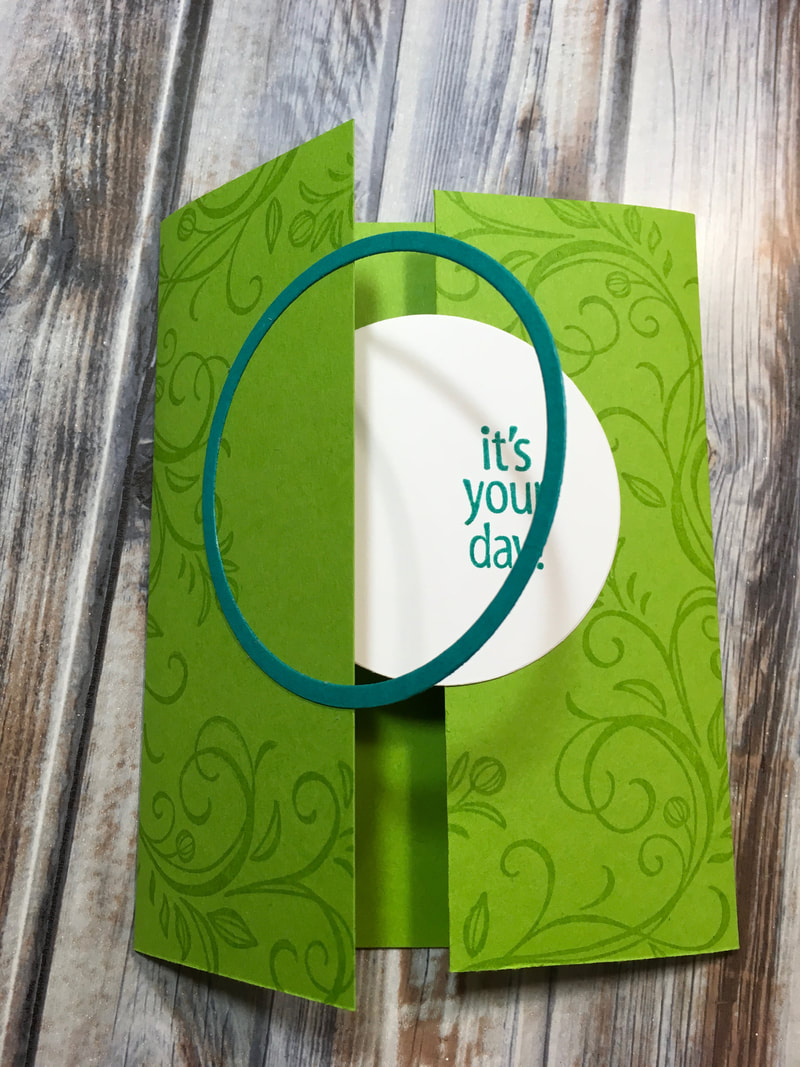
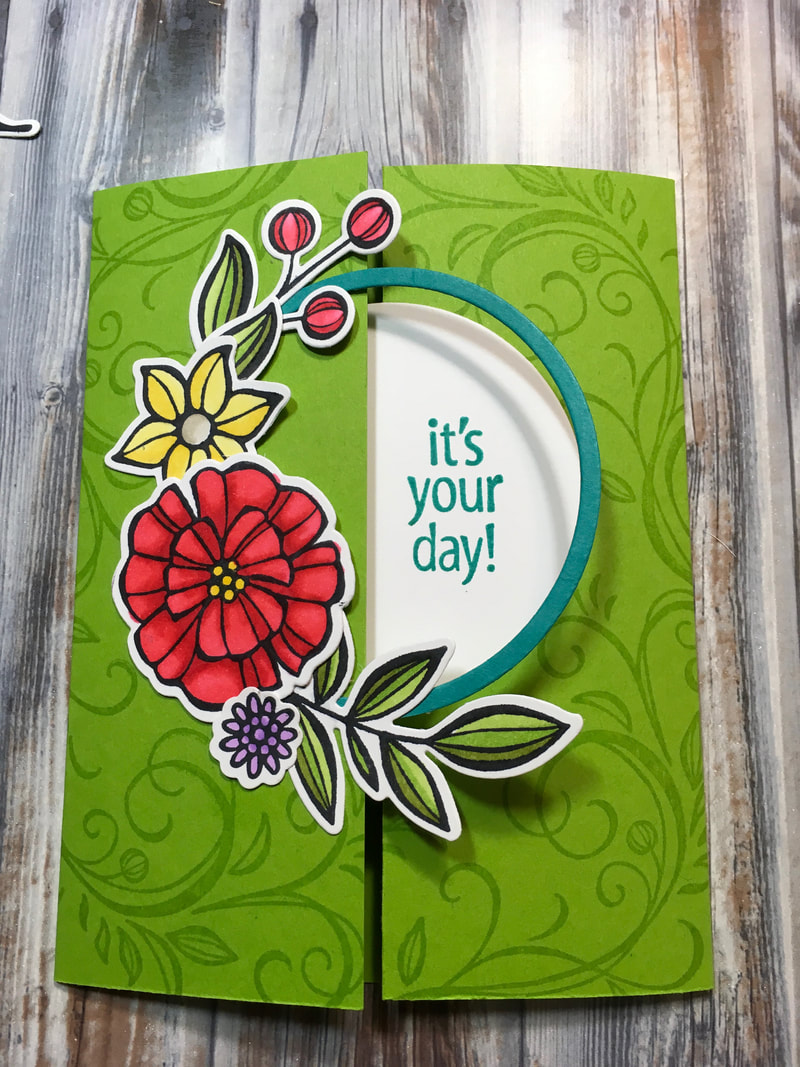
This card uses Stampin' Up!'s retired Falling Flowers stamp set (I really miss these easy to color bold flowers!) and the May Flowers framelits, as well as the Layering Circles dies.  The card base is Granny Apple Green with a circle of Bermuda Bay card stock and Whisper White for the greeting and flowers. 

I cut my Granny Apple Green cardstock in half to create a 8 1/2" x 5 1/2" piece. Then I scored it at 2 1/8" and 6 3/8". (Sorry, this step did not photograph well!)

Next, I folded in the two sides and stamped the vine/flourish stamp with Granny Apple Green around the outsides.
Picture
Picture

I then stamped the flowers on Whisper White cardstock using the Jet Black Staz-On ink pad. I colored the flowers with Stampin' Blends in Poppy Parade, Daffodil Delight, Granny Apple Green, Old Olive, Crumb Cake, and Highland Heather. I cut them out using my Big Shot and the coordinating Framelits.
Picture
Picture
Next, I cut my circles. I cut a circle of Whisper White Cardstock using the second to largest circle in the Layering Circles dies. 


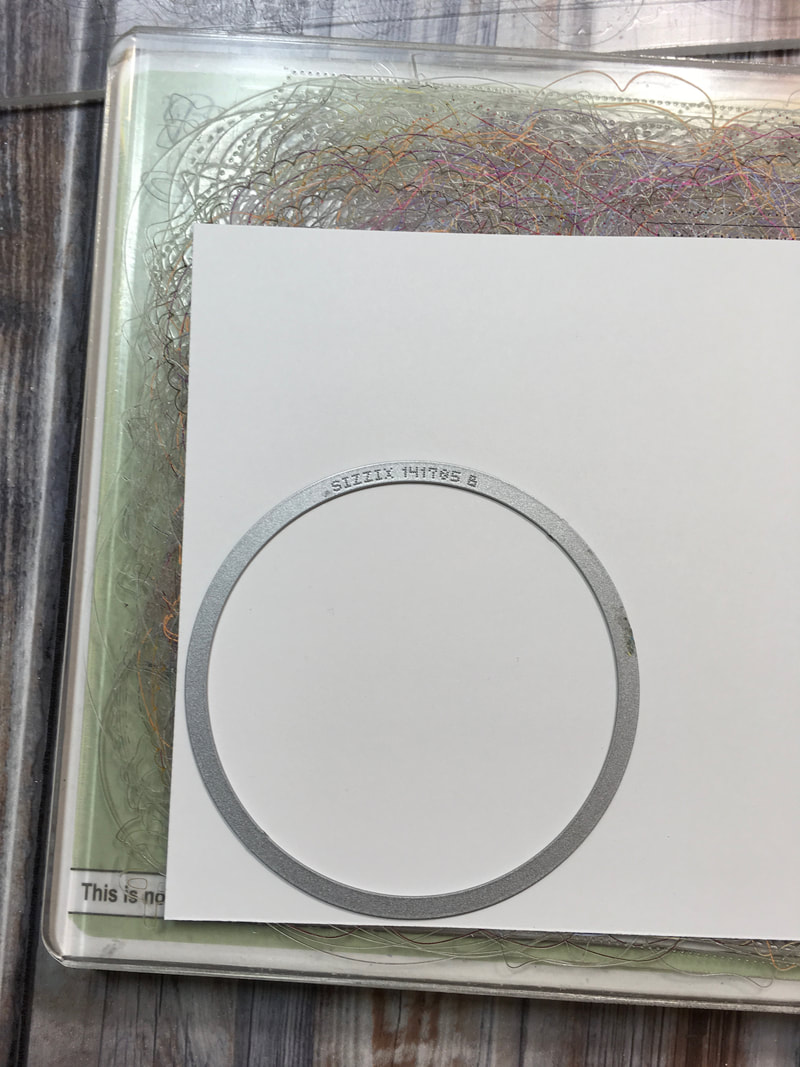
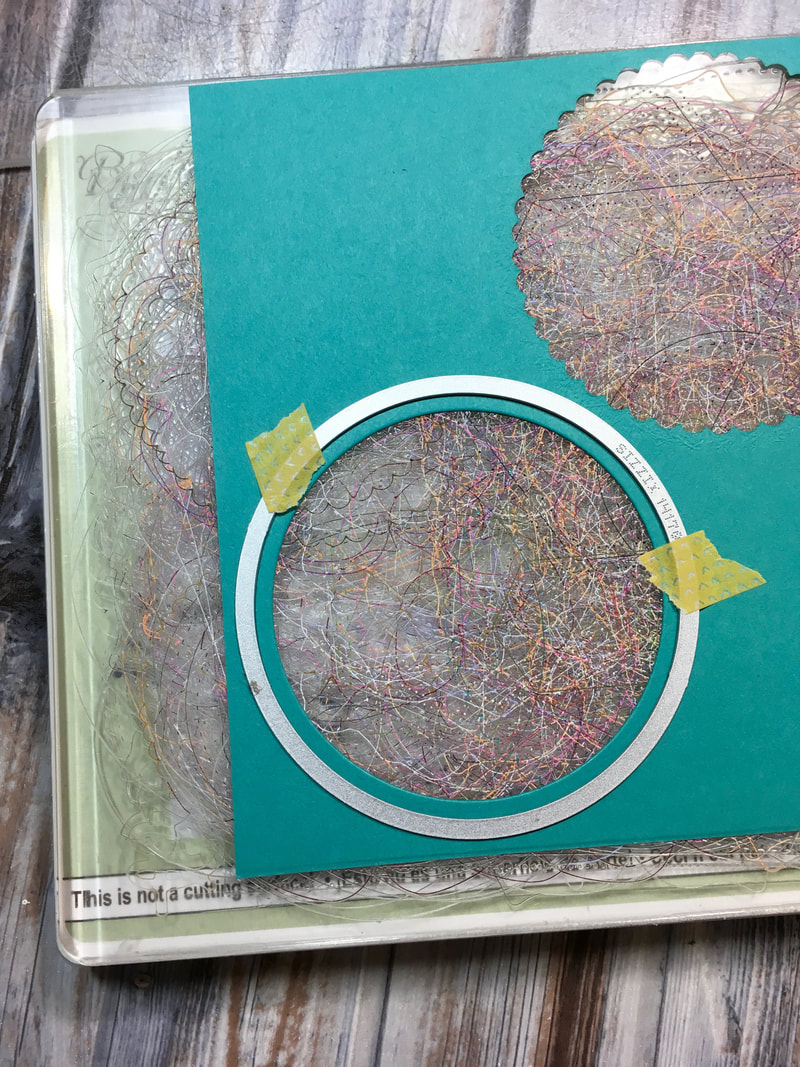
To create the thin Bermuda Bay circle frame, I used the largest and the second to largest circles in the Layering Circles dies. I started by cutting the smaller circle first. Then, I carefully laid the larger circle over the opening ensuring that it was centered. I used a couple of pieces of washi tape to hold it in place while I was cutting. 
The white circle I had previously cut fits perfectly in this frame. I stamped a sentiment from a very old, very retired All-Year Cheer stamp set on the right side of the Whisper White circle. 
Picture
Picture
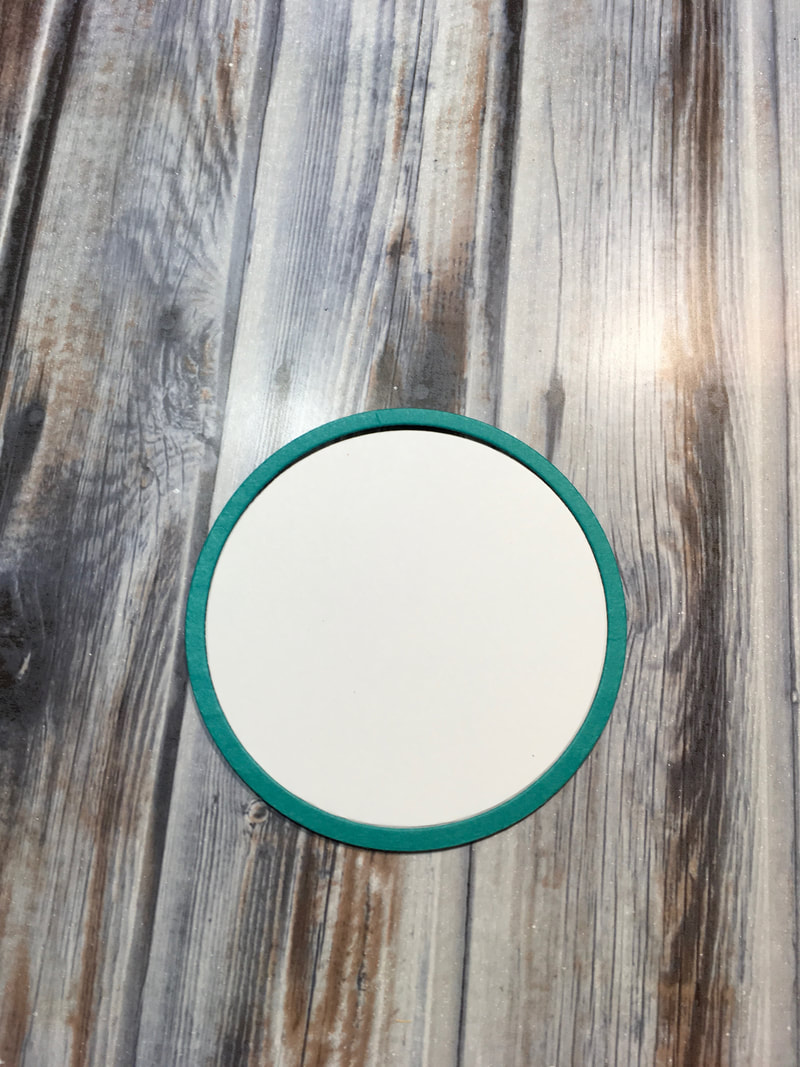
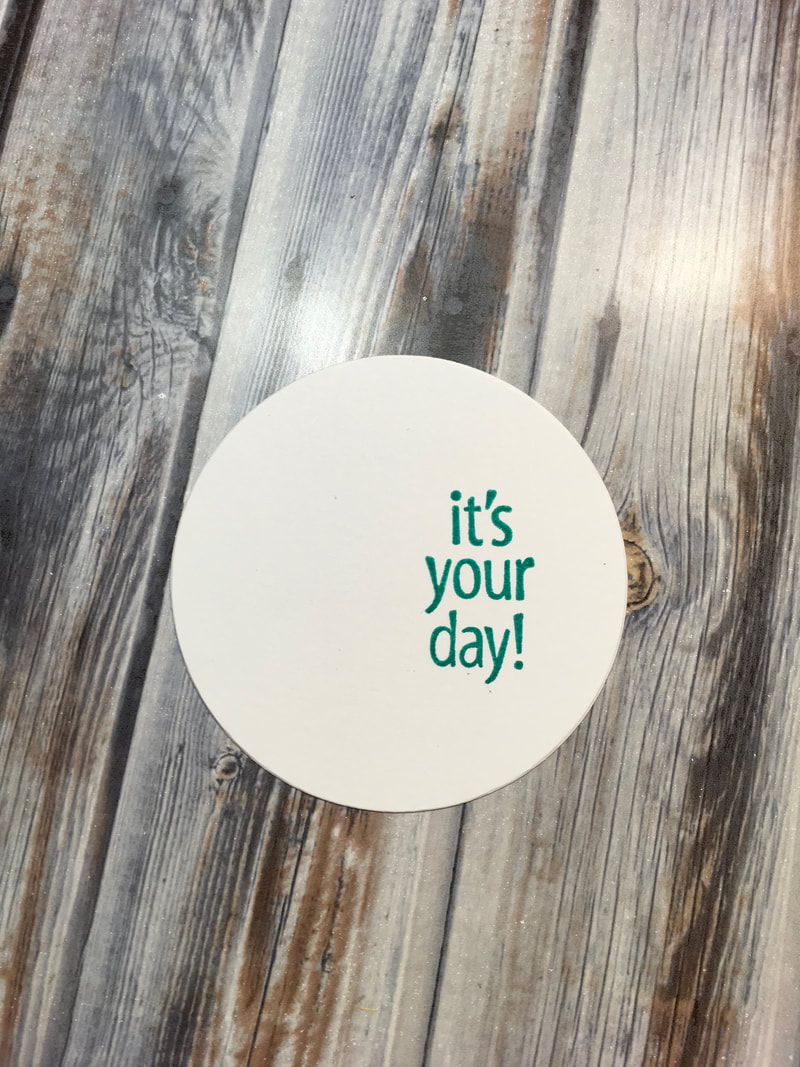
Now comes the slightly tricky part. I attached the Whisper White circle to the front of the card but only put glue on the right half (this will be the left half of your white circle when it's upside down). Then I attached the Bermuda Bay circle frame to the front but glued only the left half. Now you can see how the card fits together to open and close. 
Finally, I arranged my flowers on the front of the card and carefully glued them in place. It's important to only put glue where they will touch the Granny Apple Green or Bermuda Bay cardstock. You don't want to glue any of the flowers to the Whisper White cardstock as this will prevent the card from opening. I finished the whole thing off with a few of the enamel dots I had previously made. 
Picture
Picture
Picture
If you have questions on creating this Wow! card, leave a comment. Or, show me your own gate fold cards. I love to see your creations! 
2 Comments

Manic Monday: paper pumpkin

7/2/2019

0 Comments

 
Sometimes Manic Mondays last longer than just one day. Paper Pumpkin is a great way to craft when Monday seems to last the whole month. It's also the perfect solution for crafting on the go whether you're vacationing at a cabin in the woods or a villa on the beach. 

Paper Pumpkin is a monthly craft box that can be purchased one month at a time or as an on-going subscription. Each kit includes an exclusive stamp set, a Stampin' Spot, and all of the paper and accessories to create that month's projects. At only $22 a month, it's a steal!

Ready to get started stamping with Paper Pumpkin? Click to start your subscription. 

Picture
subscribe to paper pumpkin
Picture
Have questions?
Comment below or contact me at stampin_heidi@yahoo.com. 

Already have Paper Pumpkin? I would love to see your creations. Share a photo in the comments section. 

0 Comments
    Heidi Collins, Independent Stampin' Up! Demonstrator with On Y Go! Stamping
    Get updates and ideas on my Facebook group
    Heidi Collins, Independent Stampin' Up! Demonstrator and Owner of On Y Go! Stamping
    Shop for Stampin' Up! stamps, inks, paper, tools, and embellishments with Heidi Collins and earn points towards FREE stamps!
    Picture
    Picture
    On Y Go! Stamping YouTube channel with Card Making Videos on how to do rubber stamping, card making, scrapbooking, and paper crafting

    Archives

    March 2023
    February 2023
    January 2023
    December 2022
    November 2022
    October 2022
    September 2022
    August 2022
    July 2022
    June 2022
    May 2022
    April 2022
    March 2022
    February 2022
    January 2022
    December 2021
    November 2021
    October 2021
    September 2021
    August 2021
    July 2021
    June 2021
    May 2021
    April 2021
    March 2021
    February 2021
    January 2021
    December 2020
    November 2020
    October 2020
    September 2020
    August 2020
    July 2020
    June 2020
    May 2020
    April 2020
    March 2020
    February 2020
    January 2020
    December 2019
    November 2019
    October 2019
    September 2019
    August 2019
    July 2019
    June 2019

Powered by Create your own unique website with customizable templates.
  • About
  • Online Card Classes
  • Card Making Ideas
  • Stampin' Up! Catalogs
  • Card Tutorials
  • Contact
  • Shopping Rewards
  • Shop
  • Join Stampin' Up!