• About
  • Online Card Classes
  • Card Making Ideas
  • Stampin' Up! Catalogs
  • Card Tutorials
  • Contact
  • Shopping Rewards
  • Shop
  • Join Stampin' Up!
ON Y GO! STAMPING
  • About
  • Online Card Classes
  • Card Making Ideas
  • Stampin' Up! Catalogs
  • Card Tutorials
  • Contact
  • Shopping Rewards
  • Shop
  • Join Stampin' Up!

Family Thanksgiving Craft: Turkey Place Cards

10/30/2020

2 Comments

 
Quick and easy Thanksgiving craft that is perfect for kids. These cute turkey place cards with brighten any Thanksgiving table.
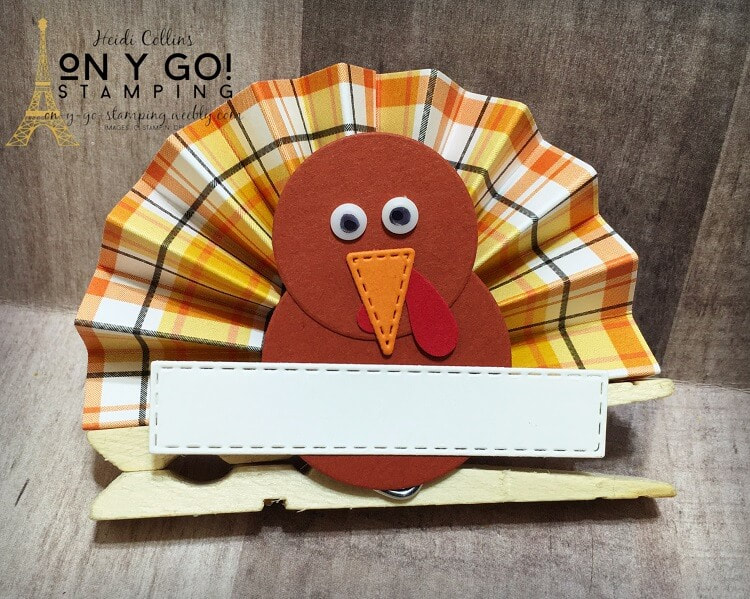
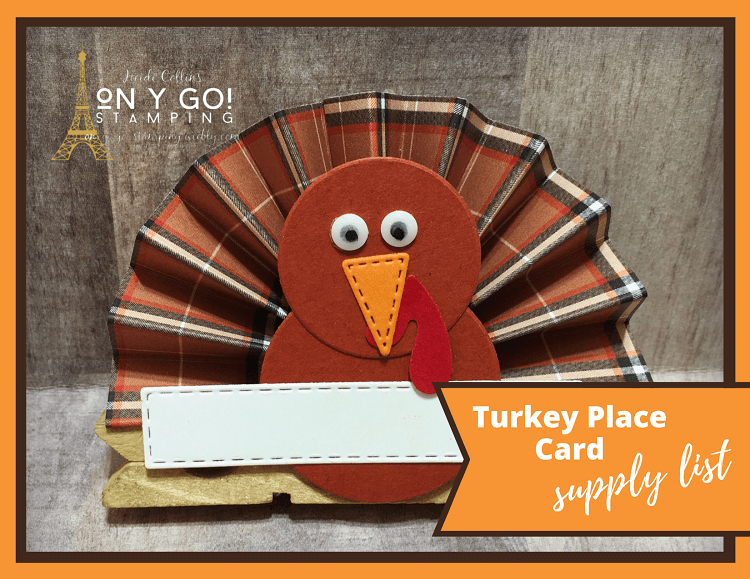
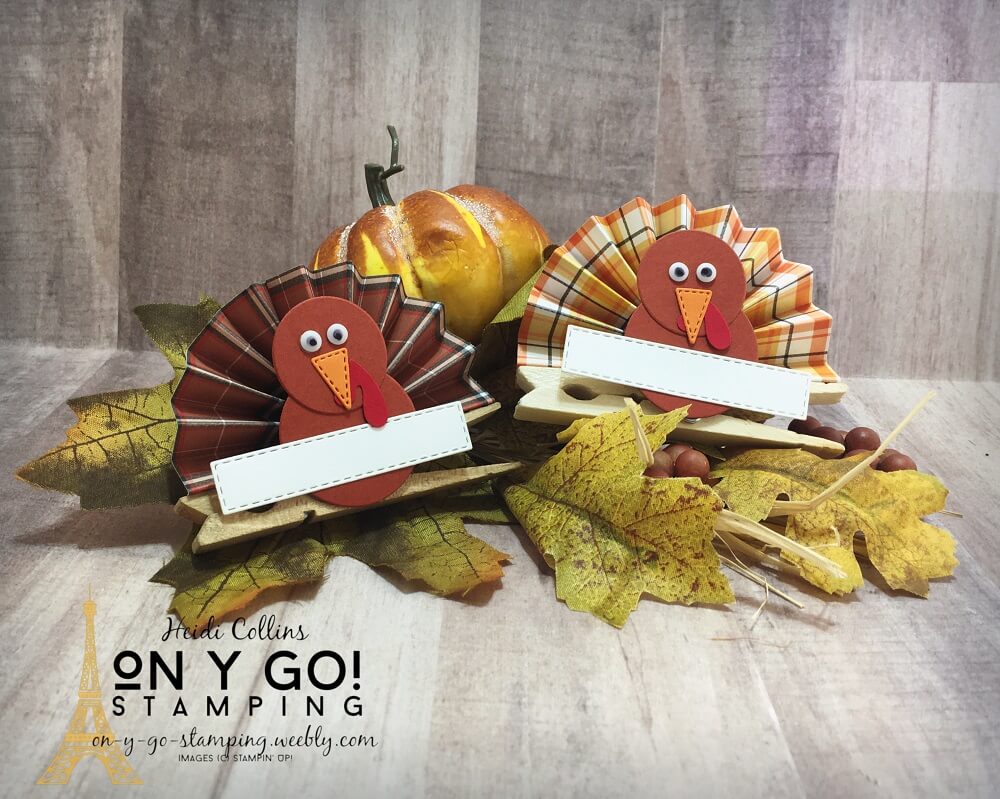
Last week, I saw these cute little turkey place cards made by Monika Davis. I loved them so much that I just had to try a couple. They use some of the awesome Plaid Tidings patterned paper from Stampin' Up! and a variety of punches and dies. They are quick and easy to make and would be a great craft to make with kids (or on your own!) to help create a festive Thanksgiving table. You'll find the link to a video below and the complete cutting dimensions and supply list. So, on y go! Let's get stamping.
Thanksgiving craft - this cute turkey place card is a perfect kids' craft and is a fun Thanksgiving decoration to brighten your table.

Cutting dimensions for this cute Thanksgiving craft

Patterned Paper: 6" x 3" (or two strips 6" x 1 1/2")
Cajun Craze cardstock: cut with the two smallest circles from the Layering Circles Dies
Pumpkin Pie cardstock: cut with the smallest triangle from the Stitched Triangle Dies
Real Red cardstock: punched with the Whale Builder punch
Whisper White: cut with the smallest die from the Stitched Rectangle dies
Clothes pin (about 3 inches)
All the Trimmings Embellishments
Click here for the complete supply list to make this adorable turkey place card. If you need any (or all) of the supplies, simply check the boxes for the ones you need and click "Add to Cart."

Need help ordering? Don't hesitate to contact me!
Supply list to create a fun Thanksgiving Craft. This turkey place card is easy to make and a perfect craft for kids!
2 Comments

Ridiculously Awesome Goats

10/28/2020

0 Comments

 
Trio of cards using the Ridiculously Awesome and Way to Goat stamp sets from Stampin' Up! with the Playing with Patterns patterned paper and Curvy dies.
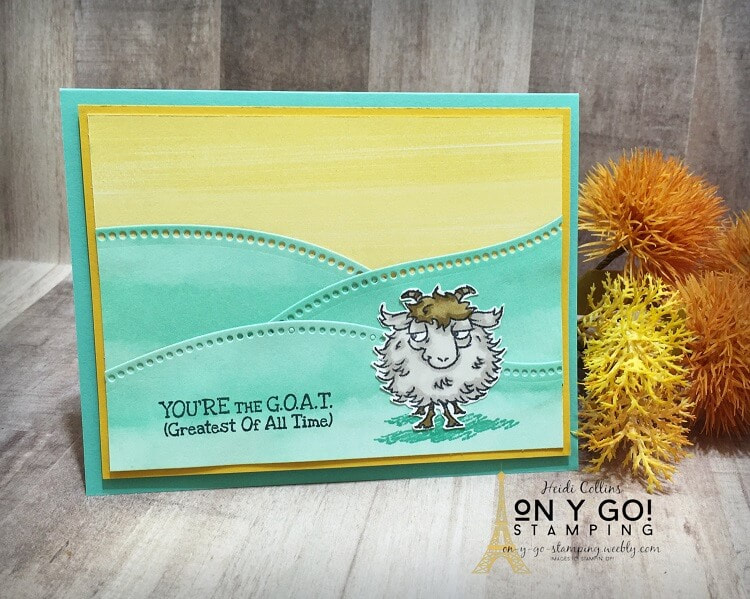
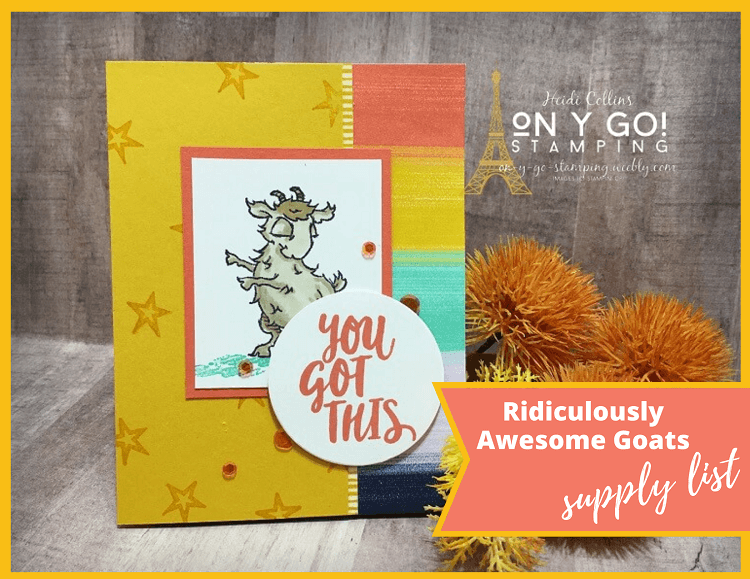
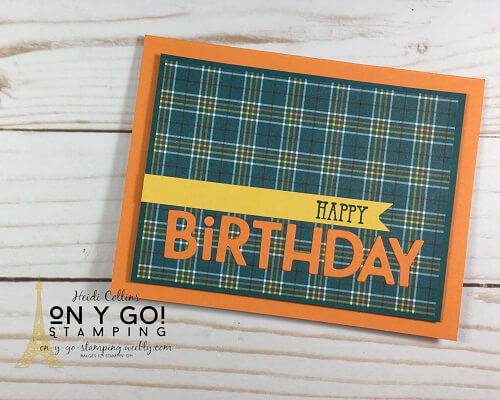
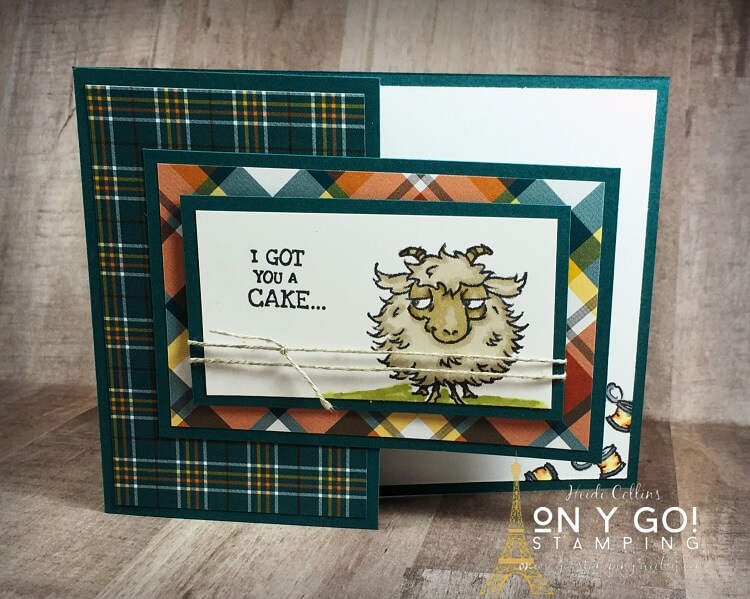
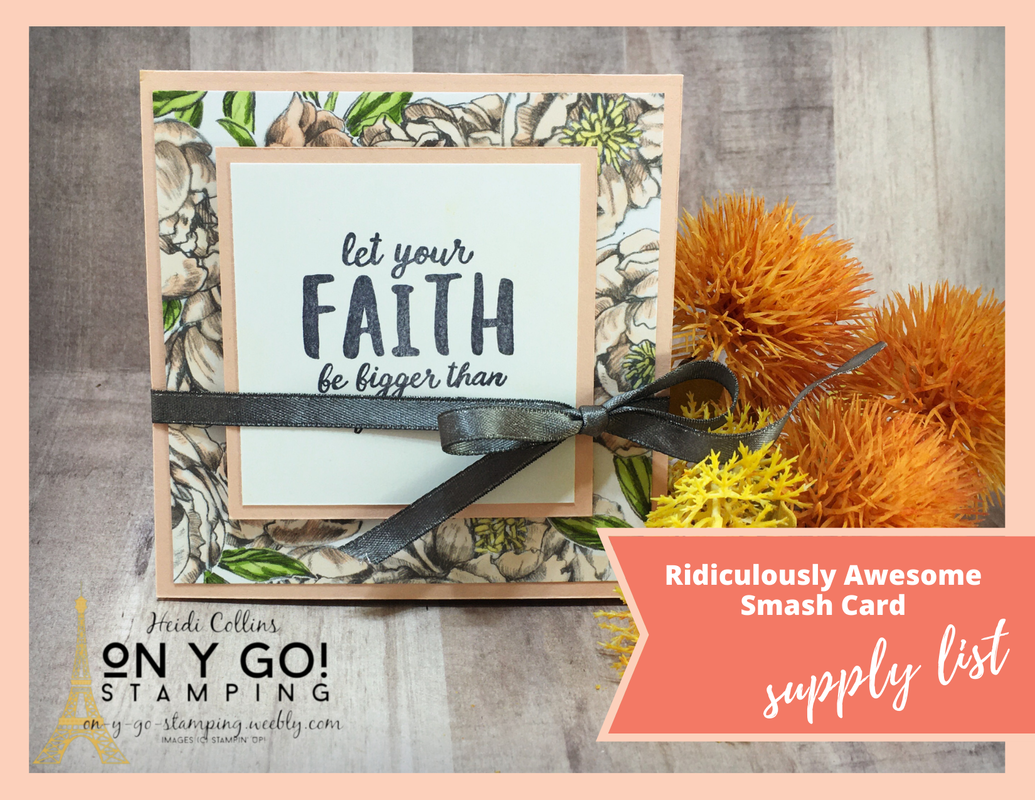
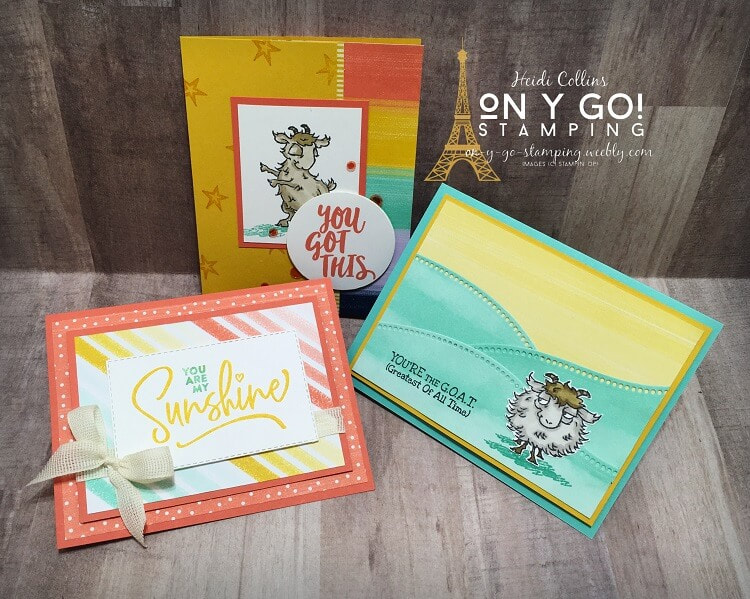
Last night's Card Class and Game Night featured the Playing with Patterns Designer Series Paper and the Way to Goat and Ridiculously Awesome stamp sets from Stampin' Up! Have I mentioned how much I love these goats?! They're just so dang cute! So, on y go! Let's get stamping.
Card making idea using the Ridiculously Awesome and Way to Goat stamp sets from Stampin' Up! These stamps pair well with the Playing with Patterns patterned paper.
This cute little guy is doing a happy dance to cheer you on because you got this! 

Cutting Dimensions for the Dancing Goat Card Idea

  • Crushed Curry (base): 5 ½” x 7”, score at 4 ¼”
  • Calypso Coral (layer): 2 ½” x 3”
  • Whisper White (stamped): 2 ¼” x 2 ¾”
  • Whisper White (circle): 2 ¼” x 2 ¼”, cut with the Layering Circle die
  • Whisper White (interior): 5 ¼” x 4”
  • Playing with Patterns Designer Series Paper (front): 5 ½” x 2 ½”
  • Playing with Patterns Designer Series Paper (front): 5 ½” x ¾”
  • Playing with Patterns Designer Series Paper (interior): 5 ½” x 2 ½”
To get the patterned paper properly adhered to the front flap, I started by gluing the thin strip of the Playing with Patterns patterned paper under the front flap. Then, I carefully laid the wider strip of Playing with Patterns DSP on the interior of the card so that the edge lined up with the right edge of the interior of the card. I put a thin line of glue on the end of the interior of the card front and then closed the card to adhere the patterned paper in just the right spot.

Cutting Dimensions for the You Are my Sunshine Card Design

  • Calypso Coral (base): 8 ½” x 5 ½”, score at 4 ¼”
  • Calypso Coral (layer): 4 ¾” x 3 ½”
  • Whisper White (stamped): 3 ¾” x 2 ¼”, cut with the Stitched Rectangle dies
  • Whisper White (interior): 5 ¼” x 4”
  • Playing with Patterns Designer Series Paper (front): 5 ¼” x 4”
  • Playing with Patterns Designer Series Paper (layer): 4 ½” x 3 ¼”
Sunshine card idea using the Ridiculously Awesome stamp set and the Playing with Patterns patterned paper from Stampin' Up!
Card design using the Way to Goat stamp set and Curvy dies from Stampin' Up! with the Playing with Patterns patterned paper.
This little side-eye goat is hanging out in a countryside of Playing with Patterns Designer Series Paper cut with the new Curvy dies available starting November 1. 

After coloring the goat with Stampin' Blends

Cutting Dimensions for the G.O.A.T Card Design

  • Coastal Cabana (base): 8 ½” x 5 ½”, score at 4 ¼”
  • Crushed Curry (layer): 5 3/16” x 3 15/16”
  • Whisper White (stamped): 1 ¾” x 2”
  • Whisper White (interior): 5 ¼” x 4”
  • Playing with Patterns Designer Series Paper (front): 5” x 3 ¾”
  • Playing with Patterns Designer Series Paper (front): (3) 5” x 2”, cut with the Curvy dies

Supply List for These Ridiculously Awesome Card Ideas

Click here for the supply list to create these ridiculously awesome goat cards. If you need to add any of these supplies to your stash, just check the ones you'd like, then press "Add to Cart."
Supply list for a trio of card ideas using the Ridiculously Awesome and Way to Goat stamp sets from Stampin' Up! with the Playing with Patterns Designer Series Paper.
0 Comments

Playing with Texture and Paper Scraps

10/26/2020

9 Comments

 
Card making idea for a beautifully simple card design using embossed strips of white cardstock to create an array of texture. This card also uses the Well Written dies from Stampin' Up!
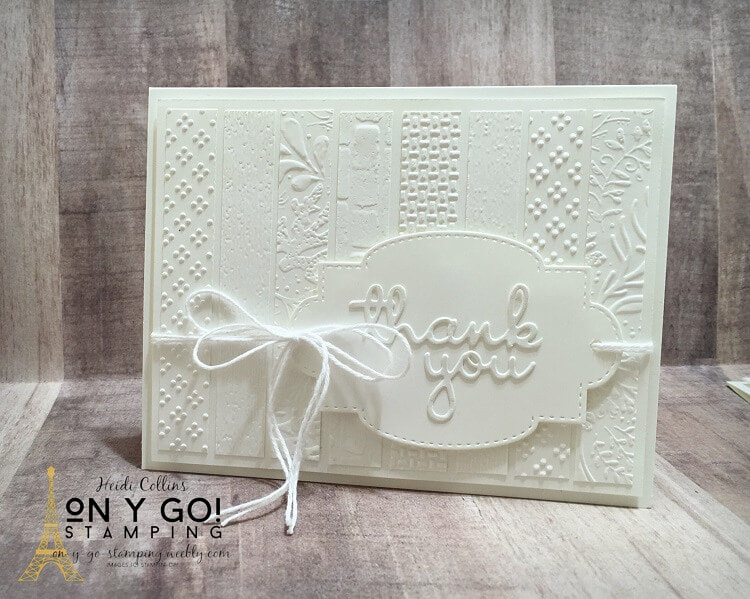
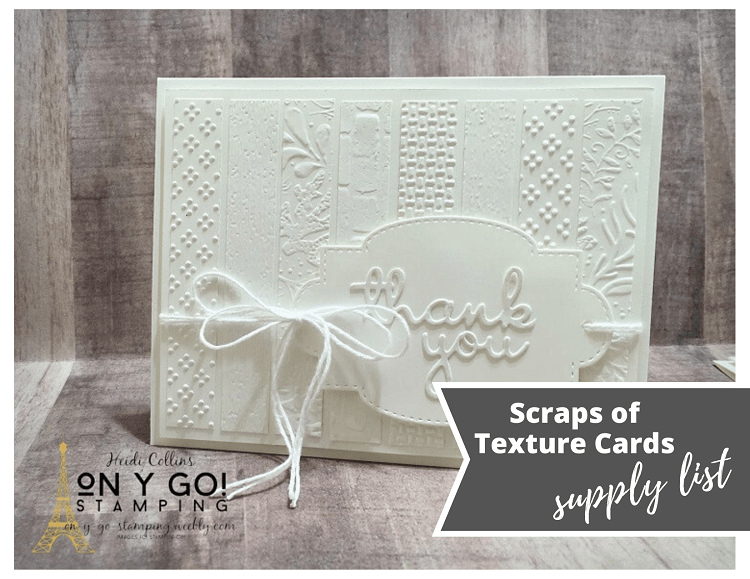
Today's cards are all about texture! I have lots and lots of half-inch strips of white cardstock. When I trim Whisper White cardstock for the inside of my cards it results in half-inch leftover. I put these in a bin and use them for sentiment strips. But there's no hope of ever using them all up. So today, I decided to come up with card making ideas that use half-inch strips of white paper scraps. The resulting card designs are white on white with lots and lots of texture!

I'm also taking part in Kylie Bertucci's International Blog Highlights Winners Hop. The theme for the hop is giving thanks and I want to say thank you to everyone who voted for my card a few weeks ago! (See it here.) I appreciate your support so much - thank you, thank you, thank you! 
Picture
Be sure to go all the way through my post and look for the list of participants at the end. Then hop over to their blogs as well to see their gorgeous designs! It's such an honor to be hopping with this amazing group of designers. ​So, on y go! Let's get stamping.
Elegant birthday card design using embossed strips of white cardstock. This beautifully simple card making idea also uses the Playful Alphabet dies.

Directions for making these Texture-rich cards

I started by embossing the paper scraps with a variety of embossing folders. I used the Wrapped in Texture, Subtle 3D, Seabed, Brick & Mortar, and Tasteful Textile embossing folders. For the top card, I cut 8 strips so that they were 3 3/4" long. For the card to the left, I cut 6 strips so that they were 5" long. I adhered these strips of cardstock scraps to a piece of 5 1/4" x 4" Whisper White cardstock which was then adhered to a standard Whisper White card base that is 8 1/2" x 5 1/2", scored at 4 1/4".
For this thank you card, I cut the words using the Well Written dies and adhered them to a label cut with the Stitched So Sweetly dies. I tied the front with a couple of pieces of leftover white baker's twine. 

The birthday card uses the Playful Alphabet dies. I adhered my cardstock to pieces of foam adhesive sheets and then cut the letters and numbers. This gives them lots of height. I adhered them to a rectangle cut with the Stitched Rectangle dies and added a bow of Polka Dot Tulle.
Thank you card idea using strips of white cardstock that have been embossed to create a card full of texture. The card design also uses the Well Written dies from Stampin' Up!
White on white card design using scraps of cardstock that have been embossed and woven to create a card front. Card idea also uses the Joy dies from Stampin' Up!
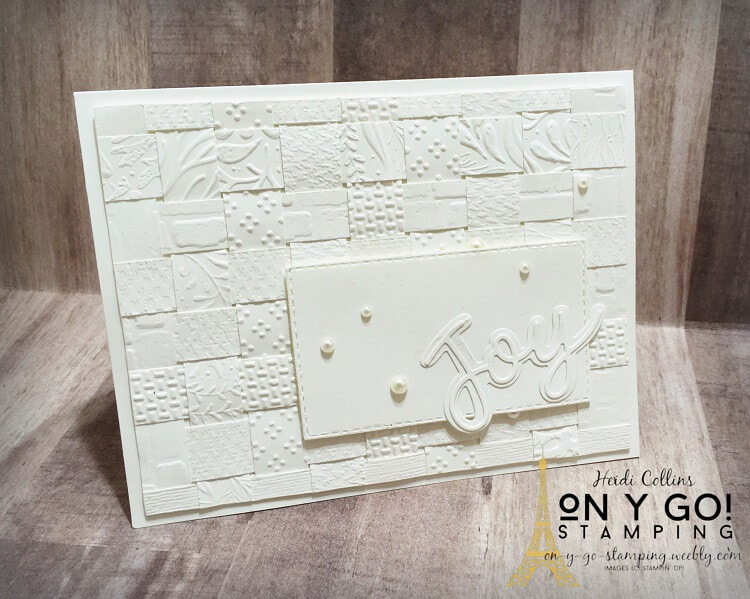
For my final card, I took longer strips, which I had also embossed, and created a basket weave. I adhered this to a piece of 5 1/4" x 4" Whisper White cardstock. Then, I trimmed the edges of the strips of cardstock to match the edge of the piece of 5 1/4" x 4" cardstock. I also glued the ends of the flaps on the front of the card so that everything would stay neatly woven together. Then, I glued this to a standard Whisper White card base (8 1/2" x 5 1/2", scored at 4 1/4"). 

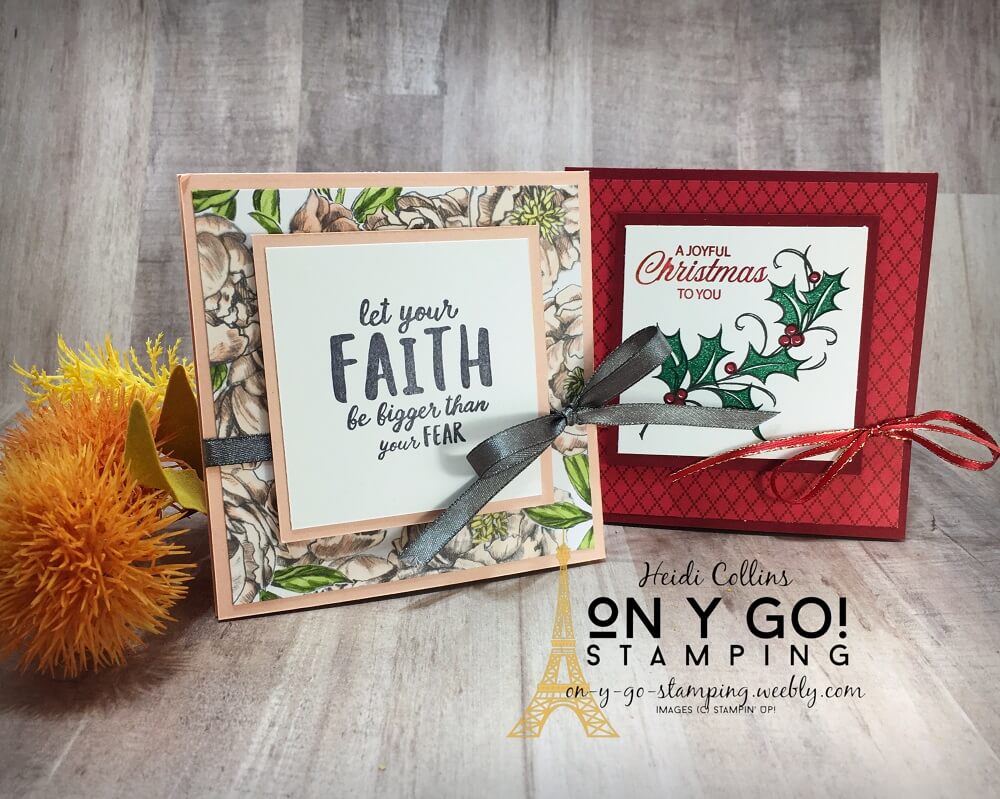
For the greeting, I used the Joy dies and adhered the cut pieces to another rectangle cut using the Stitched Rectangles dies. I added a few pearls for a little shine. 

Supply List for these Textured Paper Scraps Cards

Click here to see the complete supply list for these cards. If you need to order supplies, simply check the items you need and click "Add to Cart."
Supply list for a series of card making ideas that use strips of cardstock that have been embossed. These beautiful white cards are rich in texture.
Picture
​

Starting at 5:00 PM eastern (New York time), Kylie Bertucci's International Blog Highlights Winners Hop will be going live! I hope you'll take a moment to check out all of these fabulous designers!
9 Comments

Patterned Paper Sale!

10/23/2020

0 Comments

 
Picture
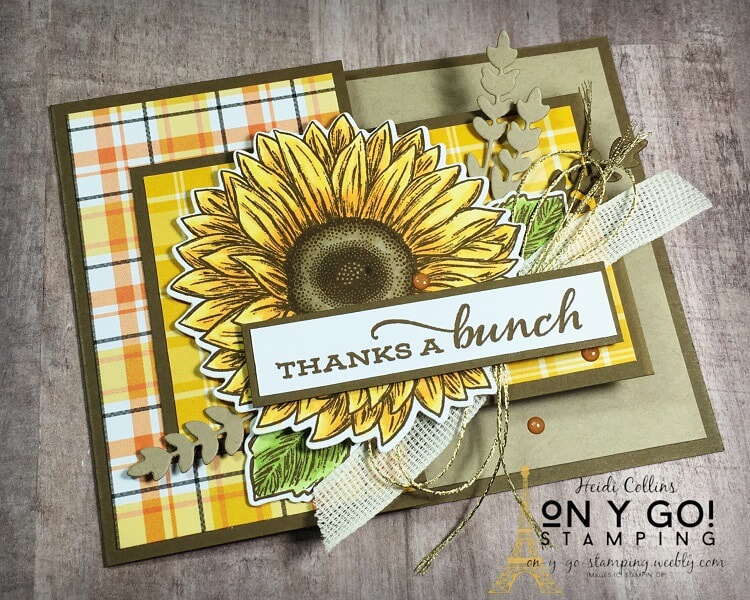
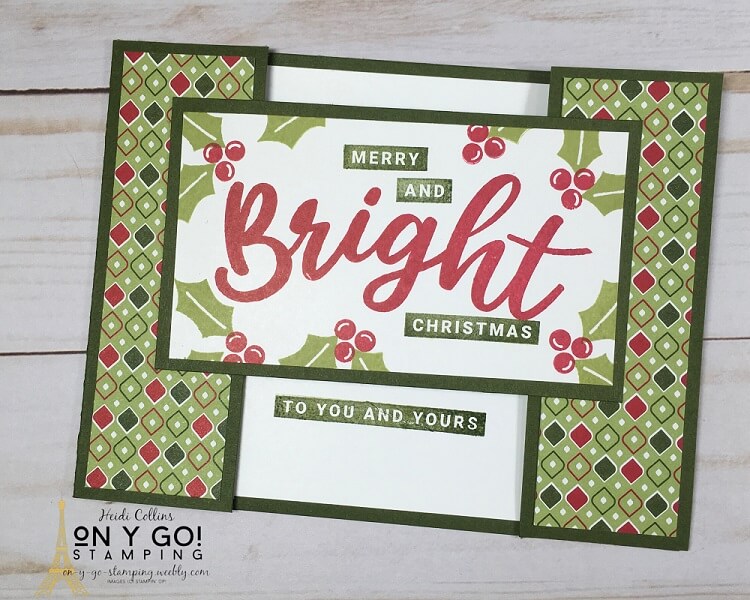
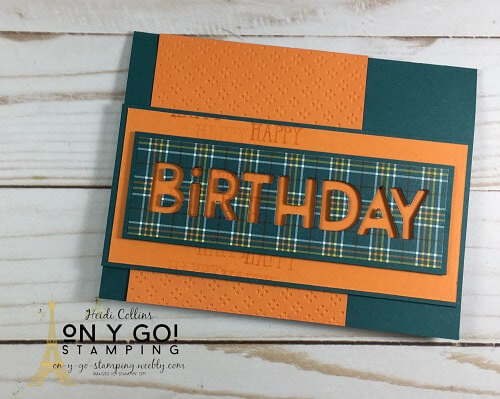
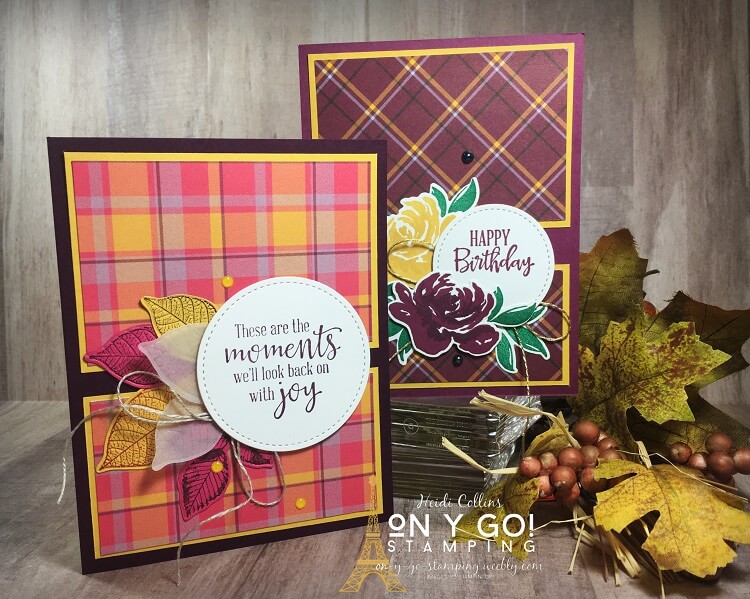
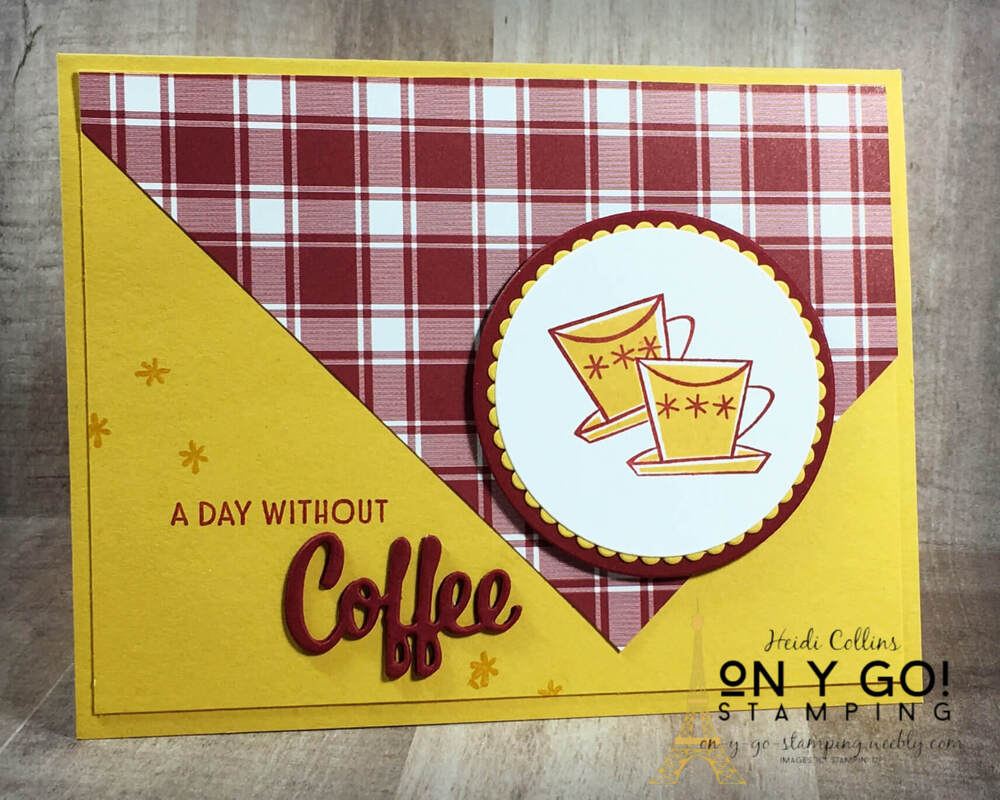
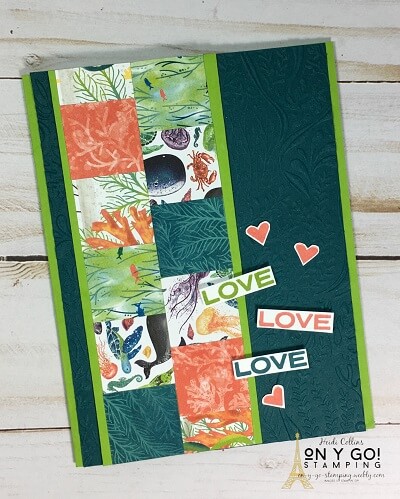
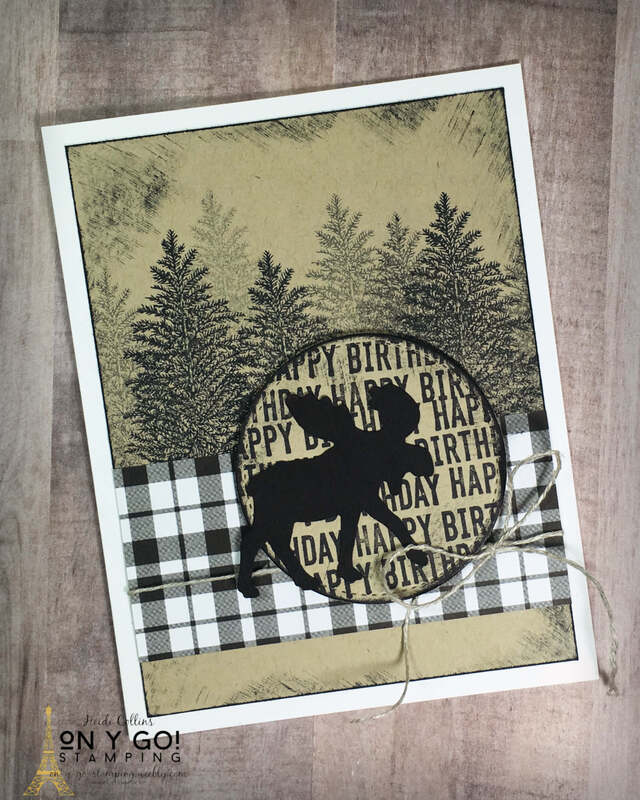
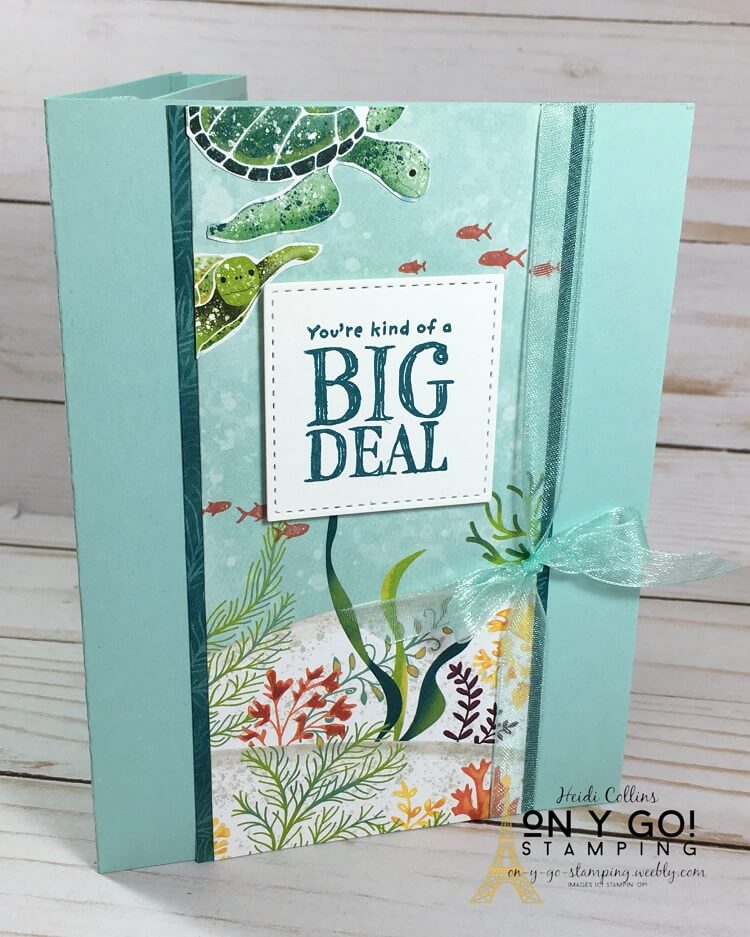
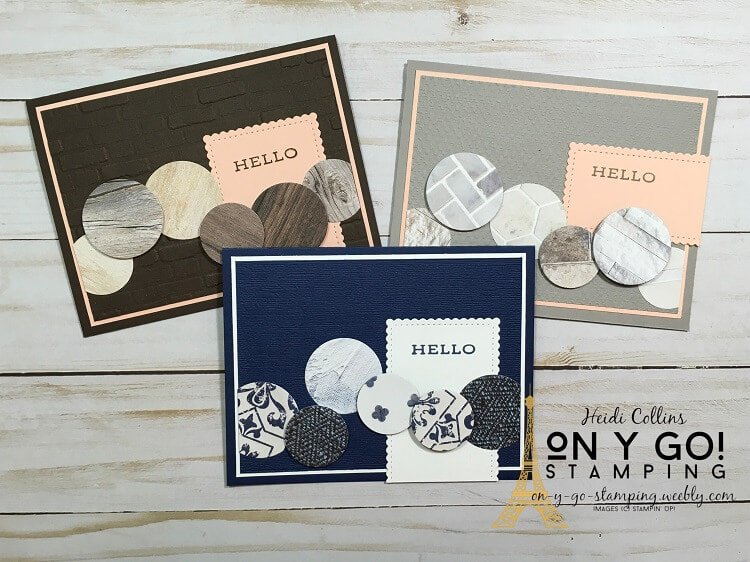
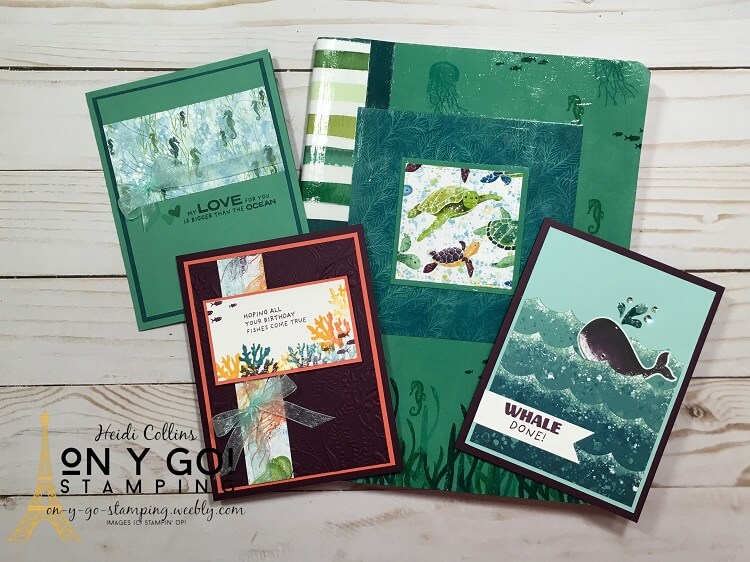
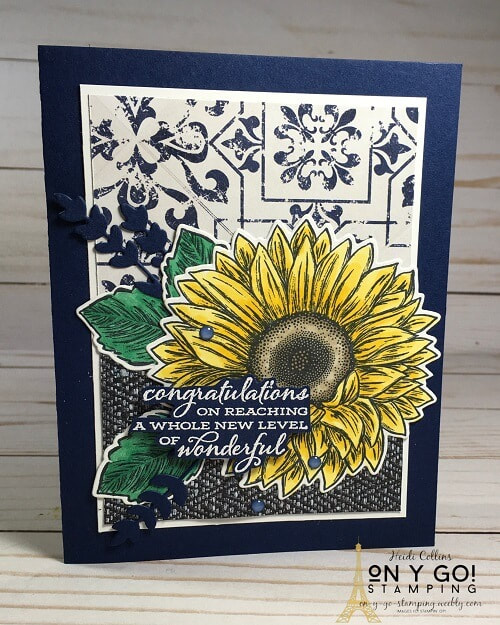
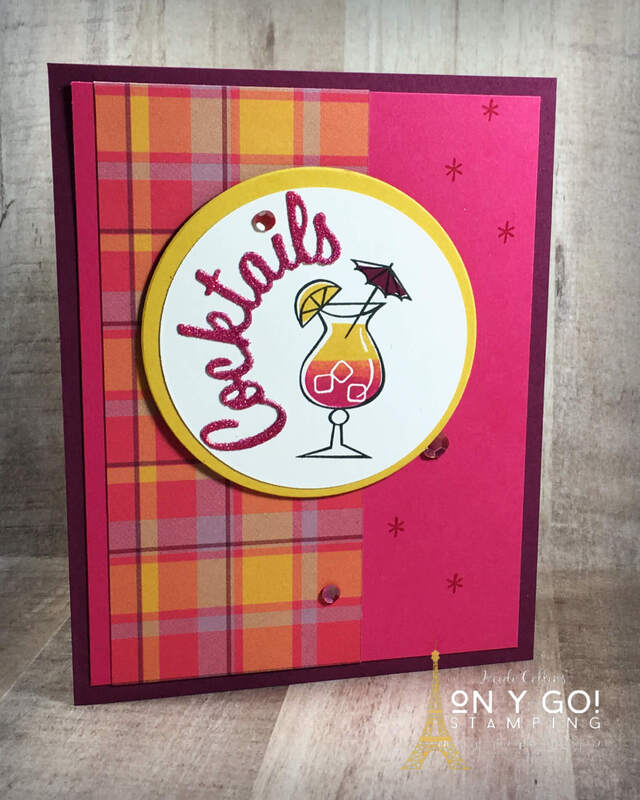
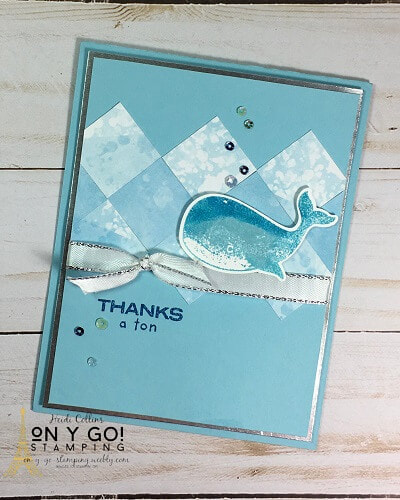
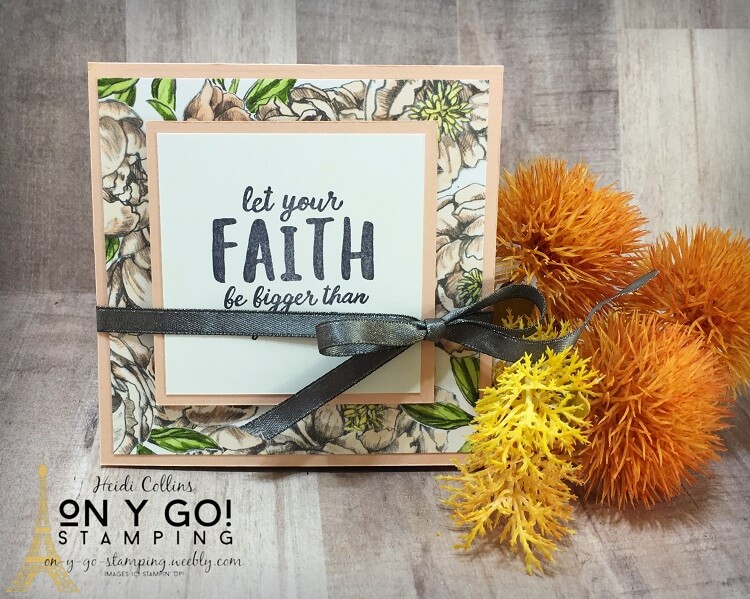
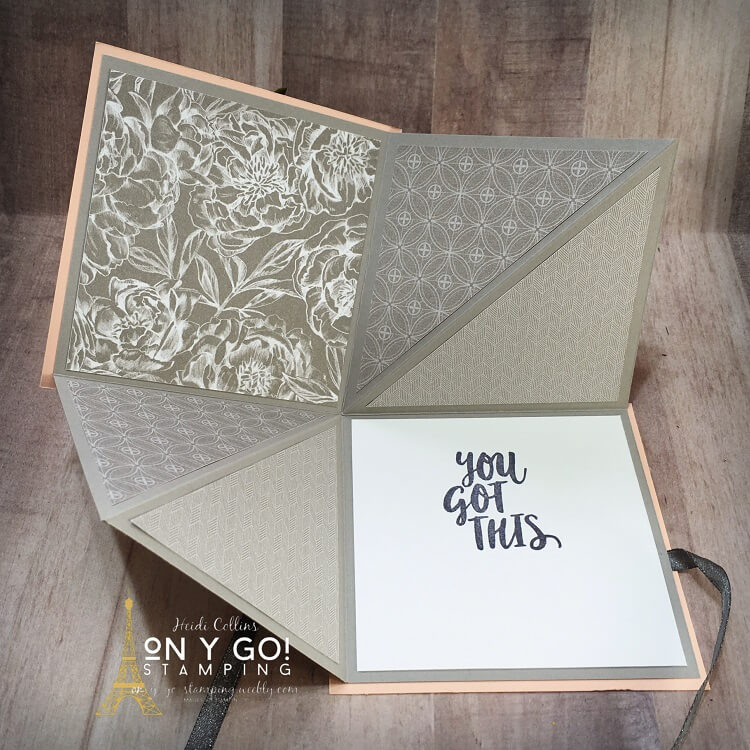
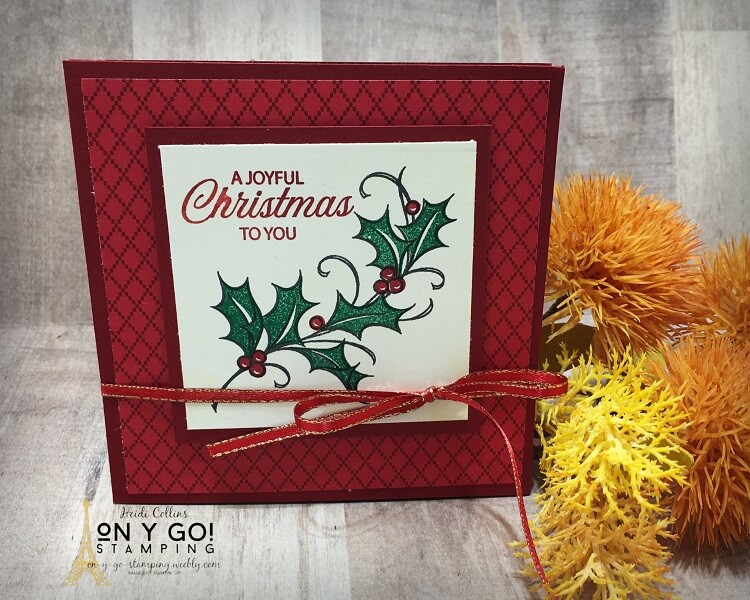
All of these gorgeous packages of patterned paper are on sale for the month of October. That means, you have one week left to take advantage of this Designer Series Paper sale goodness. To get your creative juices flowing, I thought I would look back on a variety of cards I've made using all of this yummy goodness. So, on y go! Let's get stamping.

Click on each photo to go back to the blog post about that photo with all the details, dimensions, and supply lists.
Picture
Picture
Picture
Picture
Picture
Picture
Picture
Picture
Picture
Picture
Picture
Picture
Picture
Picture
Picture
Picture
Picture
Picture
Picture
Picture
Picture
Picture
Picture
0 Comments

Fun Fold Card Idea: Smash Card

10/21/2020

0 Comments

 
Fun Fold Card Making Idea. This fancy fold card is a smash card and the samples feature the Ridiculously Awesome and Joyful Holly stamp sets from Stampin' Up!
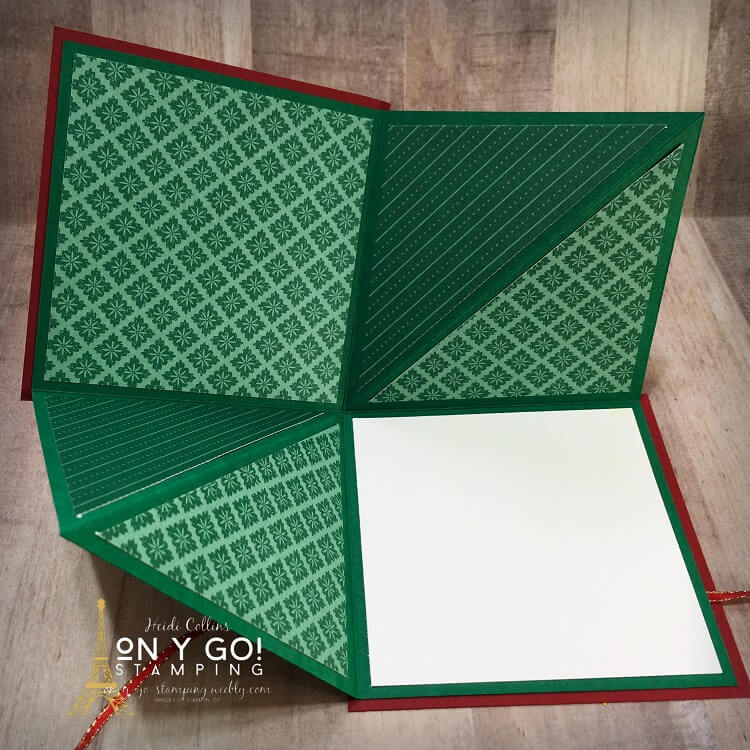
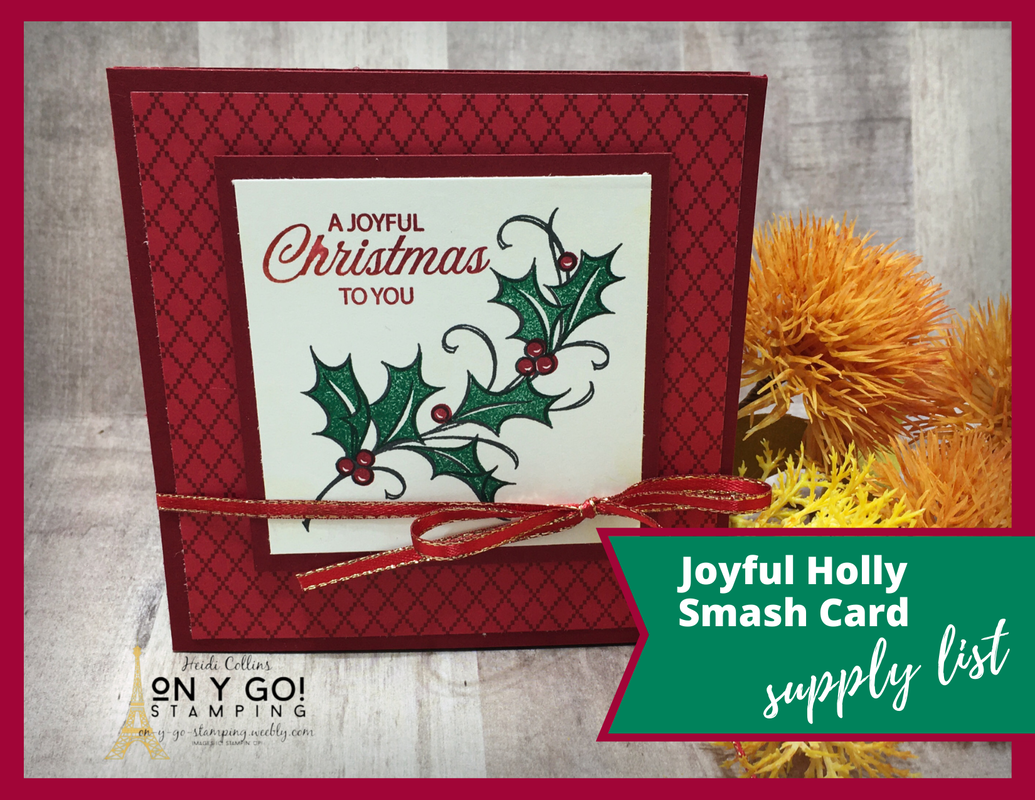
I love these little smash cards. It's a great fun fold card idea that is perfect for showing off patterned paper. We made them last night for Mystery Stamping and had a great time! If you haven't joined the Facebook Group and done Mystery Stamping, I hope you'll join us soon! We do Mystery Stamping every Tuesday night at 8:00 PM eastern except for the last Tuesday night of the month when we have a card class and game night. Ok, on y go! Let's get stamping.

Fun Fold Card Dimensions

Cardstock:
  • (2) 4 ¼” x 4 ¼”
  • 3” x 3”
Coordinating Cardstock: 8” x 8”
White or Vanilla Cardstock:
  • 3 ¾” x 3 ¾”
  • 2 ¾” x 2 ¾”
Patterned Paper:
  • 4” x 4”
  • 3 ¾” x 3 ¾”
  • (2) 3 ½” x 3 ½”

Instructions for Creating this Fun Fold Card

1. Score the piece of 8” x 8” cardstock at 4” on both sides.
​
​2. ​Score the piece of 8” x 8” cardstock diagonally from one corner to the other passing by the center. Only do this on one diagonal.
Smash card using the Ridiculously Awesome stamp set from Stampin' Up! This fun fold card also uses the Peony Garden Designer Series Paper.
Inside of a fun fold card using the Peony Garden patterned paper from Stampin' Up! This smash card is quick and fun to make!
Smash card using the Joyful Holly stamp set from Stampin' Up! This fun fold card also uses the 'Tis the Season Designer Series Paper.
Inside of a fun fold card. This smash card uses the 'Tis the Season patterned paper from Stampin' Up!
3. Lay the 8” x 8” square in front of you. Fold the square from left to right and open.
​
4. Then, fold the square from bottom to top and open.

​5. Now, fold the 8” x 8” cardstock backwards along the diagonal score line and open it back up.

6. Push the triangular areas inward, pushing the diagonal fold towards the center. The sides will fold automatically as you do this so that the piece folds flat into a 4” x 4” square.

7. Cut the 3 ½” x 3 ½” squares of patterned paper into triangles by cutting from one corner diagonally to the other corner. Each square should become 2 triangles.

8. ​Open your folded 8” x 8” cardstock. Adhere the triangles of patterned paper in the triangular areas of the cardstock on the inside.

9. Adhere the piece of 3 ¾” x 3 ¾” patterned paper to the upper left square of the piece of 8” x 8” cardstock. This should be on the inside as well.

10. Adhere the piece of 3 ¾” x 3 ¾” white or vanilla cardstock to the lower right square area.

11. Fold your 8” x 8” cardstock back into a 4” x 4” square so that the patterned paper is hidden on the inside.

12. Adhere one of the 4 ¼” x 4 ¼” pieces of cardstock to the front/top.

13. Adhere the piece of 4” x 4” patterned paper to the card front/top.

14. Adhere a piece of ribbon to the bottom of your piece of folded cardstock so that you will be able to wrap it around to the front of your card and tie it on one side.

15. Adhere the second piece of 4 ¼” x 4 ¼” cardstock to the bottom of the folded cardstock, over top of the ribbon.

16. ​Stamp a design, sentiment, or both on the piece of 2 ¾” x 2 ¾” white or vanilla cardstock. Color if needed.

17. Adhere the piece of 2 ¾” x 2 ¾” white or vanilla cardstock to the piece of 3” x 3” cardstock.

18. Adhere this to your card front/top and tie the ribbon.

19. Embellish as desired!

Fun fold card idea using the Ridiculously Awesome stamp set and the Peony Garden patterned paper from Stampin' Up!

Supply List for the Ridiculously Awesome Fun Fold Card

Click here to see the complete supply list for the Ridiculously Awesome Smash Card. If you need any of the supplies to make this card, simply check the boxes and click "Add to Cart."

Supply List for the Joyful Holly Fun Fold Card

Click here for the complete supply list and to order supplies for the Joyful Holly smash card.
Fun fold card idea using the Joyful Holly stamp set and the 'Tis the Season patterned paper from Stampin' Up!
0 Comments
<<Previous
    Heidi Collins, Independent Stampin' Up! Demonstrator with On Y Go! Stamping
    Get updates and ideas on my Facebook group
    Heidi Collins, Independent Stampin' Up! Demonstrator and Owner of On Y Go! Stamping
    Shop for Stampin' Up! stamps, inks, paper, tools, and embellishments with Heidi Collins and earn points towards FREE stamps!
    Picture
    Picture
    On Y Go! Stamping YouTube channel with Card Making Videos on how to do rubber stamping, card making, scrapbooking, and paper crafting

    Archives

    January 2023
    December 2022
    November 2022
    October 2022
    September 2022
    August 2022
    July 2022
    June 2022
    May 2022
    April 2022
    March 2022
    February 2022
    January 2022
    December 2021
    November 2021
    October 2021
    September 2021
    August 2021
    July 2021
    June 2021
    May 2021
    April 2021
    March 2021
    February 2021
    January 2021
    December 2020
    November 2020
    October 2020
    September 2020
    August 2020
    July 2020
    June 2020
    May 2020
    April 2020
    March 2020
    February 2020
    January 2020
    December 2019
    November 2019
    October 2019
    September 2019
    August 2019
    July 2019
    June 2019

Powered by Create your own unique website with customizable templates.
  • About
  • Online Card Classes
  • Card Making Ideas
  • Stampin' Up! Catalogs
  • Card Tutorials
  • Contact
  • Shopping Rewards
  • Shop
  • Join Stampin' Up!