• About
  • Online Card Classes
  • Card Making Ideas
  • Stampin' Up! Catalogs
  • Card Tutorials
  • Contact
  • Shopping & Rewards
  • Join Stampin' Up!
  • Color Picker
  • Favorite Things
ON Y GO! STAMPING
  • About
  • Online Card Classes
  • Card Making Ideas
  • Stampin' Up! Catalogs
  • Card Tutorials
  • Contact
  • Shopping & Rewards
  • Join Stampin' Up!
  • Color Picker
  • Favorite Things

Fun Folds for Christmas and Beyond

12/21/2019

7 Comments

 
Picture
I am so excited to be participating in the very first Magnolia Blog Hop today! These designers from around the globe have prepared some beautiful Christmas projects for you, so be sure to check out Ginny Harrell's Celebrate the Journey blog next. You can find the complete Blog Hop itinerary and links at the bottom of this post. 

You've probably already stamped, signed, and mailed your Christmas cards this year, but I wanted to share some of the cards I made using three different fun folds. These folds are great for Christmas or any occasion.


Picture
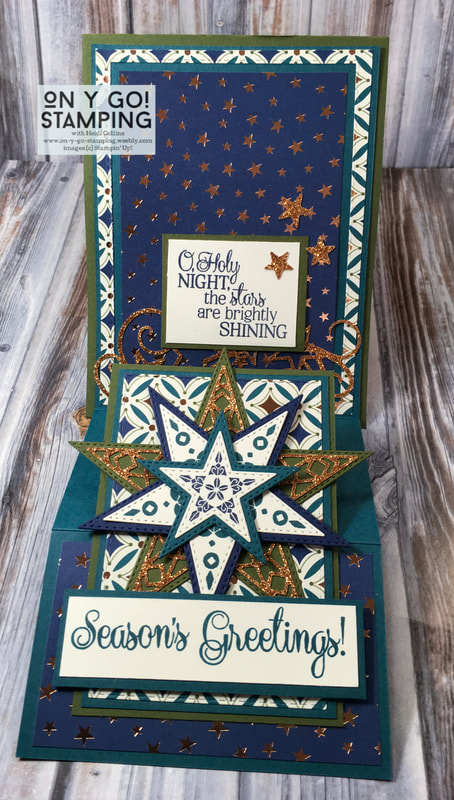
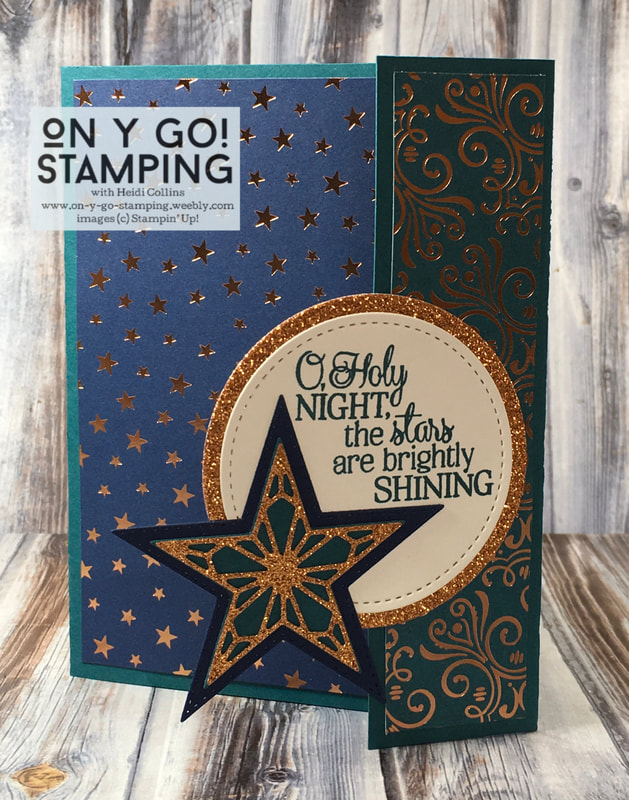
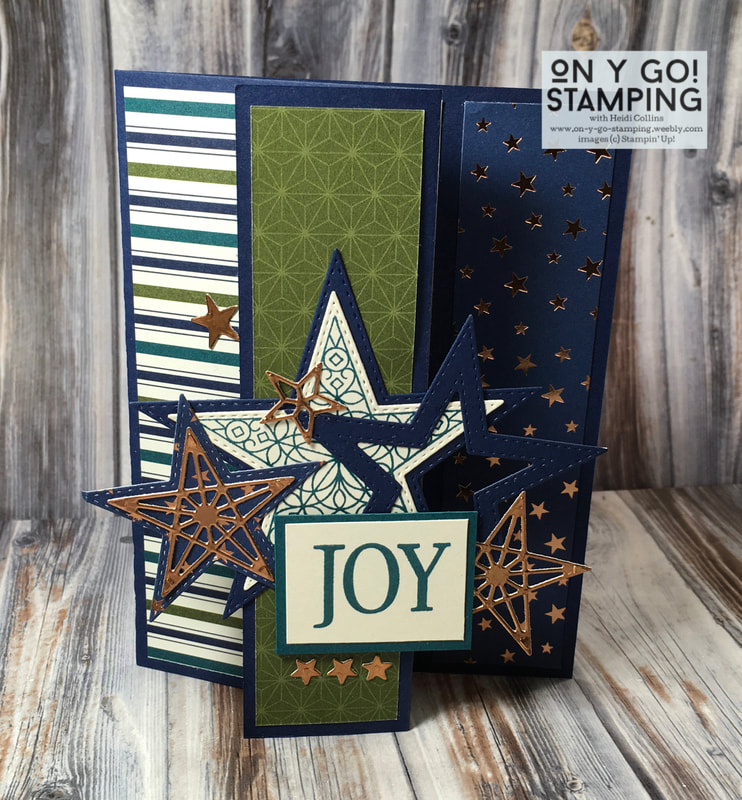
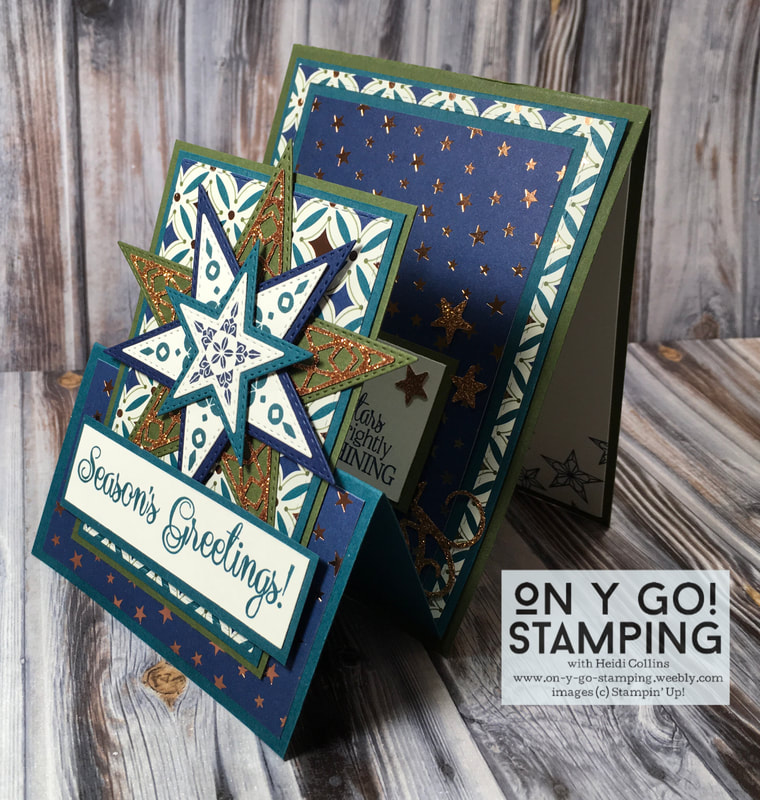
For the Christmas cards, I used the So Many Stars stamp set and dies with the Beautifully Gleaming Designer Series paper. Unfortunately, this gorgeous paper is sold out for this year, but Stampin' Up! has promised to bring it back next September! The stamps and dies will be retiring at the end of December, so if they're on your wish list, be sure to order them before they are gone. ​
Picture
This first card is a tri-fold card. This is created using two pieces of cardstock. The back is a piece of Mossy Meadow Cardstock that is 11" x 4 1/4" and is scored at 5 1/2". This piece is then simply folded in half. The front piece is Pretty Peacock cardstock and is 10 1/4" x 4". This piece is scored at 2 1/2" and 5". The folds are folded in different directions to create an accordion type fold as you can see in this photo. 

​I decorated it using paper from the Brightly Gleaming Designer Series Paper and Mossy Meadow, Night of Navy, and Pretty Peacock ink and cardstock. The star decorage on the front fold hides additional decoration on the layer behind. The card also lifts up to reveal an "inside" with an additional sentiment.
Picture
Picture
This second card features a flap on the right hand side. The central images on the card is attached to this flap. In addition to the beautiful patterned paper, this card has lots of sparkle because it uses gold glimmer paper. While the foil in the designer series paper is copper, next to the gold glimmer paper, it appears golden. 
Picture
Picture
Picture
Picture
The last card has a fold-back flap. It is basically a regular card where the right side has been folded back to reveal the inside. Three strips of the Brightly Gleaming Designer Series Paper are used to emphasize the three areas. I decorated this card with a group of stars. The stars are glued to each other where they overlap so that they are only attached to the center, folded-back flap. 
Picture
Picture
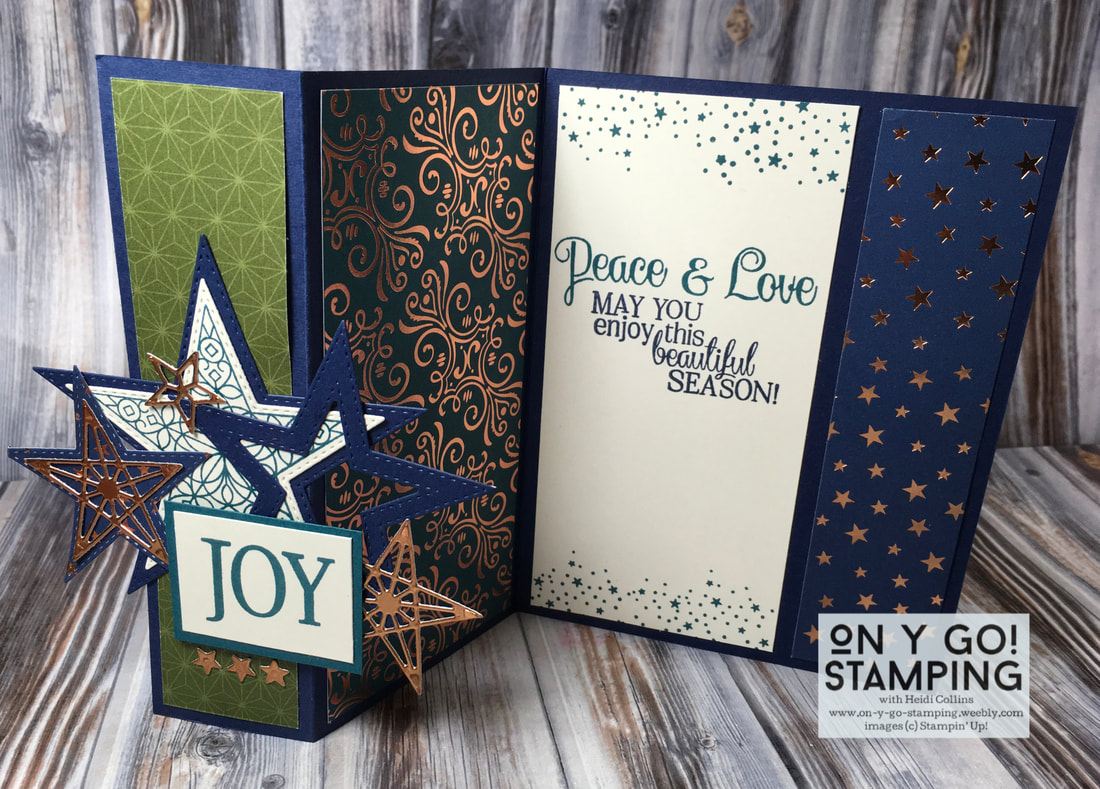
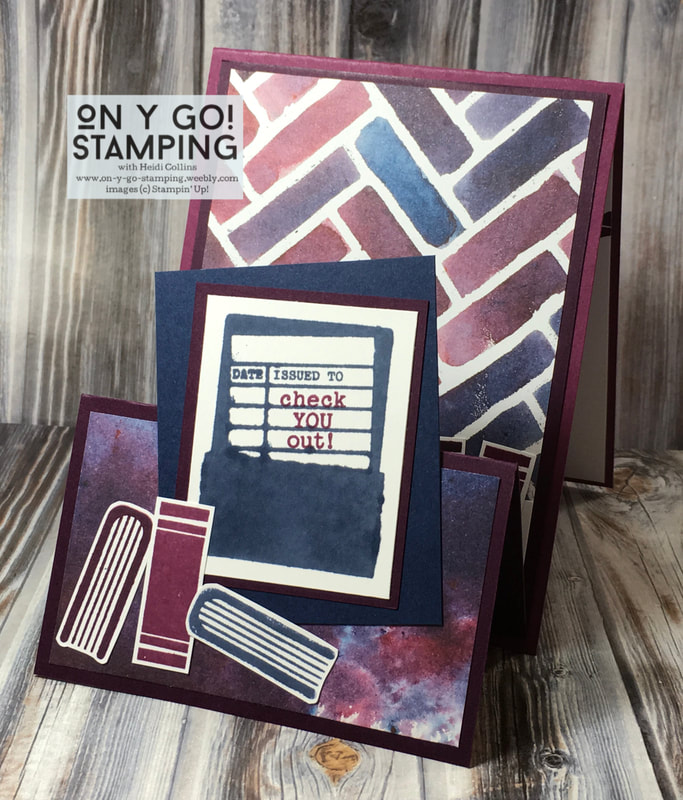
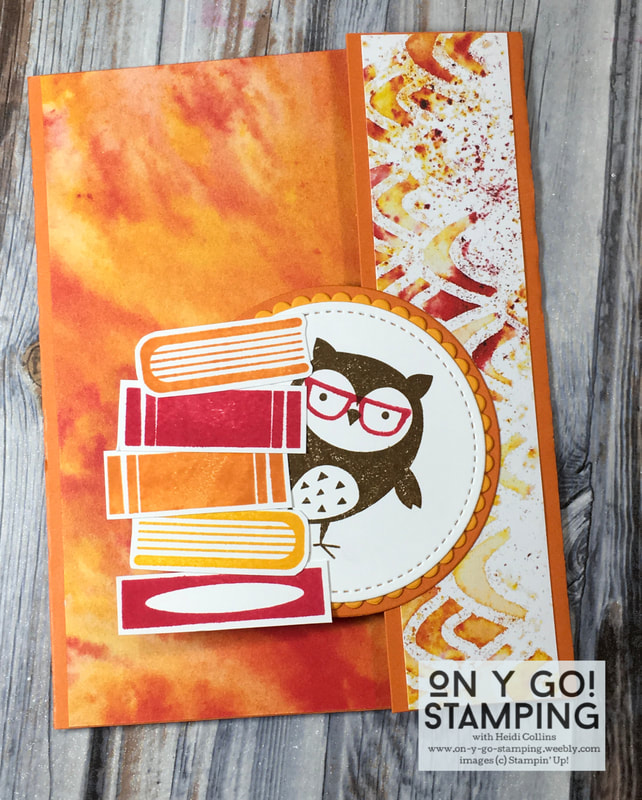
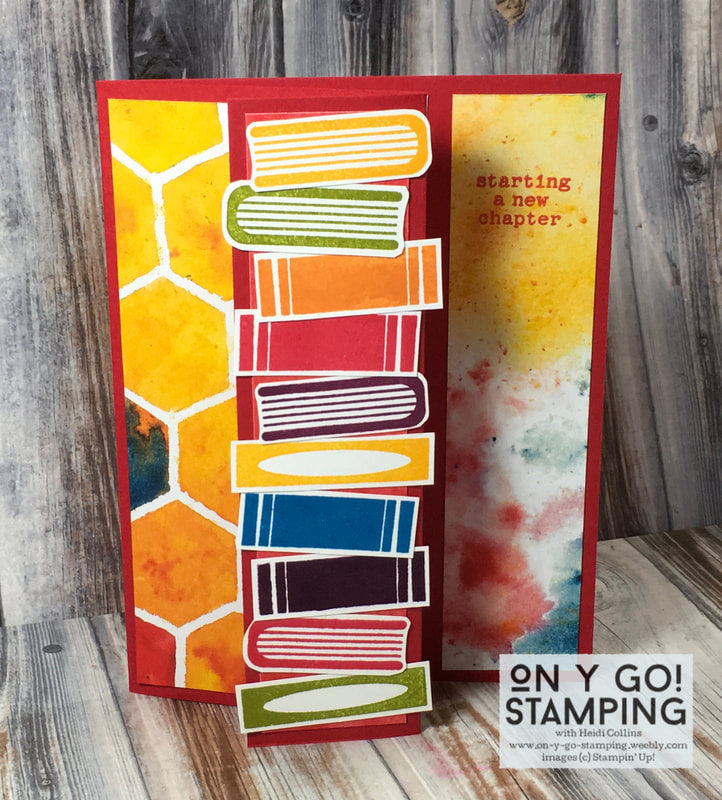
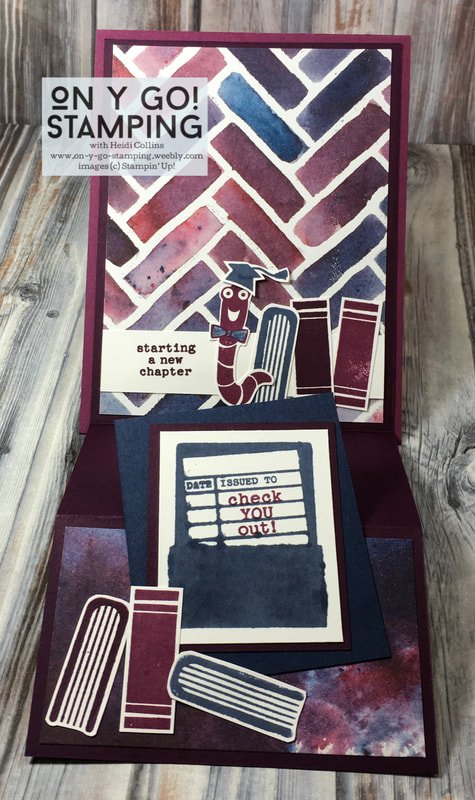
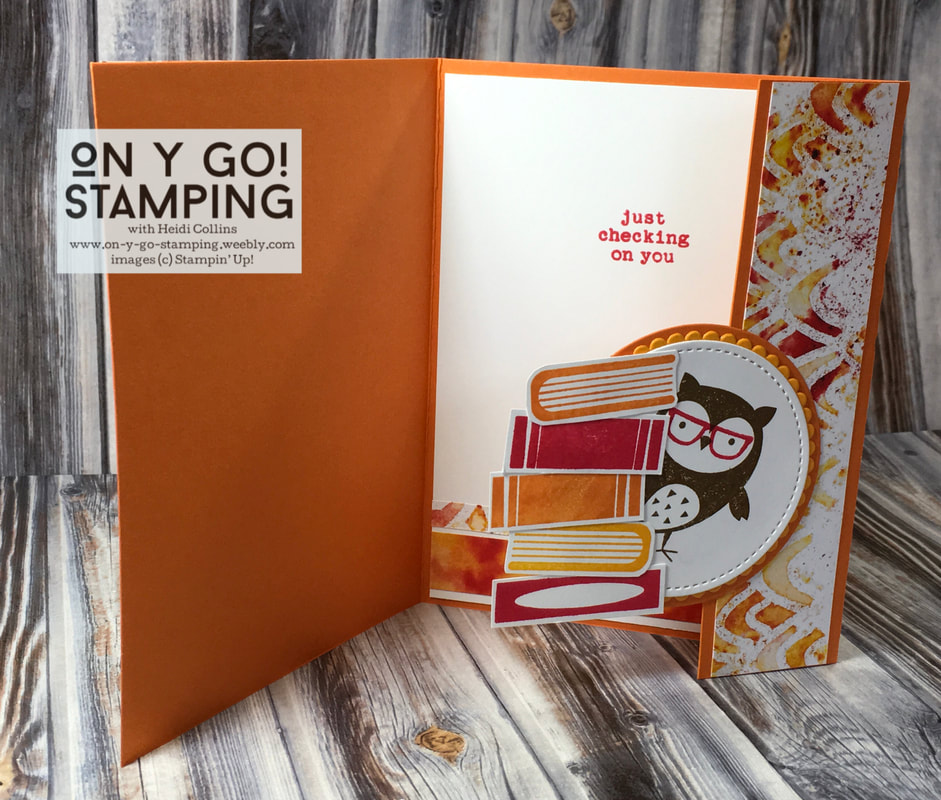
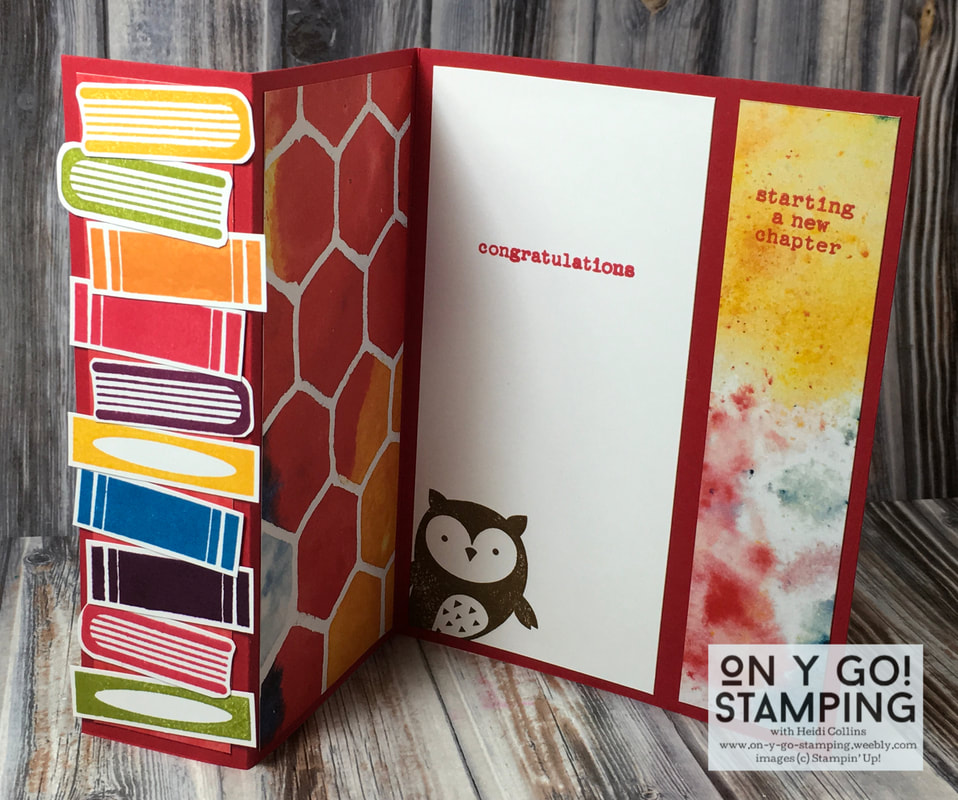
While all of these fun folds make great Christmas cards, they can be used for any occasion. I paired the Check You Out stamp set with the See a Silhouette Designer Series Paper to create another set of cards using these same three folds. 
Picture
Picture
Picture
Picture
Picture
Picture
I hope you've enjoyed these Christmas cards and are able to use the fun folds in your own creations. Please take a moment to check out the rest of the designers participating in the Magnolia Blog Hop!

Judith Weiß
​
Silke Trapani
Samira Merzouk​
Heidi Collins (You are here!)
Ginny Harrell
Ramona Shneider
Margreit Siekman
Sandra Herzog
7 Comments

A Quartet of Playful Penguins

12/20/2019

0 Comments

 
Picture
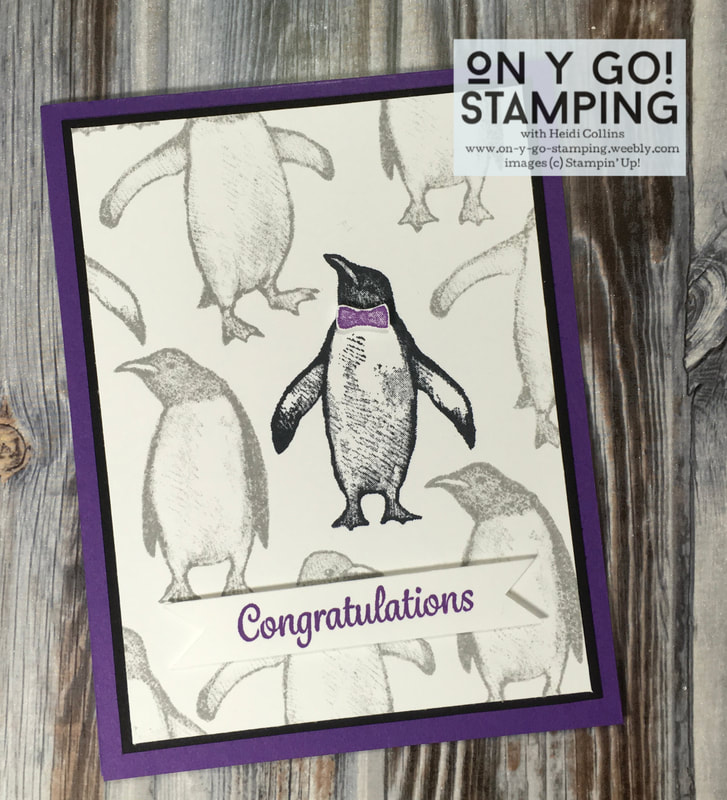
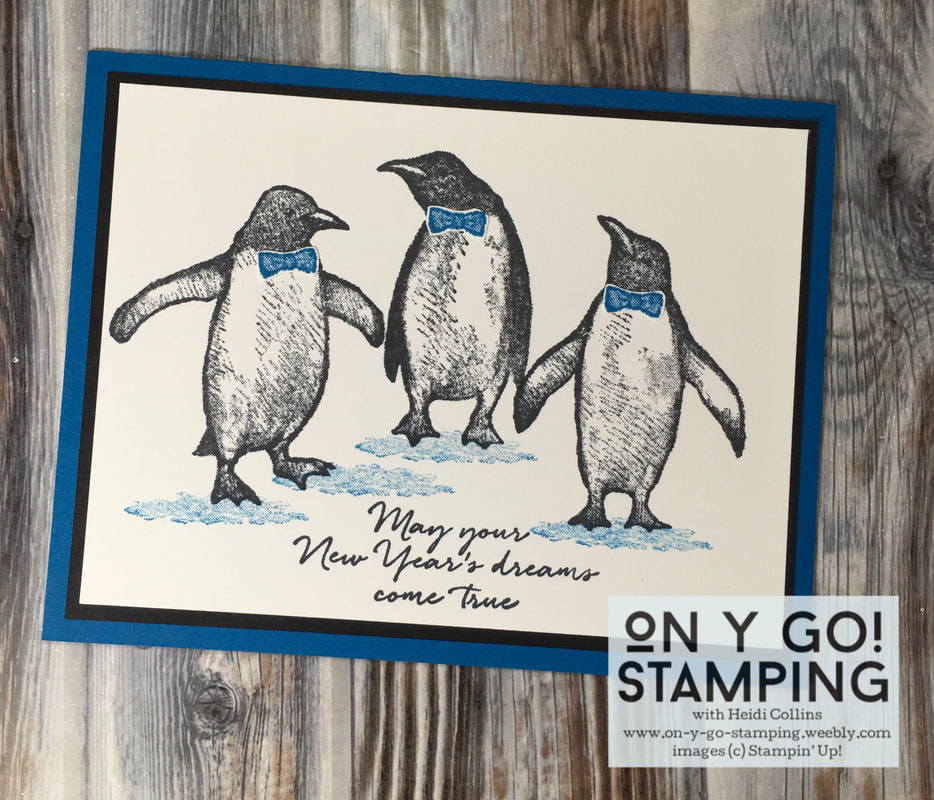
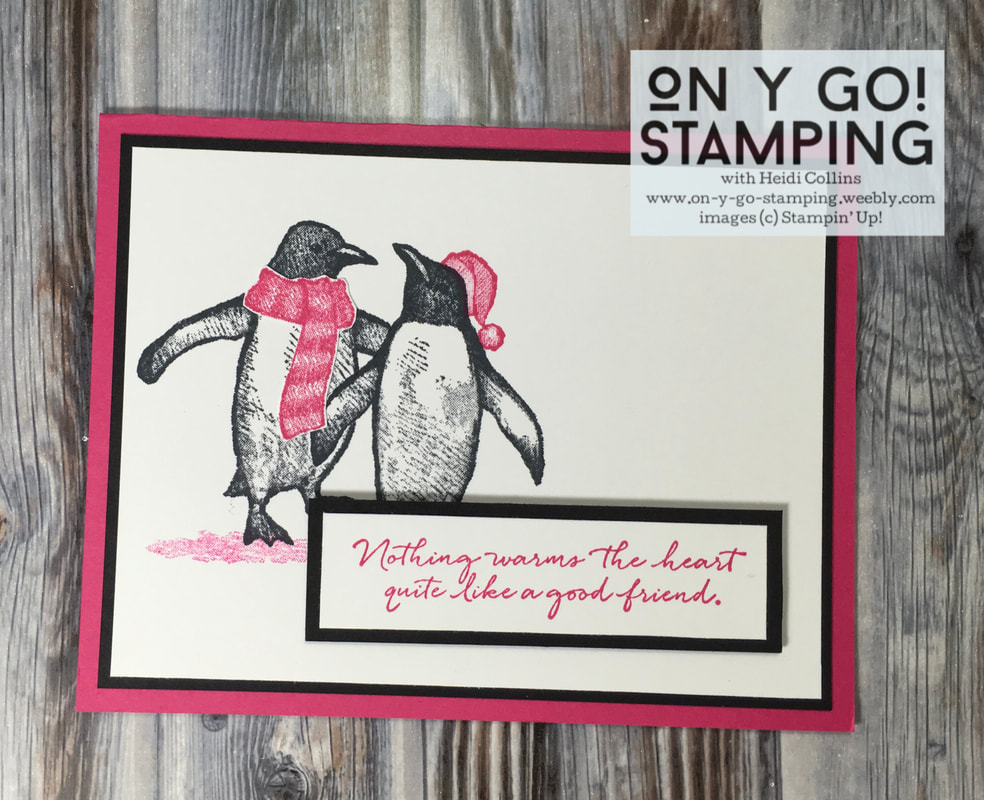
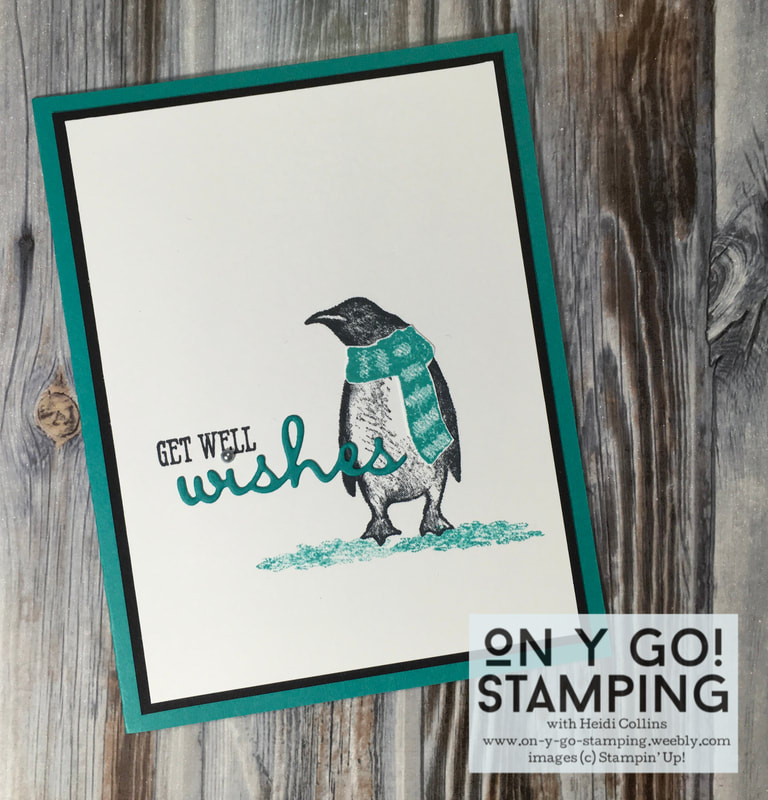
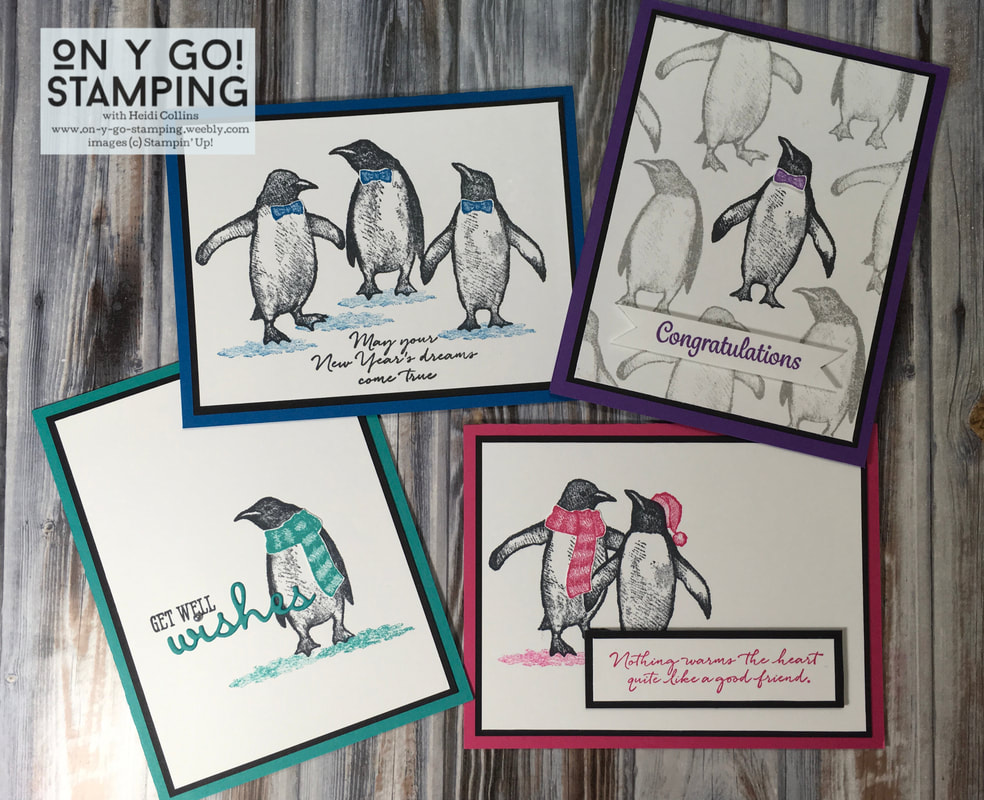
Before the 2019 Holiday Catalog by Stampin' Up is over, I wanted to share a few more cards featuring stamp sets from it, like these Playful Penguins. This set is so cute and easy to overlook in the catalog. It is a great set for creating a variety of cards. While the stamp set includes some great sentiments, I also paired the penguins with greetings from other stamp sets to show its versatility. 

All of these cards follow the same basic pattern. A piece of 5" x 3 3/4" Whisper White cardstock, a piece of 5 3/16" x 3 15/16" Basic Black cardstock, and a card base in one of the brights colors cut to 5 1/2" x 8 1/2" and scored at 4 1/4". 
Complete Supply List
Picture
For this first card, I stamped the focal penguin in Jet Black Stazon ink. Then I stamped the other penguins around him using Smoky Slate ink. I stamped the penguin's bow tie in Gorgeous Grape, cut it out, and attached it to the penguin using a mini Stampin' Dimensional. 

The "Congratulations" stamp is from the "Here's a Card" stamp set, found in the 2019-20 Annual Catalog. I stamped it on a strip of Whisper White cardstock using Gorgeous Grape ink. I cut the ends as flags and adhered it to the card front using Stampin' Dimensionals to give it depth. 
The second card has a trio of penguins all stamped in Jet Black Stazon ink. I stamped the bow ties with Pacific Point ink, cut them out, and glued them to the penguins using liquid adhesive. I stamped some snow for the penguins to stand on using Pacific Point as well. However, I wanted it to be a little lighter, so I stamped off on a piece of scrap paper before stamping on my card front. 

The New Year's sentiment for this card comes from the Playful Penguins stamp set. I simply stamped it directly on the card front using Jet Black Stazon ink.
Picture
Picture
These cute little penguin friends seem to be cheering each other up, and the fun pop of Melon Mambo helps brighten the card. To allow one penguin to stand in front of the other penguin, I used masking. I stamped the front penguin (the one with her wings down) on a sticky note. Then, I cut out the left side of the penguin. I stamped this same penguin in Jet Black Stazon ink on my card front. Next, I put the sticky note penguin directly on top of the penguin stamped on my card front. Then, I stamped the penguin in the background (the one with his wings up) on my card front overlapping the sticky note penguin. Finally, I peeled the sticky note off to reveal the image. 
​
I stamped the scarf with Melon Mambo ink on a scrap piece of Whisper White cardstock and cut it out before adhering it to my penguin with liquid adhesive. I tried stamping the scarf directly on the penguin, but was unhappy with the muddled results. The scarf is much brighter when it isn't stamped onto a black penguin. And fussy cutting the scarf was easy! However, the hat is stamped directly on the card front. 

Once again, the sentiment is from the Playful Penguins stamp set. I stamped it in Melon Mambo on a strip of Whisper White cardstock and mounted it on another piece of Basic Black cardstock. Then I mounted it to my card front using Stampin' Dimensionals.
​
The last card may be my favorite of the quartet. This little penguin in his scarf definitely looks like he needs some get well wishes!

Like the others, he's stamped with Jet Black Stazon ink. His scarf is stamped in Bermuda Bay ink on a scrap piece of Whisper White and cut out and attached. The sentiment comes from the Well Said Stamp Set and "wishes" is cut from Bermuda Bay cardstock using the Well Written dies. To dot the "i," I used a silver metallic pearl. Like the other cards, I stamped off the snow before stamping it on the card front in Bermuda Bay ink. 
Picture

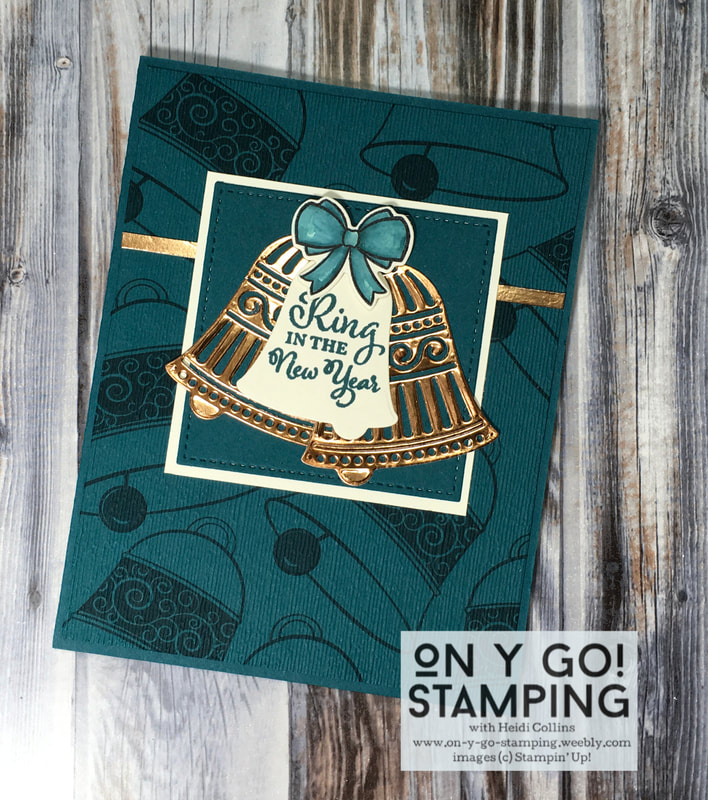
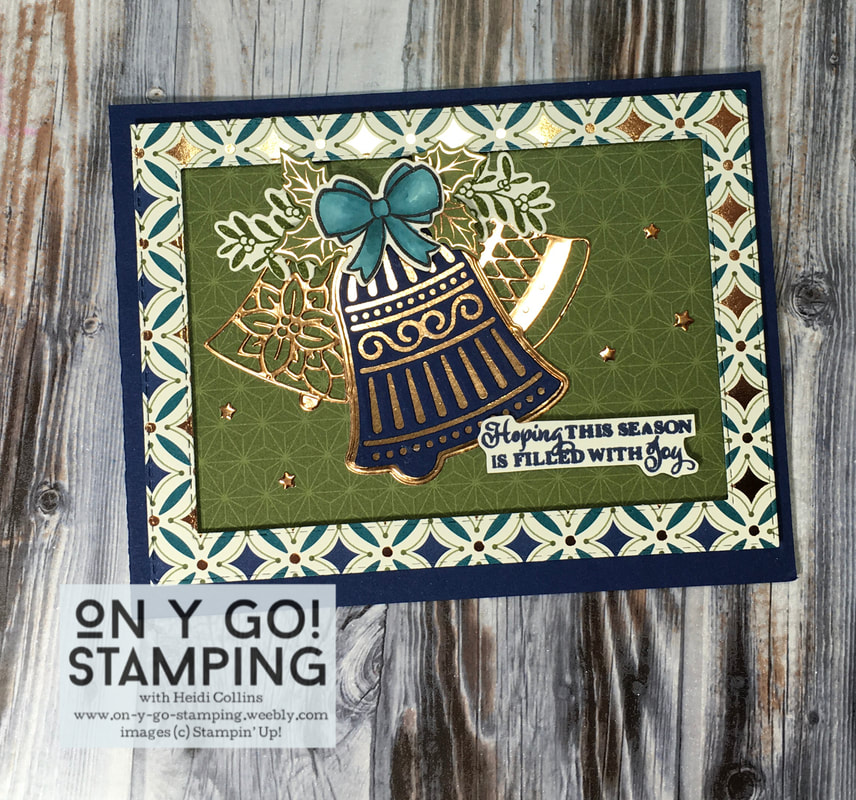
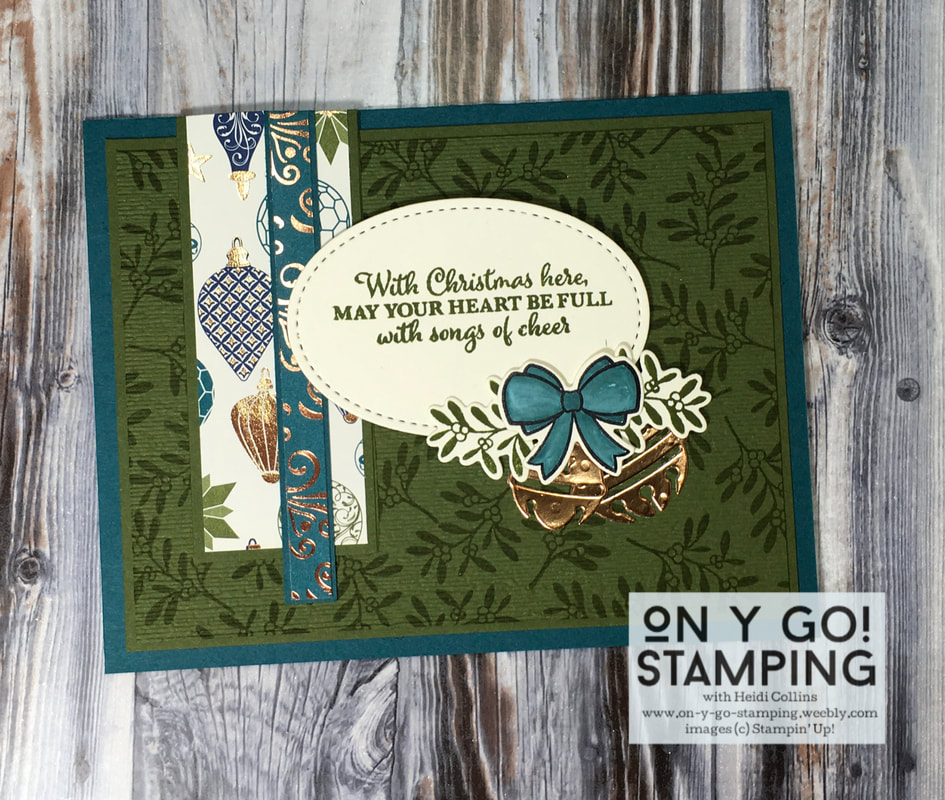
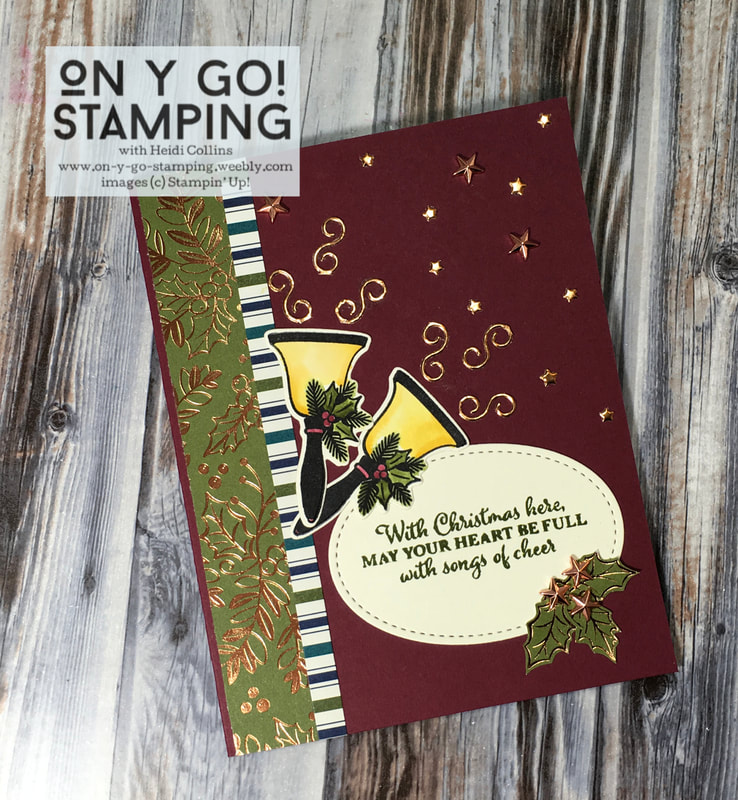
I hope you've enjoyed this quartet of penguins! Tomorrow, I have one last post of gorgeous Christmas cards coming your way as I participate in the first ever Magnolia Bloghop Project.
0 Comments

Bells are Ringing

12/15/2019

0 Comments

 
Picture
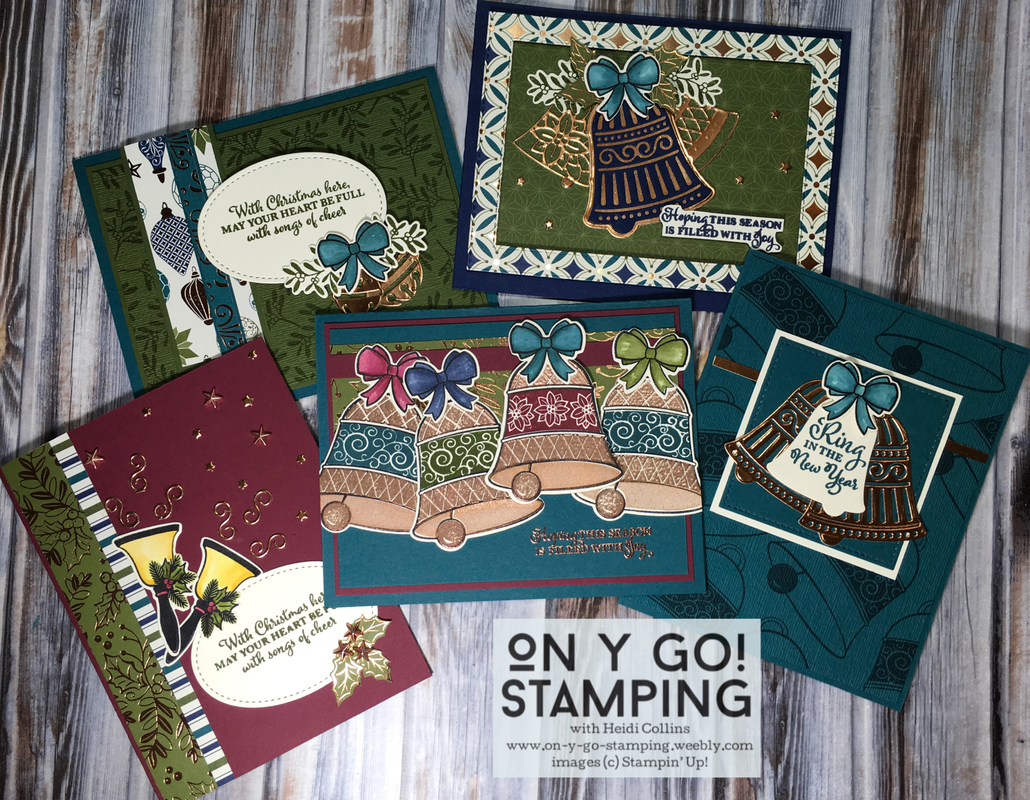
The Bells are Ringing stamp set and the Detailed Bells Dies from the 2019 Holiday catalog feature a variety of bells from handbells to jingle bells that are perfect for Christmas, the New Year, weddings, and more. I paired this bundle with the Brightly Gleaming Designer Series Paper. While the paper is sold out for this year, it will be back for the Holiday 2020 catalog. However, this wonderful bundle of bells will retire at the end of December!

To coordinate with the Brightly Gleaming DSP, all of these cards use Pretty Peacock, Mossy Meadow, Night of Navy, and Merry Merlot cardstock and ink as well as Very Vanilla Copper Foil cardstock. All of the coloring on these cards has been done using an aqua-painter with ink from the ink pad. 
Complete Supply List
Picture

This card uses only Pretty Peacock, Copper Foil, and Very Vanilla cardstock. I stamped the bells with Pretty Peacock ink on Pretty Peacock cardstock (5 5/16" x 4 1/16") for the background. To give this background layer some texture, I embossed it with the Subtle 3D embossing folder. 

I cut another piece of Pretty Peacock cardstock with the Stitched Shape dies and mounted it on a piece of Very Vanilla cardstock. To pull your eye up, I added a thin strip of Copper Foil cardstock about one third of the way down the front of the card.

I stamped the bow with Stazon ink. To color it, I tapped my Pretty Peacock ink pad on an acrylic block to transfer a little ink. Then, I used my aqua-painter to pick up the ink from the acrylic block and color the ribbon. 

I cut the bells using the Detailed Bells dies and stamped the sentiment with Pretty Peacock ink. ​

For this second card, I used the Stitched Rectangles dies to cut a frame from the Brightly Gleaming Designer Series Paper. When I assembled the card, I used Stampin' Dimensionals to attach this frame so that it is higher than the background. 

The bells, bow, and sprigs were cut using the Detailed Bells dies. The small stars are punched out from one of the other bells in the die set. The sentiment is stamped in Night of Navy ink on Very Vanilla cardstock. Then I cut it out free hand, trimming closely to the words to get the straight edges in the center and the curliness of "Hoping" and "Joy" on the ends. 
Picture
Picture
The third card uses the same technique as the first card of stamping a background and then embossing it with the Subtle 3D embossing folder. I love the look this gives the background; it almost looks like fabric. I mounted this piece of Mossy Meadow (5" x 3 3/4") on another piece of Mossy Meadow (5 3/16" x 3 15/16") that hadn't been stamped or embossed. This provides a subtle border between the embossed background and the Pretty Peacock card base.

The sentiment is stamped on Very Vanilla and cut with the Stitched Shapes dies. The other images are cut using the Detailed Bells dies.
My fourth card features the largest bell in the Bells are Ringing stamp set. For this bell, the outside of the bell, the inside of the bell, the clapper, and the decorative band in the center are all separate stamps. To create two different coppers for the outside and the inside of the bell, I embossed the outside of the bell and the clapper using copper embossing powder. Then, I stamped the inside of the bell using Copper Delicata ink. I added the decorative centers in Pretty Peacock, Mossy Meadow, Night of Navy, and Merry Merlot ink and added coordinating bows colored with the same inks. 

Picture
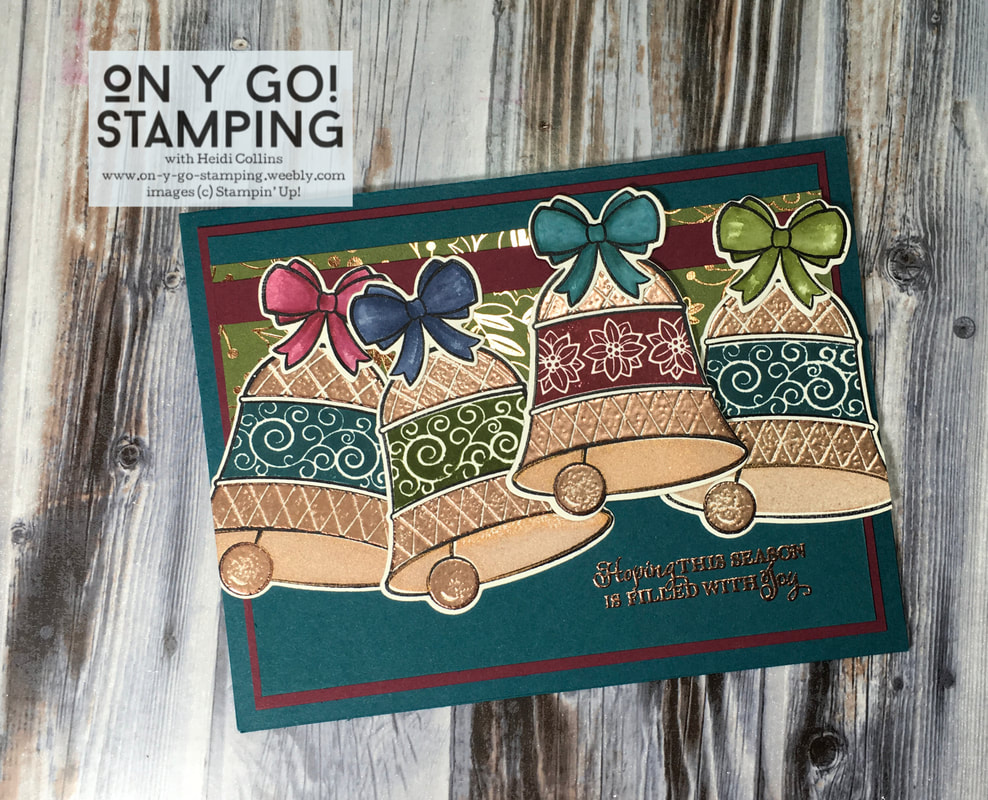
I cut the bells using the Detailed Bells dies and attached them to the front of the card overlapping the bells and varying the heights to give interest and a feeling of movement. 
Picture
For the final card, I used the handbell stamp. I stamped it using Stazon ink and then colored with an aqua-painter and inkpads as I did in the other cards using Crushed Curry for the bells. 

The holly leaves in the lower right are cut from the Brightly Gleaming DSP and instead of berries, I used the Copper Star Designer Elements.  A couple of these are used on the top of the card as well. The other swirls and stars are pieces that are "punched out" when cutting the other bells in the Detailed Bells dies. 
0 Comments

Marching Band Ornaments

12/11/2019

2 Comments

 
Picture
Picture
Picture
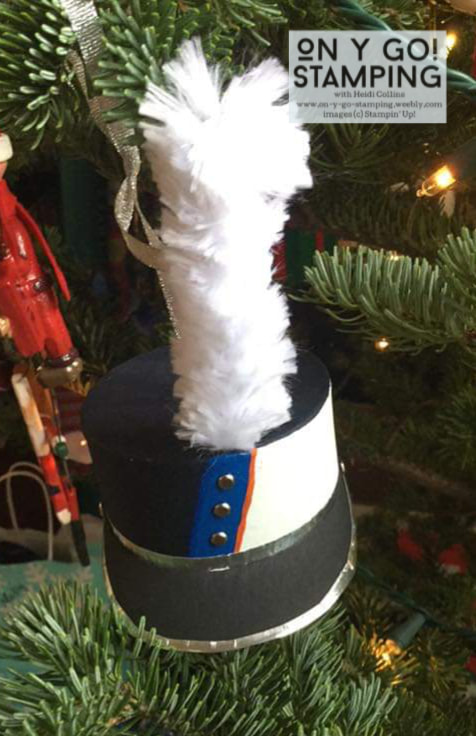
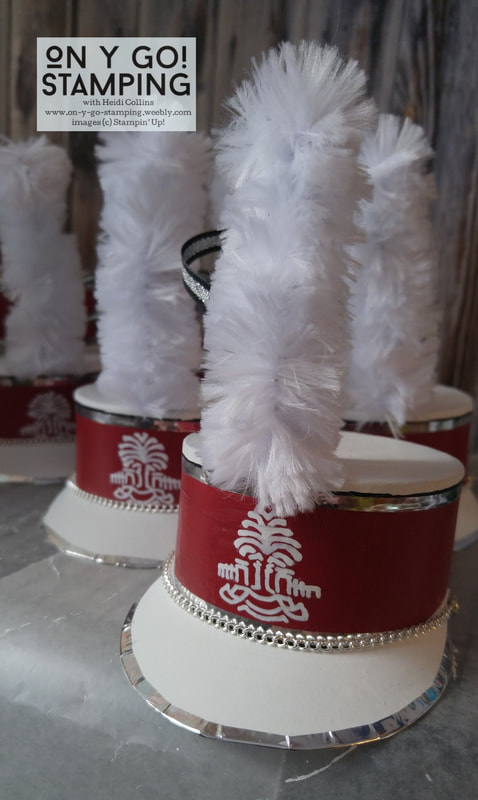
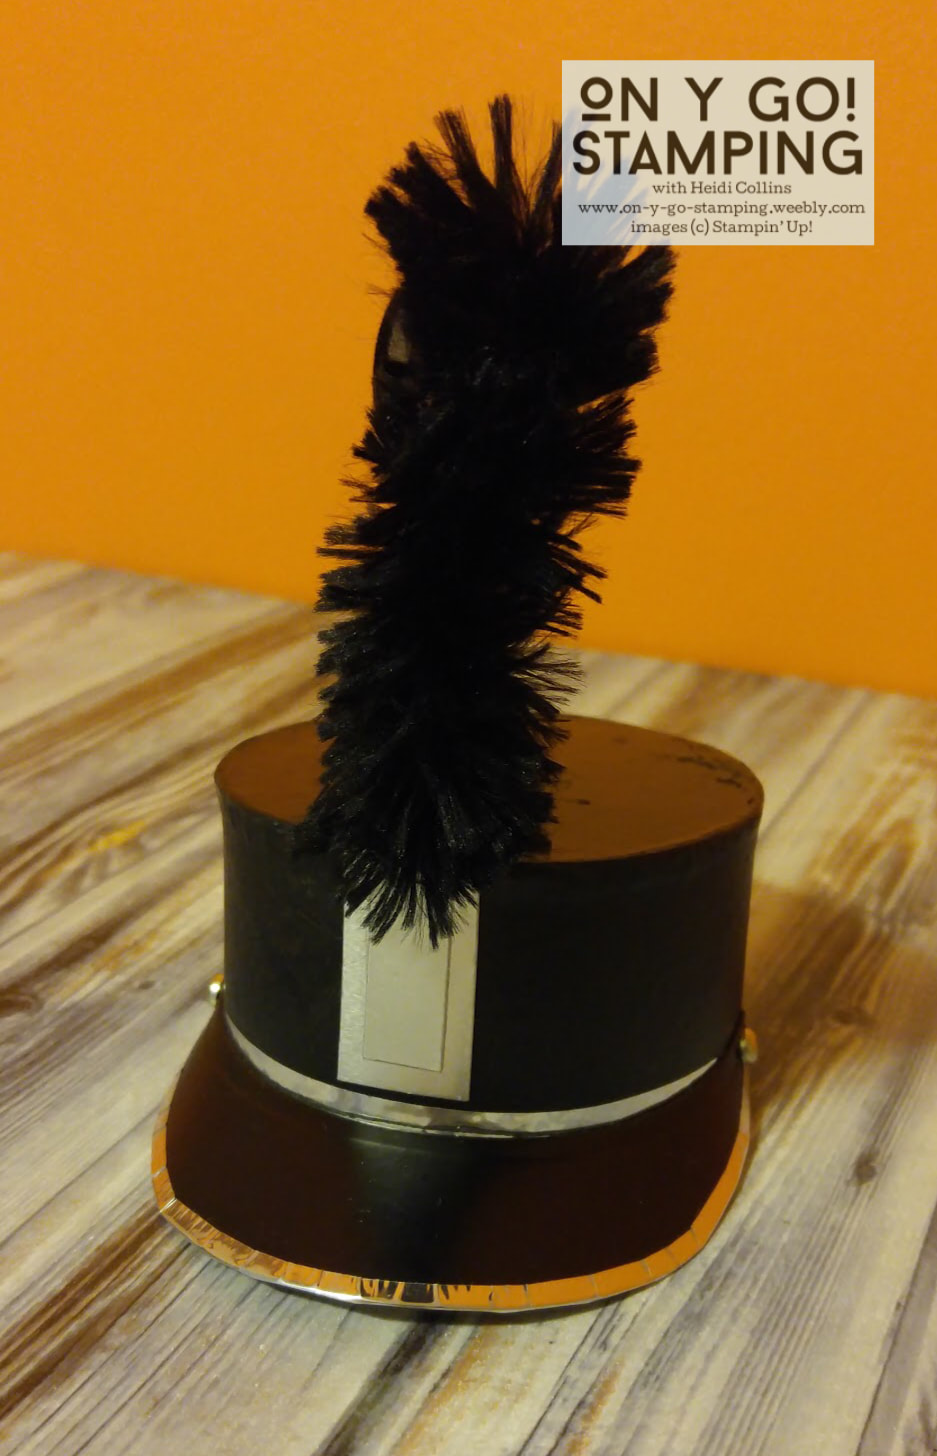
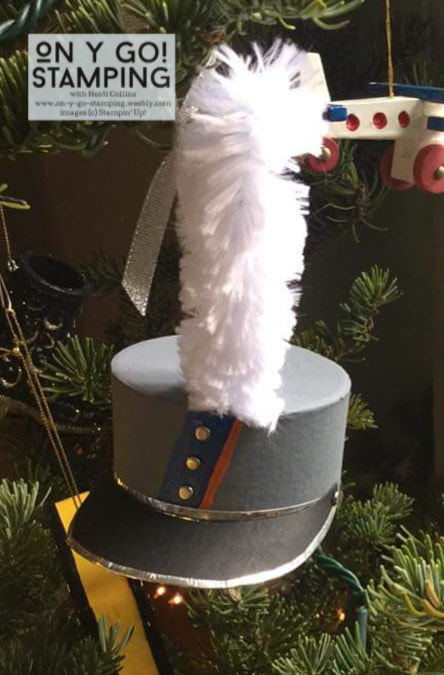
Normally, I only blog about projects that involve rubber stamping, but today, I thought I'd share with you what has been taking up all my time and keeping me from my stamping.

My kids were both in marching band all through high school, and when they went off to college, they joined their universities' marching bands. Band has been a huge part of our lives for the last 10 (?) years, from Jr. High all the way through. (Although, they both decided not to continue this fall, and it has probably been harder on me than them!)

We also give the kids a special ornament each year that ties into something they'd been doing or that they really liked that year. So, when my kids were in high school, I wanted to give them marching band ornaments. They had other musical instrument ornaments from previous years, but since they were both in high school marching band, I wanted something that was specifically related to marching. I searched and searched and came up completely empty handed.

Not one to be easily daunted once I have an idea in my head, I decided that I was just going to have to make them something. 
Picture
Picture
So with a little trial and error and a fair bit of time and fussy work, I came up with these miniature shakos (the fancy name for a marching band hat). They matched their school's uniforms, including the gray one for my daughter's drum major uniform. I was pretty happy with how they'd turned out. 
Fast forward to a few weeks ago. A parent on my daughter's university's band parent page was looking for someone that could make marching band ornaments since she, like me, had been unable to find any. Suddenly, I has a chorus of other parents requesting ornaments as well. I made these to match their uniforms and sent them off to the dozen or so parents who had ordered them.

One parent posted a photo of her ornament when it arrived on the same band parent Facebook page, and suddenly I had orders pouring in for more. My stamp studio has turned into a miniature hat factory, but I'm hoping to push aside the paint and the fluffy plume material and get a little stamping done one of these days. 
Picture
2 Comments

Parisian Beauty - 1 card, 3 ways

12/8/2019

0 Comments

 
Picture
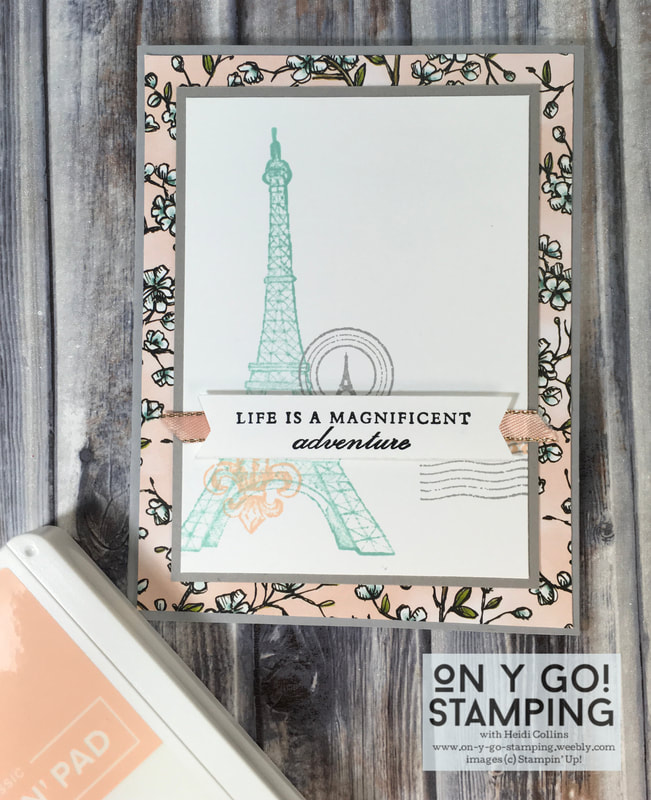
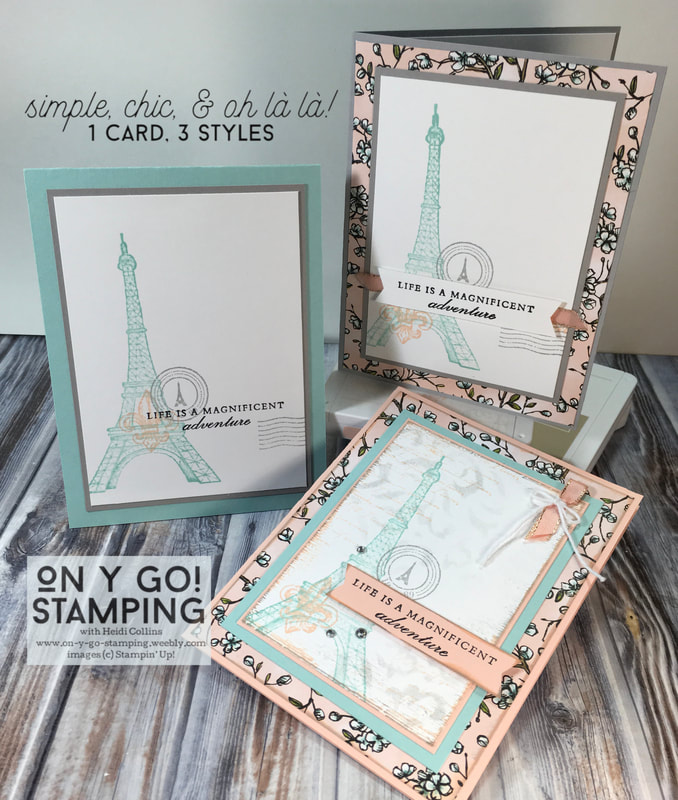
As a Francophile, the new Parisian Beauty stamp set was a must have! It will be available in the new January - June 2020 Mini Catalog, but I just couldn't wait to sit down and have a play with it. And then I couldn't wait to share the results with you!

I used this stamp set to create three cards, one that is very simple but elegant, one that has a few more layers or what I like to call chic, and the last one where I pulled out all the bells and whistles, or embossing folders and masks, to create an over-the-top, Oh là là! card. For all three cards, I used a color combination of Pool Party, Petal Pink, and Smoky Slate.
Picture
This first card is elegant in its simplicity. On a piece of Whisper White cardstock (3 3/4" x 5"), I stamped the Eiffel Tower in Pool Party ink, the fleur-de-lis in Petal Pink ink, and the stamp and cancellation in Smoky Slate ink. Then, I stamped the saying: "Life is a Magnificent adventure" with Jet Black stāzon. I adhered it to a piece of Smoky Slate cardstock (3 15/16" x 5 3/16") and then to the Pool Party card base. This #simplestamping card comes together in 5 minutes without looking thrown together.
The second card, my chic card, follows the same basic pattern as the simple card, but it has a few more layers.

This time, I started with a piece of Whisper White cardstock that was 3 1/4" x 4 1/2". I stamped the same images in the same colors, but I spread out the fleur-de-lis and the circular image slightly so that they would both show up when I added the saying that I had stamped on a separate piece of Whisper White cardstock (5/8" x 3"). I trimmed the ends using the Tailored Tag punch.
​

Then, I placed a piece of Petal Pink Metallic-Edge Ribbon (coming in the new Mini Catalog) across the images and layered the greeting using Stampin' Dimensionals. 

I layered all of this on a piece of Smoky Slate cardstock (3 7/16" x 4 11/16"). The patterned paper (4 1/16" x 5 5/16") is from the Bird Ballad DSP collection found in the Annual Catalog. Finally, all of this is layered on a Smoky Slate card base. 

Not any harder than the previous card, but a little more time consuming due to all the layers. 
Picture
Picture

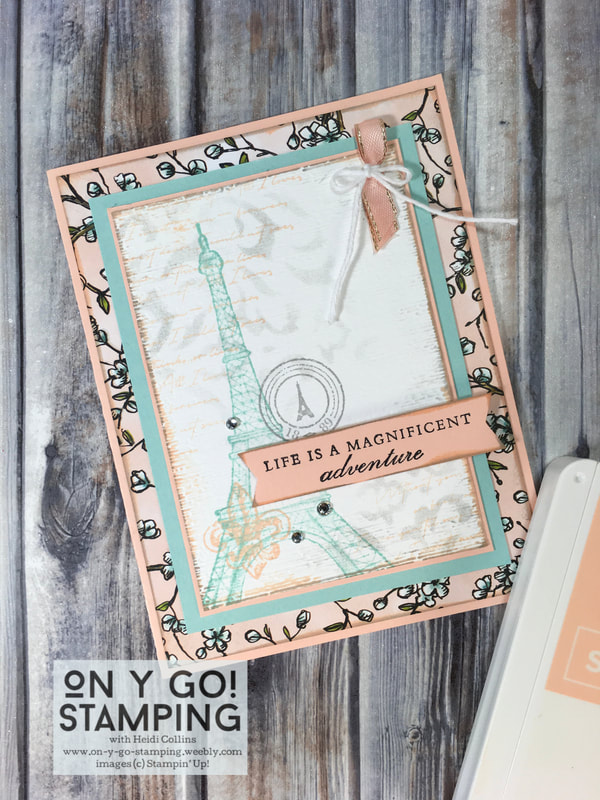
​Finally, I pulled out all the stops for my Oh là là! card. Although, as you can see, it still has the same basic imagery stamped on the front, but there is a lot of other stuff going on as well.

This time I started with an even smaller piece of Whisper White cardstock (3" x 4 1/4"). I started by using a mask from the set of Basic Pattern Decorative Masks found on page 35 of the Holiday Catalog. I used a sponge dauber to lightly sponge Smoky Slate ink in the upper left and lower right corners. Over this, I stamped the long, hard-to-read sentiment from the stamp set in Petal Pink ink. I stamped off before stamping it each time. Then, I stamped the other images as I had on the previous two cards.

I ran this stamped piece of Whisper White through my Big Shot using the Subtle 3D embossing folder. Then I swiped my Smoky Slate and Petal Pink ink pads along the edges to give it a distressed look. I layered it on a piece of Petal Pink cardstock (3 1/8" x 4 3/8"), a piece of Pool Party cardstock (3 7/8" x 4 5/8"), a piece of Bird Ballad DSP (4 1/16" x 5 5/16") whose edges I had also swiped in Smoky Slate and Petal Pink ink, and finally onto my Petal Pink Card Base. 

​I stamped the greeting in black on a small piece of Petal Pink cardstock, clipped the ends with the Tailored Tag punch, and swiped the edges with gray and pink ink. I adhered this to my card with Stampin' Dimensionals so that it was somewhat off-center and across multiple layers. I added three Basic Rhinestones near the greeting, and in the upper right corner, I took a small piece of Petal Pink Metallic-edged Ribbon, folded it in half, tied a piece of White Baker's Twine in a bow around it, and adhered it in place with a glue dot and a little Snail adhesive. 

This card was definitely not quick, but like the chic card, it wasn't difficult either. It just took a little more time and fussing. The end results were completely worth it though! I can't wait to make more cards with this beautifully elegant stamp set. Did I mention it has matching dies as well? Hopefully, those will be coming to my stamp studio soon!
0 Comments
    Heidi Collins, Independent Stampin' Up! Demonstrator with On Y Go! Stamping
    Get updates and ideas on my Facebook group
    Heidi Collins, Independent Stampin' Up! Demonstrator and Owner of On Y Go! Stamping
    Picture
    Picture
    On Y Go! Stamping YouTube channel with Card Making Videos on how to do rubber stamping, card making, scrapbooking, and paper crafting

    Archives

    June 2025
    May 2025
    April 2025
    March 2025
    February 2025
    January 2025
    December 2024
    November 2024
    October 2024
    September 2024
    August 2024
    July 2024
    June 2024
    May 2024
    April 2024
    March 2024
    February 2024
    January 2024
    December 2023
    November 2023
    October 2023
    September 2023
    August 2023
    July 2023
    June 2023
    May 2023
    April 2023
    March 2023
    February 2023
    January 2023
    December 2022
    November 2022
    October 2022
    September 2022
    August 2022
    July 2022
    June 2022
    May 2022
    April 2022
    March 2022
    February 2022
    January 2022
    December 2021
    November 2021
    October 2021
    September 2021
    August 2021
    July 2021
    June 2021
    May 2021
    April 2021
    March 2021
    February 2021
    January 2021
    December 2020
    November 2020
    October 2020
    September 2020
    August 2020
    July 2020
    June 2020
    May 2020
    April 2020
    March 2020
    February 2020
    January 2020
    December 2019
    November 2019
    October 2019
    September 2019
    August 2019
    July 2019
    June 2019

Proudly powered by Weebly
  • About
  • Online Card Classes
  • Card Making Ideas
  • Stampin' Up! Catalogs
  • Card Tutorials
  • Contact
  • Shopping & Rewards
  • Join Stampin' Up!
  • Color Picker
  • Favorite Things