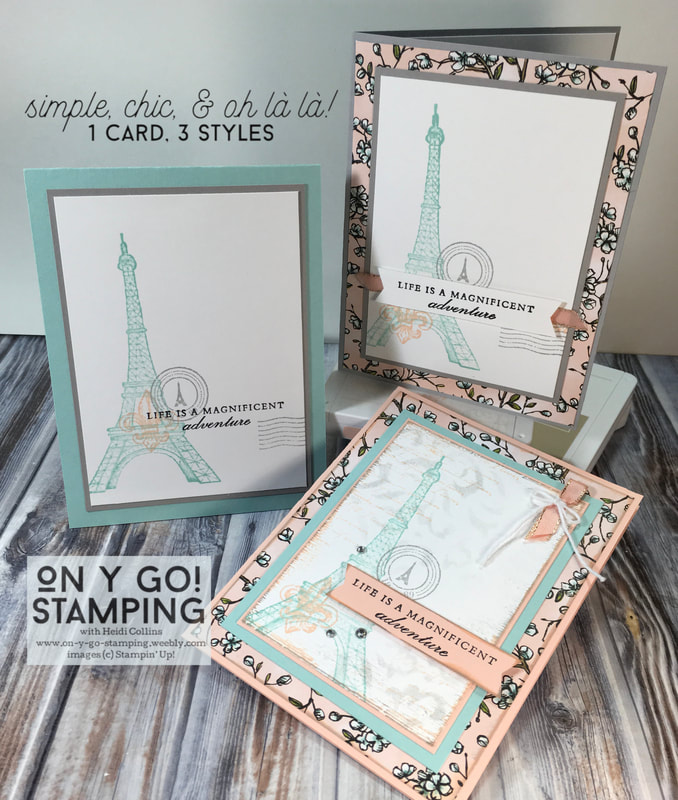
 As a Francophile, the new Parisian Beauty stamp set was a must have! It will be available in the new January - June 2020 Mini Catalog, but I just couldn't wait to sit down and have a play with it. And then I couldn't wait to share the results with you! I used this stamp set to create three cards, one that is very simple but elegant, one that has a few more layers or what I like to call chic, and the last one where I pulled out all the bells and whistles, or embossing folders and masks, to create an over-the-top, Oh là là! card. For all three cards, I used a color combination of Pool Party, Petal Pink, and Smoky Slate.
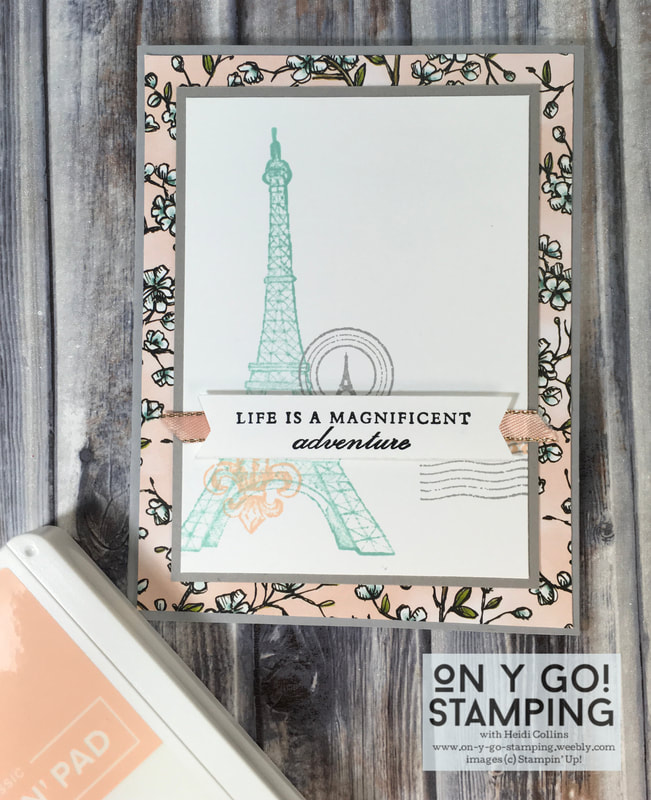
The second card, my chic card, follows the same basic pattern as the simple card, but it has a few more layers. This time, I started with a piece of Whisper White cardstock that was 3 1/4" x 4 1/2". I stamped the same images in the same colors, but I spread out the fleur-de-lis and the circular image slightly so that they would both show up when I added the saying that I had stamped on a separate piece of Whisper White cardstock (5/8" x 3"). I trimmed the ends using the Tailored Tag punch.
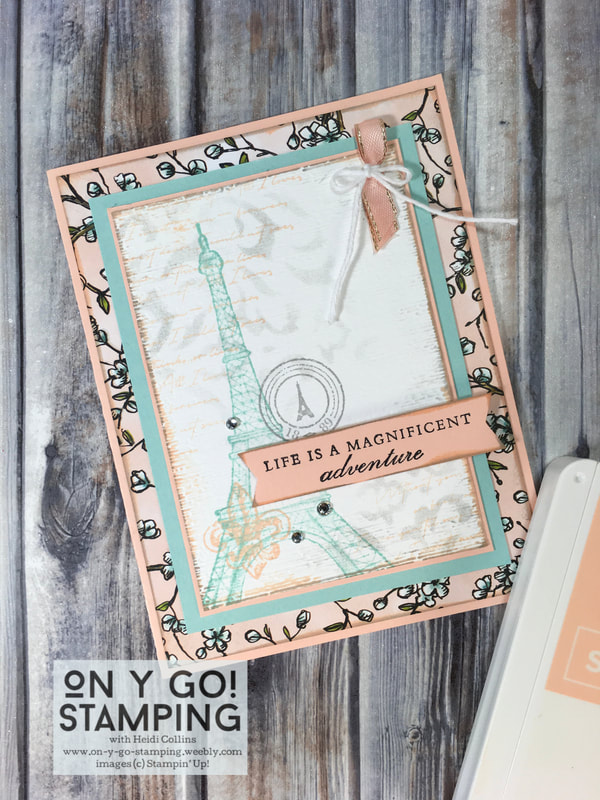 Finally, I pulled out all the stops for my Oh là là! card. Although, as you can see, it still has the same basic imagery stamped on the front, but there is a lot of other stuff going on as well. This time I started with an even smaller piece of Whisper White cardstock (3" x 4 1/4"). I started by using a mask from the set of Basic Pattern Decorative Masks found on page 35 of the Holiday Catalog. I used a sponge dauber to lightly sponge Smoky Slate ink in the upper left and lower right corners. Over this, I stamped the long, hard-to-read sentiment from the stamp set in Petal Pink ink. I stamped off before stamping it each time. Then, I stamped the other images as I had on the previous two cards. I ran this stamped piece of Whisper White through my Big Shot using the Subtle 3D embossing folder. Then I swiped my Smoky Slate and Petal Pink ink pads along the edges to give it a distressed look. I layered it on a piece of Petal Pink cardstock (3 1/8" x 4 3/8"), a piece of Pool Party cardstock (3 7/8" x 4 5/8"), a piece of Bird Ballad DSP (4 1/16" x 5 5/16") whose edges I had also swiped in Smoky Slate and Petal Pink ink, and finally onto my Petal Pink Card Base. I stamped the greeting in black on a small piece of Petal Pink cardstock, clipped the ends with the Tailored Tag punch, and swiped the edges with gray and pink ink. I adhered this to my card with Stampin' Dimensionals so that it was somewhat off-center and across multiple layers. I added three Basic Rhinestones near the greeting, and in the upper right corner, I took a small piece of Petal Pink Metallic-edged Ribbon, folded it in half, tied a piece of White Baker's Twine in a bow around it, and adhered it in place with a glue dot and a little Snail adhesive. This card was definitely not quick, but like the chic card, it wasn't difficult either. It just took a little more time and fussing. The end results were completely worth it though! I can't wait to make more cards with this beautifully elegant stamp set. Did I mention it has matching dies as well? Hopefully, those will be coming to my stamp studio soon!
0 Comments
Your comment will be posted after it is approved.
Leave a Reply. |


Archives
July 2024
|