• About
  • Online Card Classes
  • Card Making Ideas
  • Stampin' Up! Catalogs
  • Card Tutorials
  • Contact
  • Shopping Rewards
  • Shop
  • Join Stampin' Up!
ON Y GO! STAMPING
  • About
  • Online Card Classes
  • Card Making Ideas
  • Stampin' Up! Catalogs
  • Card Tutorials
  • Contact
  • Shopping Rewards
  • Shop
  • Join Stampin' Up!

Card Ideas: Nothing's Better than A Plaid Moose

9/30/2020

0 Comments

 
Card making ideas using the Plaid Tidings Designer Series Paper from Stampin' Up! These cards also feature the Merry Moose and Nothing's Better Than stamp sets.
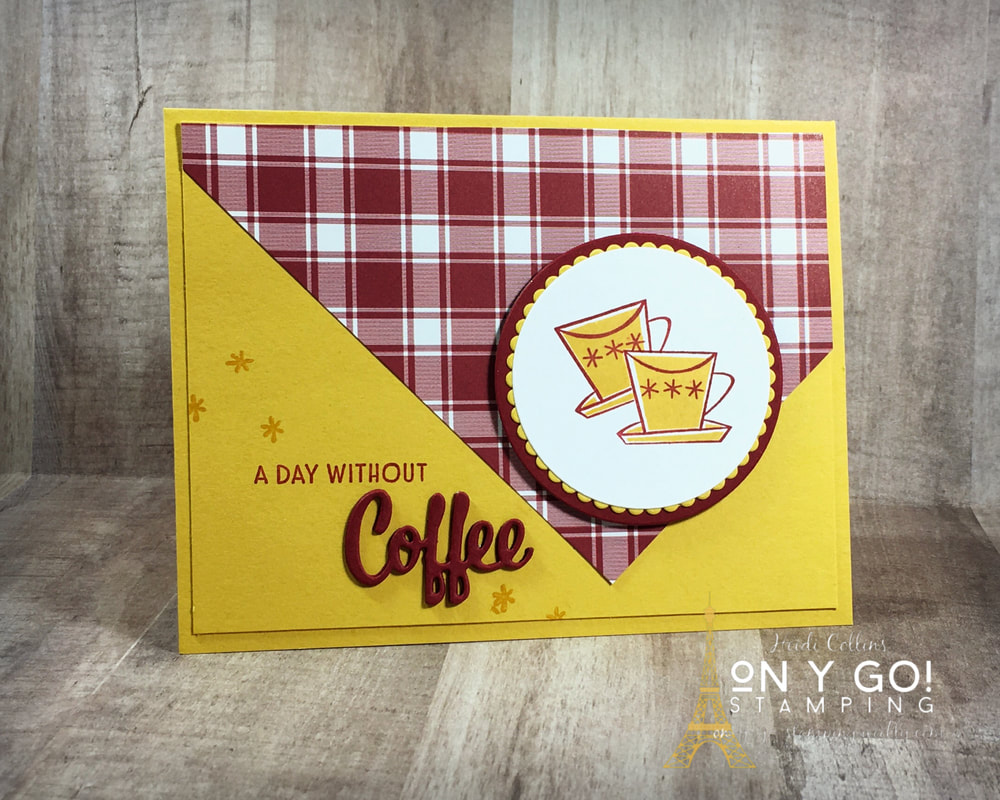
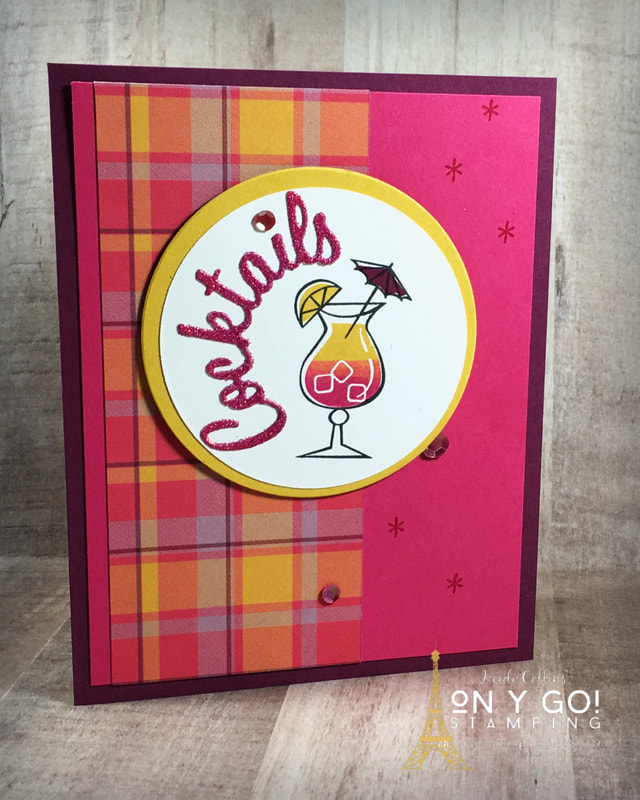
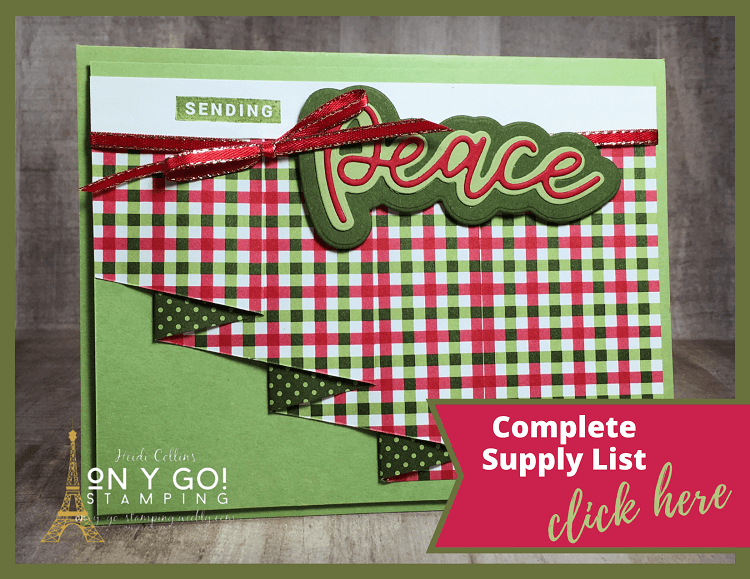
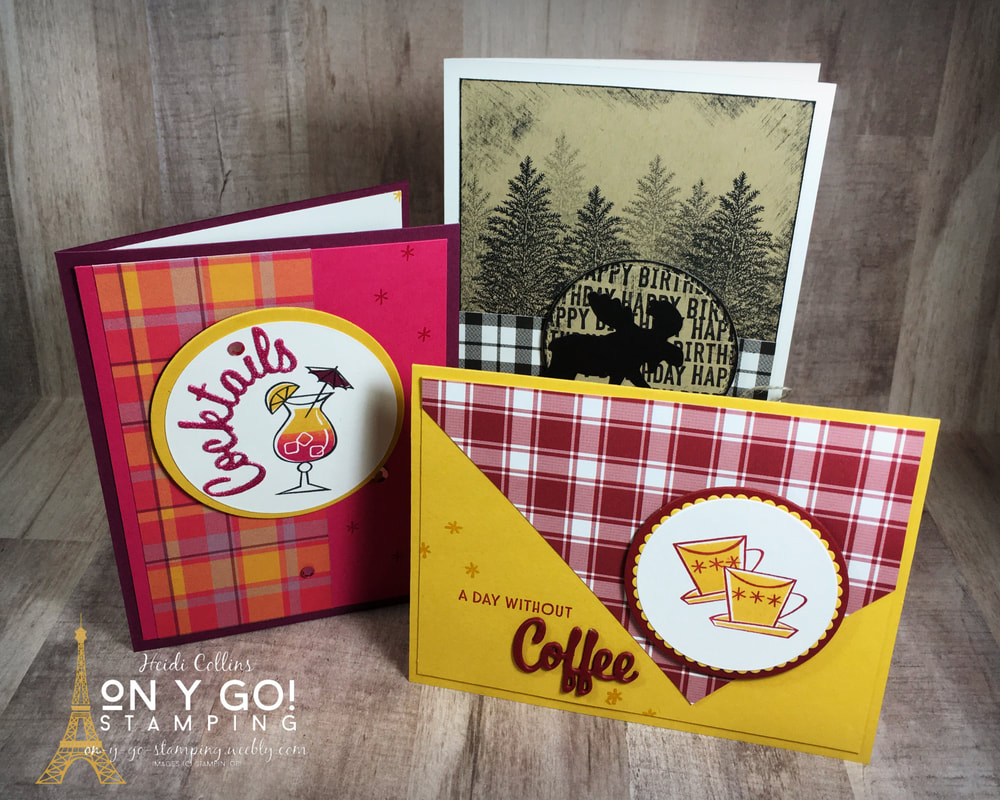
Last night's Card Class & Game Night was so much fun! We played games and I shared how to create these fun cards using the Plaid Tidings Designer Series Paper. I hope you'll join us for our next Card Class & Game Night on October 27. It's held virtually on the On Y Go! Stamping Facebook page. Register and order your card kit by October 18. On y go! Let's get stamping.
Card making idea using the Nothing's Better Than stamp set and the Plaid Tidings patterned paper. Nothing is better than coffee and this funny card is a great all-purpose card design.

Nothing's Better Than Coffee Card Idea

The first card uses the coffee image from the Nothing's Better Than stamp set. The coffee cups are stamped in Cherry Cobbler and Bumblebee ink. They're stamped on layered circles and then adhered to a piece of Plaid Tidings Designer Series paper that makes me think of a red-checked tablecloth. I stacked three die-cuts of the word coffee to give it extra dimension and added the words "a day without" above it. The inside has the second half of the sentiment: "is like ummm... nevermind..." I love this funny card! Great for sending a note to a friend.

Handmade Cards and Cocktails because Adulting's Hard

The second card also uses the Nothing's Better Than stamp set. This time, I focused on the cocktail image. I stamped the outline on a Whisper White circle. Then, I added the inside drink by inking the top half of the stamp with Bumblebee ink and the bottom half with Melon Mambo. 

"Cocktails" is cut from the Rainbow Glimmer Paper. I added an Artistry Blooms sequin for the dot above the "i." The inside of the card says "Because adulting is hard." Another great card to send to a friend just because or perhaps to invite them out for cocktails!
Pink Cocktails card making idea using the Nothing's Better Than stamp set and Plaid Tidings Designer Series Paper from Stampin' Up! This fun card design features a greeting cut from rainbow glimmer paper.
Masculine birthday card idea using the Merry Moose stamp set and the Plaid Tidings patterned paper from Stampin' Up! The moose is punched from Basic Black cardstock using the moose punch. The black, white, and tan color combination results in a contemporary country card.

A Merry Moose Birthday Card Idea

My last card is a birthday card using the Merry Moose stamp set. I stamped trees on a piece of Crumb Cake cardstock using Tuxedo Black Memento ink. I also stamped the "Happy Birthday" greeting on a circle of Crumb Cake with black ink. Then, I took the ink pad and light brushed the edges of the Crumb Cake cardstock. This is an easy way to get a defined edge without adding an additional layer. 
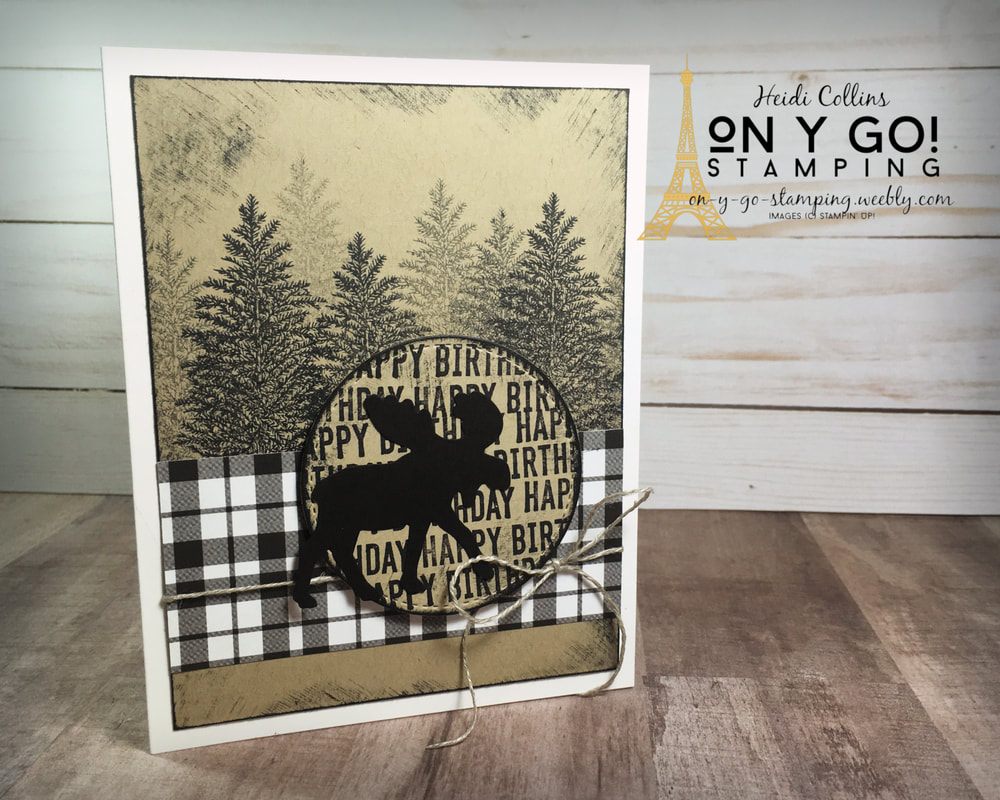
After adhere the black and white plaid from the Plaid Tidings patterned paper, I added the greeting circle using Stampin' Dimensionals. I punched the moose outline using the Moose punch from Basic Black cardstock and adhered it to the greeting circle. The card front is tied with a piece of linen thread, and then, the card front is glued to a Whisper White card base. This is a great masculine birthday card idea!
0 Comments

A Bunch of Handmade Birthday Cards

9/28/2020

0 Comments

 
Picture
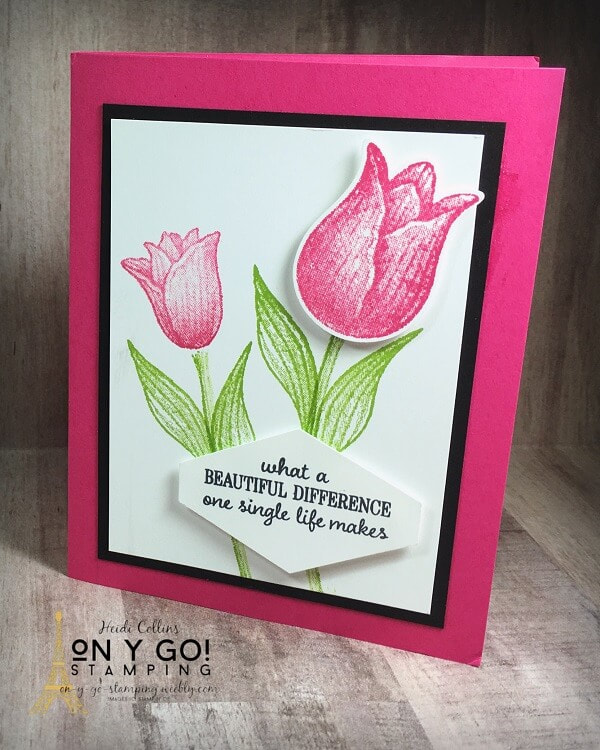
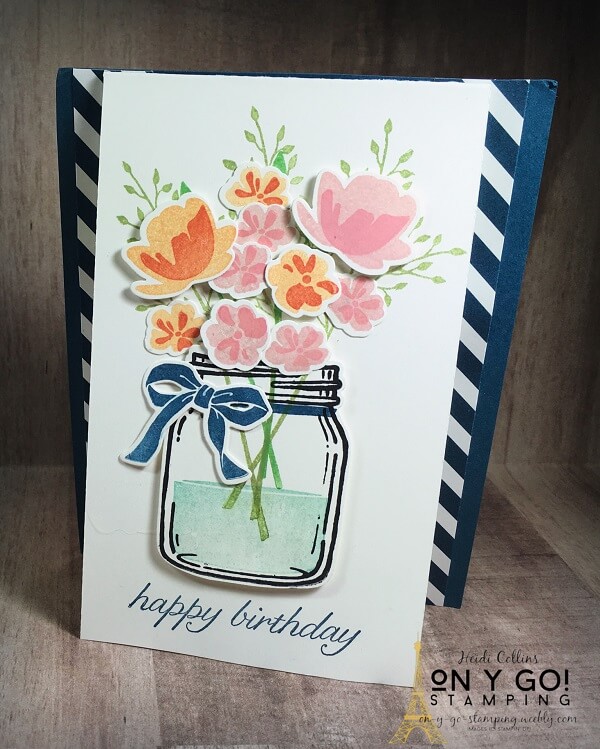
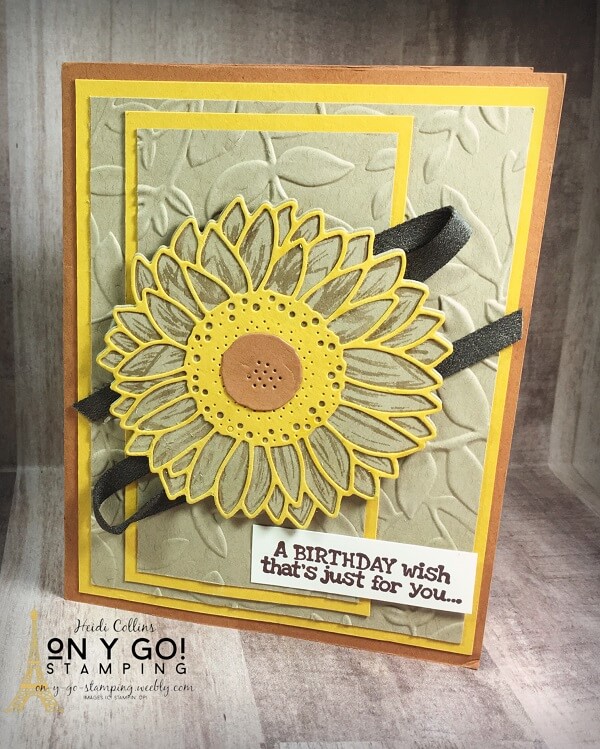
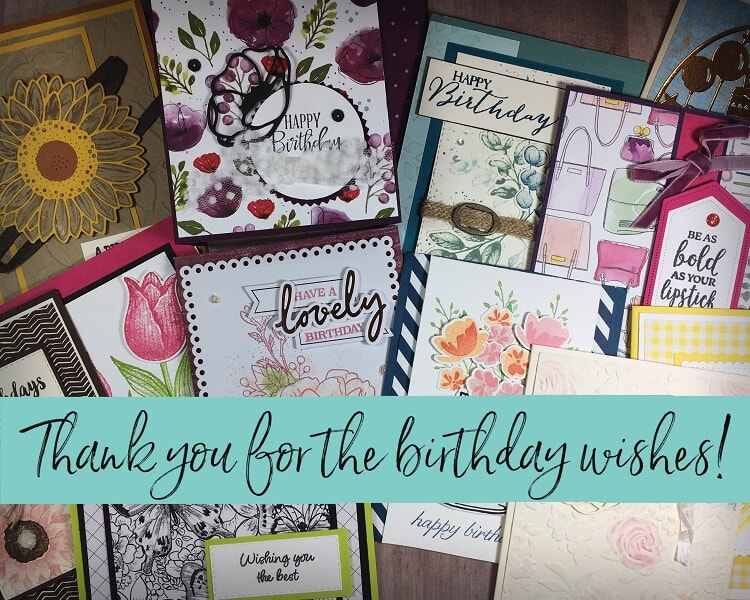
Being a Stampin' Up! Demonstrator means that I got a flurry of handmade birthday cards for my birthday this weekend. Thank you to all of my family, friends, and fellow demos who sent me cards. They are beautiful! I thought y'all might like to see the gorgeous bouquet of cards I received. There are tons of great birthday card making ideas here! So, on y go! Let's get stamping.
Picture
From Deedra Corona
Picture
From Kathy Taylor
Picture
From Carol Grutkoski
Picture
From Dana Coots
Picture
From Melissa Bolinger
Picture
From Eileen Thiessen
Picture
From Cheryl
Picture
From Karen Burch
Picture
From Jackie Bolhuis
Picture
From Judi Cayton
Picture
From Judie Silvis
Picture
From Vickie Knight
0 Comments

Cardmaking Technique: How to create a scene using masking

9/25/2020

0 Comments

 
Card making idea using the Coming Home stamp set from Stampin' Up! Learn how to use the masking technique to create a scene and how to color using Stampin' Blends alcohol markers.
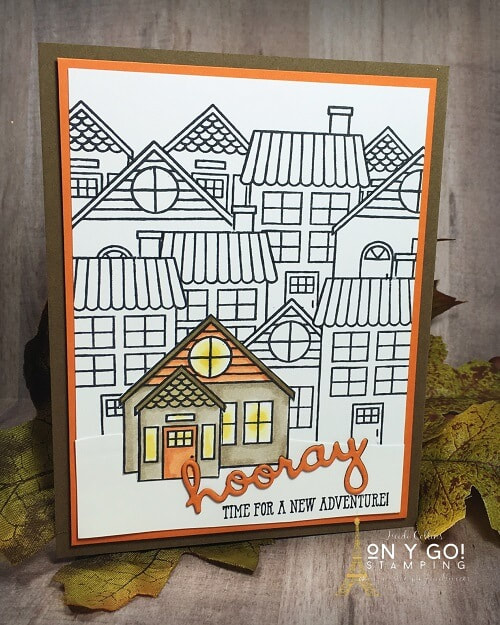
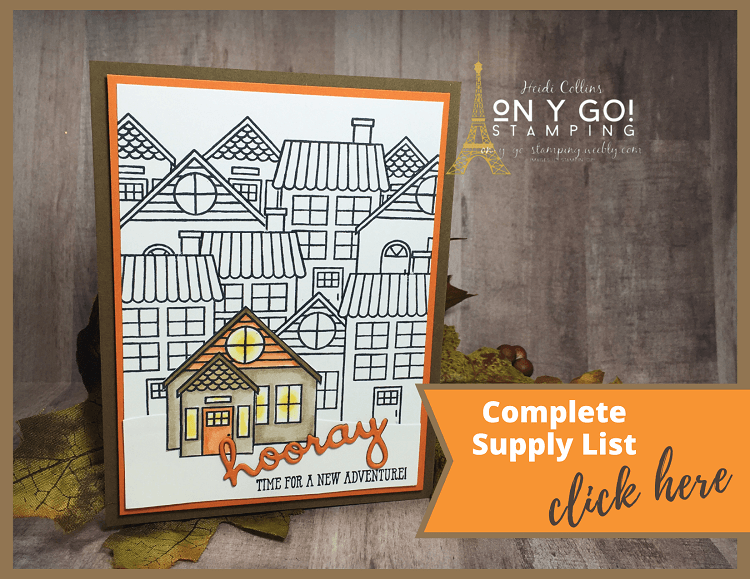
Masking is the perfect card making technique for creating scenes and it works fantastically with the Coming Home stamp set from the 2020 August-December Mini Catalog from Stampin' Up! I love the way this card has a neighborhood of black and white houses with the focal point colored. It would be a great housewarming card! So on y go! Let's get stamping.

How to do Masking and Coloring with Alcohol Markers

This video will walk you step-by-step through the process of masking. I also share tips for coloring with Stampin' Blends alcohol markers. 
Cardmaking Technique: Masking. Use masking to create a cluster of houses using the Coming Home stamp set from Stampin' Up! Also, get tips for using the Stampin' Blends alcohol markers.

Cutting Dimensions for this Housewarming Card Making Idea

Soft Suede cardstock:
  • 8 1/2" x 5 1/2", scored at 4 1/4"
  • scraps
Pumpkin Pie cardstock:
  • 3 15/16" x 5 3/16"
  • scraps
Whisper White cardstock:
  • 3 3/4" x 5"
  • Scraps
I colored the house with Pumpkin Pie, Crumb Cake, Soft Suede, and Daffodil Delight Stampin' Blends alcohol markers. For the greeting, I used the Well Written dies and Well Said stamp set. I love how these coordinating dies and stamps work together to create dynamic greetings!
​
Picture

Shop the supply List for this fun Card Design

Click here for a complete list of supplies to create this fun housewarming card. Need stamps, inks, and accessories? Check the supplies you need and then click "Add to Cart." Don't forget to add the current host code to your order so that you can earn Frequent Shopper Rewards (you'll find it towards the top of the sidebar to the right). 
0 Comments

Fun Fold Card Idea: Drapery Fold

9/23/2020

0 Comments

 
Easy fun fold card idea. This simple card design features a drapery fold that is perfect for showing off gorgeous scrapbooking paper.
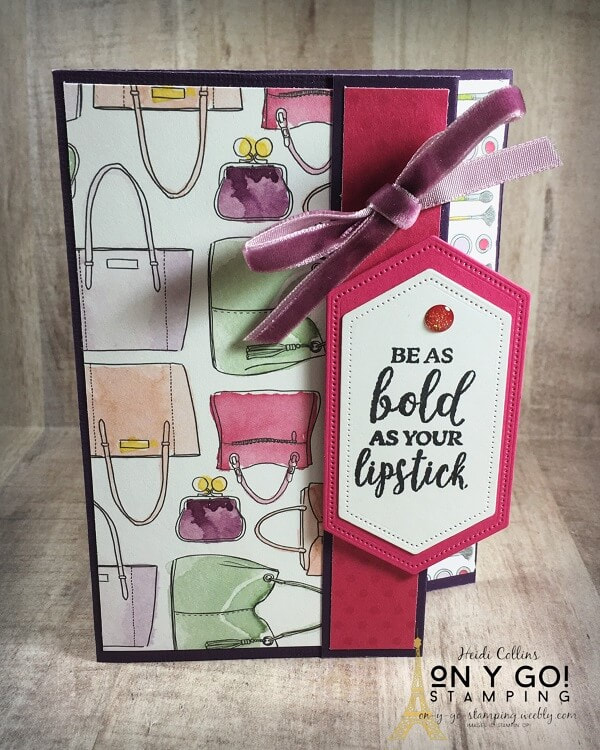
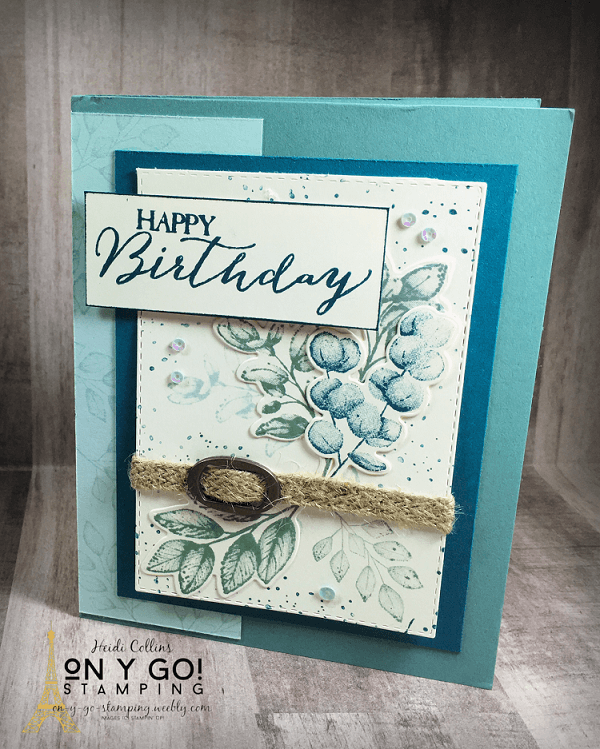
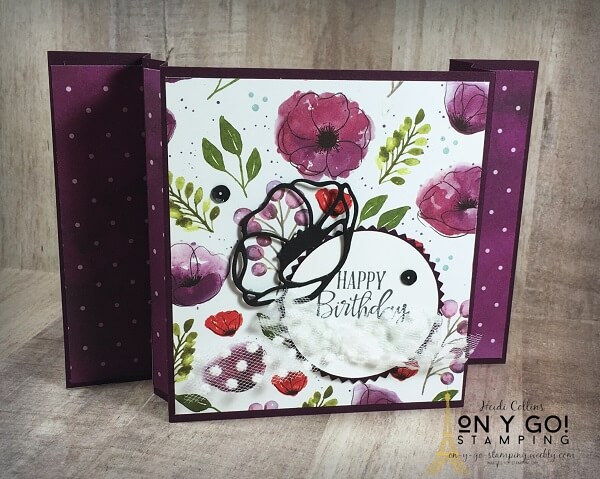
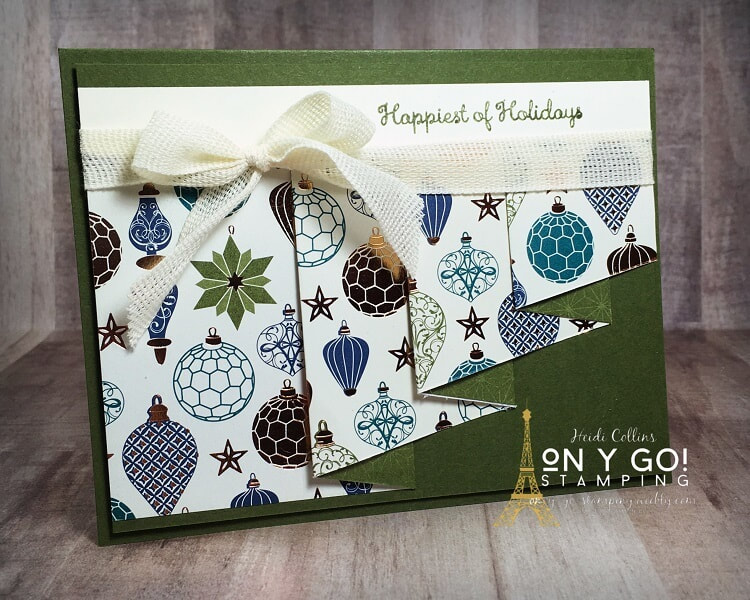
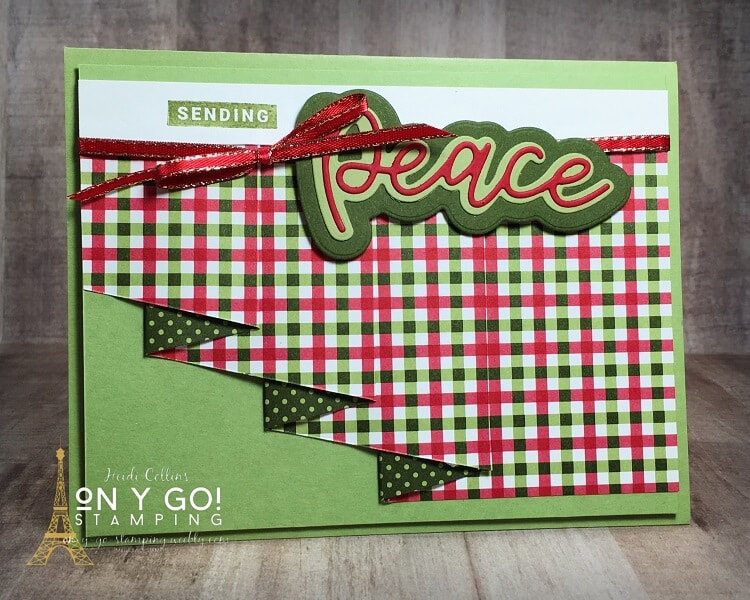
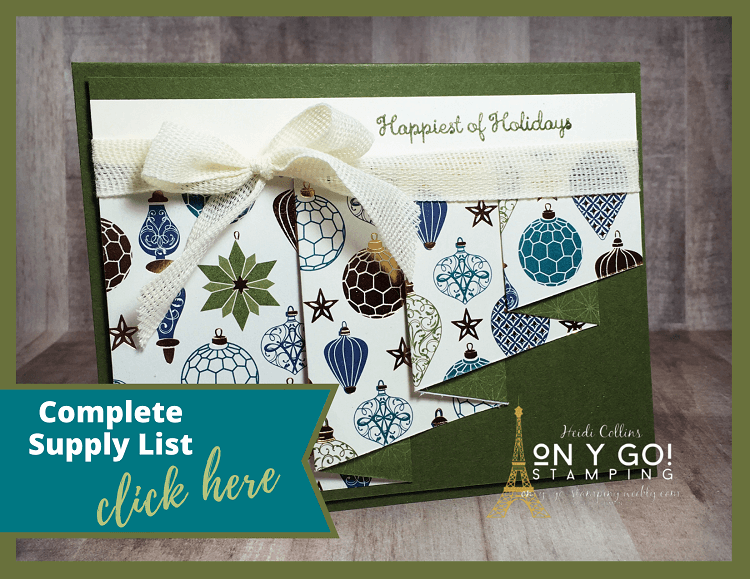
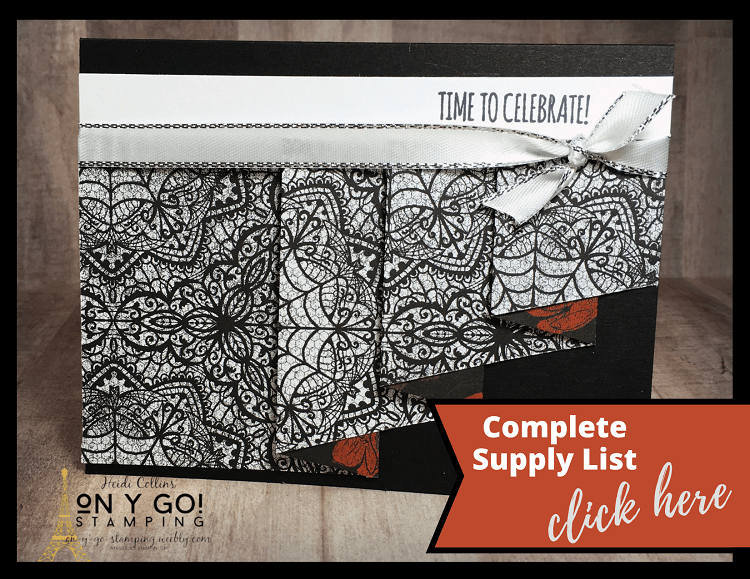
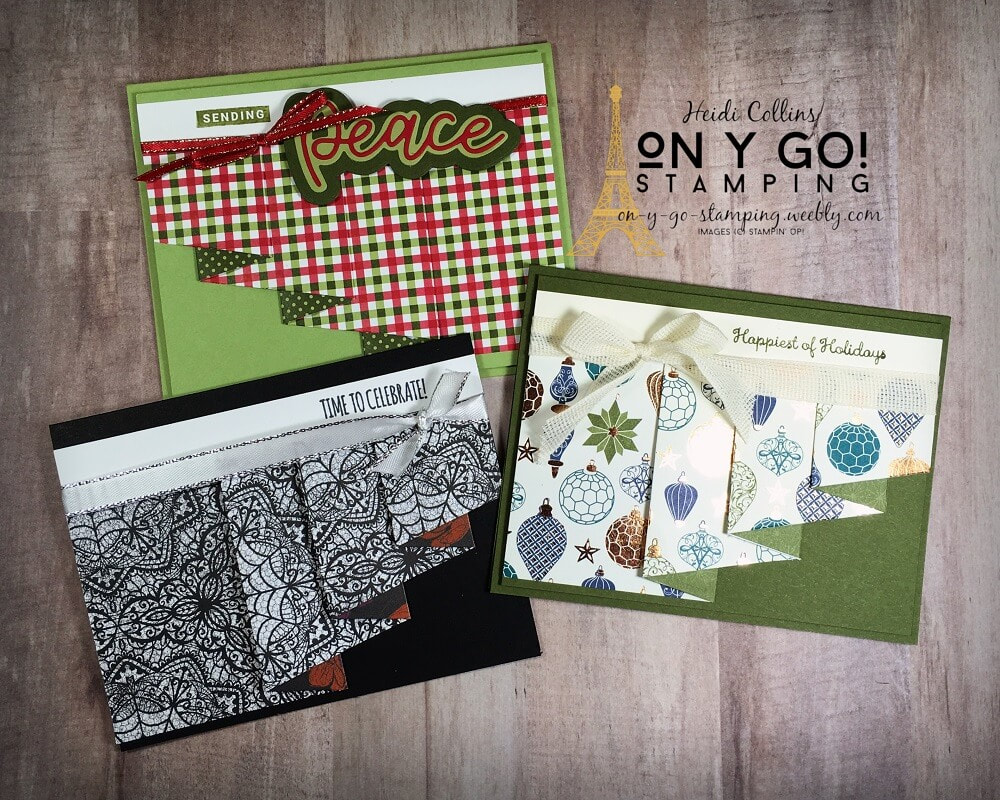
This fun fold card making idea features a pleated card front that adds a touch of elegant whimsy. This quick card design is easy once you have the right measurements. So, on y go! Let's get stamping.
Fun fold cardmaking idea using the Brightly Gleaming patterned paper from Stampin' Up! The greeting is from the Merry Moose stamp set. This easy fun fold card design has a drapery fold that is perfect for showing off your gorgeous scrapbook paper.

Cutting Dimensions for this Fun Fold Card Idea

Cardstock:
  • 8 ½” x 5 ½”, scored at 4 ¼”
  • 5 ¼” x 4”
White or Vanilla Cardstock: ¾” x 5 ¼”
Patterned Paper: 3 ¼” x 11 ¼”
  • score at: 2 ¾”, 3 ¾”, 5 ¾”, 6 ¾”, 8 ¾”, 9 ¾”

Instructions for Making the Pleated Card Front

  1. Lay the piece of 3 ¼” x 11 ¼” of patterned paper in front of you with the smaller section on the left side. (The pattern you want to see less of should be facing up.)
  2. Make a mark on the left side of the piece of patterned paper. The mark should be 1 ¼” from the top.
  3. Draw a line from this mark to the bottom of the score line that is farthest to the right. Cut along this line.
  4. Turn over your piece of patterned paper so that the largest section is on the left now and the angled edge is on the bottom. 
  5. Fold the piece of patterned paper toward the left on the farthest left most score line.
  6. Fold the patterned paper back toward the right on the next score line.
  7. Continue alternating the folds towards the left and then toward the right.
  8. End with a fold towards the right. 
An easy card making idea using the Heartwarming Hugs patterned paper, the Peace & Joy stamp set, and the Joy dies from Stampin' Up! This easy fun fold card idea features a drapery fold.
Card making idea for a fun fold card using the Magic in This Night Designer Series Paper from Stampin' Up! This beautiful drapery fold is quick and easy to make.

Finishing the Drapery Fold Card Design

Adhere the folded piece of patterned paper on the piece of 5 ¼” x 4” cardstock so that the folded even edge is approximately ¾” from the top of the piece of 5 ¼” x 4” cardstock. Stamp a greeting on the strip of Whisper White or Very Vanilla cardstock and adhere this to the card front so that it slightly overlaps the patterned paper. Tie a ribbon around the front and adhere to your card base. 

While there seems to be a lot of steps, this card is actually quite easy. And it's a fabulous way to show off that gorgeous patterned paper you've been hoarding! 
Supply list for an easy fun fold card idea using the Heartwarming Hugs patterned paper, the Peace & Joy stamp set, and the Joy dies. This pleated card front is a quick and easy card making idea.
Supply list for an easy card making idea featuring a fun fold and the Brightly Gleaming patterned paper from Stampin' Up! The greeting is from the Merry Moose stamp set. This beautiful drapery fold is a great card making idea for showing off the gorgeous patterned paper.

Shop the Supply Lists for These Easy Fun Fold Cards

Click each image to see the complete supply list for that card. Plus, it's easy to shop directly from the supply list. Just choose the stamps, papers, and accessories you need then click "Add to Cart." Don't forget to use the monthly host code to earn Frequent Shopper Rewards - it's to the right above. 
Supply list for an easy fun fold card using the Magic in the Night patterned paper from Stampin' Up! This beautiful drapery fold card design is easy to make.
0 Comments

Card Making Technique: Pointillism Coloring

9/21/2020

0 Comments

 
Elegant handmade card design using the To a Wild Rose stamp set from Stampin' Up! and the card making technique: coloring with pointillism.
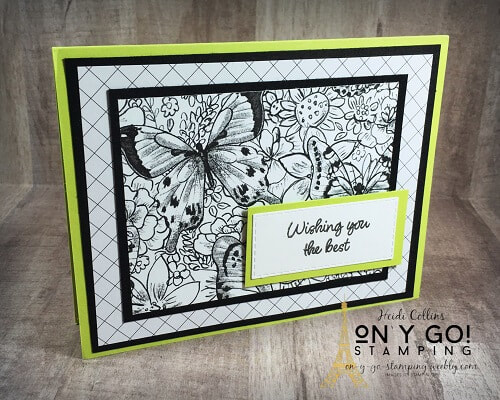
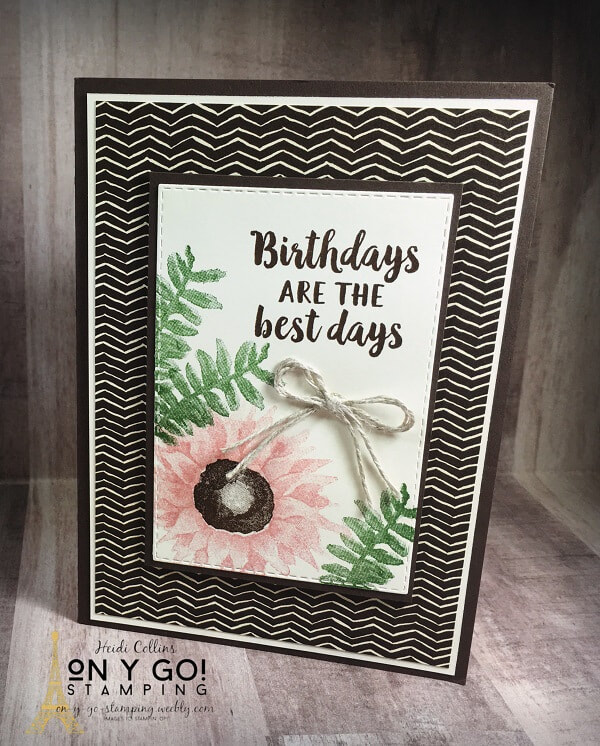
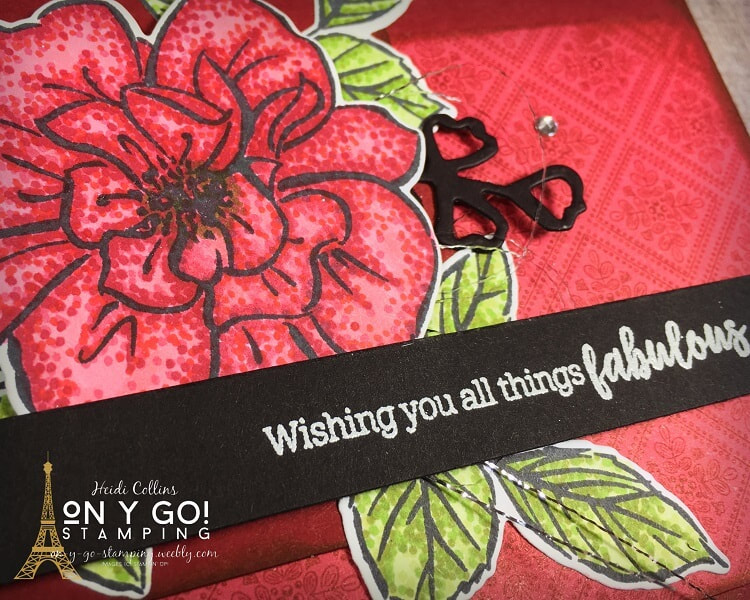
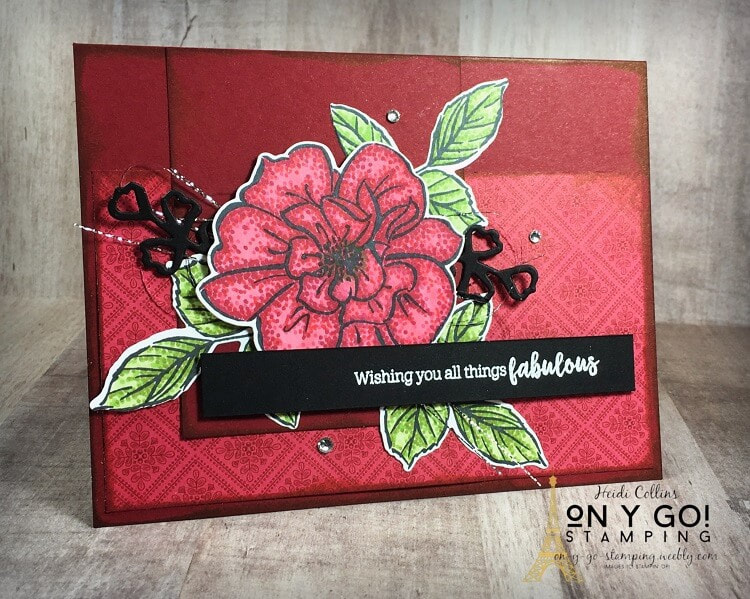
Last Thursday, I shared this unique pointillism coloring technique. If you missed it, go back and check out that post to learn exactly how to do it or watch the video. I just couldn't stop the dots! Here is another card design featuring the To a Wild Rose stamp set and the 'Tis the Season 6" x 6" patterned paper. So, on y go! Let's get stamping.

Cutting Dimensions for this beautiful Card Making Idea

Cherry Cobbler:
  • 8 1/2" x 5 1/2", scored at 4 1/4"
  • 2 3/4" x 3 1/2"
'Tis the Season Designer Series Paper: 5 5/16" x 3"
Basic Black: 1/2" x 4 1/4" & Scraps
​Whisper White: Scraps
Gorgeous card making idea using the To a Wild Rose stamp set from Stampin' Up! and the pointillism coloring technique.

Putting this Beautiful Card Design Together

to start, I swiped my Cherry Cobbler ink pad along the edges of my cardstock and patterned paper to created a slightly distressed edge. 

I stamped the images using Tuxedo Black Memento Ink. Then, I used the pointillism coloring technique to color the rose using the Poppy Parade and Cherry Cobbler Stampin' Blends alcohol markers. For the leaves, I used Granny Apple Green and Old Olive alcohol markers. I love the way this technique really shows up on the larger flower image! 

I grabbed a greeting from the All Things Fabulous stamp set, embossed it with white embossing powder on a strip of Basic Black cardstock. I trimmed the silver edge from a piece of Silver Metallic Ribbon and pulled the fine silver threads to add behind the rose by twisting them in a circle and taping them with a little piece of tape. A few rhinestone basic jewels finished the card with a little sparkle!
Supply list for all of the rubber stamps, ink pads, cardstocks, patterned paper, and embellishments needed to create a beautiful handmade card design with the To a Wild Rose stamp set from Stampin' Up!

See the Complete Supply List for this Elegant Card Making Idea

Click here to see all of the supplies used for today's gorgeous To a Wild Rose card idea. If you need any of the rubber stamps, ink pads, cardstocks, patterned papers, or embellishments, simply select them and then click add to cart. Be sure to grab this month's Host Code (to the right above) and use it with your order to earn Frequent Shopper Points.
Thank you so much for stopping by the website today. If you have any questions or need help with anything, please leave a comment or send an email (stampin_heidi@yahoo.com). I would love to hear from you!
0 Comments
<<Previous
    Heidi Collins, Independent Stampin' Up! Demonstrator with On Y Go! Stamping
    Get updates and ideas on my Facebook group
    Heidi Collins, Independent Stampin' Up! Demonstrator and Owner of On Y Go! Stamping
    Shop for Stampin' Up! stamps, inks, paper, tools, and embellishments with Heidi Collins and earn points towards FREE stamps!
    Picture
    Picture
    On Y Go! Stamping YouTube channel with Card Making Videos on how to do rubber stamping, card making, scrapbooking, and paper crafting

    Archives

    March 2023
    February 2023
    January 2023
    December 2022
    November 2022
    October 2022
    September 2022
    August 2022
    July 2022
    June 2022
    May 2022
    April 2022
    March 2022
    February 2022
    January 2022
    December 2021
    November 2021
    October 2021
    September 2021
    August 2021
    July 2021
    June 2021
    May 2021
    April 2021
    March 2021
    February 2021
    January 2021
    December 2020
    November 2020
    October 2020
    September 2020
    August 2020
    July 2020
    June 2020
    May 2020
    April 2020
    March 2020
    February 2020
    January 2020
    December 2019
    November 2019
    October 2019
    September 2019
    August 2019
    July 2019
    June 2019

Powered by Create your own unique website with customizable templates.
  • About
  • Online Card Classes
  • Card Making Ideas
  • Stampin' Up! Catalogs
  • Card Tutorials
  • Contact
  • Shopping Rewards
  • Shop
  • Join Stampin' Up!