• About
  • Online Card Classes
  • Card Making Ideas
  • Stampin' Up! Catalogs
  • Card Tutorials
  • Contact
  • Shopping & Rewards
  • Join Stampin' Up!
  • Color Picker
  • Favorite Things
ON Y GO! STAMPING
  • About
  • Online Card Classes
  • Card Making Ideas
  • Stampin' Up! Catalogs
  • Card Tutorials
  • Contact
  • Shopping & Rewards
  • Join Stampin' Up!
  • Color Picker
  • Favorite Things

What to do with all these scraps?!?

10/9/2020

0 Comments

 
Unsure what to do with all of your scrapbooking paper scraps? Learn to create beautiful cards with your leftover patterned paper.
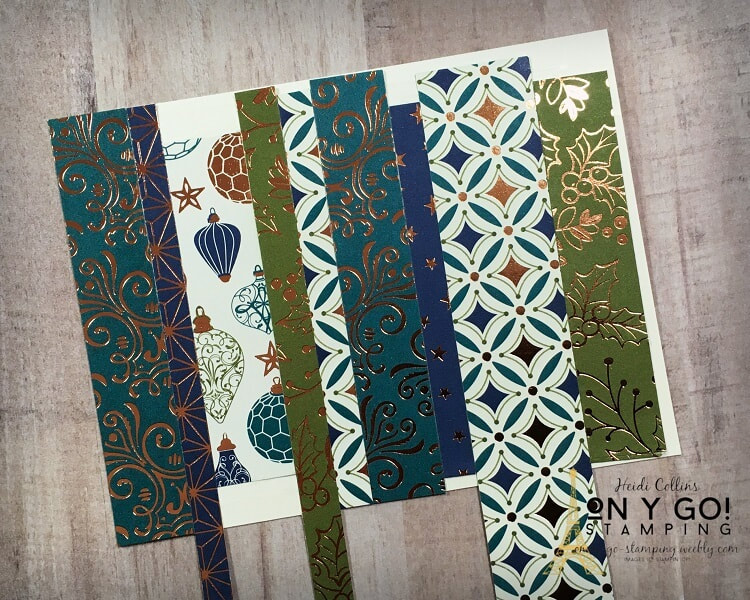
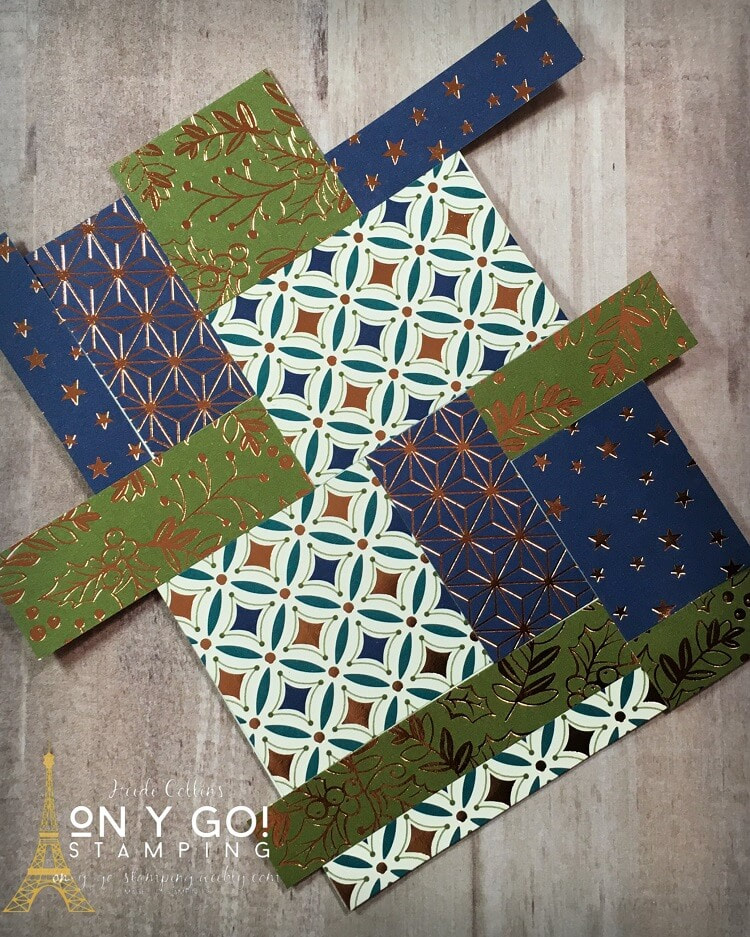
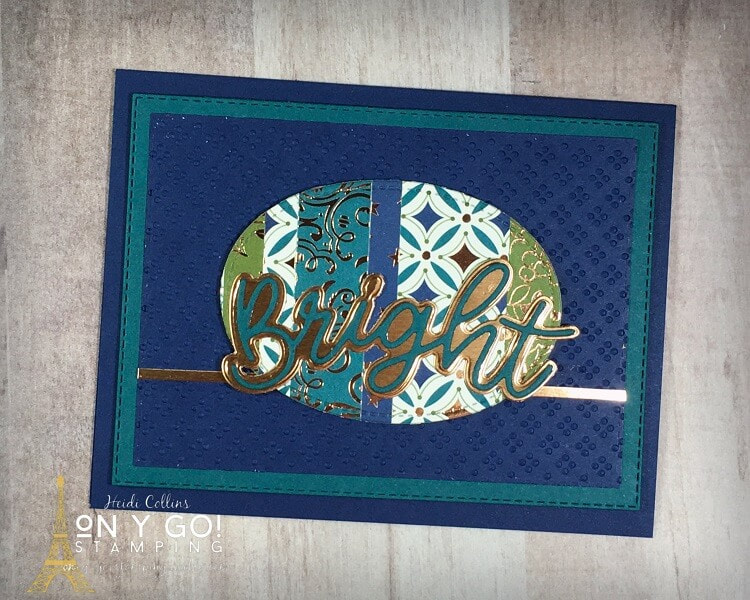
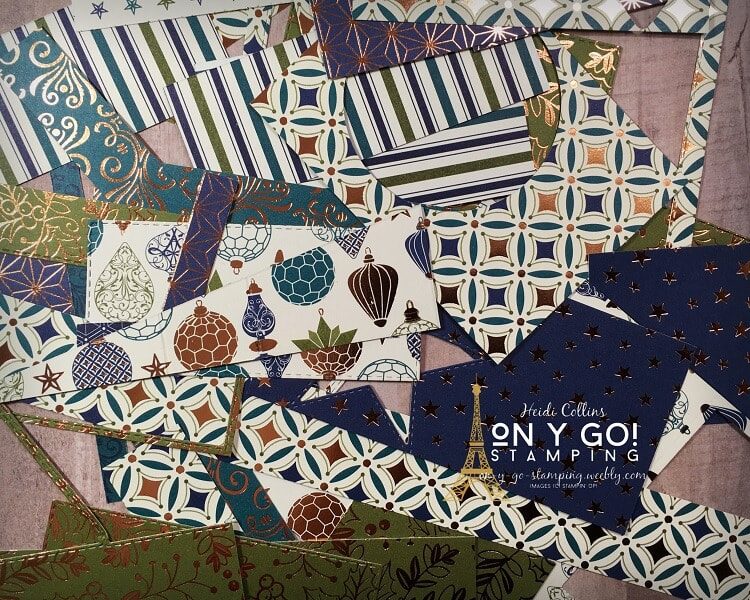
I LOVE the Brightly Gleaming patterned paper. It is absolutely gorgeous with rich colors and beautiful copper accents. I've used it and used it and used it in card making and scrapbooking and now, I have all these scraps. This scrapbooking paper is just too scrumptious to throw out the left over bits and pieces. If you've ever done any paper crafting, I'm betting you've run into a similar problem. I decided to sit down and see if I could create some cards from these paper scraps. So, on y go! Let's get stamping.
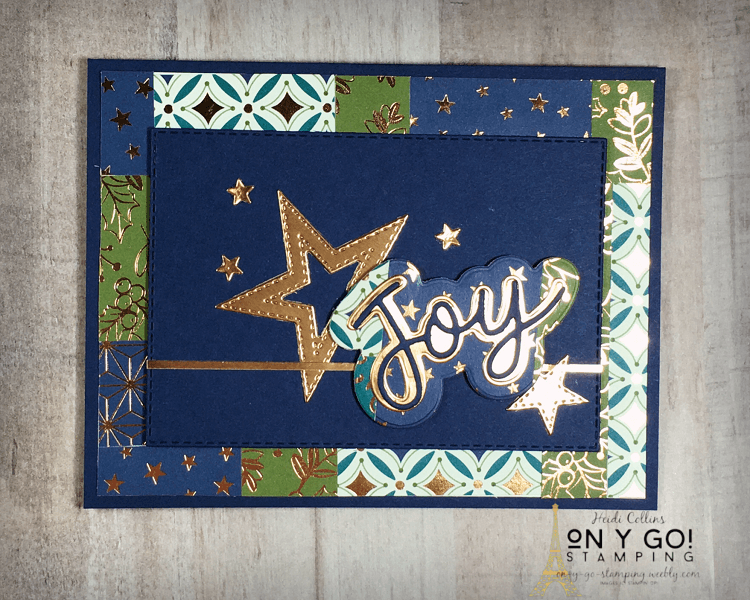
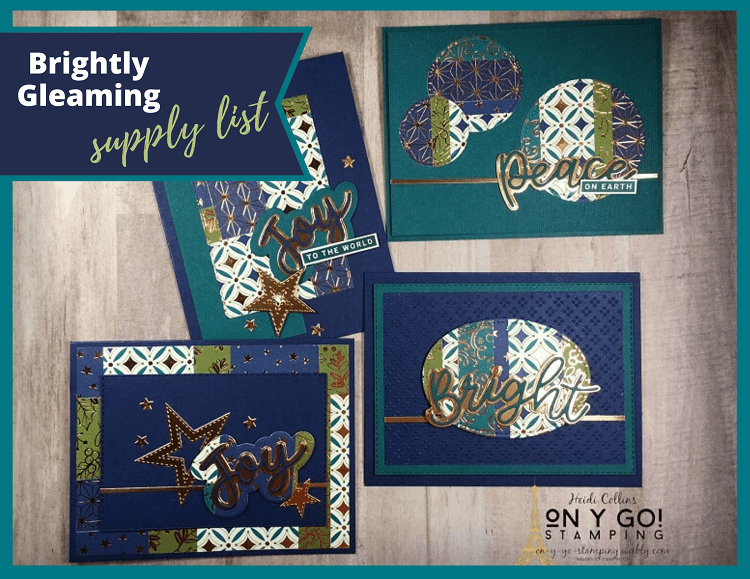
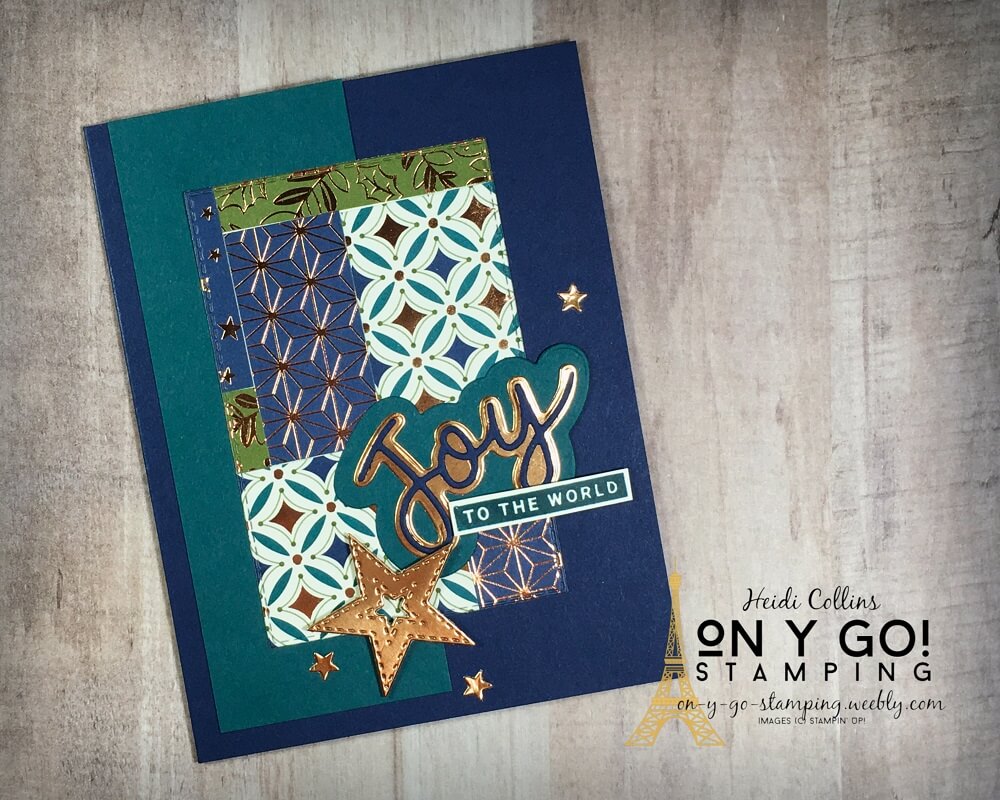
Picture
Picture

How to get started with this scrappy card making idea

I started by cutting a piece of Very Vanilla cardstock into four pieces that were each 5 1/2" x 4 1/4". Then, I put glue all over the piece of cardstock being sure to get good coverage all the way towards the edges. Then, I started laying down strips of patterned paper.

With the first piece, I used some of the longer strips and adhered them in a line with the sides pushed closely together. For the other pieces, I used more of the square and squatty pieces. I butted the edges up to each other, but didn't really have a pattern. When I had to, I would overlap pieces to completely cover the Very Vanilla cardstock. 

Originally, I planned to use the whole piece of Very Vanilla cardstock as the card front. But once I had finished gluing the scraps of patterned paper, I decided to cut shapes using the Stitched Shapes, Joy, and Stitched Rectangle dies. 
Christmas card idea using paper scraps from the Brightly Gleaming patterned paper from Stampin' Up! and the Joy and Peace stamp set and the Joy, Stitched Stars, and Stitched Rectangle dies from Stampin' Up!

Sample Card Designs using Paper Scraps

For my first card, I cut a rectangle of the glued scraps using the Stitched Rectangle dies. I used a Night of Navy card base (8 1/2" x 5 1/2", scored at 4 1/4"). I added a strip of Pretty Peacock cardstock that is 1 3/4" x 5 1/4". Then, I added the rectangle that I cut from the piece of Brightly Gleaming scraps. Using the Joy dies, I cut the base of the word "Joy" from Pretty Peacock, the second layer from Copper Foil, and the third from Night of Navy cardstock. I stamped "to the world" with Pretty Peacock ink on Very Vanilla cardstock and trimmed close to the rectangular stamped image. For a little more sparkle, I added some stars cut from Copper Foil using the Stitched Stars dies.
For my second card, I used the outside rectangle from where I had cut the rectangle for the first card. I covered the whole with another rectangle cut from Night of Navy cardstock using the Stitched Rectangle dies. 

I also cut the base for the "Joy" sentiment from a piece of the Brightly Gleaming scraps. I added more copper foil stars as well as a very thin strip of copper foil that serves as a base to anchor the word "Joy." Usually, I would use ribbon here, but I didn't have a piece of ribbon in the right color. 
Holiday card making idea using scraps of the Brightly Gleaming patterned paper, Joy and Piece stamp set, and Joy, Stitched Stars, and Stitched Rectangle dies from Stampin' Up!
Card making idea for handmade Christmas cards using patterned paper scraps from the Brightly Gleaming Designer Series Paper pack from Stampin Up! Also uses the Joy and Peace stamp set and the Joy and Stitched Shapes dies.
For my third holiday card sample, I cut three circles using the Stitched Shapes dies from the piece of Very Vanilla cardstock where I had glued stripes of the Brightly Gleaming Designer Series Paper. I adhered these to a piece of Pretty Peacock cardstock (5 1/4" x 4") that I had embossed with the Subtle 3D embossing folder. Once again, I added a very thin strip of copper foil and the word "Peace" cut from copper foil and Pretty Peacock cardstock. All this is adhered to a Pretty Peacock card base (8 1/2" x 5 1/2", scored at 4 1/4").
My last card has an oval cut from the stripes of Brightly Gleaming scraps using the Stitched Shapes dies. This is adhered to a piece of Night of Navy cardstock that was cut with the Stitched Rectangle dies and embossed with one of the Wrapped in Texture embossing folders. I mounted this on a piece of Pretty Peacock cardstock cut with another Stitched Rectangle die and adhered to a Night of Navy card base (8 1/2" x 5 1/2", scored at 4 1/4").
Using paper scraps to create handmade Christmas cards using the Brightly Gleaming patterned paper and Joy and Peace stamp set from Stampin' Up!
Card making ideas using paper scraps from the Brightly Gleaming patterned paper from Stampin' Up! These cards also feature the Peace and Joy stamp set, and the Joy, Stitched Shapes, and Stitched Rectangle dies.

Supply List for these Scrap Paper Card making Ideas

Click here for the complete supply list for these scrappy card making ideas. 
0 Comments

Double Easel Fun Fold Card Design

10/7/2020

0 Comments

 
Double Easel Fun Fold Cards. This quick and easy fancy fold card idea is also elegant and makes perfect Christmas cards and Birthday cards.
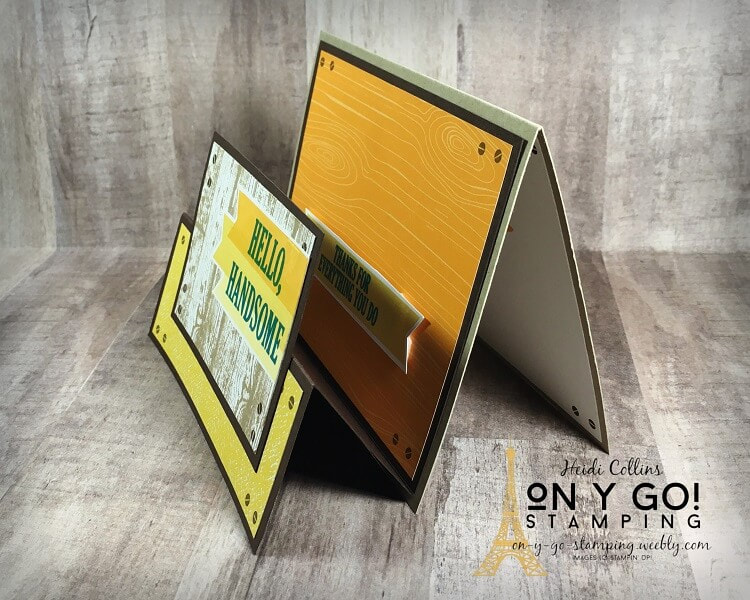
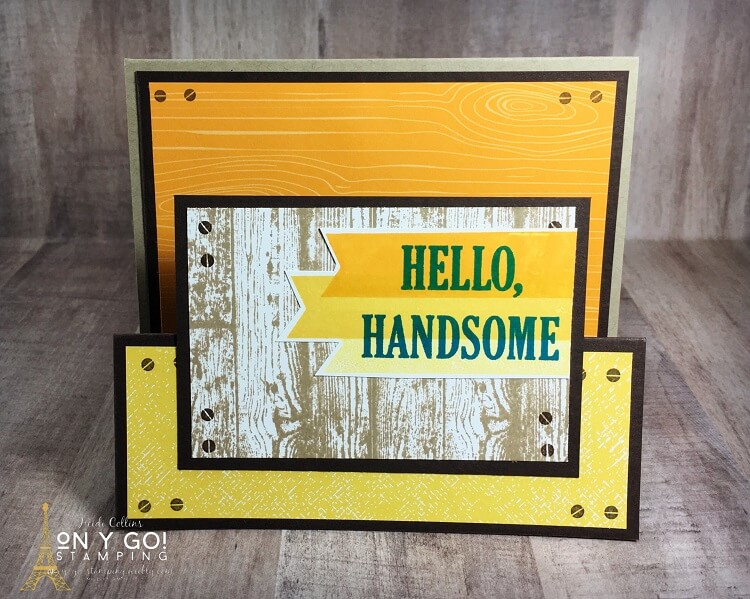
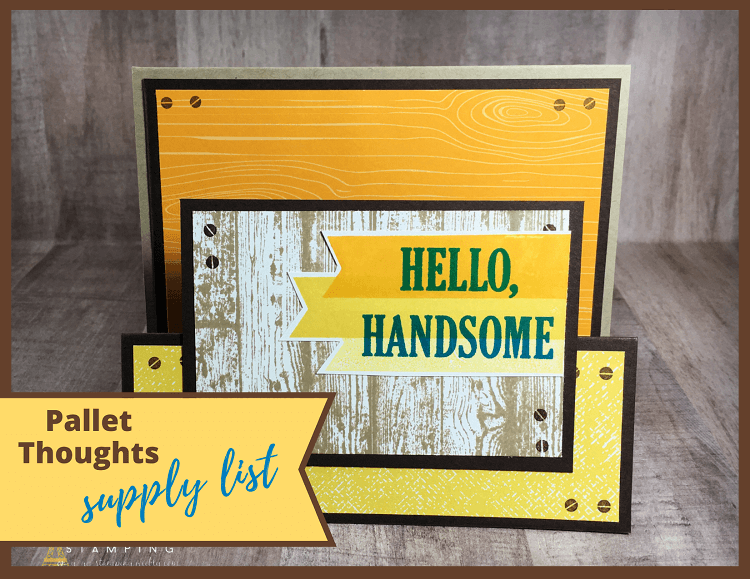
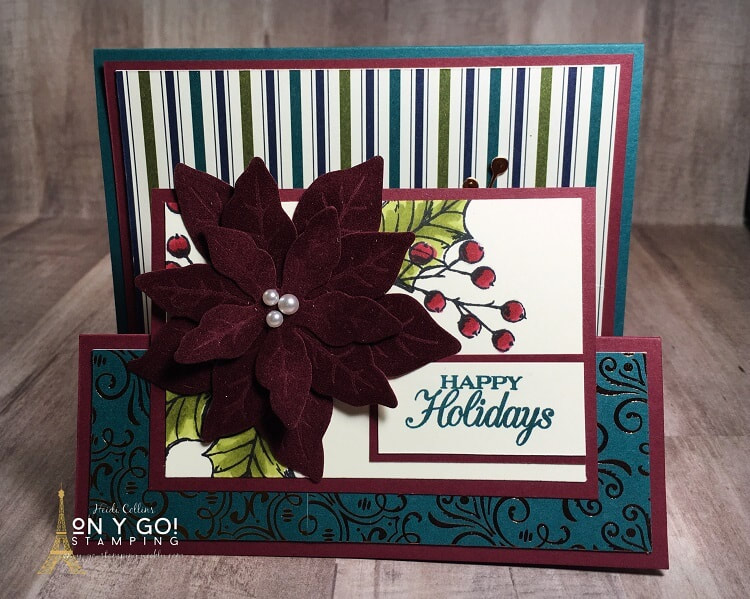
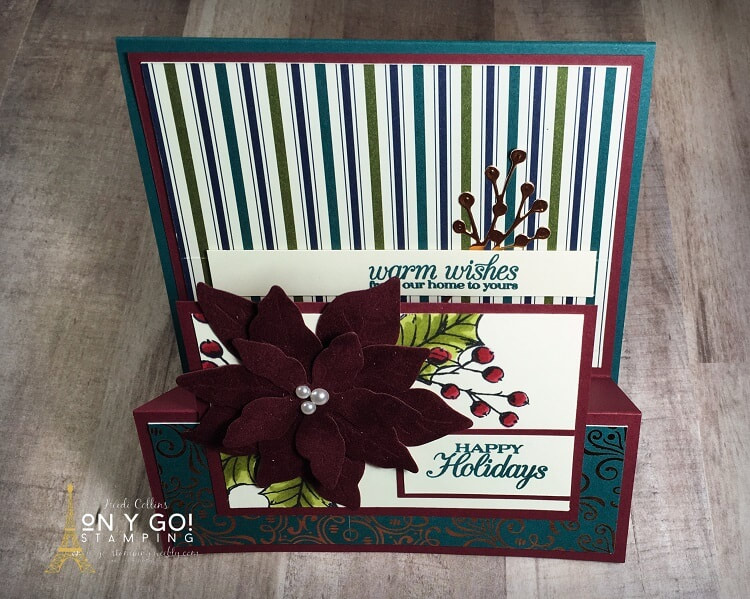
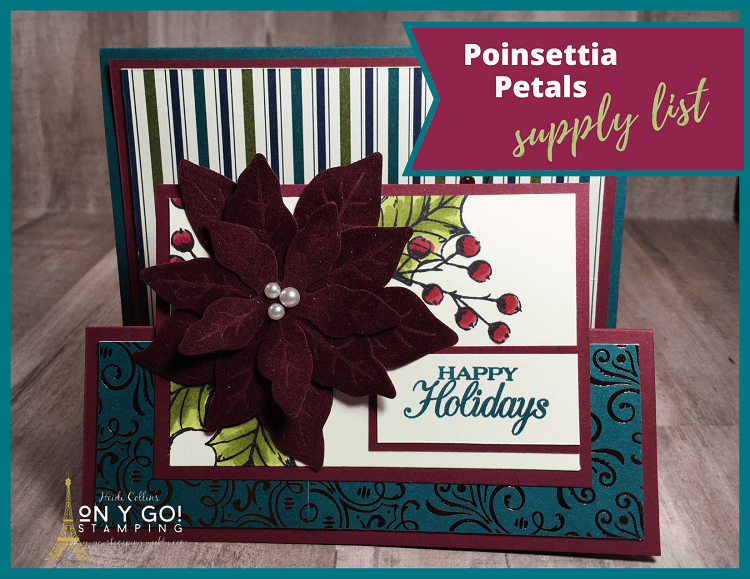
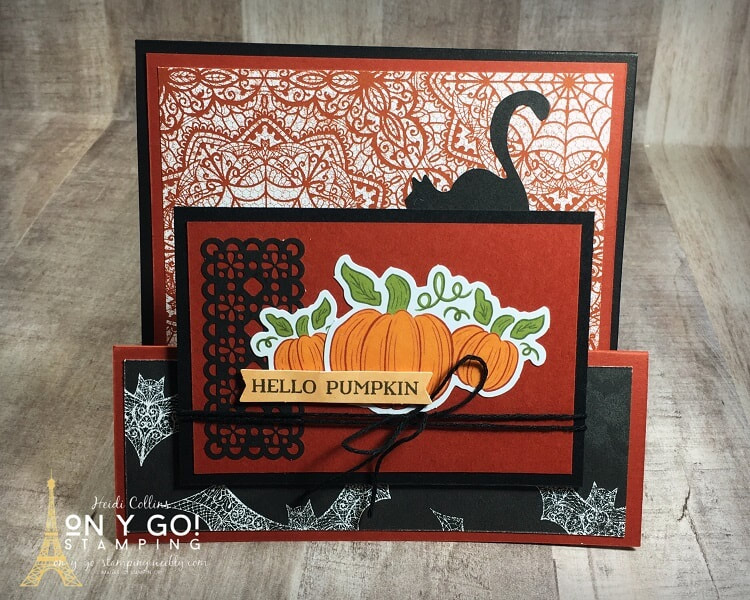
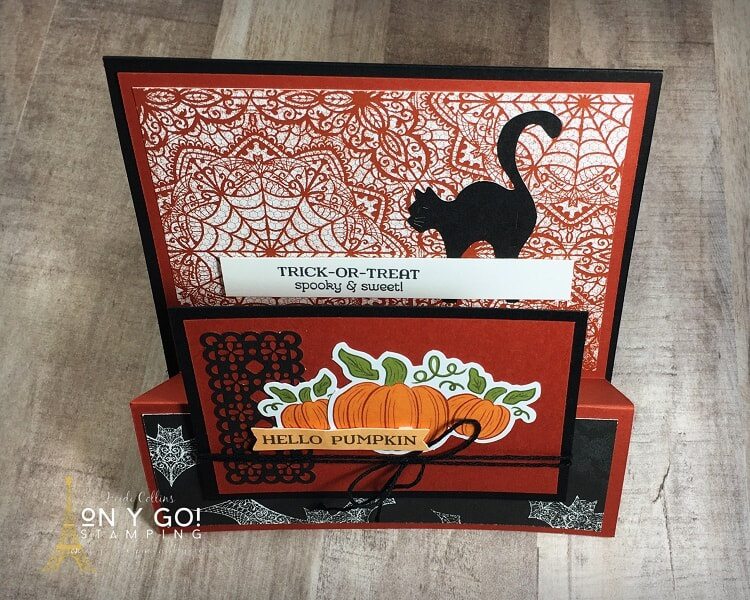
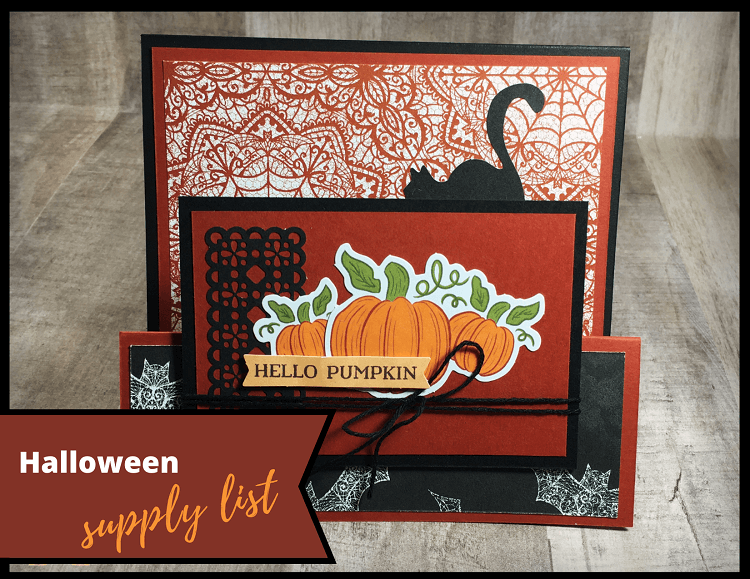
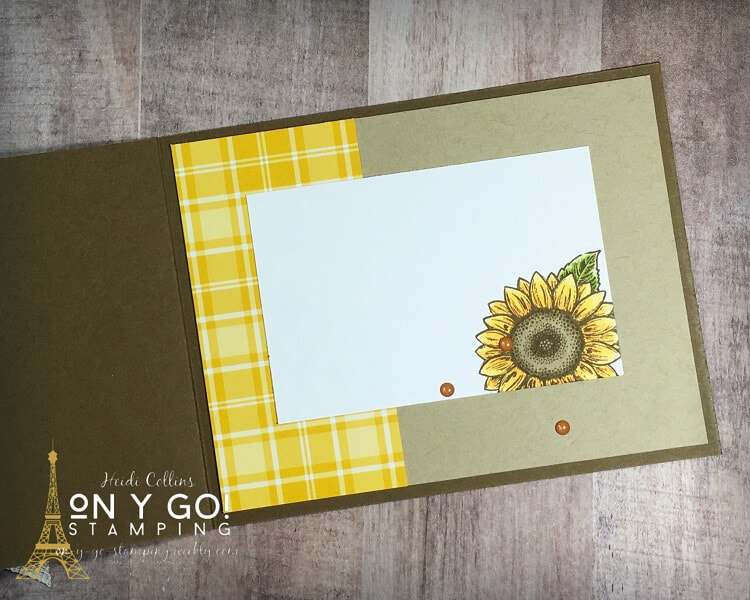
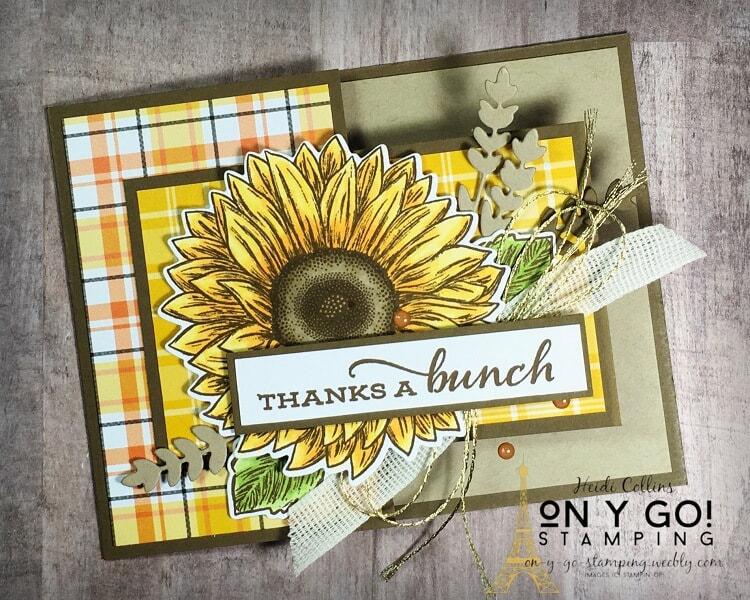
Here is a great double easel fancy fold card design that is perfect for when you want to give something a little extra to someone without spending too much time. It looks fantastic standing on a mantle and would make a gorgeous holiday card! So, on y go! Let's get stamping.

Cutting Dimensions for this Easy Fancy Fold Card Idea

Cardstock: 8 ½” x 5 ½”, scored at 4 ¼”
Coordinating Cardstock:
  • 5 ¼” x 8”, scored at 4” and 6”
  • 4” x 2 ¾”
White or Vanilla Cardstock:
  • 3 ¾” x 2 ½”
  • 3 ¾” x ¾”
  • Additional Scraps
Patterned Paper:
  • 5” x 3 ¾”
  • 5” x 1 ¾”

Assembly Instructions for the Double Easel Card

Fold the piece of 8 1/2" x 5 1/2" cardstock in half on the score line. This is the card base. Then, set the piece of 5 1/4" x 8" cardstock in front of you so that the score lines are towards the bottom. Fold the cardstock up on the center score line. Then, fold it back down on the bottom score line. Adhere this piece of accordion folded cardstock to the front of your card base. 

The 5" x 3 3/4" piece of patterned paper goes behind the accordion, and the 5" x 1 3/4" piece goes on the front flap. 
Fancy fold card idea shown from the side. This double easel card design uses the Pallet Thoughts stamp set and Brights 6x6 patterned paper from Stampin' Up!
Birthday card idea using a double easel fun fold card design. This fancy fold card uses the Pallet Thoughts stamp set and Brights 6x6 Designer Series Paper from Stampin' Up!
Double easel fancy fold card design using the Pallet Thoughts stamp set and Brights 6x6 patterned paper from Stampin' Up!

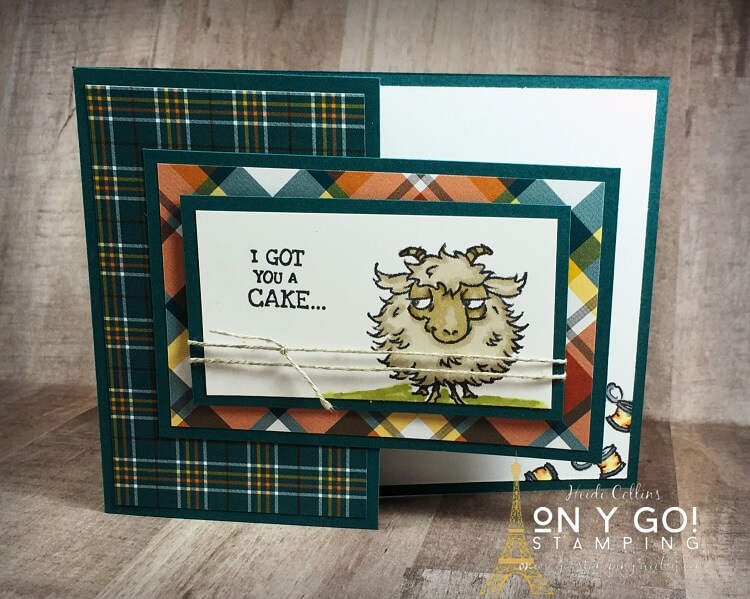
Pallet Thoughts Birthday Card
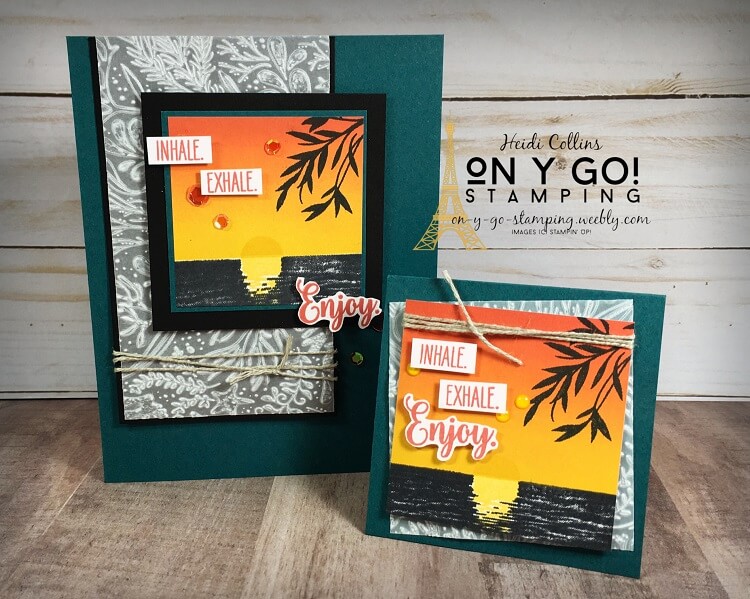
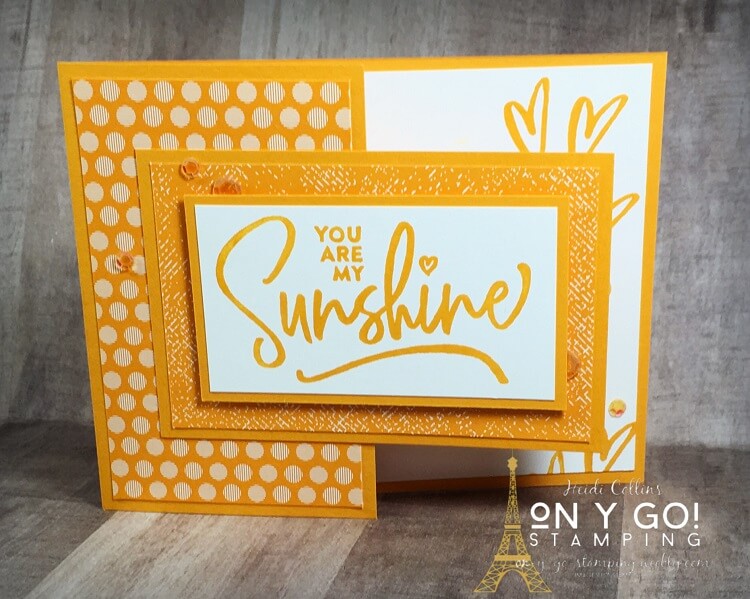
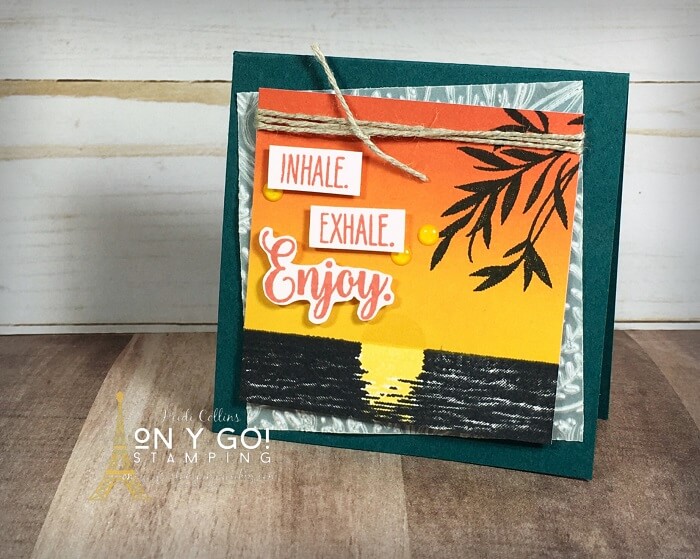
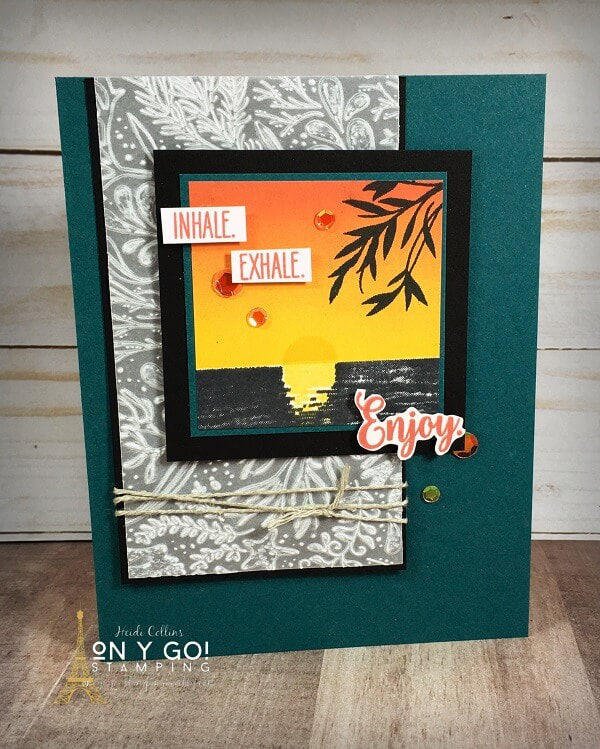
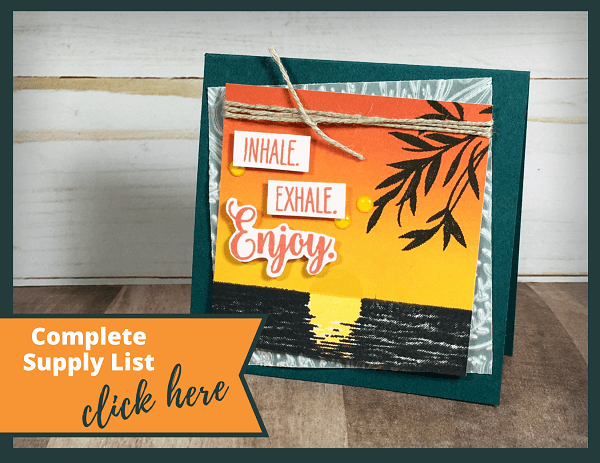
Supply list for the Double Easel Fun Fold Card Design using the Pallet Thoughts stamp set and Brights 6x6 patterned paper from Stampin' Up!
Click here for the Pallet Thoughts Supply List
My first card design uses the Pallet Thoughts stamp set. This is a great stamp set that has a large image of woodgrain boards, a banner, a variety of greetings, and some other smaller images. It is a stamp set that will work well with all sorts of other stamp sets, but here I've used it on its own. I paired the Pallet Thoughts stamp set with the Brights 6" x 6" patterned paper in Mango Melody and Daffodil Delight. 

I stamped the banner three times in Mango Melody and Daffodil Delight. I stamped it twice with the Daffodil Delight ink to get two different yellows. I love the ombre look of the three banners. I added the greeting in Pacific Point ink. 

Double easel fun fold card idea using the Poinsettia Petals stamp set and Brightly Gleaming patterned paper from Stampin' Up! This quick card idea is also elegant and makes a perfect Christmas card design.
Fun fold card idea using the Poinsettia Petals stamp set and the Brightly Gleaming patterned paper from Stampin' Up! This double easel card design is quick and elegant.
Inside of a double easel fun fold card design. This Christmas card idea uses the Poinsettia Petals stamp set and the Brightly Gleaming patterned paper from Stampin' Up!
Picture

Poinsettia Petals Double Easel Christmas Card Idea

I cheated a bit for my second card sample using the Poinsettia Petals stamp set. In the August - December 2020 Mini Catalog, there is some really cool velvet paper in bright red. I have not - yet - purchased this gorgeous specialty paper. However, I have a few sheets left in a package of velvet paper that Stampin' Up! sold years and years and years ago. So, I pulled out this darker red color. It is close to Merry Merlot in color. So, you won't be able to recreate this exact Christmas card, but you could create it with bright red velvet paper and different colored cardstock or you could recreate it using regular Merry Merlot cardstock for the focal point poinsettia.

This velvet paper is so awesome because you can emboss on it with the embossing dies that come with the Poinsettia dies. The vein lines on the poinsettia will show on the velvet. It's hard to see in the photos, but it is so cool looking in real life. 

I paired this with the Brightly Gleaming patterned paper. While the patterned paper doesn't have any red in it, it works well with the other colors - Pretty Peacock, Mossy Meadow, and Night of Navy - that are in the Brightly Gleaming Designer Series Paper. 

​In the supply list, I have included the Red Velvet paper that is currently available. 
​
Click here for the Poinsettia Petals Supply List

Halloween Easel Card Idea

My final card design idea uses the Magic in This Night patterned paper and elements from the September Paper Pumpkin to create a fun Halloween double easel card. 

I used Basic Black and Cajun Craze cardstock to match the Magic in This Night Designer Series Paper. The other elements and stamps are from the September Paper Pumpkin Kit. I love creating alternate Paper Pumpkin ideas!
Double easel fun fold card idea. This handmade Halloween card design features the Magic in This Night Designer Series Paper and elements from the September Paper Pumpkin kit from Stampin' Up!
Fancy fold card design for a Halloween card using the September Paper Pumpkin and the Magic in This Night patterned paper from Stampin' Up!
Supply list for a Halloween Double Easel card idea using the September Paper Pumpkin and the Magic in This Night patterned paper.
Interior of a Halloween card using a double easel fun fold card idea.
While the September Paper Pumpkin is no longer available, you can get a Paper Pumpkin box shipped to your house each month filled with limited-edition exclusive stamps and accessories. 
​
Supply list for the Halloween Double Easel Card
0 Comments

Fancy Fold Card Idea: Cut and Flip Card

10/5/2020

7 Comments

 
Quick and easy card making idea using a fabulous fun fold card design. These cards use the Way to Goat, Ridiculously Awesome, and Celebrate Sunflowers stamp sets from Stampin' Up!
Picture
Picture
I absolutely love this fun fold card idea! The dimensions for this card are so easy and don't leave a lot of weird extra pieces of cardstock. Just cut off half of your card front, rotate it, and glue it back on the front of your card. Then add patterned paper and stamped images to create your masterpiece!

Be sure to scroll all the way to the end of this blog post to see my gorgeous Celebrate Sunflowers card. This is my entry this month for Kylie Bertucci's International Blog Highlights. There are so many awesome designers in her gallery! After you're done here, I hope you'll take a moment to jump over there, vote for my card, and then check out all the other card designs as well.

​So, on y go! Let's get stamping.

Cutting Dimensions for this Fun Fold Card Design

Cardstock: 4 1/4" x 11", score at 5 1/2", then cut at 8 1/4"
Patterned Paper: (2) 4" x 2 1/2"
Whisper White: 5 1/4" x 4"
Whisper White: 3 1/2" x 4 3/4"
​Cardstock: 3 3/4" x 5"
Ridiculously awesome fun fold card idea that is quick and easy to make. The fun card features the Ridiculously Awesome stamp set and the Brights 6

Ridiculously Awesome Card Idea!

My first sample card idea is so, so easy! I used the Brights 6" x 6" Designer Series Paper in Mango Melody and the Ridiculously Awesome stamp set. I stamped the greeting and a few hearts on the inside using Mango Melody ink. I added a few Artistry Blooms self-adhesive sequins in Mango Melody as well for just a bit of sparkle!
Supply List for this Ridiculously Awesome Card Design

Way to Goat!

My second easy card making idea uses the Way to Goat stamp set. I love these goats! They're so darn cute. I colored this little guy giving me side-eye with Stampin' Blends alcohol markers. This card uses a couple of the gorgeous plaids from the Plaid Tidings Designer Series Paper pack.
Supply List for the Way to Goat Card Idea
Quick and easy fun fold card using the Way to Goat stamp set and Plaid Tidings patterned paper from Stampin' Up!
Fancy fold card design idea using the Celebrate Sunflowers stamp set from Stampin' Up! This gorgeous card also features the Plaid Tidings Designer Series Paper.
Gorgeous Celebrate Sunflowers stamp set. This beautiful sunflower is the focal point of an easy fancy fold card.
Inside of a Fancy fold Card using the Celebrate Sunflowers stamp set from Stampin' Up! This fun fold card design is quick and easy to make.
Supply List for the Celebrate Sunflowers Card Design
If you haven't already, I hope you'll hop over to Kylie's International Highlights gallery and check out all the amazing designers. 

CElebrate Sunflowers

Even though this is an easy card making idea, your card doesn't need to be simple! Here I used the Celebrate Sunflowers stamp set and more of the Plaid Tidings Designer Series Paper. I stamped the large sunflower, leaves, and greeting with Soft Suede ink and colored it with Stampin' Blends alcohol markers. I added some of the Forever Greenery Ribbon Combo Pack by tying a bow and adhering it under the sentiment strip. 
​
For the inside of this card, I added some more plaid patterned paper. To delineate a space to write a personal message, I added another piece of 2 1/4" x 4 1/2" Whisper White cardstock. I stamped a smaller sunflower to match the front of the card. 

This card is just so rich and full and absolutely gorgeous!
Picture
7 Comments

How to use a Brayer to Create a Sunset with the Sending Sunshine Stamp Set

10/2/2020

0 Comments

 
Use the Sending Sunshine stamp set to create beautiful sunset cards. Start by recreating a card from the Stampin' Up! catalog to create a beautiful sunset background using Classic Stampin' Pads or Dye Ink and a brayer. Then, transform the mini card into a full-sized card using the same card making techniques.
When Stampin' Up! had their stamp sale a week or so ago, I couldn't resist buying a few new stamp sets. Sometimes, when you get a new set, it can be a little daunting to figure out what to do with it. Or maybe you'd like to try a new technique, but aren't really sure what to do with it. This is a perfect opportunity to CASE (Copy and Share Everything) a card from the catalog (or other source). Here, I CASEd a card from p. 111 of the Stampin' Up! Annual Catalog. Because I wasn't sure what I was doing, I started by copying it exactly as it was shown in the catalog. Then, I make a second card and changed things up a bit. So, on y go! Let's get stamping!

​
Get to know a stamp set by CASE-ing (Copy and Share Everything) a stamp set from the Stampin' Up! Catalog. This is also a great way to learn new card making techniques like this brayered ink background used to recreate a sunset.

Card Making Technique: Ink Brayering

I shared how to recreate this beautiful 3" x 3" card on my first YouTube live video last night. You can still watch the replay of the video to see how simple it is to create this beautiful sunset background. 

I started by stamping the water with my Tuxedo Black Memento ink pad. Then, I covered the water with a sticky note, and brayered the top half of the card front with Daffodil Delight Ink. Next, I brayered the very top portion with Calypso Coral and then Terracotta Tile ink. Finally, I stamped the leaves in black.

To create the greeting, I had to perform a stamp-dectomy on my stamps. I very carefully cut the words apart. Then, I stamped each separately and cut them out before adhering them to my card front with Stampin' Dimensionals.
Transform a card idea from the Stampin' Up! Catalog from a mini card into a full-sized card design. This card has a beautiful sunset background using the ink brayering technique with the Classic Stampin' Pads dye ink from Stampin' Up! and the Sending Sunshine stamp set.

Cutting Dimensions for this Mini Card Design

Pretty Peacock cardstock: 3" x 6", scored at 3"
Whisper White cardstock: 2 7/16" x 2 7/16"
Vellum cardstock: 2 5/8" x 2 5/8"

Cutting Dimensions for this Full Card Design

Pretty Peacock cardstock:
  • 8 1/2" x 5 1/2", scored at 4 1/4"
  • 2 3/8" x 2 3/8"
Whisper White cardstock: 2 1/4" x 2 1/4"
Basic Black cardstock:
  • 2 13/16" x 2 13/16"
  • 2 3/4" x 4 5/8"
Vellum cardstock: 2 1/2" x 4 1/2"
Click here to see the list of supplies needed to create these cards. You can purchase supplies directly from the list by clicking add to cart. 
List of supplies needed to create this beautiful handmade card idea. Create an easy sunset background by using a foam brayer with regular dye ink pads like the Classic Stampin' Pads from Stampin' Up! This card features the Sending Sunshine stamp set.
0 Comments
Forward>>
    Heidi Collins, Independent Stampin' Up! Demonstrator with On Y Go! Stamping
    Get updates and ideas on my Facebook group
    Heidi Collins, Independent Stampin' Up! Demonstrator and Owner of On Y Go! Stamping
    Picture
    Picture
    On Y Go! Stamping YouTube channel with Card Making Videos on how to do rubber stamping, card making, scrapbooking, and paper crafting

    Archives

    June 2025
    May 2025
    April 2025
    March 2025
    February 2025
    January 2025
    December 2024
    November 2024
    October 2024
    September 2024
    August 2024
    July 2024
    June 2024
    May 2024
    April 2024
    March 2024
    February 2024
    January 2024
    December 2023
    November 2023
    October 2023
    September 2023
    August 2023
    July 2023
    June 2023
    May 2023
    April 2023
    March 2023
    February 2023
    January 2023
    December 2022
    November 2022
    October 2022
    September 2022
    August 2022
    July 2022
    June 2022
    May 2022
    April 2022
    March 2022
    February 2022
    January 2022
    December 2021
    November 2021
    October 2021
    September 2021
    August 2021
    July 2021
    June 2021
    May 2021
    April 2021
    March 2021
    February 2021
    January 2021
    December 2020
    November 2020
    October 2020
    September 2020
    August 2020
    July 2020
    June 2020
    May 2020
    April 2020
    March 2020
    February 2020
    January 2020
    December 2019
    November 2019
    October 2019
    September 2019
    August 2019
    July 2019
    June 2019

Proudly powered by Weebly
  • About
  • Online Card Classes
  • Card Making Ideas
  • Stampin' Up! Catalogs
  • Card Tutorials
  • Contact
  • Shopping & Rewards
  • Join Stampin' Up!
  • Color Picker
  • Favorite Things