• Home
  • About
  • Contact
  • Shopping Rewards
  • Shop
  • Join Stampin' Up!
  • Stampin' Up! Catalogs
  • Online Card Classes
  • Ideas & Inspiration
  • Tutorial Store
On y go! Stamping
  • Home
  • About
  • Contact
  • Shopping Rewards
  • Shop
  • Join Stampin' Up!
  • Stampin' Up! Catalogs
  • Online Card Classes
  • Ideas & Inspiration
  • Tutorial Store

Scrappy Quilt Technique

5/1/2020

0 Comments

 
Picture
Picture
A few weeks ago, I shared cards made with the scrappy strip technique. Today, I have a pair of cards using the scrappy quilt technique. This is another great way to use up those leftover strips of patterned paper.

Start with strips of patterned paper. The strips can be all the same width or varying widths. I would make them 1/4" to 3/4" wide. At least some of the strips should be at least 5" long. Longer strips are better, but shorter ones will work too. 


You also need a piece of Whisper White or Very Vanilla cardstock that is the size of a card front. I used 5 1/4" x 4.'' You can cut your piece down at the end if you decide you would like your card front to be smaller.

Start by adhering one strip of patterned paper diagonally across your piece of cardstock. You can adhere each piece individually, or cover your card front with snail adhesive making sure to get all the way to the edges.  Your strip of patterned paper should hang off the edges of your cardstock.
Picture
Picture
Now adhere a second strip perpendicular to the first strip. Adhere a third strip next to this strip. Now, change directions again. The fourth strip should be adhered perpendicular to the third strip. 
Continue changing directions every 1-3 pieces of patterned paper. 

When you have covered an entire area, flip your piece of cardstock over and trim the edges of the patterned paper to match the edges of your cardstock. You could use a paper trimmer to do this, but I prefer to use some long-edged scissors.
Picture
Picture
Picture
Picture
Continue in the same manner until you've filled the whole card front. This piece can now be mounted on a card base. You can add images to the front or even just add a sentiment. 

This technique is so addictive! It's impossible to just make one. But, it's a great way to use up bits of Designer Series Paper.
Picture
How are you doing on using up your stash of stamping supplies?

Here's another card made using bits of the Rebecca Designer Series Paper that I'm still trying to use up! I'm getting closer, but these sheets of patterned paper seem to last forever. 
Picture
Picture
Product List
Varied Vases Photopolymer Stamp Set
[146644]
$26.00
Stitched Shapes Dies
[152323]
$30.00
Brights 6" X 6" (15.2 X 15.2 Cm) Designer Series Paper
[149613]
$11.50
Whisper White 8-1/2" X 11" Cardstock
[100730]
$9.75
Basic Black 8-1/2" X 11" Cardstock
[121045]
$8.75
Bermuda Bay 8-1/2" X 11" Cardstock
[131197]
$8.75
Tuxedo Black Memento Ink Pad
[132708]
$6.00
Bermuda Bay Classic Stampin' Pad
[147096]
$7.50
Daffodil Delight Classic Stampin' Pad
[147094]
$7.50
Melon Mambo Classic Stampin' Pad
[147051]
$7.50
Sahara Sand 8-1/2" X 11" Cardstock
[121043]
$8.75
Early Espresso 8-1/2" X 11" Cardstock
[119686]
$8.75
0 Comments

Scrapbooking my Stash

4/10/2020

0 Comments

 
Picture
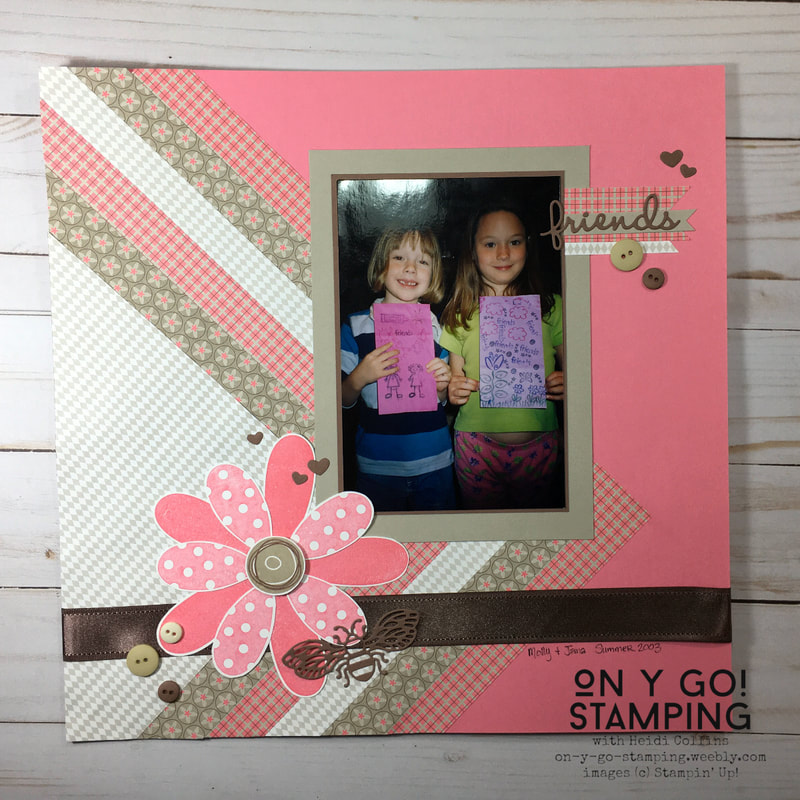
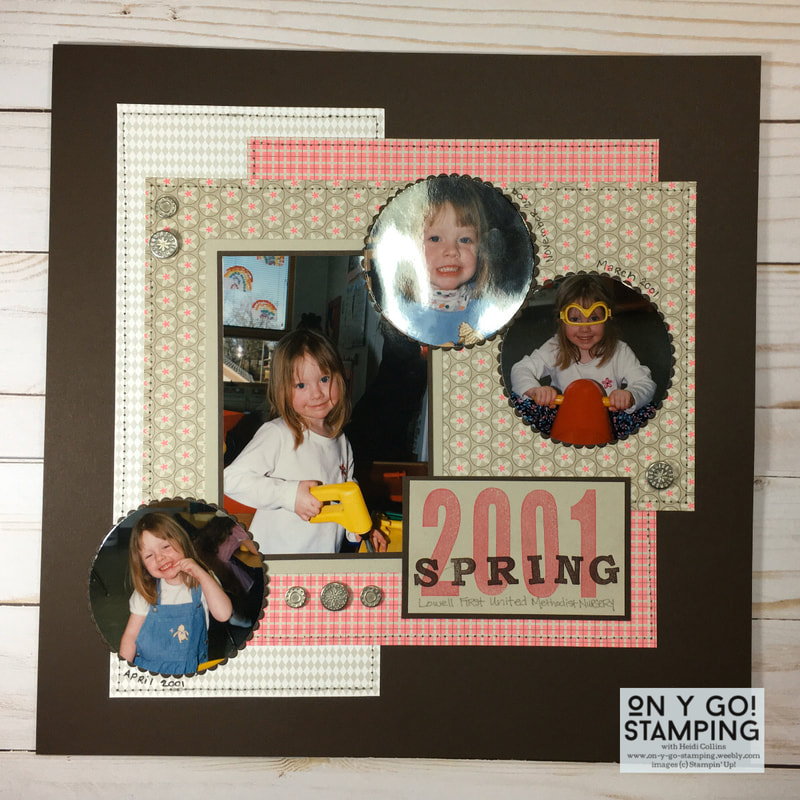
Yup, still trying to use up those 6 sheets of Rebecca Designer Series Paper! I decided that if I have any hope of using it up, I'm going to have to create some scrapbook pages since it's easier to use large quantities of patterned paper on them. The layout ideas for these two page come from AnnMarie Bryant who runs a great Facebook group: Scrapbooking the day away! She provides monthly challenges and offers a space for scrappers to share. This month, she is doing daily layout ideas.

Once again, I used the Rebecca DSP with Sahara Sand (still available) and Chocolate Chip (retired) cardstock. I added brads from the Hodpodge Hardware kit (retired). The circles are cut with the Layering Circles dies (still available). The two lettering stamp sets are both retired and stamped with Regal Rose and Chocolate Chip ink. 

To create the stitching around the outside, I used my old tool kit that Stampin' Up! used to sell when eyelets were popular. There is a plastic template in it to help you punch even holes. I poked through all the holes and then used a Sahara Sand marker to draw a line through them to look like stitching. 
Picture
This second page uses my last piece of Regal Rose cardstock. The flower in the lower left is made with the Pick a Petal stamp set from 2007. I love this set! There are multiple designs for petals and you can stamp them separately and then put them together to make flowers. There are also some circles for the center. Here, I've stamped it in Regal Rose. I stamped off on the polka dot petals to give them a lighter color. I added buttons that we used to carry and some old satin ribbon. The bee and the hearts are cut with the Detailed Bee dies (still available). 
​

While the stamps and paper are no longer available, Stampin' Up! has many great options that would work as well! I hope the pages inspire you to create your own layouts and use up your stash!
Order from Stampin' Up!
0 Comments

Does Embossing Powder Go Bad?

4/8/2020

0 Comments

 
Since I am focusing on using up my stash in the month of April, I will also be talking about some issues that come up with really old supplies. My first topic: the shelf life of embossing powder.

Does embossing powder go bad? This question is raised often in various rubber stamping communities and the opinions vary. Some people will say that embossing powder absolutely goes bad after a couple years. Personally, I have found that it depends. I have a number of powders and many of them are from 2005-2010. Most of these powders are generally fine. 

However, as I've delved back into stamping, I did notice that I was getting poor results from my white embossing powder. I finally purchased a new jar so I can share some comparisons with you. 
Picture
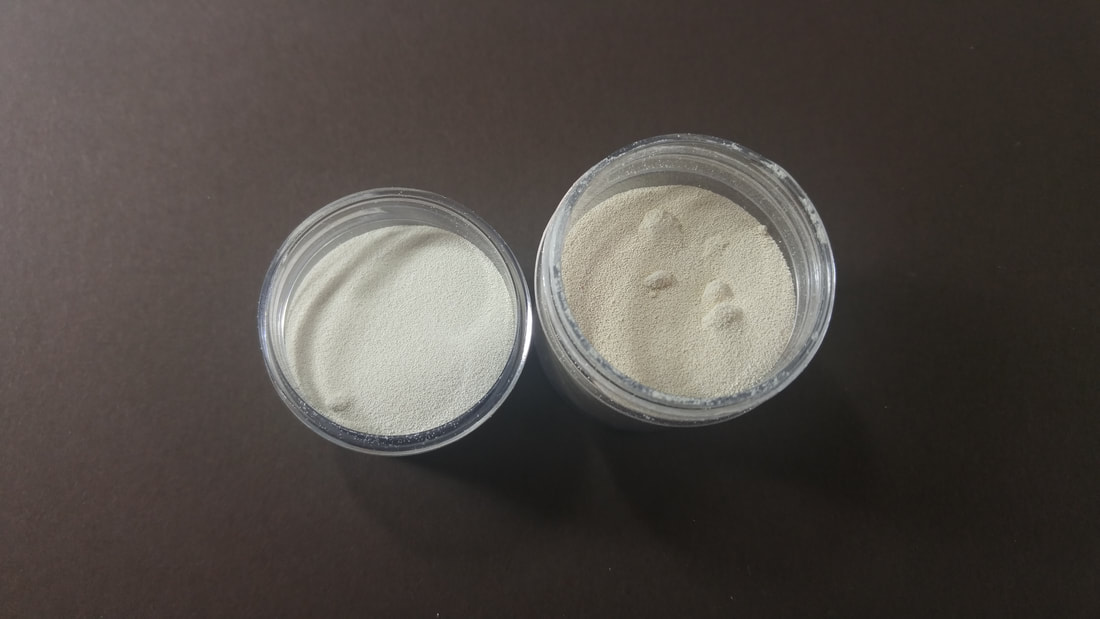
The jar on the left is my new jar and the jar on the right is my old jar of white embossing powder. It is hard to see in the picture, but there is a definite difference in color. The older powder has a yellowed look to it. You can also see that the older powder is clumpier. Now, often embossing powder will clump and it's not a big deal. However, I think the extra clumps in my older powder represent the general clumpiness of it, to the point that it does stick evenly to my image when I apply it. 
Picture
In this picture, the top image uses my new embossing powder and the bottom uses the old embossing powder. Again, you can see a difference in color between the two. However, you can also see the difference in coverage. While it is normal to have an uneven application when using a bold stamp, the one on the bottom has much larger spaces that aren't covered and just looks lumpier. This is representative of the way this older embossing powder has been acting for me since I have started stamping again.

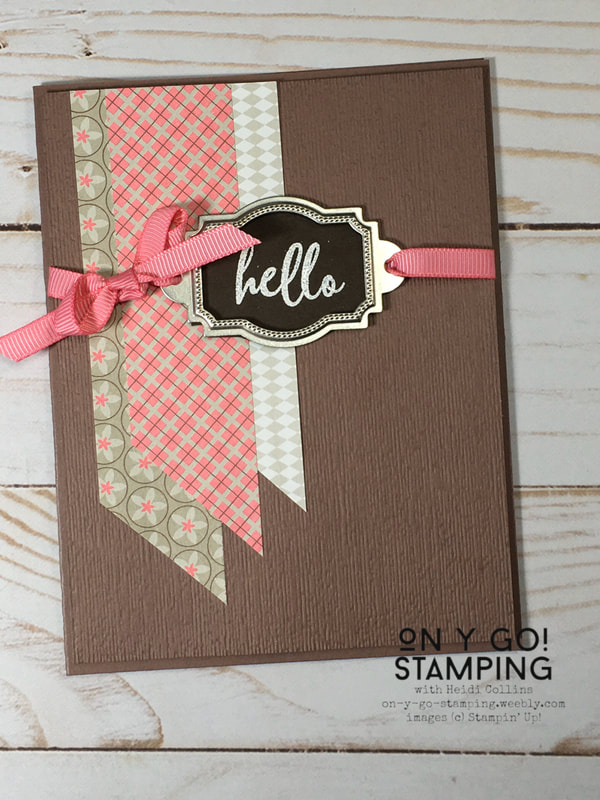
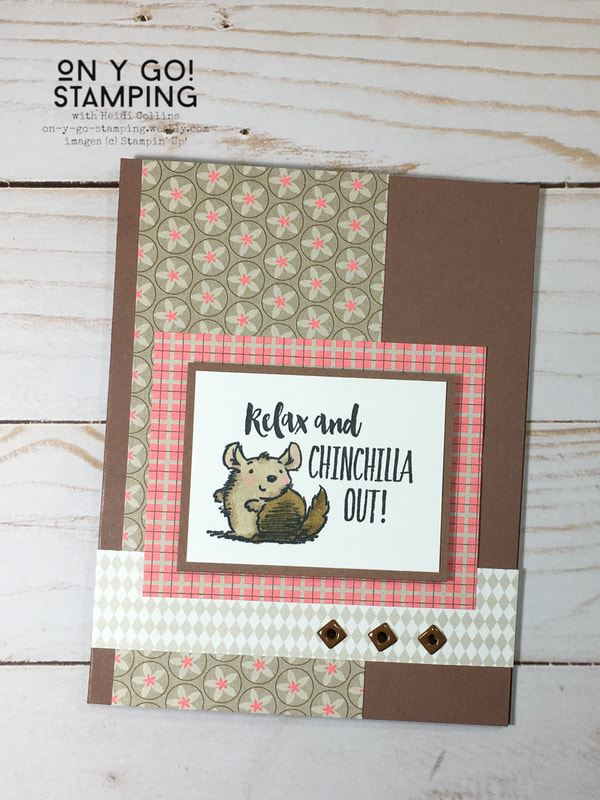
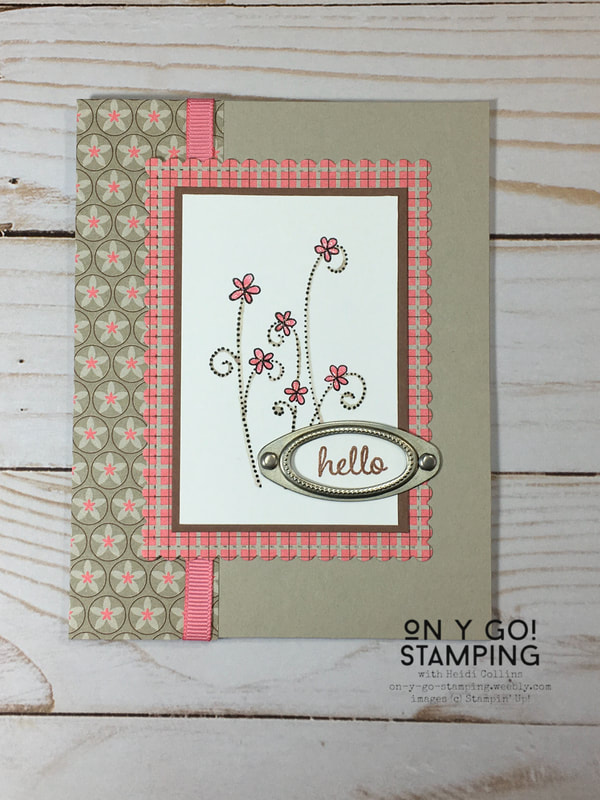
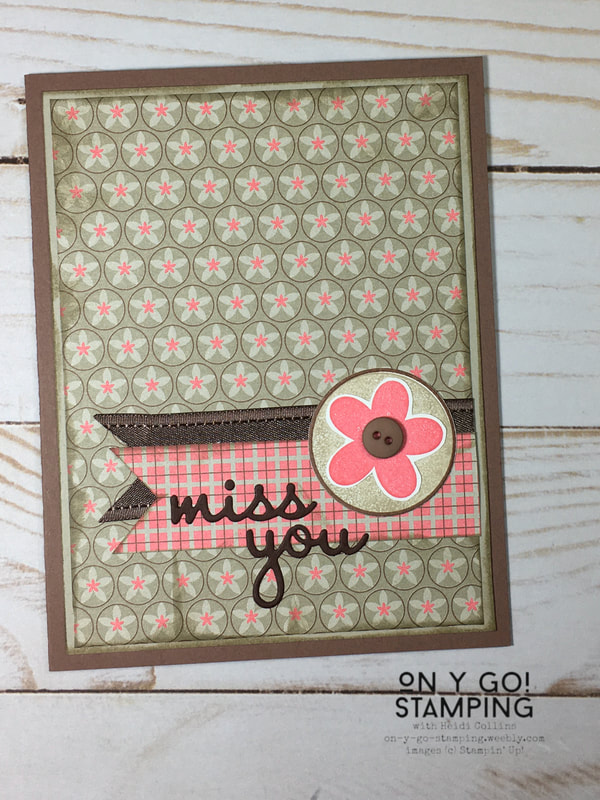
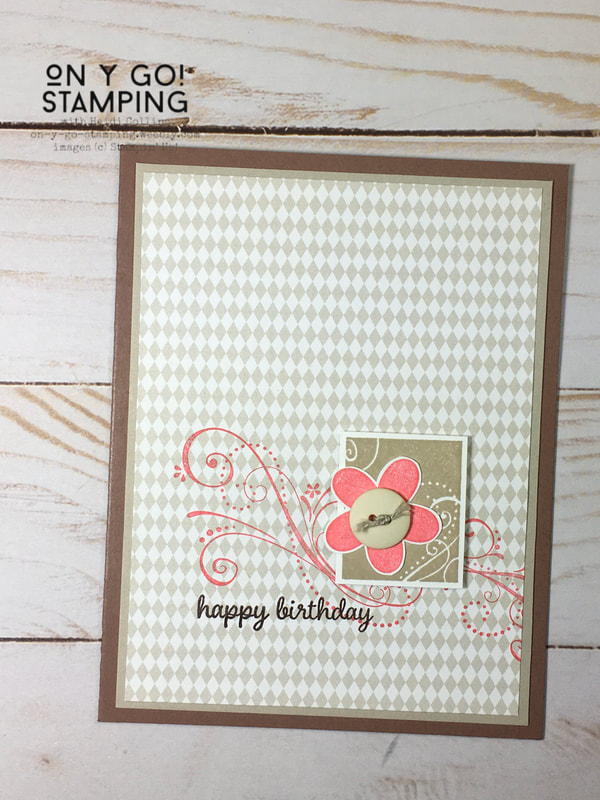
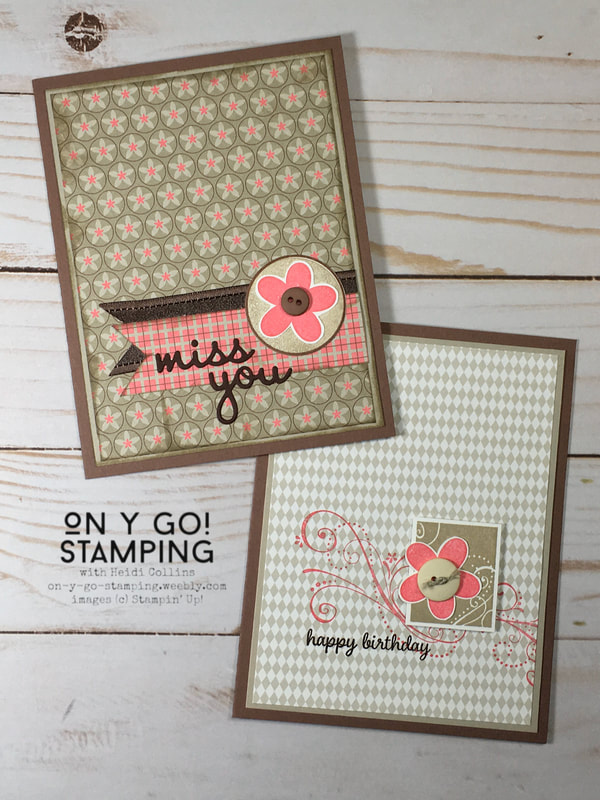
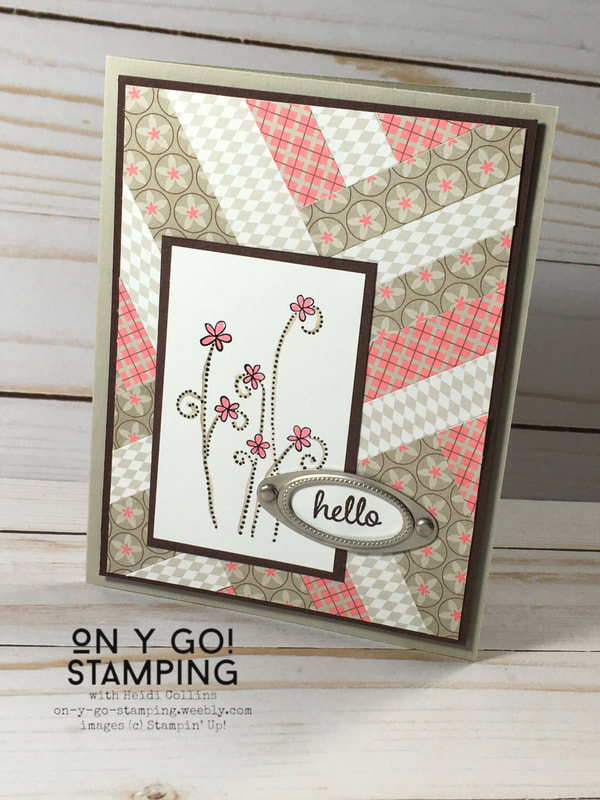
My final decision is that while some powders may still work fine after years, others may not. If your embossing powder isn't acting the way you expect it to or isn't giving you as nice of images as your other powders, you may want to consider replacing it. 
0 Comments

More cards using my stash

4/5/2020

0 Comments

 
Picture
My efforts to use up this package of Rebecca Designer Series Paper from 2006 continue. It's amazing how difficult it can be to use up 12x12 pieces of paper when you are making cards. For today's trio, I used some retired stamps and some current stamps as well. To match the paper, I used ink and cardstock in Regal Rose (retired), Close to Cocoa (retired), Chocolate Chip (retired), and Sahara Sand (NOT retired!). 

While many of these products are retired, Stampin' Up! offers a great selection of current stamps, papers, and accessories that could be used instead of these images. I hope that if you're in the market for new stamping supplies, you will check out my Stampin' Up! store.

Shop Stampin' Up!
Picture
This sweet hello card was quick and easy to make. The card base is Close to Cocoa cardstock cut 8 1/2" x 5 1/2" and folded in half.

For the card front, I used another piece of Close to Cocoa cut 5 5/16" x 4 1/16" and embossed with the Subtle 3D embossing folder. I added three strips of the designer series paper cut to different lengths and with one end cut at an angle. I stamped the greeting from the To a Wild Rose stamp set on a piece of Chocolate Chip cardstock with Versamark ink and embossed it with Whisper White embossing powder.


To frame the sentiment, I used a piece of Hodgepodge Hardware. These awesome kits were also available around the same time period as the Rebecca DSP. They contained a number of brads, metal frames, buckles, and fancy paper clips. Each tin contained about 200 pieces. I still have two of the kits. 

I attached the metal frame for the sentiment using a piece of pink grosgrain ribbon from the same period. This roll is almost gone! I'm hoping to finish it sometime this week. Maybe then I'll feel like I'm start to make a dent in my stash. Who are we kidding? It will take a lot more than one finished roll of ribbon.

This card, perfect to send to someone sheltering at home, uses the Witty-Cisms stamp set. I stamped the image with Tuxedo Black Memento ink and then colored it with Crumb Cake, Soft Suede, and Flirty Flamingo Stampin' Blends.

Once again, the card base is Close to Cocoa, I adhered a strip of DSP about 2 1/2" wide along the side and another piece about 1" wide along the bottom. I adhered the image to a piece of Close to Cocoa cardstock and then used dimensionals to attach it to a third piece of DSP. 

Along the bottom, I added 3 eyelets. Remember those? I still have tons of them, so watch for them to show up on a number of projects this month!
Picture
Picture
My last card uses an image from the retired Simply Said stamp set from 2006. I stamped it in Jet Black Stazon ink and then colored it with an Aqua Painter and ink from my Regal Rose and Mint Macaron ink pads. I layered the image on a piece of Close to Cocoa cardstock and then on a piece of Rebecca DSP cut using the Stitched So Sweetly dies from the current January-June mini catalog.

The greeting comes from the Timeless Tulips stamp set found in the current January-June mini catalog. I stamped it in Close to Cocoa ink on a separate piece of Whisper White cardstock. I attached it with another piece from a Hodgepodge Hardware kit. 

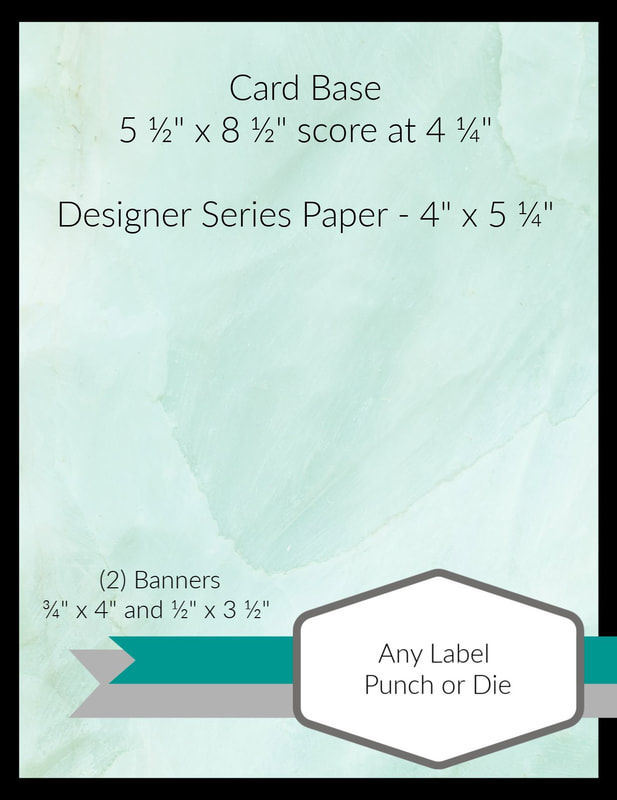
The card base is Sahara Sand cardstock with a strip of Rebecca DSP added to one side and another piece of the pink Grosgrain ribbon attached along the edge. I added the layered image on top. 
0 Comments

#ProjectUseUpMyStash Challenge

4/1/2020

0 Comments

 
Picture
So many people tell me that they have lots of stamping supplies that they never use. I too have lots of stamping supplies that aren't getting used. In fact, I have an entire drawer of solid-colored retired cardstock, tons of old eyelets, rolls of washi tape, and stacks of old ribbons. If this describes you too, April is your opportunity to dive into your stash and rediscover the treasures in your stash. 

Picture
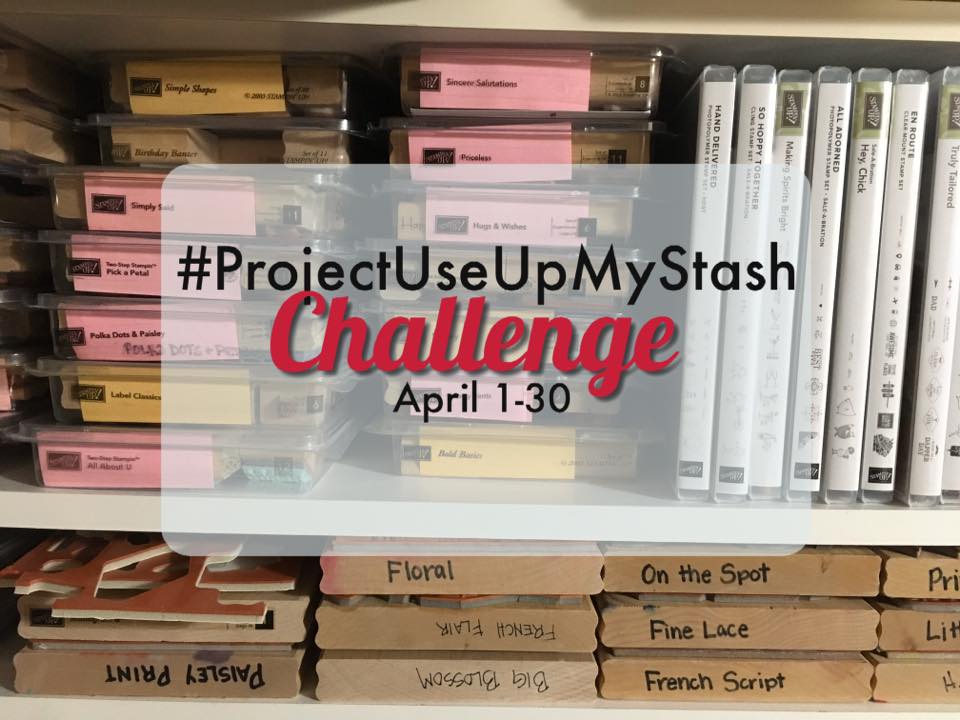
On my Facebook group and Instagram, I am hosting the #ProjectUseUpMyStash challenge. During the month of April, post pictures of evidence that you've used something up from your stash - like an empty ribbon roll, empty cardstock package, the last unusable scraps of a pack of designer series paper, or whatever else shows that you've used something up. Also, post pictures of your creations using old stamps and accessories. You can post them to my Facebook group or on Instagram using the hashtag #ProjectUseUpMyStash. Every time you post, I'll enter you into a drawing to win a $20 gift certification for Stampin' Up! product that you can use in May or June. (Redeemable only through me and only to residents of the United States.) 

​So dig into your hoards of stamping supplies and let me see what you create! ​
Join the On Y Go! Stamping Facebook Group

While I'll be using lots of retired product during the month of April, I hope you will still be able to use the samples as inspiration for your own cards. Today, I used a basic sketch to create my cards. You can see it has two flags and a sentiment at the bottom. 

For both of my cards, I used the Rebecca Designer Series Paper, circa 2007. This paper uses the colors Sahara Sand, Close to Cocoa (retired), and Regal Rose (retired). I am out of Regal Rose cardstock but still used the ink with Sahara Sand and Close to Cocoa cardstock.
Picture
Picture
For my first card, I used the Priceless and Basic Shapes stamp sets, also from 2007 and some retired satin ribbon. I paired these with a sentiment cut using the Well Written dies (still current). I added a button to the center of the flower for added dimension. 

To give the card a worn look, I swiped my Sahara Sand ink pad on the edges of the designer series paper and the layer of Sahara Sand cardstock.
My second card also uses the Priceless stamp set. I stamped the swirly stamps on the designer series paper with Regal Rose ink. The flower is stamped in this same color. Once again, I added a button to the center for texture. I tied a piece of linen thread (current) to the center of the flower.

For the sentiment, I used a stamp from the Timeless Tulips stamp set available in the January-June 2020 Mini Catalog. I stamped the greeting using Chocolate Chip ink (retired).

I hope you'll join me this month as I attempt to make a dent in my stash. Please join my Facebook group and share your creations!
Picture
0 Comments
<<Previous
    Heidi Collins, Independent Stampin' Up! Demonstrator with On Y Go! Stamping
    Get updates and ideas on my Facebook group
    Heidi Collins, Independent Stampin' Up! Demonstrator and Owner of On Y Go! Stamping
    Online card class featuring the Let's Set Sail stamp set and punch from Stampin' Up!
    Get a 6 x 6 sample of all of the new patterned papers from the 2022-2023 Annual Catalog. Plus, a free invitation to a Sneak Peek Virtual Pajama Party to see card making demonstrations using all new products.
    Shop for Stampin' Up! stamps, inks, paper, tools, and embellishments with Heidi Collins and earn points towards FREE stamps!
    On Y Go! Stamping YouTube channel with Card Making Videos on how to do rubber stamping, card making, scrapbooking, and paper crafting

    Archives

    May 2022
    April 2022
    March 2022
    February 2022
    January 2022
    December 2021
    November 2021
    October 2021
    September 2021
    August 2021
    July 2021
    June 2021
    May 2021
    April 2021
    March 2021
    February 2021
    January 2021
    December 2020
    November 2020
    October 2020
    September 2020
    August 2020
    July 2020
    June 2020
    May 2020
    April 2020
    March 2020
    February 2020
    January 2020
    December 2019
    November 2019
    October 2019
    September 2019
    August 2019
    July 2019
    June 2019

Powered by Create your own unique website with customizable templates.
  • Home
  • About
  • Contact
  • Shopping Rewards
  • Shop
  • Join Stampin' Up!
  • Stampin' Up! Catalogs
  • Online Card Classes
  • Ideas & Inspiration
  • Tutorial Store