• About
  • Online Card Classes
  • Card Making Ideas
  • Stampin' Up! Catalogs
  • Card Tutorials
  • Contact
  • Shopping Rewards
  • Shop
  • Join Stampin' Up!
ON Y GO! STAMPING
  • About
  • Online Card Classes
  • Card Making Ideas
  • Stampin' Up! Catalogs
  • Card Tutorials
  • Contact
  • Shopping Rewards
  • Shop
  • Join Stampin' Up!

Simple card sketch

8/19/2019

0 Comments

 
Picture
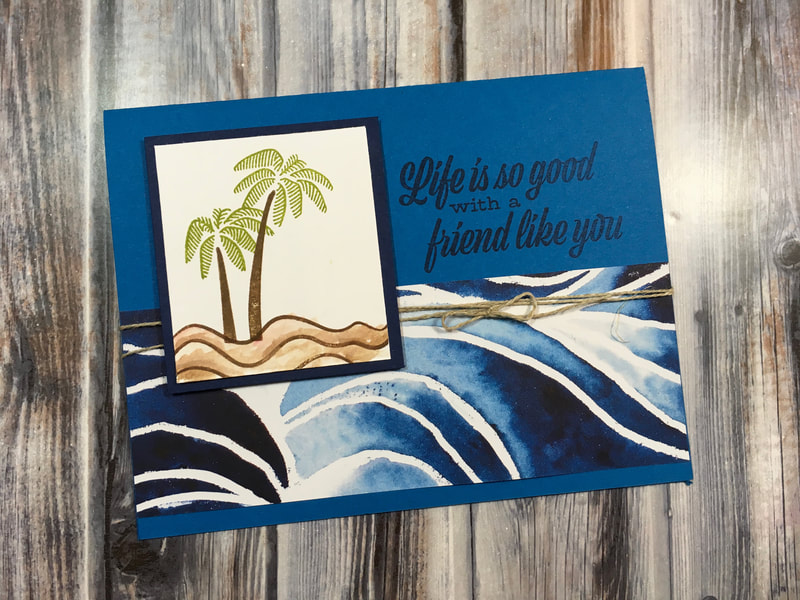
You can switch it up by turning the card on it's side, or maybe changing the square into a circle, or perhaps you want to add a greeting. This simple sketch lends itself to so many awesome cards. How have you used this simple design? Leave a comment below. I'd love to see your stamping projects.
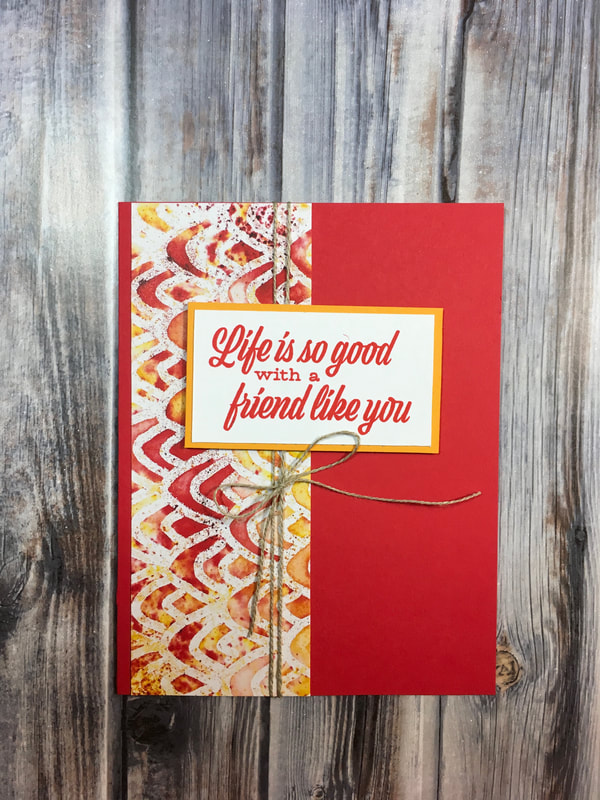
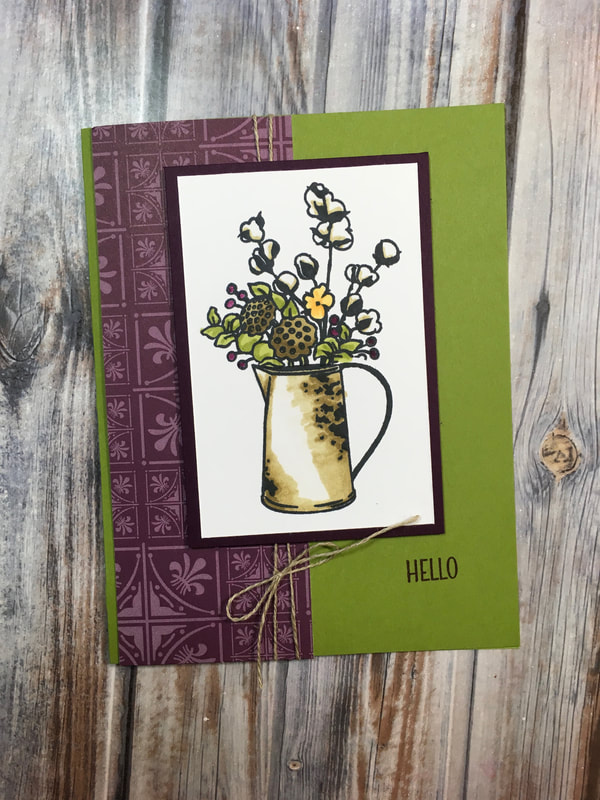
Once again, it's been a busy weekend and this Manic Monday requires some quick and easy stamping! Today, I used my easiest, go-to sketch for whipping up a card. Often this sketch is the building block for many more complicated cards. 

It's simply a card base with a strip of patterned paper along the side, a square with an image layered on top, and some ribbon. It's as easy as that!
​
Picture
0 Comments

Easy Watercolor Background

8/16/2019

0 Comments

 
Picture
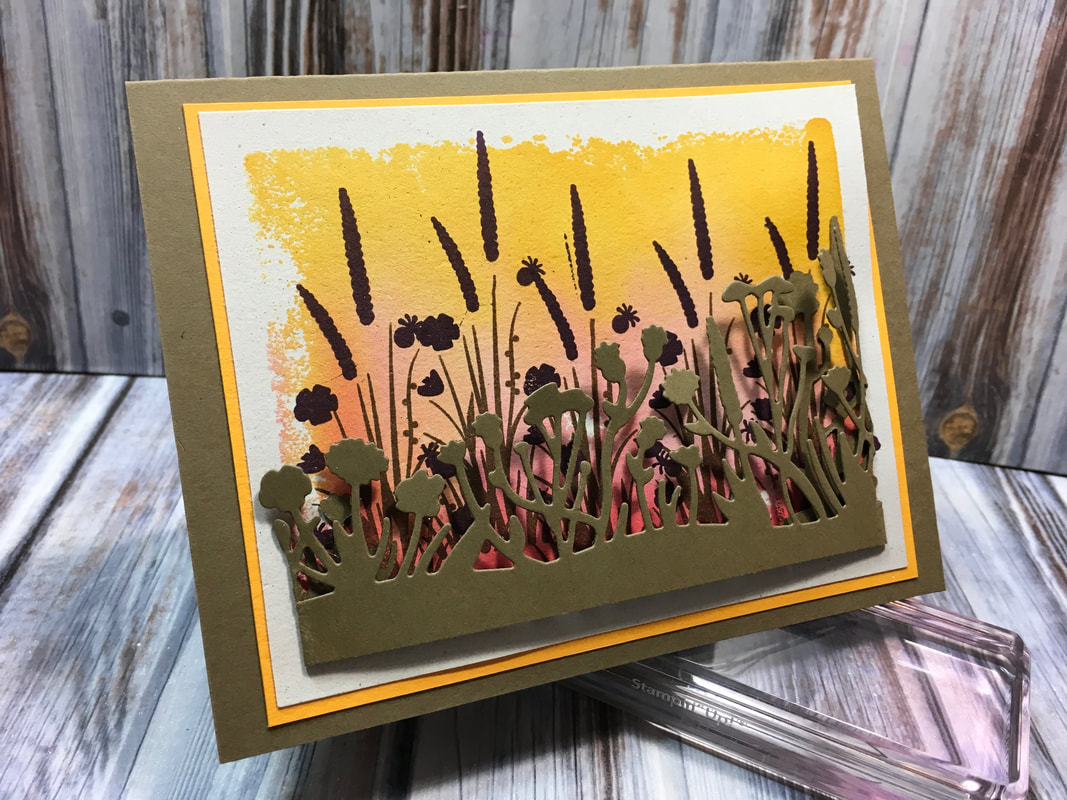
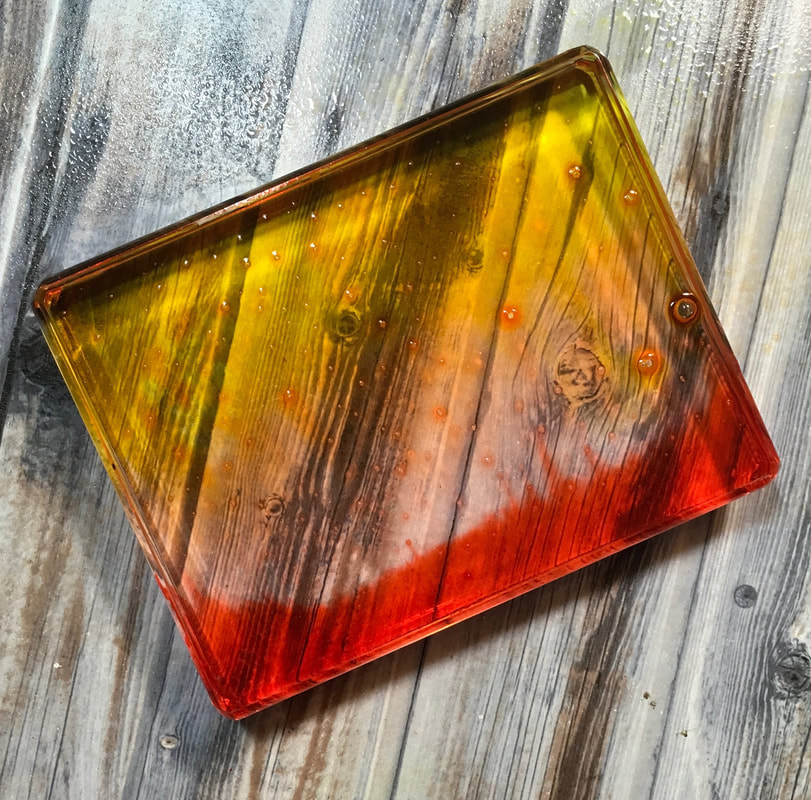
Watercolor backgrounds can seem intimidating, but here's a way to easily create a watercolor background using an acrylic block. You know those clear plastic blocks you adhere your stamps to? Those are the secret to a beautiful background. 
Picture
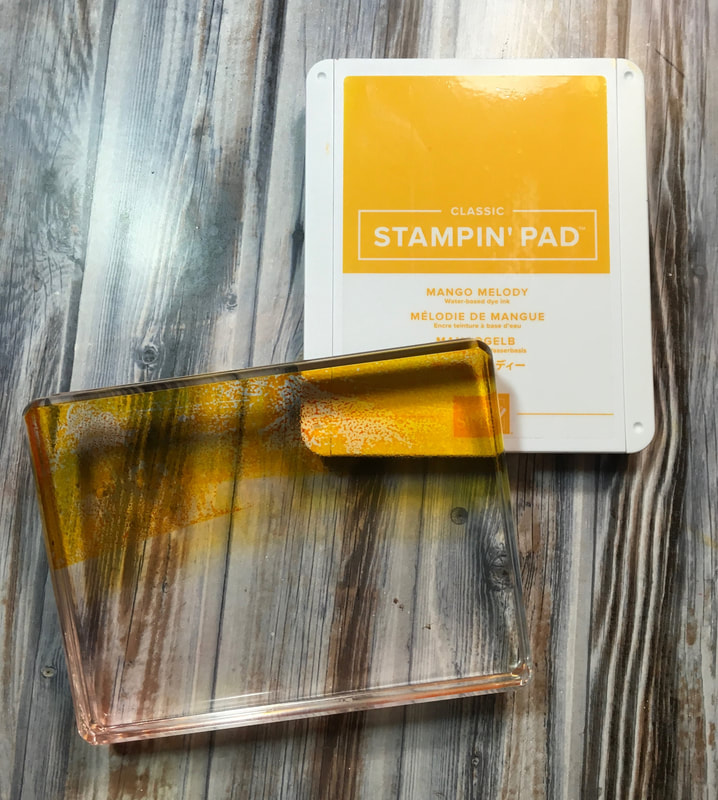
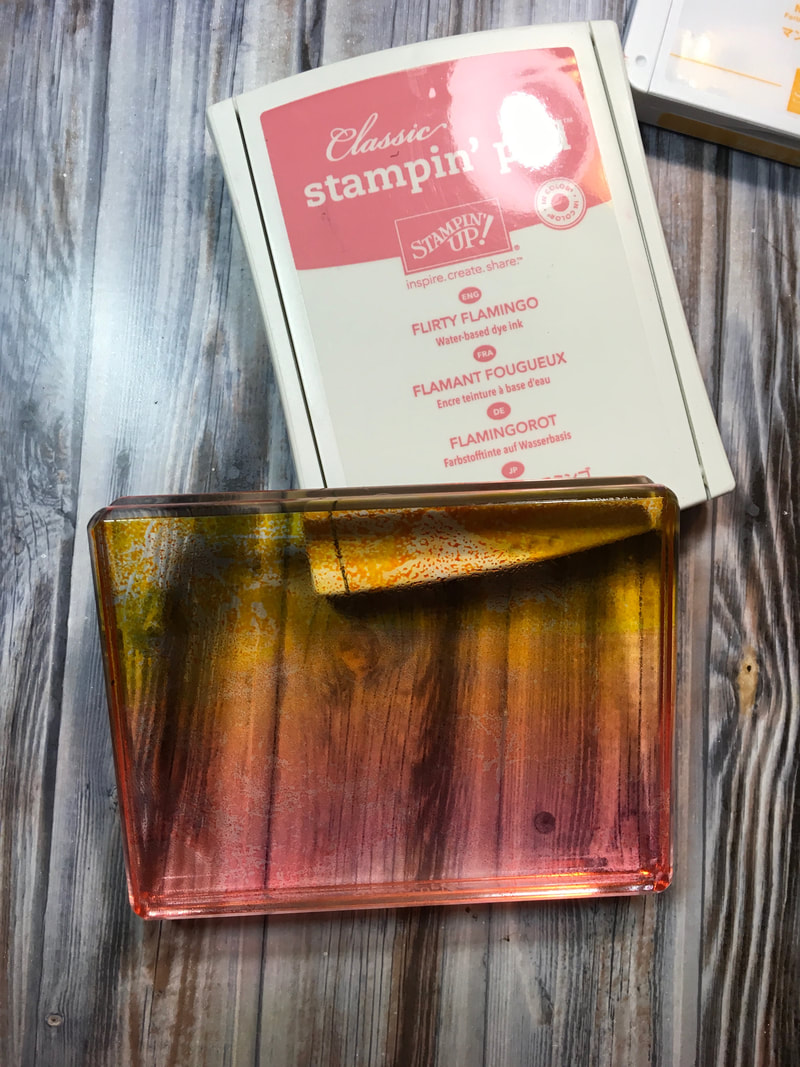
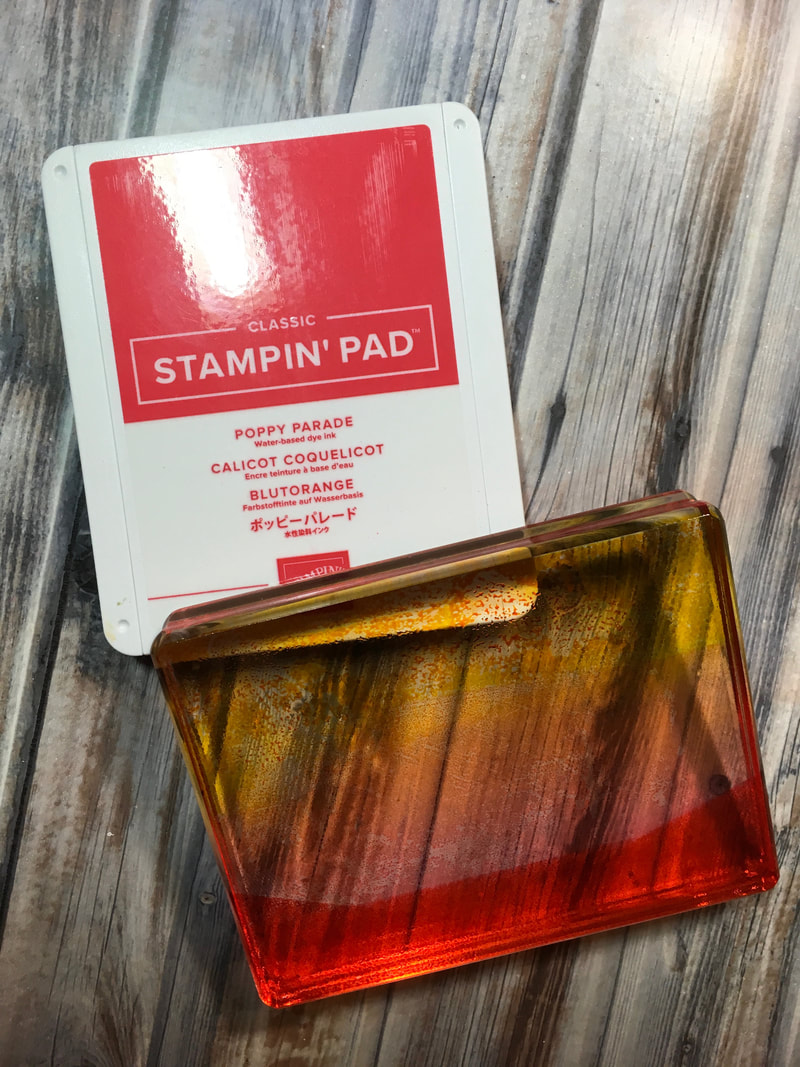
For this card, I used three ink colors: Mango Melody, Flirty Flamingo, and Poppy Parade. 

I started with a clean, E block by Stampin' Up! This block is almost the size of a card front. 

I inked the top portion of the block with Mango Melody. Then I inked the center portion with Flirty Flamingo. It's ok to overlap them a bit. This is why I started with the lightest color, so I didn't get Flirty Flamingo on my Mango Melody ink pad or Poppy Parade on my Flirty Flamingo ink pad. I finished by apply Poppy Parade on the bottom of the acrylic block. 
Picture
Picture
This leaves a pretty rainbow on your acrylic block. You could stamp it just like this, but it wouldn't have that same watercolor look. Instead, I spritzed it 4-5 times with a little water. Then I tilted the block up and down to allow the colors to run into each other a little bit. 

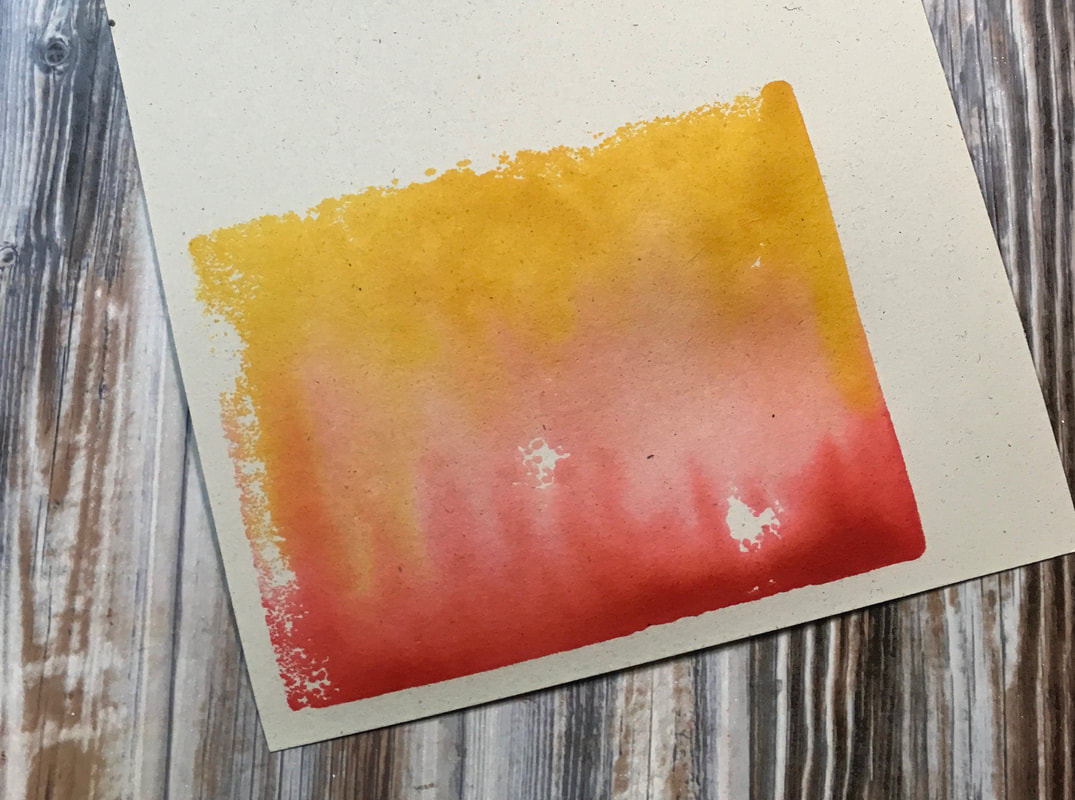
Now the really fun part! Stamp your block directly on your paper. When you lift up, you will have a background that looks like you watercolored it. I recommend using a heavier cardstock like watercolor paper or Shimmer White cardstock by Stampin' Up!

Picture
Picture
Picture
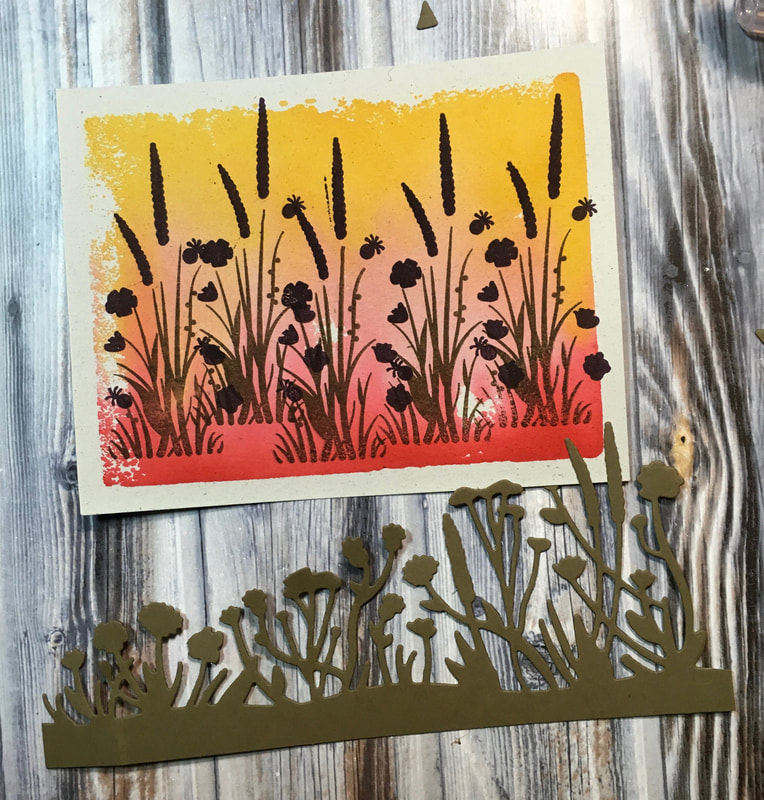
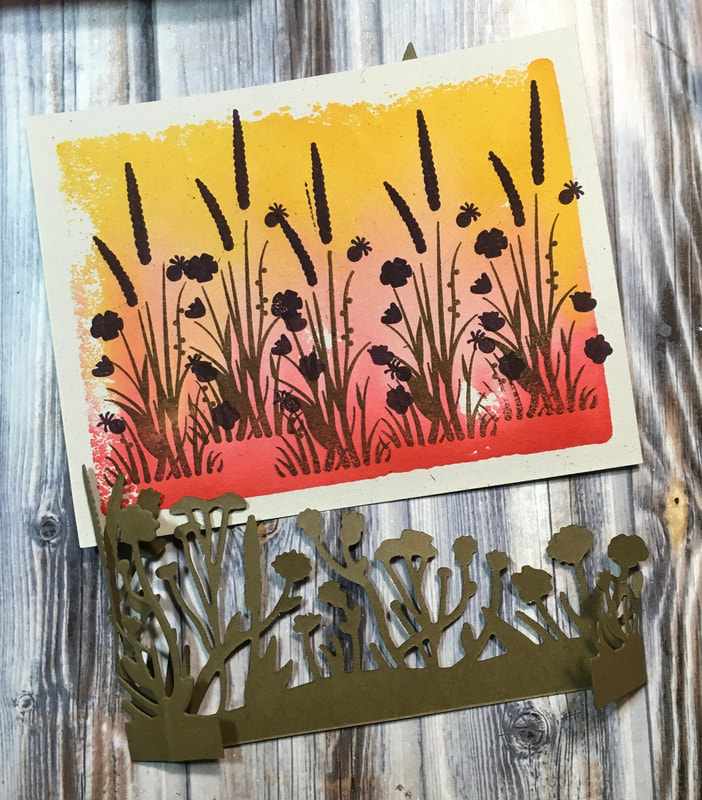
After the background dried, I stamped the flower images from A Friend Like You stamp set using Soft Suede ink for the stems and Blackberry Bliss for the flowers. I trimmed out the stamped area leaving an even border around the edges.

I used the Friendly Silhouette dies to cut out the flower silhouette from Soft Suede cardstock. The die-cut image is longer than the stamped image. 
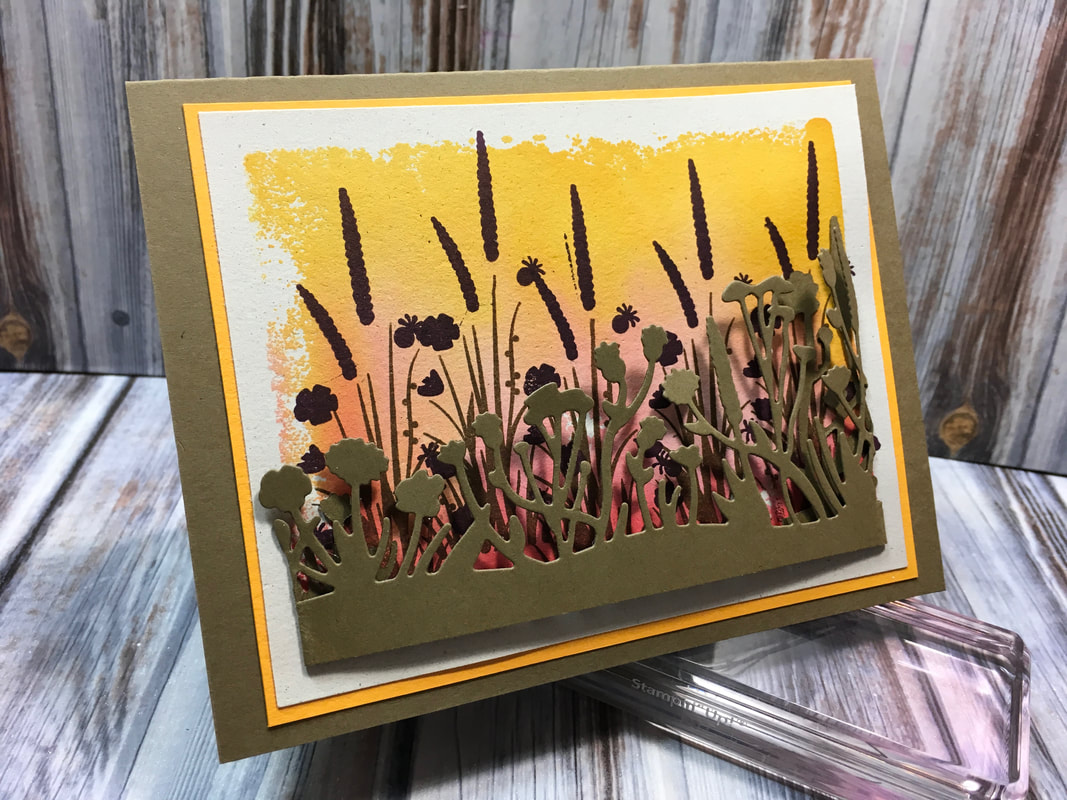
I folded the edges of the die-cut image so that it was just a little longer than the stamped scene, about 1/8-1/4" longer. Then, I put adhesive on just these folded ends and adhered the strip to the bottom of the stamped scene. While the die-cut was a little longer than the stamped background, I lined the edges up exactly. This allows the silhouette to pop out from the card a little and gives it dimension. 
Picture
Picture
I finished it off by mounting the image on a piece of Mango Melody and then a card base of Soft Suede.
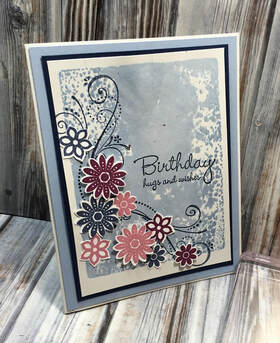
Here's another sample using some very old Stampin' Up! product: One of a Kind stamp set and matching punch in Bordering Blue and Night of Navy ink and cardstock.

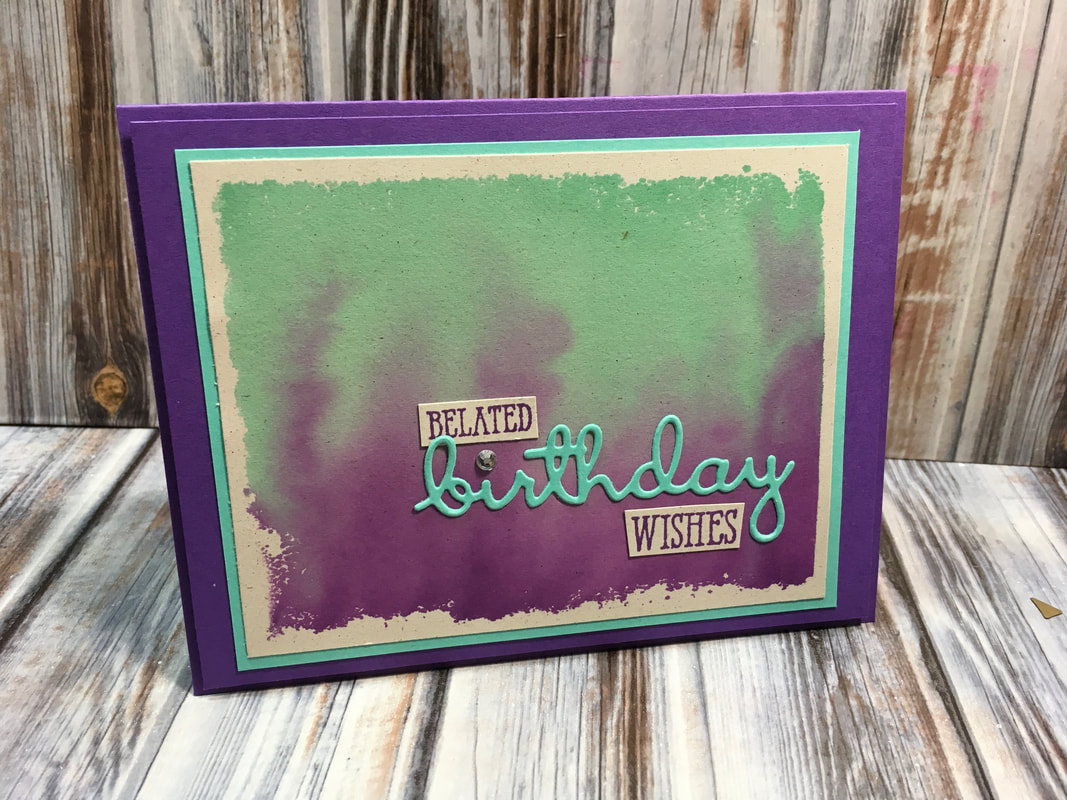
​And one last sample using Coastal Cabana and Gorgeous Grape inks and cardstock. I finished this one off using the Well Said stamp set and Well Written dies. 

I'd love to see your creations using this technique. Drop an image in the comments below!
Picture
Picture
0 Comments

Dark Colors that Pop!

8/14/2019

0 Comments

 
Picture
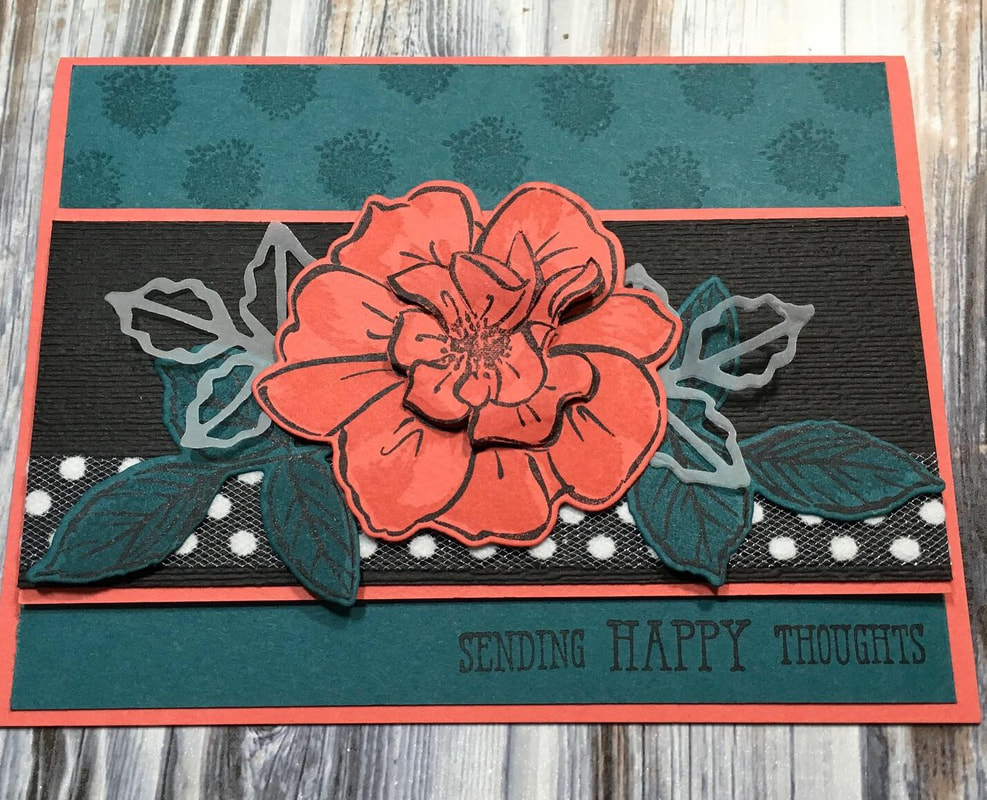
So often our card bases tend to be light colors. This makes sense - light colors are easier to stamp on. However, darker cards can be dramatic. For today's Wow Wednesday, I used the To a Wild Rose stamp set and dies. For the greeting, I used the Well Said set. 

This card uses the 2019-2021 In-Colors Terracotta Tile and Pretty Peacock as well as Basic Black. I used Staz-on jet black ink to stamp the outlines of the rose and leaves. Then, I stamped the shading with Versamark to give it a slightly darker color. I cut the images out with the dies. I stamped a second flower and fussy cut the center. I mounted this center on the middle of the flower with dimensionals to give a 3D effect. 

To create a background at the top of the card, I stamped the flower center image in Versamark ink on Pretty Peacock cardstock. To add some texture, I embossed the strip of Basic Black cardstock with the Subtle embossing folder. Finally, I tied it all together with some Polka Dot Tulle. 

All of the supplies, including the To a Wild Rose stamp set are available from Stampin' Up!

Next time you want to create a truly dramatic card, consider using darker colors. They can really pop!
0 Comments

Clearance Rack!

8/12/2019

0 Comments

 
Picture
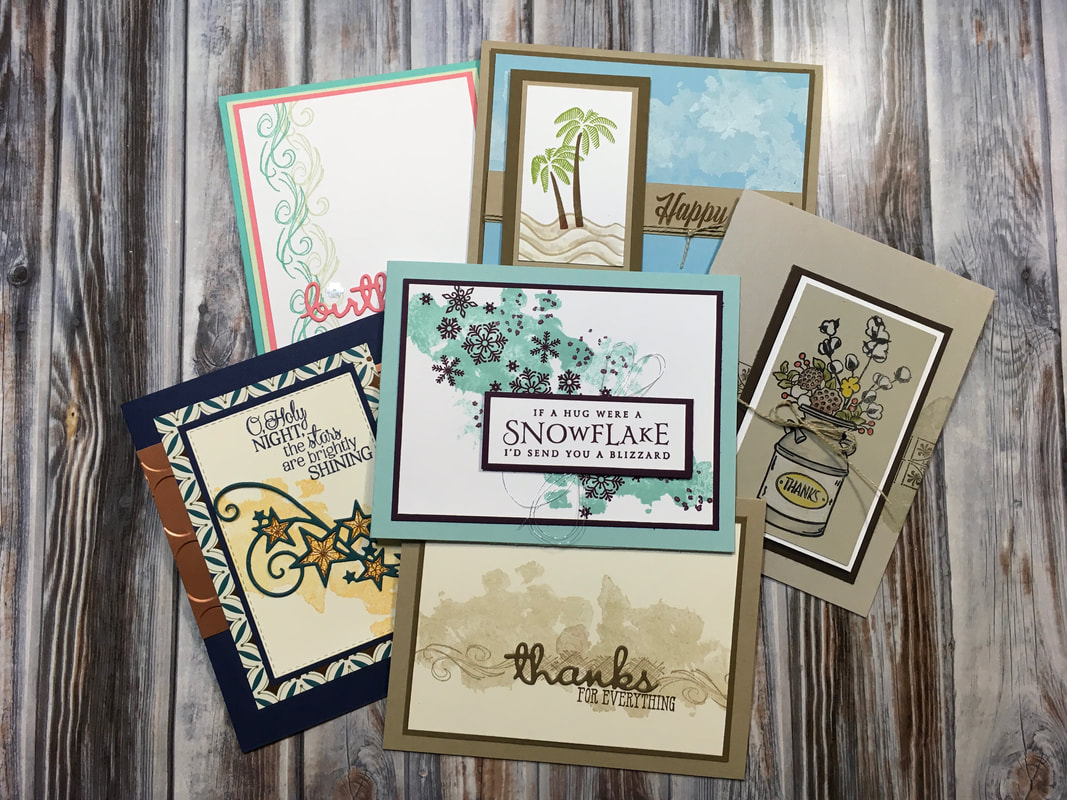
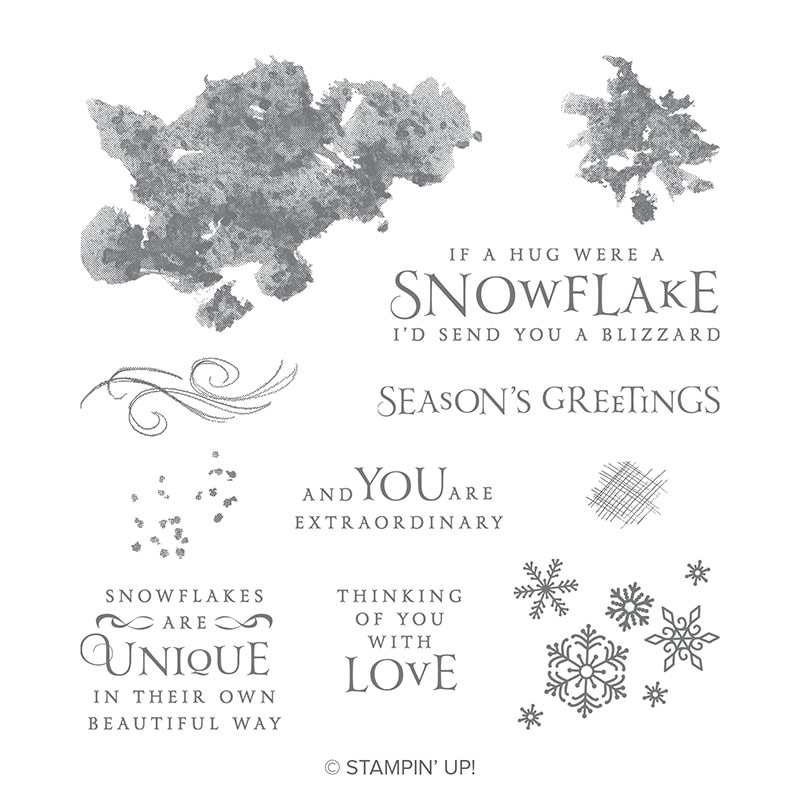
Have you checked out the Stampin' Up! Clearance Rack lately? It's a great place to get some pretty awesome deals, and for the first time this summer, there are stamp sets on the Clearance Rack. There are lots of holiday sets available right now, including Beautiful Blizzard which I used on all of these cards. But remember, items on the Clearance Rack are available for a limited time, so get 'em before they're gone!
Picture
The Beautiful Blizzard stamp set was built for stamping blizzards and includes some wonderful greetings. But, the texture pieces can be used to create so much more and will allow you to give your backgrounds a little something extra. 
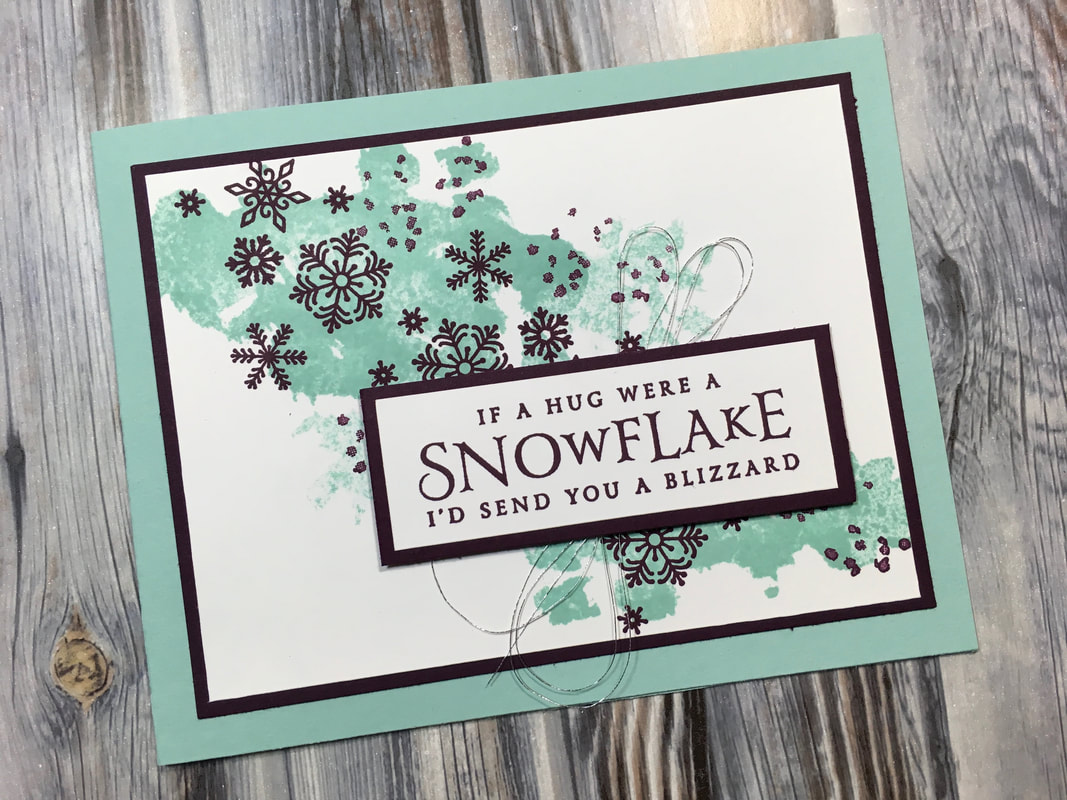
Here I've created a winter themed card using the pieces for their intended purposes. I stamped the stormy background with Pool Party and added some Blackberry Bliss snowflakes on Whisper White cardstock. Under the greeting, I layered some Silver Thread. 
Picture
Picture

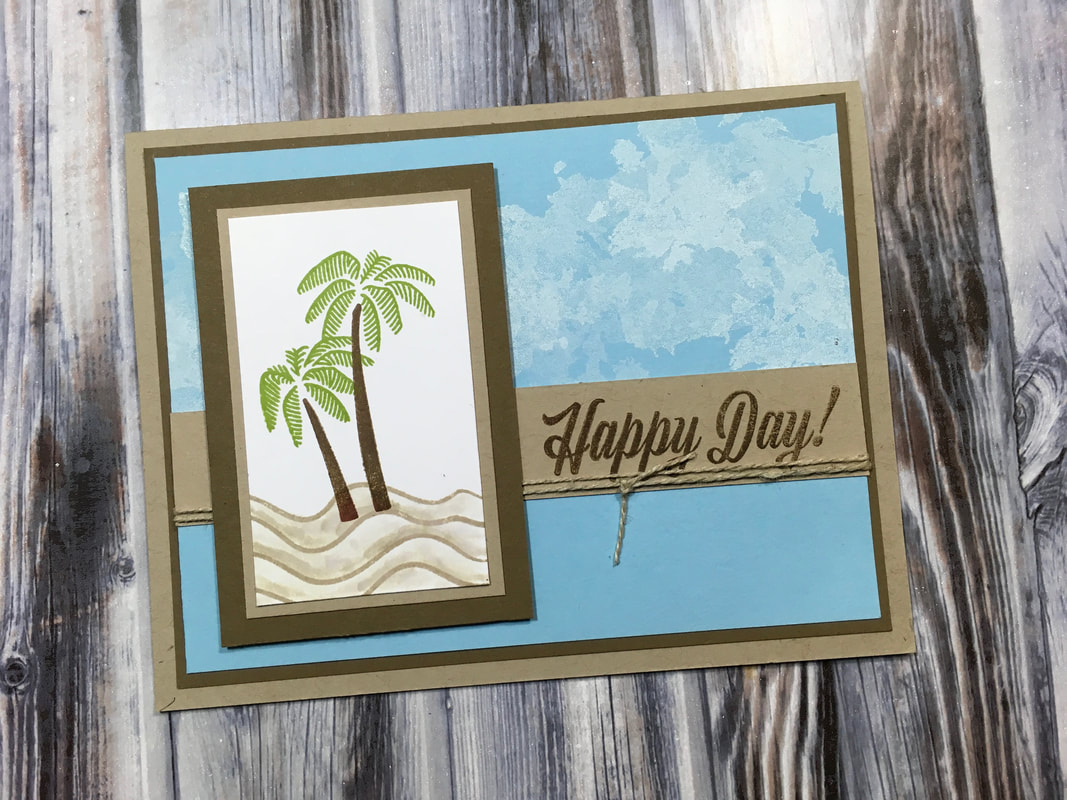
For this card, the stormy background stamp becomes fluffy clouds by stamping in White craft ink on Balmy Blue cardstock. I paired the Beautiful Blizzard set with A Friend Like You stamped in Crumb Cake, Soft Suede, and Granny Apple Green. I used an Aquapainter and Crumb Cake ink to color in the sand. The tie it together, I finished with a piece of Linen Thread.
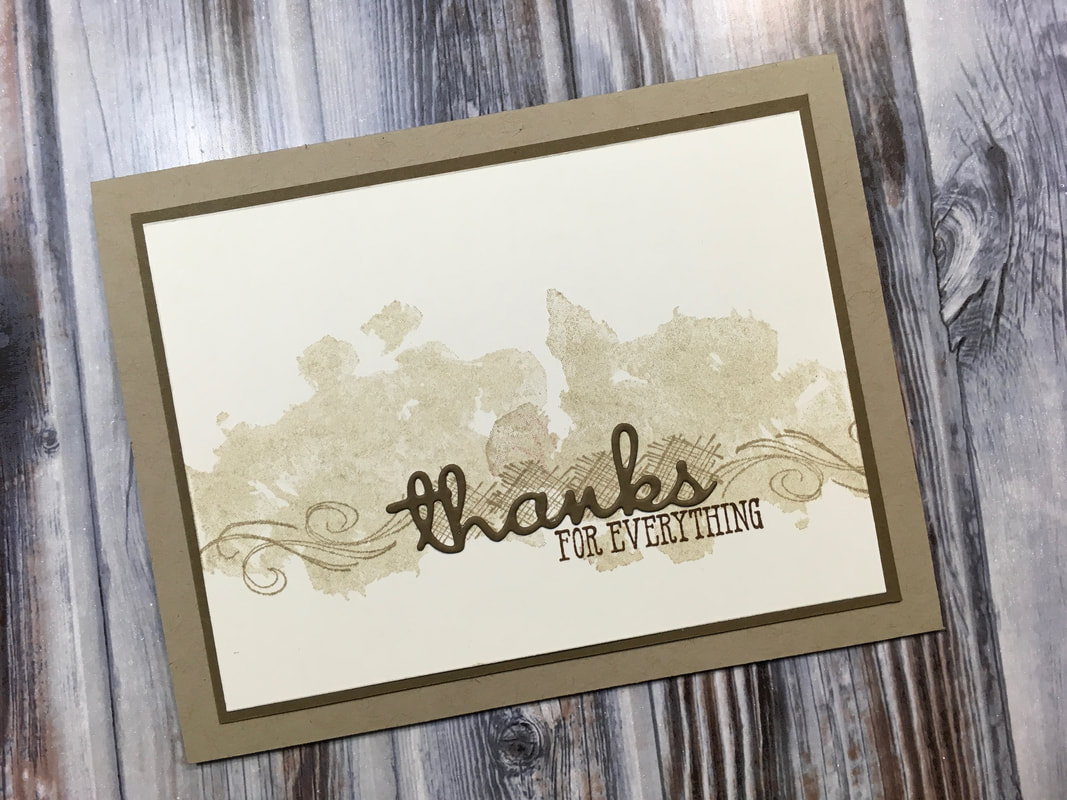
This simple thank you card uses the same stormy background stamp to create texture using Crumb Cake ink that has been stamped off once. On top of this is layered, the swirls and hash marks from Beautiful Blizzard also stamped in Crumb Cake, but not stamped off. The greeting comes from the Well Said stamp set and Well Written dies in Soft Suede. These pair perfectly and offer a variety of sayings.
Picture
Picture
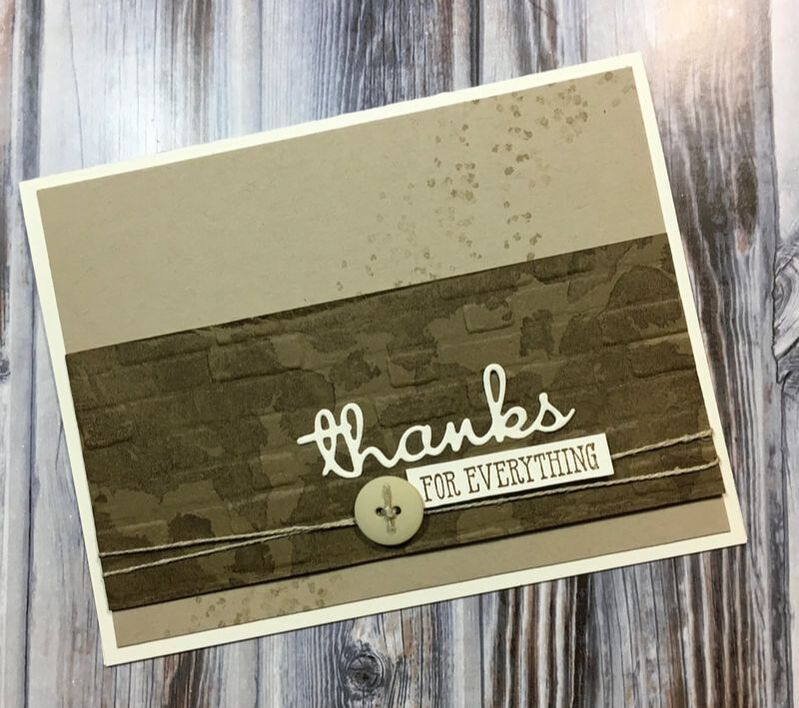
This set uses the same stamp sets, dies, and colors as the thank you card above. This time, I stamped the stormy background stamp in Soft Suede on a piece of Soft Suede cardstock. Then I ran it through my embossing platform using the Brick & Mortar 3D embossing folder. Then, I stamped some small dots from the Beautiful Blizzard set in Crumb Cake ink on Crumb Cake cardstock. I finished by adding my greeting, some linen thread, and a tan button. 
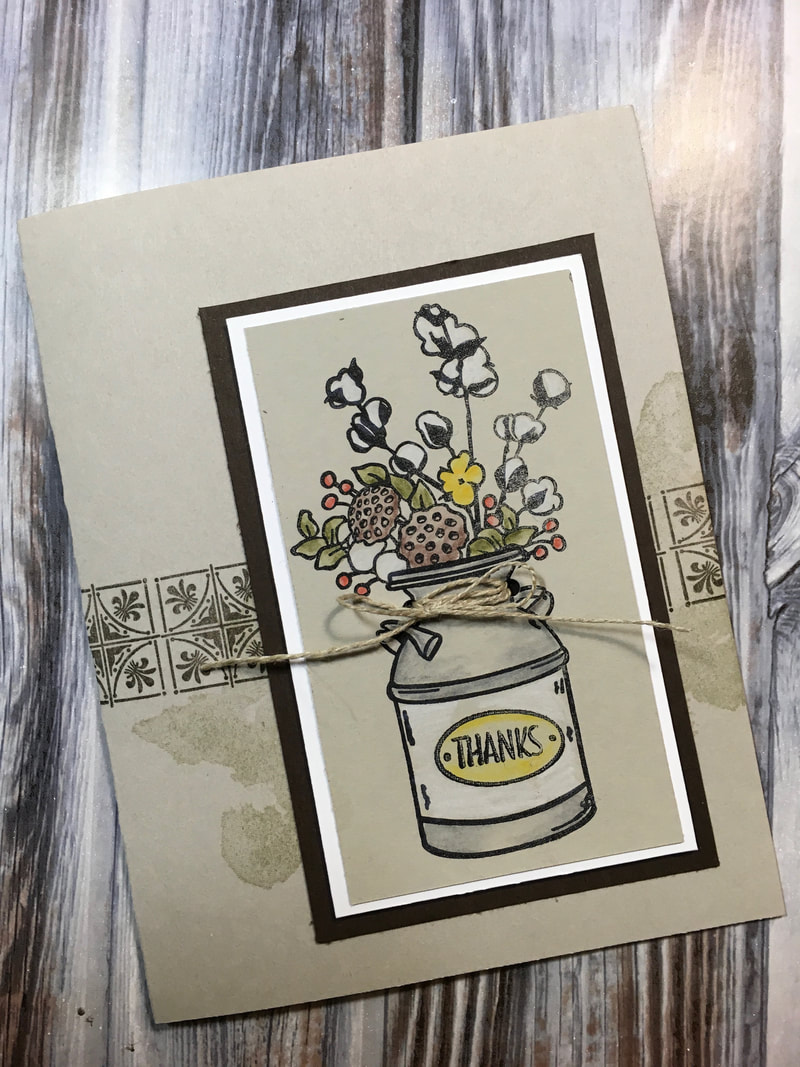
This card uses the Country Home stamp set colored with watercolor pencils and an Aquapainter. I wanted to add a little texture to the background, so once again, I used the stormy background stamp in Crumb Cake ink on Crumb Cake cardstock. 
Picture
Picture

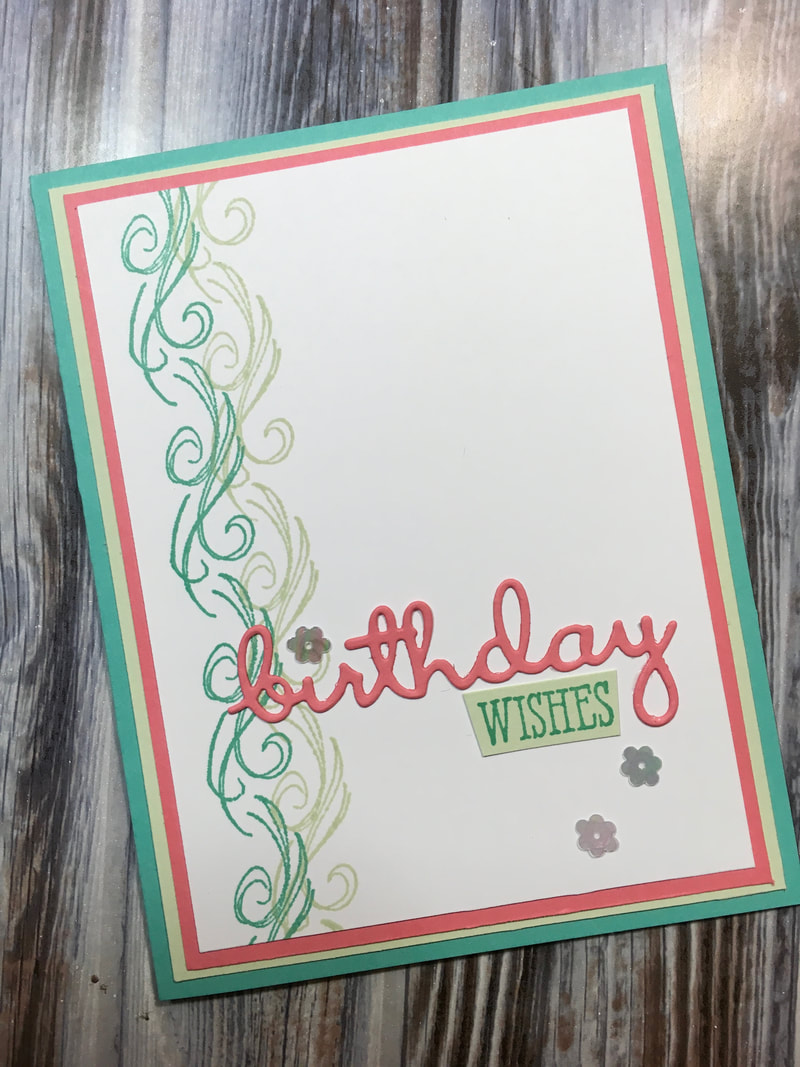
This birthday card features a cleaner look than some of the previous cards. I stamped the swirl image from Beautiful Blizzard along the side in Coastal Cabana and Soft Sea Foam. Once again, I used the Well Said stamp set and Well Written dies to create the greeting. I added a few sequins and layered it on Flirty Flamingo, Soft Sea Foam, and Coastal Cabana cardstock.

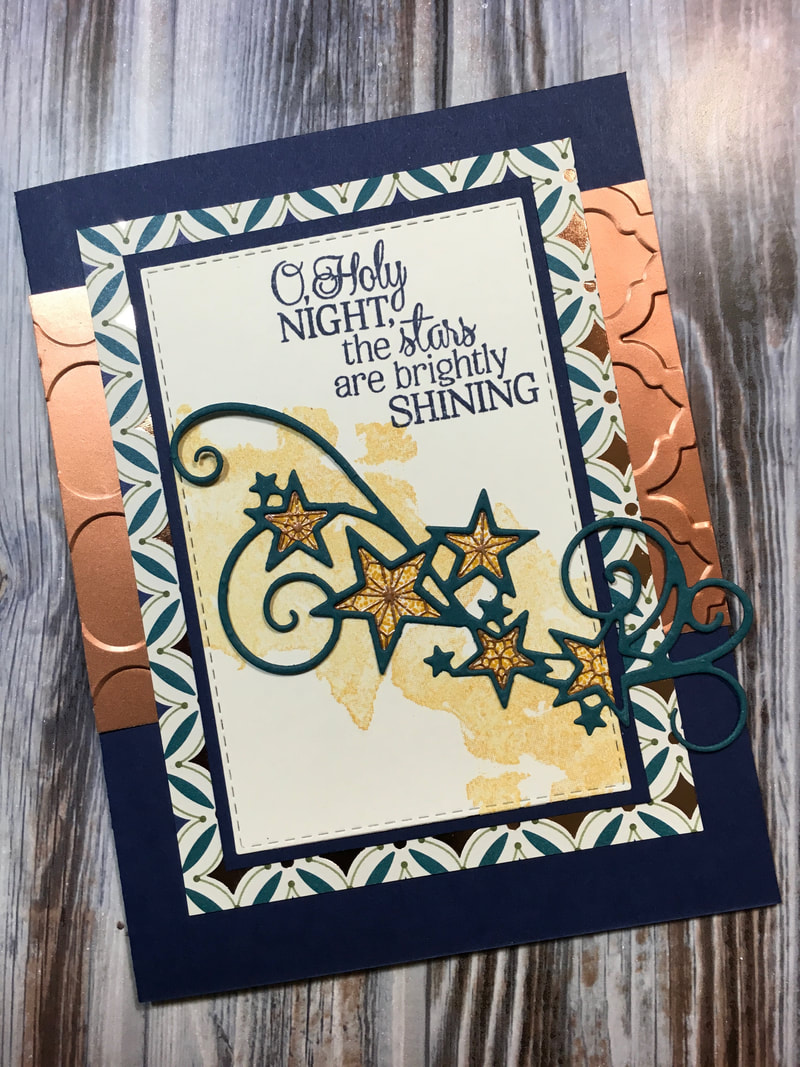
Today's final card gives you a sneak peek at the So Many Stars stamp set and Stitched Stars dies from the new Holiday Catalog coming in September. Once again, I used the stormy background stamp from Beautiful Blizzard to create a backdrop for the stars. 

Beautiful Blizzard is a versatile stamp set that can be used to create background texture on a variety of cards. But, it's not the only great deal available on the Clearance Rack! Click here to go check it out today and get some amazing deals before they're gone. 
Picture
0 Comments

All About Heat Embossing

8/9/2019

0 Comments

 
Picture
Today's Tips & Techniques for the Weekend focuses on heat embossing. This is an old standby in the world of stamping, but one that never fails to add a bit of elegance or a professional look to your card. 

There are a few basic supplies you will need:
          - Embossing Ink or Versamark Ink
          - Embossing Powder
          - a Heat Gun

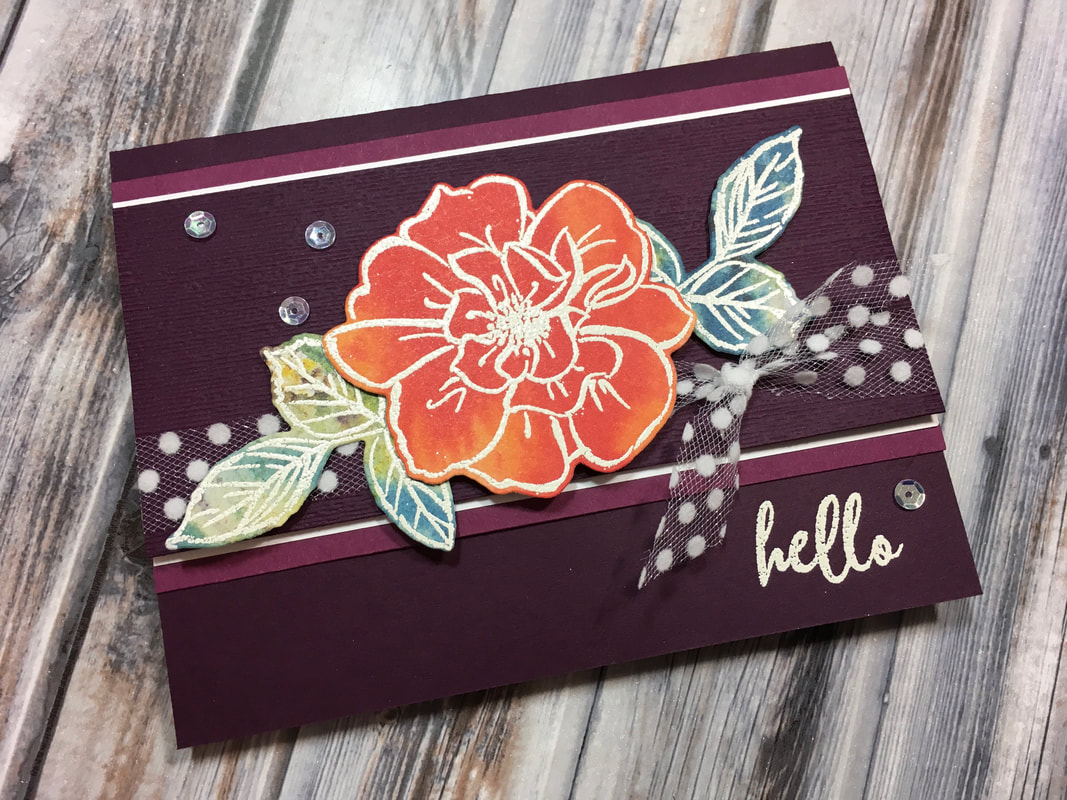
For this card, I am using the To A Wild Rose stamp set and embossing the images on the See a Silhouette Designer Series Paper. Stamping on patterned paper is a fun way to get an interesting fill for your line images. I love the watercolor look of the See A Silhouette paper and this way, I didn't have to do any coloring!
​
Picture
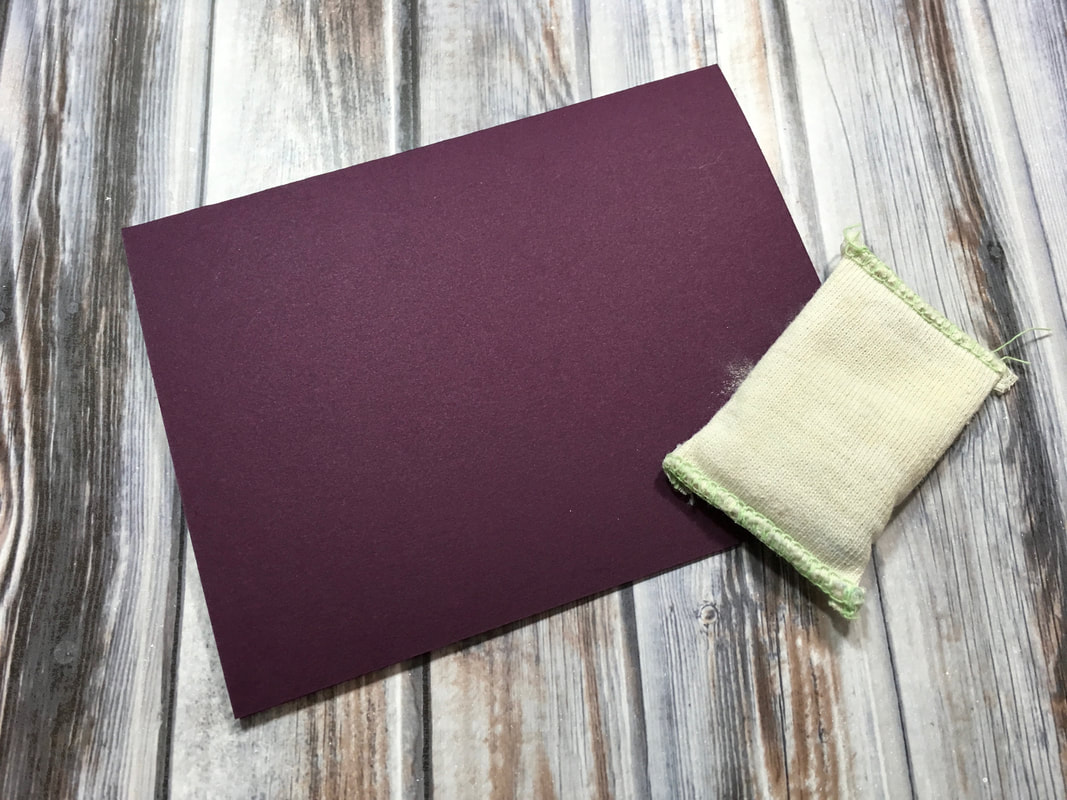
While not absolutely necessary, it's also helpful to have an Embossing Buddy. This little bag of powder helps keep embossing powder from sticking where it's not supposed.

If you have an Embossing Buddy, rub it across your piece of paper before stamping. You might want to lightly tap it to release some powder and then spread it around. I used Blackberry Bliss for the base of this card. 
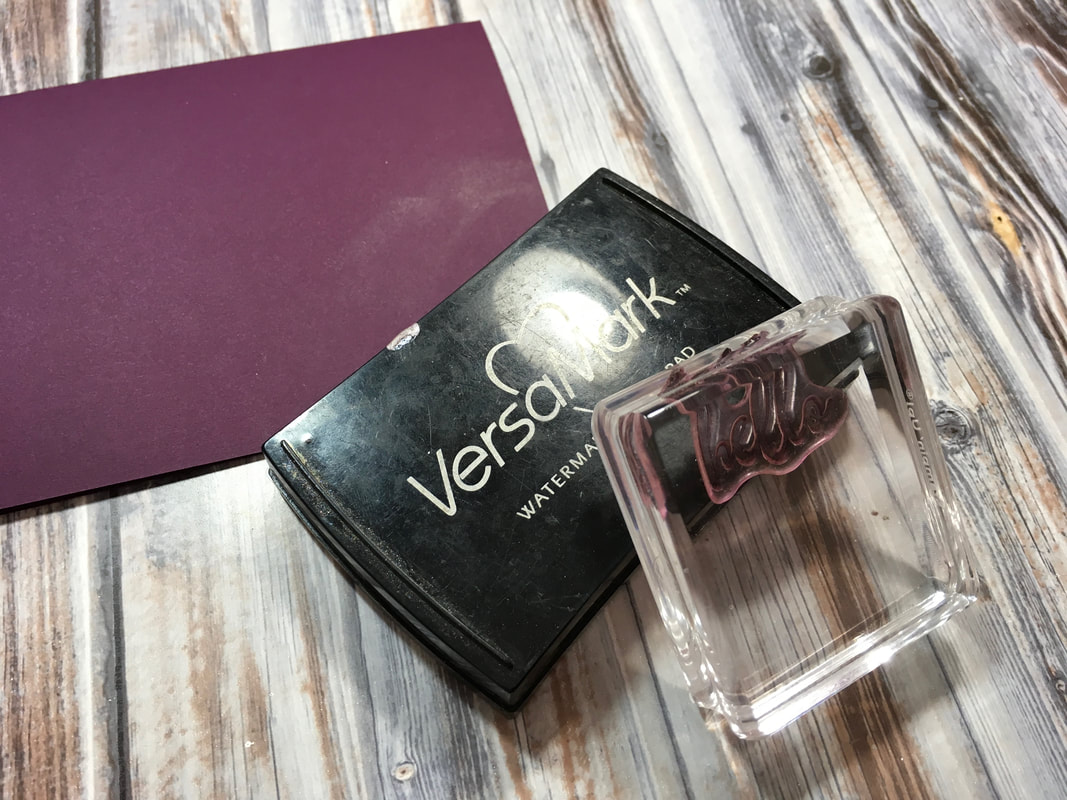
Next, stamp the image using an embossing ink or Versamark ink. I chose to use Versamark. This leaves a sticky image for your embossing powder to stick to. 

​I stamped "hello" from the To a Wild Rose stamp set in the lower right corner of my card base.
Picture
Picture
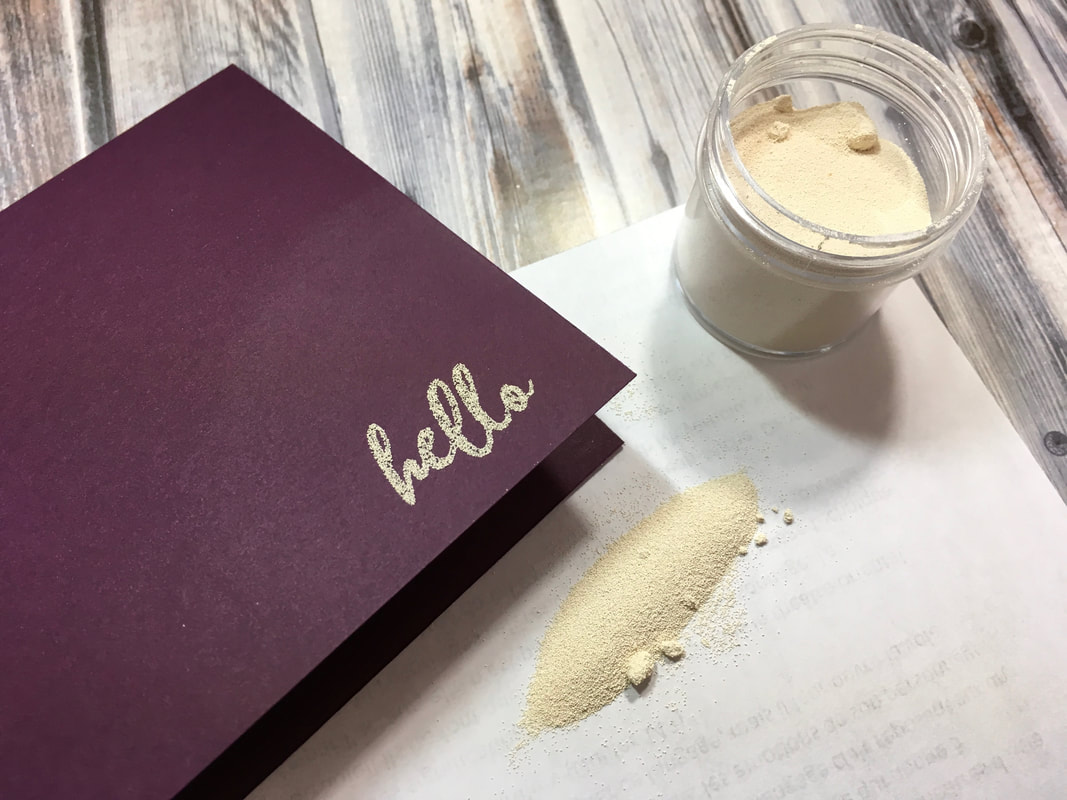
You will want to lay your card on a piece of scrap paper before dumping embossing powder on it. This will make clean up much easier and avoid wasting embossing powder. It's amazing how long one little jar of embossing powder will last!


I used white embossing powder for my card. Just dump some over the area you stamped, and then turn your card over and let the excess powder fall on your scrap paper. You can lightly tap the back of your card to remove any stray powder. If you still have some powder in areas where it shouldn't be, carefully use a dry paintbrush to brush it away. 

Then, gently fold your scrap paper and pour the extra embossing powder back in the jar. 
​
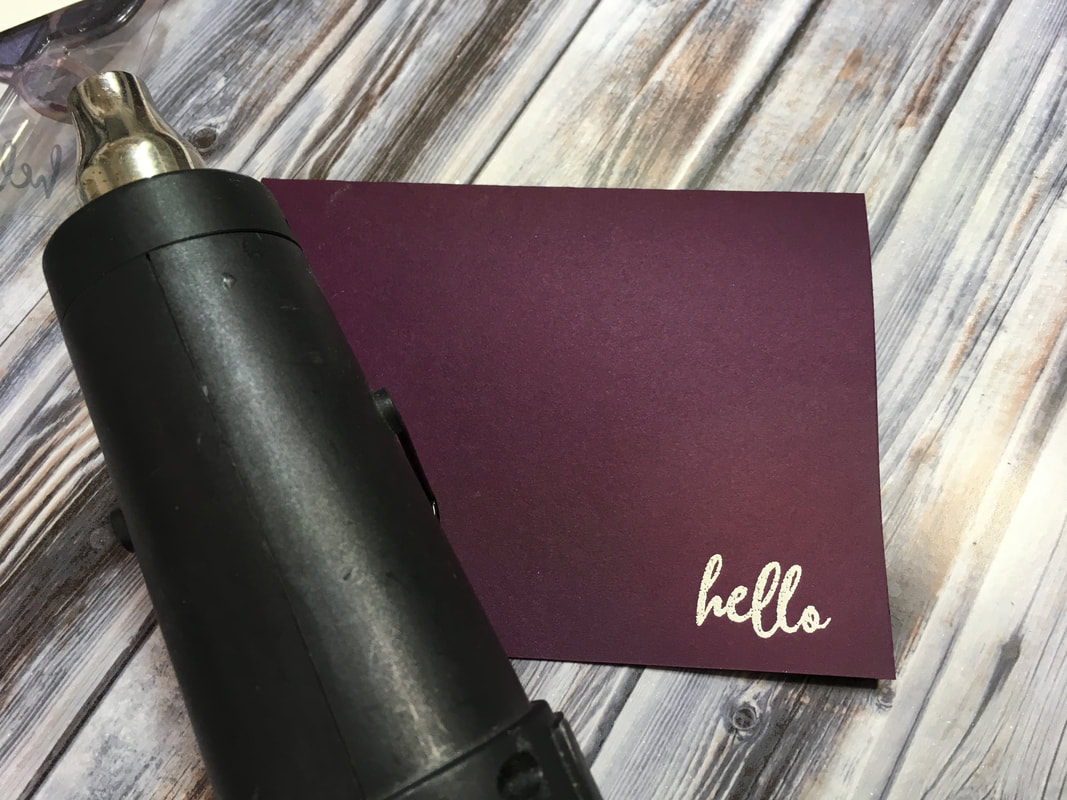
Next, it's time to heat your image. This will melt the embossing powder and give it that shiny raised appearance you want. Back in the day, when I first started stamping, I used to hold my cardstock over my electric stove burner to melt the embossing powder. This isn't the best way though and can lead to scorched paper. But, if you're in a pinch, it can be done as long as you are very careful!


Picture
A much easier method is to use a heat gun. Slowly move the heat gun over your image as you see the powder melt. Be careful not to hold the heat gun in one place for too long because you can over melt the powder. This will cause it to appear dull and melt completely into the cardstock leaving a flat image instead of a raised one. ​
Picture
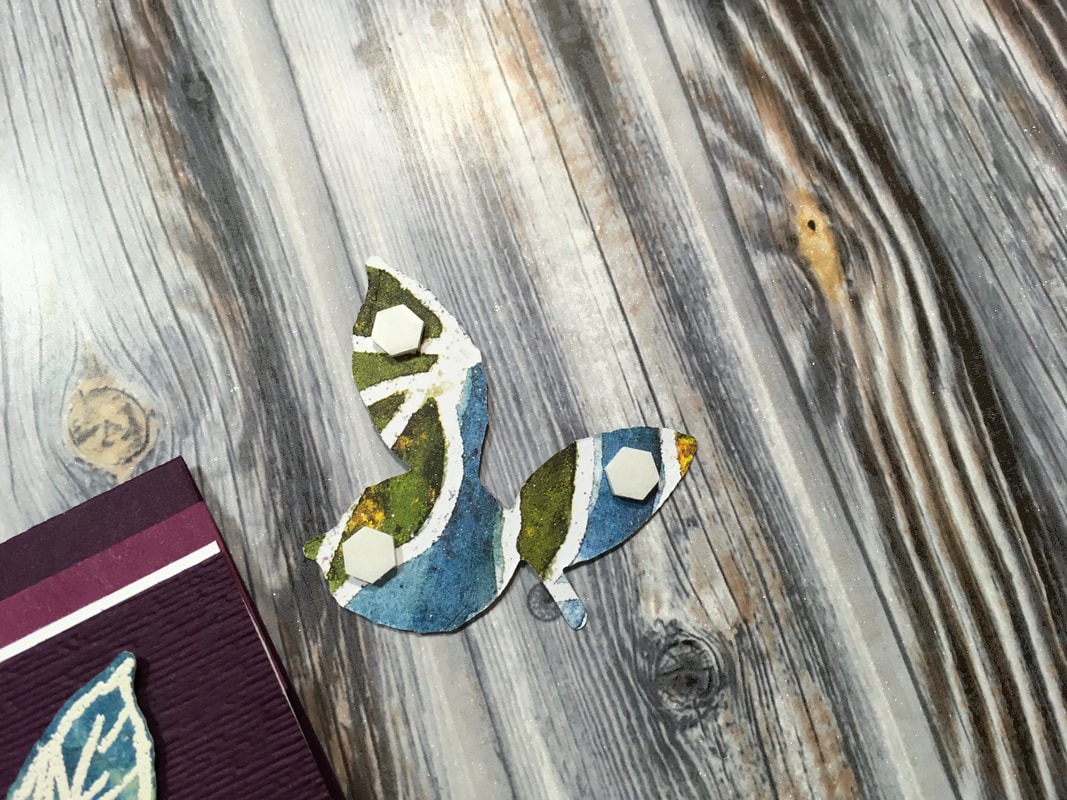
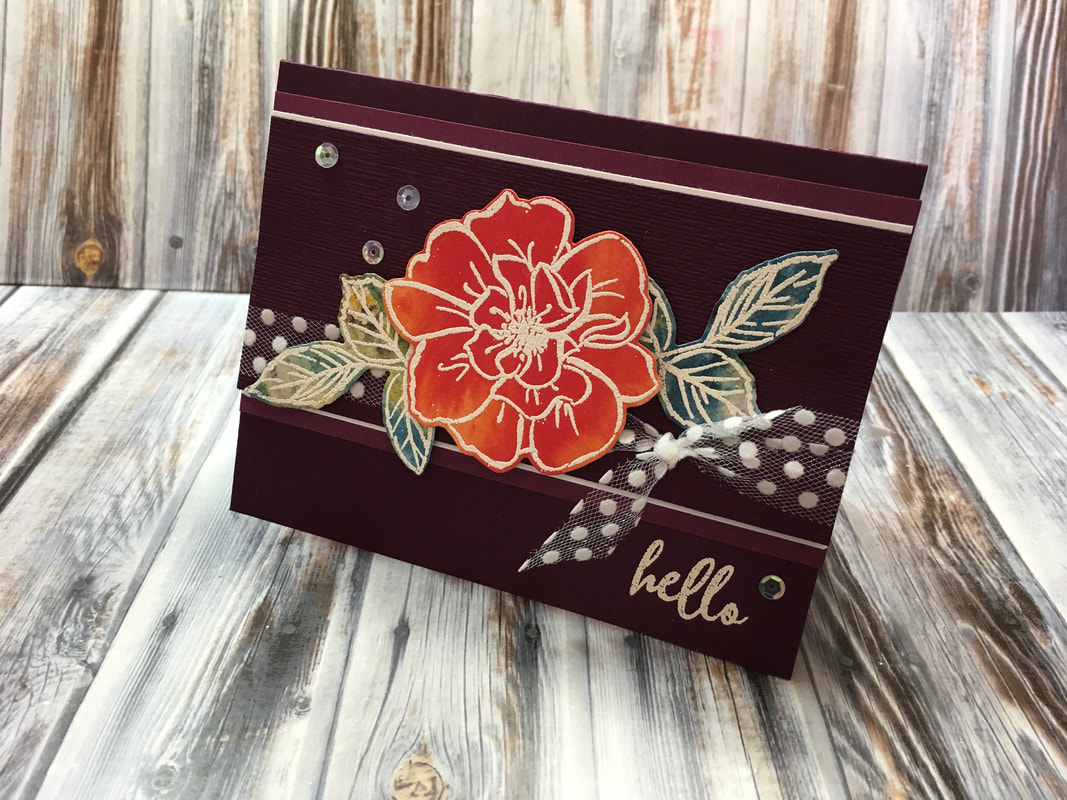
To finish my card, I embossed the flower and stem images on the See a Silhouette Designer Series Paper. Then, I used the Wild Rose dies to cut them out. I ran a strip (2.25 x 5.5") of Blackberry Bliss through my Big Shot using the Subtle embossing folder to add a little texture. I mounted this strip on a piece of Whisper White cardstock (2.5 x 5.5") and then on a piece of Rich Razzleberry cardstock (3 x 5.5"). I tied it with a piece of Polka Dot Tulle and mounted my flower and stem images on top. To give it a little pop, I used some dimensionals to adhere the flower and the outsides of the leaves. I finished by adhering this strip to my card base and adding some sequins. 
Picture
0 Comments
<<Previous
Forward>>
    Heidi Collins, Independent Stampin' Up! Demonstrator with On Y Go! Stamping
    Get updates and ideas on my Facebook group
    Heidi Collins, Independent Stampin' Up! Demonstrator and Owner of On Y Go! Stamping
    Shop for Stampin' Up! stamps, inks, paper, tools, and embellishments with Heidi Collins and earn points towards FREE stamps!
    Picture
    Picture
    Picture
    On Y Go! Stamping YouTube channel with Card Making Videos on how to do rubber stamping, card making, scrapbooking, and paper crafting

    Archives

    November 2023
    October 2023
    September 2023
    August 2023
    July 2023
    June 2023
    May 2023
    April 2023
    March 2023
    February 2023
    January 2023
    December 2022
    November 2022
    October 2022
    September 2022
    August 2022
    July 2022
    June 2022
    May 2022
    April 2022
    March 2022
    February 2022
    January 2022
    December 2021
    November 2021
    October 2021
    September 2021
    August 2021
    July 2021
    June 2021
    May 2021
    April 2021
    March 2021
    February 2021
    January 2021
    December 2020
    November 2020
    October 2020
    September 2020
    August 2020
    July 2020
    June 2020
    May 2020
    April 2020
    March 2020
    February 2020
    January 2020
    December 2019
    November 2019
    October 2019
    September 2019
    August 2019
    July 2019
    June 2019

Powered by Create your own unique website with customizable templates.
  • About
  • Online Card Classes
  • Card Making Ideas
  • Stampin' Up! Catalogs
  • Card Tutorials
  • Contact
  • Shopping Rewards
  • Shop
  • Join Stampin' Up!