• About
  • Online Card Classes
  • Card Making Ideas
  • Stampin' Up! Catalogs
  • Card Tutorials
  • Contact
  • Shopping Rewards
  • Shop
  • Join Stampin' Up!
ON Y GO! STAMPING
  • About
  • Online Card Classes
  • Card Making Ideas
  • Stampin' Up! Catalogs
  • Card Tutorials
  • Contact
  • Shopping Rewards
  • Shop
  • Join Stampin' Up!

Ink Blending with Stampin' Up! Dye Inks

8/10/2020

0 Comments

 
Picture
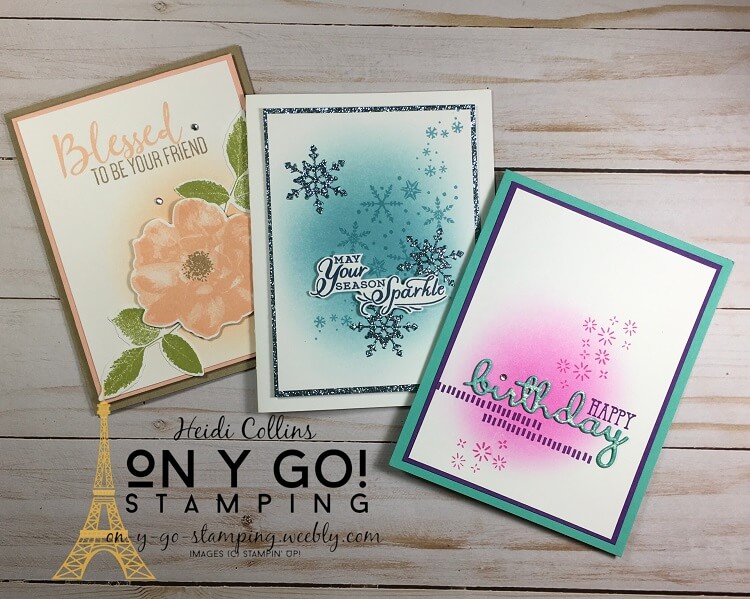
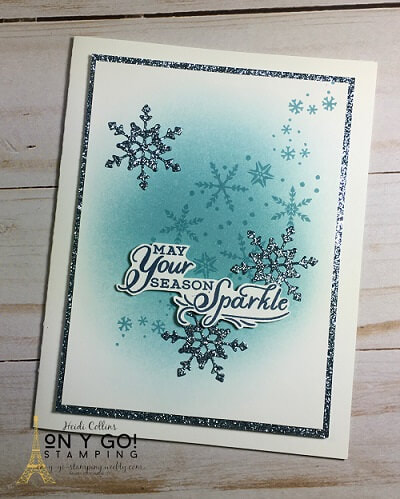
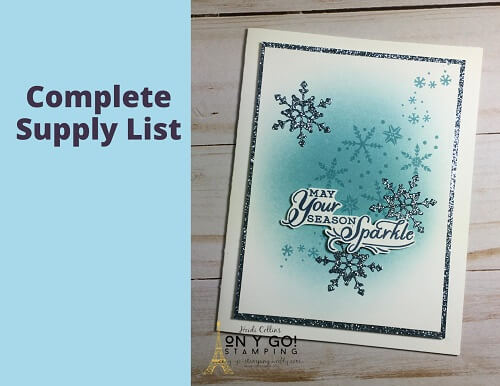
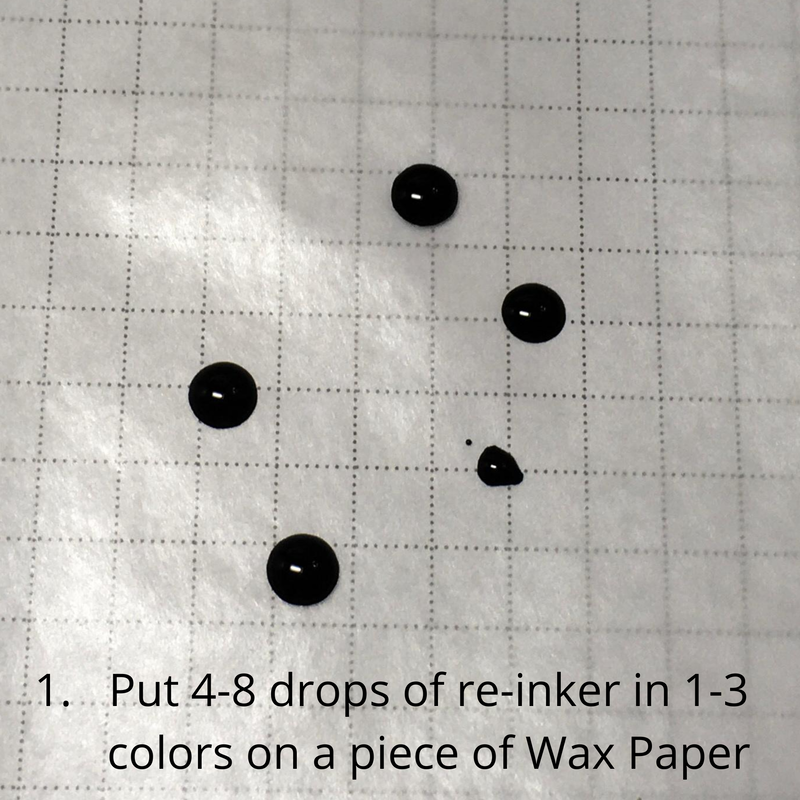
For quite a while now, I have been trying to make the perfect cloud or puff of ink as a background on my card fronts. I kept ending up with blotchy, streaky messes. Finally, I realized I was using the wrong tool. I'm very excited to share with you today how I successfully got these beautiful clouds of ink in the middle of my card fronts. So, on y go! Let's get stamping. 
You can watch this short video tutorial to learn the technique. Then, find more info about each sample card below. 
Snowflakes on a Cloud:
My first card uses the new Snowflake Wishest stamp set and So Many Snowflakes dies from the 2020 August-December Mini Catalog. I made my cloud of ink using Balmy Blue ink with Balmy Blue snowflakes stamped on top. I added some snowflakes cut from the new Balmy Blue Glimmer Paper and stamped the greeting with Misty Moonlight ink. Such a sparkly and easy holiday card. Tip: Cut the center from the Balmy Blue Glimmer paper and cut your snowflakes from it.

Picture
Cutting Dimensions:
Whisper White: 
  • 8 1/2" x 5 1/2", scored at 4 1/4"
  • 3 1/2" x 4 3/4"
  • Scrap
Balmy Blue Glimmer Paper: 3 11/16" x 4 15/16"
Snowflake Supply List
Picture
Picture
Picture
Birthday on a Cloud:
My second card uses the Pattern Play and Well Said stamp sets and the Well Written dies. My poof of ink is Magenta Madness for this card. I cut three "birthdays" from Coastal Cabana cardstock and stacked them to create a more dimensional greeting. Then, to add a little bling, I went over the die-cut with my Wink of Stella Glitter Brush and added a rhinestone dot to the i. 

Cutting Dimensions:
Coastal Cabana: 
  • 8 1/2" x 5 1/2", scored at 4 1/4"
  • Scraps
Whisper White: 3 3/4" x 5"
Gorgeous Grape: 3 15/16" x 5 3/16"
Birthday Supply List
Rose on a Cloud:
For my last card, I used the To a Wild Rose stamp set. I created a Petal Pink cloud and layered a Petal Pink rose on top of it using Stampin' Dimensionals. I love the soft glow the extra poof of ink gives behind the rose. 
Picture
Picture
Rose Supply List
0 Comments

1 Card, 3 Ways: Peace & Joy

8/7/2020

0 Comments

 
Picture
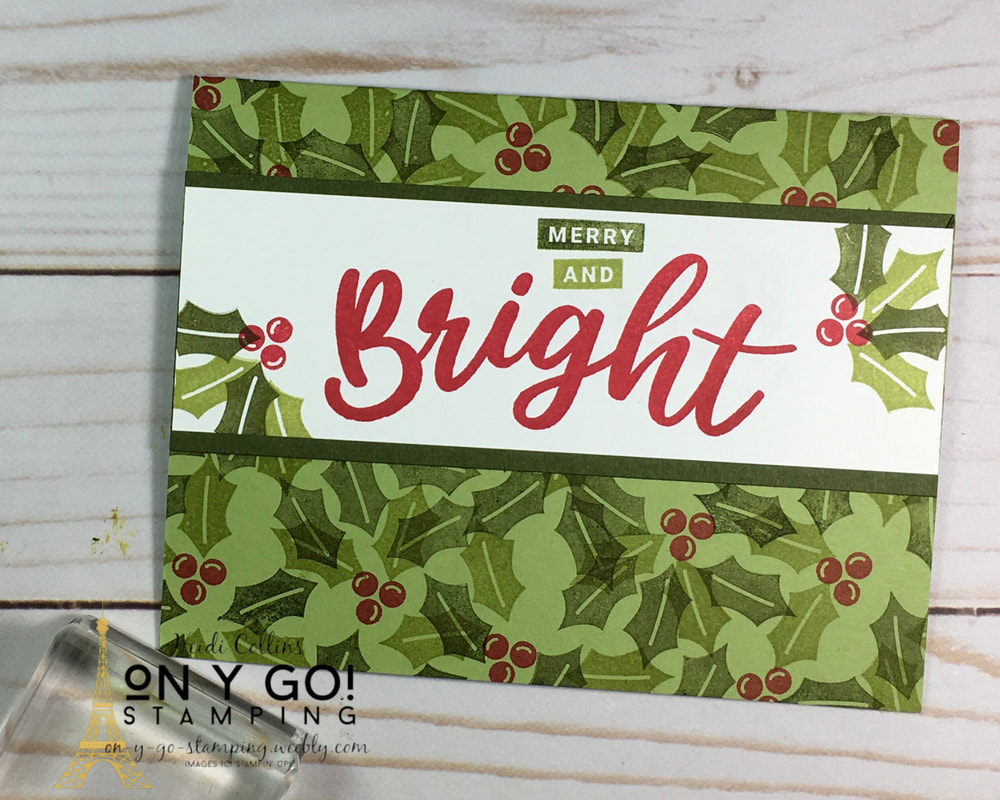
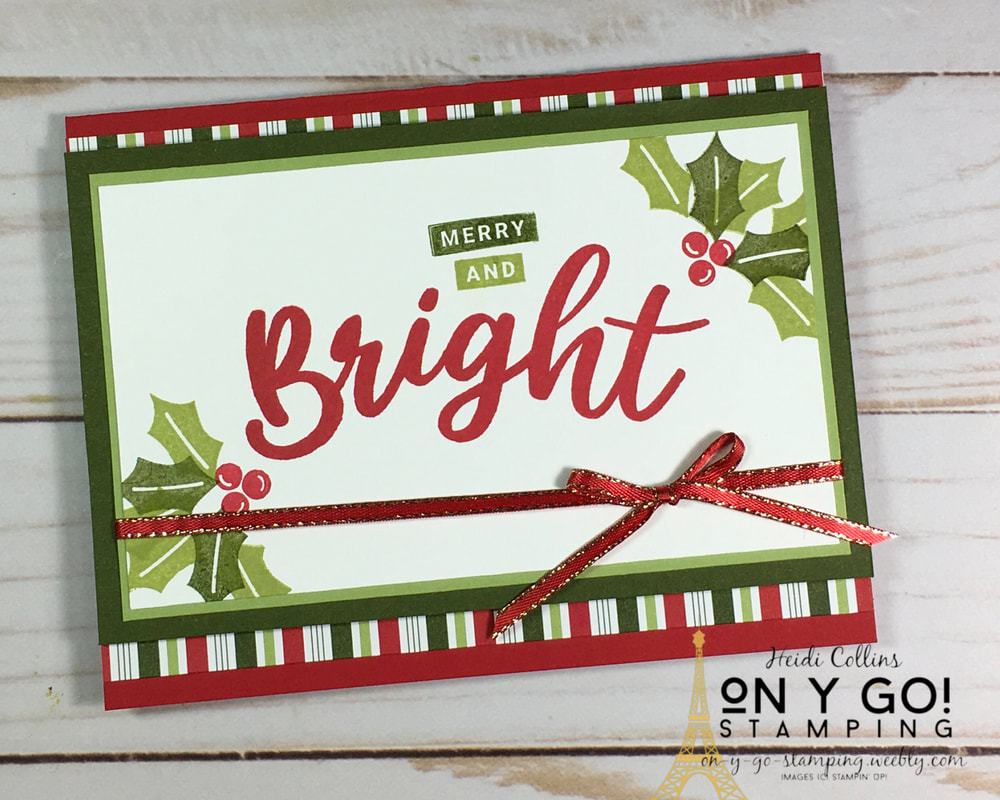
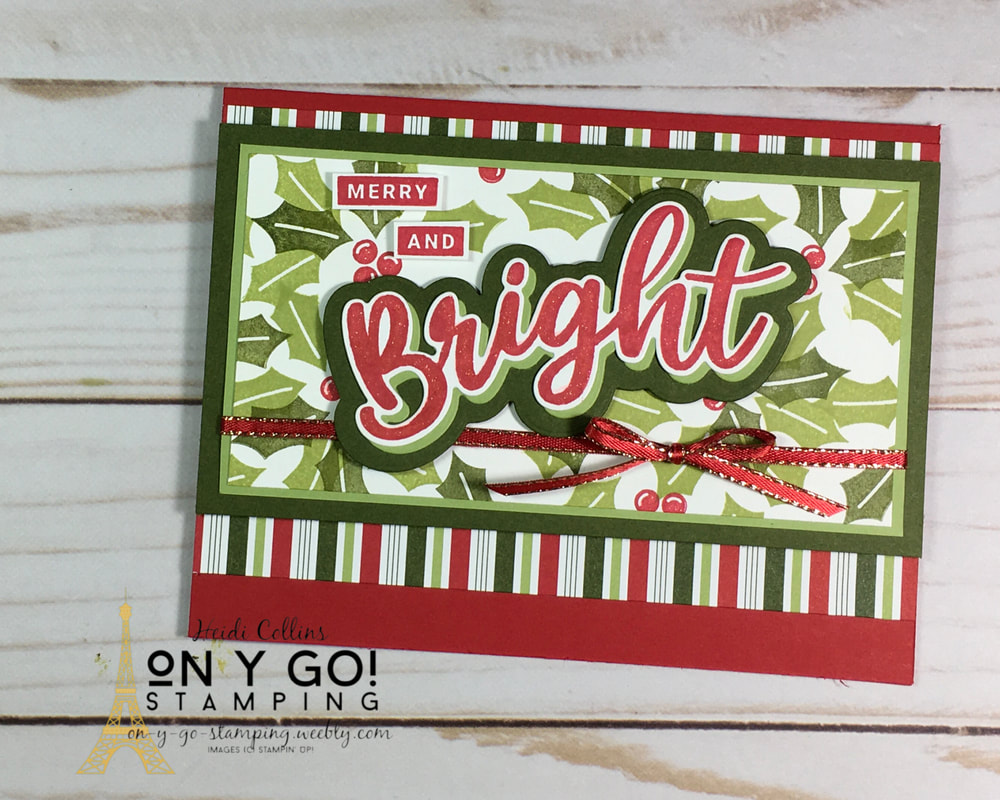
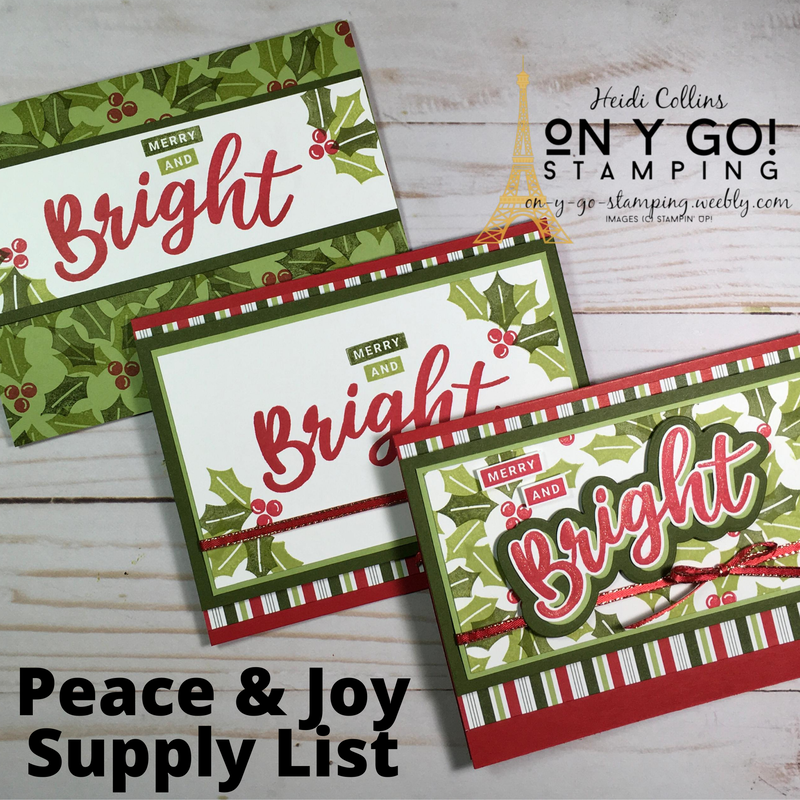
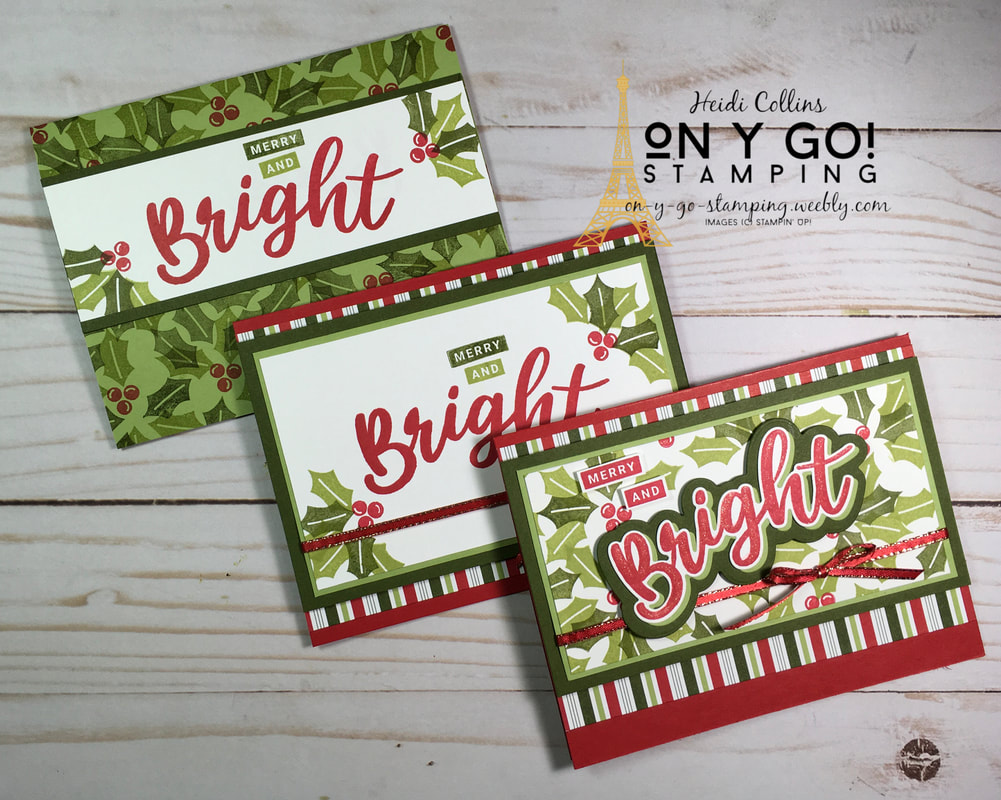
It's only August, but Christmas will be here before you know it! So, it's never to early to start making Christmas Cards. Today, I have three cards for you using the new Peace & Joy stamp set from Stampin' Up! I started with a very simple card that uses only stamping and minimal layering. Then, I stepped it up using a little ribbon and some Heartwarming Hugs Designer Series Paper. Finally, I stepped it up again by using the coordination Joy dies. Whether you want a super quick and easy card or something fancy, there's a design for you! So, on y go! Let's get stamping.

Easy Card:
For this card, I used a Pear Pizzazz base and covered it in holly leaves stamped in Pear Pizzazz and Mossy Meady. Then, I added a simple strip of Whisper White cardstock with the greeting stamped on it. 

Dimensions:
Pear Pizzazz: 8 1/2" x 5 1/2", scored at 4 1/4"
Whisper White: 1 3/4" x 5 1/2"
Mossy Meadow: 2" x 5 1/2"
Picture
Picture
Casual Card:
For my second card, I still stamped the greeting on Whisper White cardstock, but I mounted it on Pear Pizzazz before adding it on Mossy Meadow. I also added a piece of red ribbon from the all the Trimmings Ribbon Combo Pack. For the DSP, I cut 3/4" strips and adhered them to the Real Red cardstock. Then, I added the main image with Stampin' Dimensionals.
Casual Card Dimensions:
Real Red: 8 1/2" x 5 1/2", scored at 4 1/4"
Heartwarming Hugs DSP: (2) 3/4" x 5 1/2"
Whisper White: 3" x 5"
Pear Pizzazz: 3 3/16" x 5 3/16"
​Mossy Meadow: 3 1/2" x 5 1/2" 

Fancy Card:
For my final card, I stamped "Bright" with Real Red ink on Whisper White cardstock and cut it with the Joy dies. Then, I cut a piece of Pear Pizzazz cardstock using the same die. I layered this under the stamped "Bright" slightly offsetting it so that it would show on the bottom and right. Finally, I mounted this on a piece of Mossy Meadow cardstock cut with the shadow die. 
Picture

I stamped a piece of Whisper White cardstock with Mossy Meadow and Pear Pizzazz holly leaves with Real Red berries. I added a piece of the All the Trimmings Ribbon and the "Merry" and "and" portions of the greeting using Stampin' Dimensionals. 

Fancy Card Dimensions:
Real Red: 8 1/2" x 5 1/2"
Heartwarming Hugs DSP: (2) 3/4" x 5 1/2"
Mossy Meadow: 3" x 5 1/2"
Pear Pizzazz: 2 11/16" x 5 3 1/6"
Whisper White: 2 1/2" x 5"
Picture
Click to see a complete supply list and order. 
0 Comments

Easy Fun Fold Card: Illusion Card Front

8/5/2020

0 Comments

 
Picture
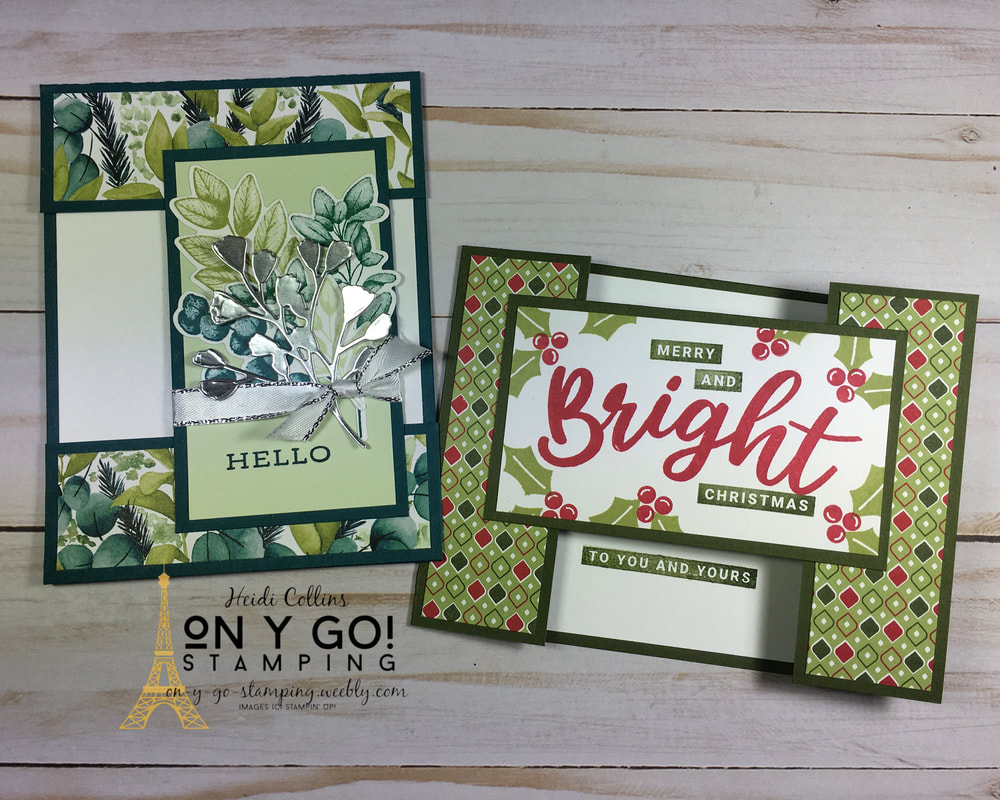
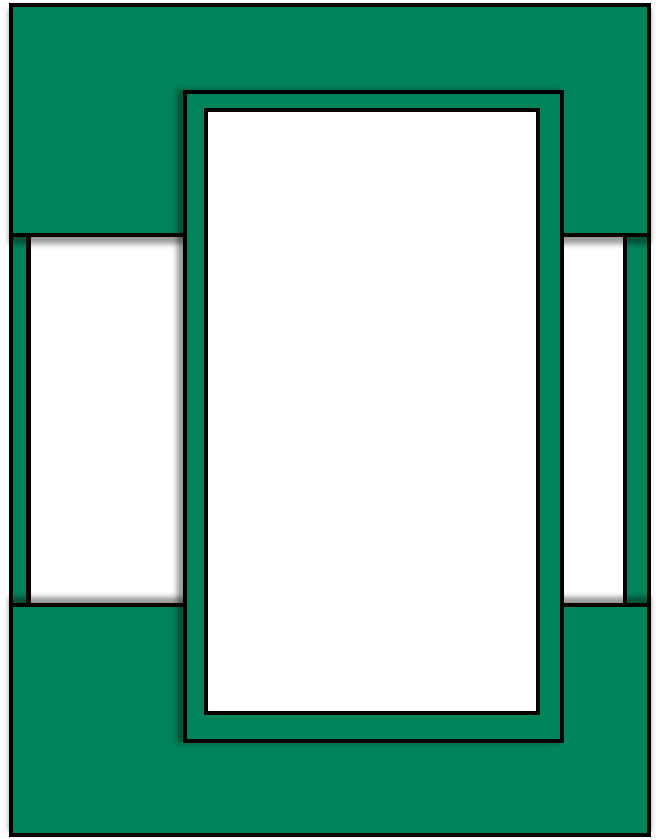
I never know quite what to call the different fun-fold cards. So, I settled on Illusion Card Front for this one, because it kind of seems like an optical illusion that the card stays together. We did this fun layout for last night's Mystery Stamping event. It's great because it's easy and can be used with all sorts of stamps. So, on y go! Let's get stamping.

Cutting Dimensions:
Cardstock: 4 ¼” x 11”, scored at 5 ½”
White or Vanilla cardstock:
  • 2 ¼” x 4”
  • 4” x 5 ¼”
Designer Series Paper: (2 pieces) 1 ¼” x 4”

The secret to this card is that you cut the card front and then piece it back together. Cut the cardstock at 9 1/2" and 7". Adhere the pieces of DSP to the 1 1/2" strip of cardstock that you cut off. Glue the other piece of DSP to the 1 1/2" flap of cardstock left at the top.
​
Picture
Next, fold the card and set it in front of you. Lay the cut-off strip of 1 1/2" x 4 1/4" cardstock on the bottom where it would have originally been. Then, turn the piece of 2 1/2" x 4 1/4" card stock and glue it so that it holds the bottom strip to the top flap to create the card front. Be careful to only put glue on the top and bottom so that you don't glue your card front closed!

Add a piece of 4" x 5 1/4" Whisper White or Very Vanilla cardstock to the inside of the card. Stamp an image on the piece of 2 1/4" x 4" Whisper White or Very Vanilla cardstock and it to the front of your card. 
Picture

For my first card, I used the Forever Greenery Suite including the Forever Fern stamp set, Forever Flourishing dies, and Forever Greenery Designer Series Paper. For the card base, I used Pretty Peacock cardstock. I stamped the leaves in Pretty Peacock, Pear Pizzazz, Shaded Spruce, and Soft Sea Foam. I added a sprig cut from Silver cardstock and tied it together with Silver Metallic Edge Ribbon. 
Product List
Forever Fern Bundle (English)
[154094]
$54.00
Forever Fern Cling Stamp Set (English)
[152559]
$24.00
Forever Flourishing Dies
[152714]
$36.00
Forever Greenery Suite Collection (English)
[154143]
$105.00
Forever Greenery Designer Series Paper
[152492]
$11.50
Pretty Peacock Classic Stampin’ Pad
[150083]
$7.50
Pretty Peacock 8-1/2" X 11" Cardstock
[150880]
$8.75
Whisper White 8-1/2" X 11" Cardstock
[100730]
$9.75
Soft Sea Foam Classic Stampin' Pad
[147102]
$7.50
Soft Sea Foam 8-1/2" X 11" Cardstock
[146988]
$8.75
Shaded Spruce Classic Stampin' Pad
[147088]
$7.50
Pear Pizzazz Classic Stampin' Pad
[147104]
$7.50
Silver 3/8" Metallic-Edge Ribbon
[144213]
$7.00
Paper Trimmer
Paper Trimmer
[152392]
$25.00
Multipurpose Liquid Glue
[110755]
$4.00
My second card uses the new Peace & Joy stamp set and the Heartwarming Hugs Designer Series Paper. I stamped the "Bright" with Real Red ink and the other greetings with Mossy Meadow ink. The holly leaves are stamped with Pear Pizzazz ink. This card has nothing fancy except for the fold. So it really is a Simple Stamping card!
Picture
Product List
Whisper White 8-1/2" X 11" Cardstock
[100730]
$9.75
Pear Pizzazz Classic Stampin' Pad
[147104]
$7.50
Paper Trimmer
Paper Trimmer
[152392]
$25.00
Multipurpose Liquid Glue
[110755]
$4.00
Peace & Joy Photopolymer Stamp Set
[153430]
$18.00
Heartwarming Hugs Designer Series Paper
[153492]
$11.50
Real Red Classic Stampin' Pad
[147084]
$7.50
Mossy Meadow 8-1/2" X 11" Cardstock
[133676]
$8.75
Mossy Meadow Classic Stampin' Pad
[147111]
$7.50
0 Comments

Thanks for More Smooshing!

8/3/2020

4 Comments

 
Picture
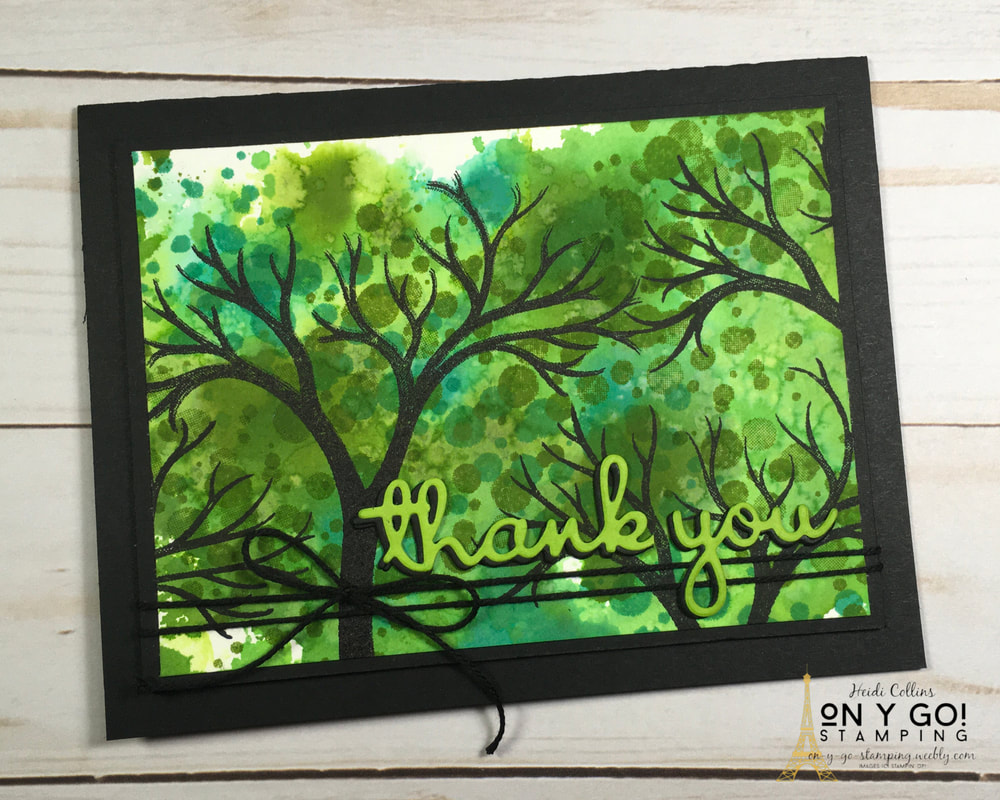
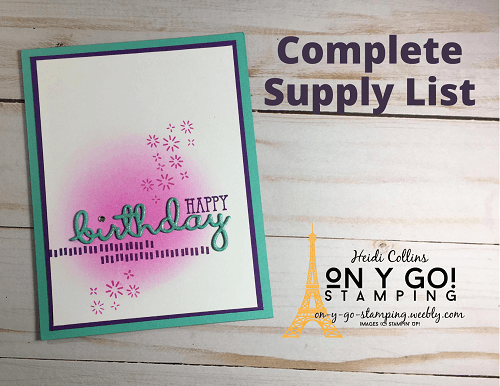
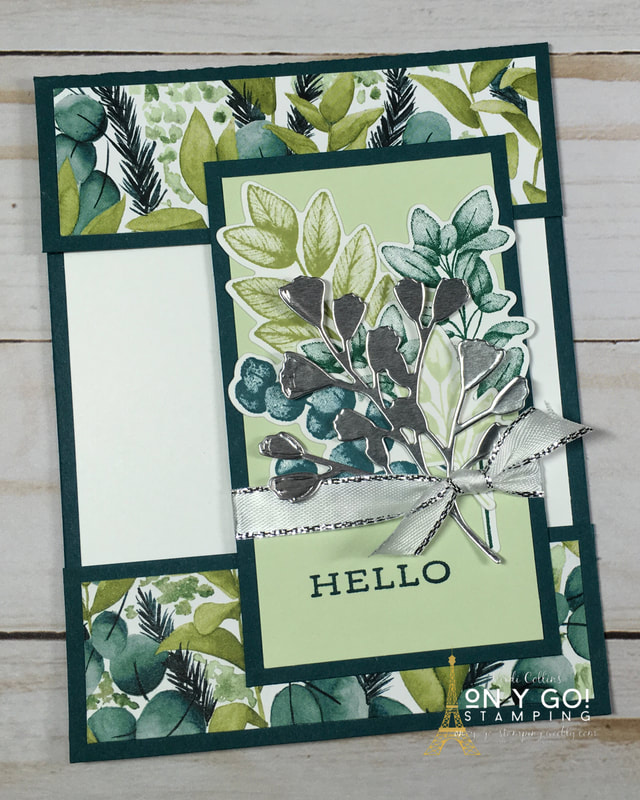
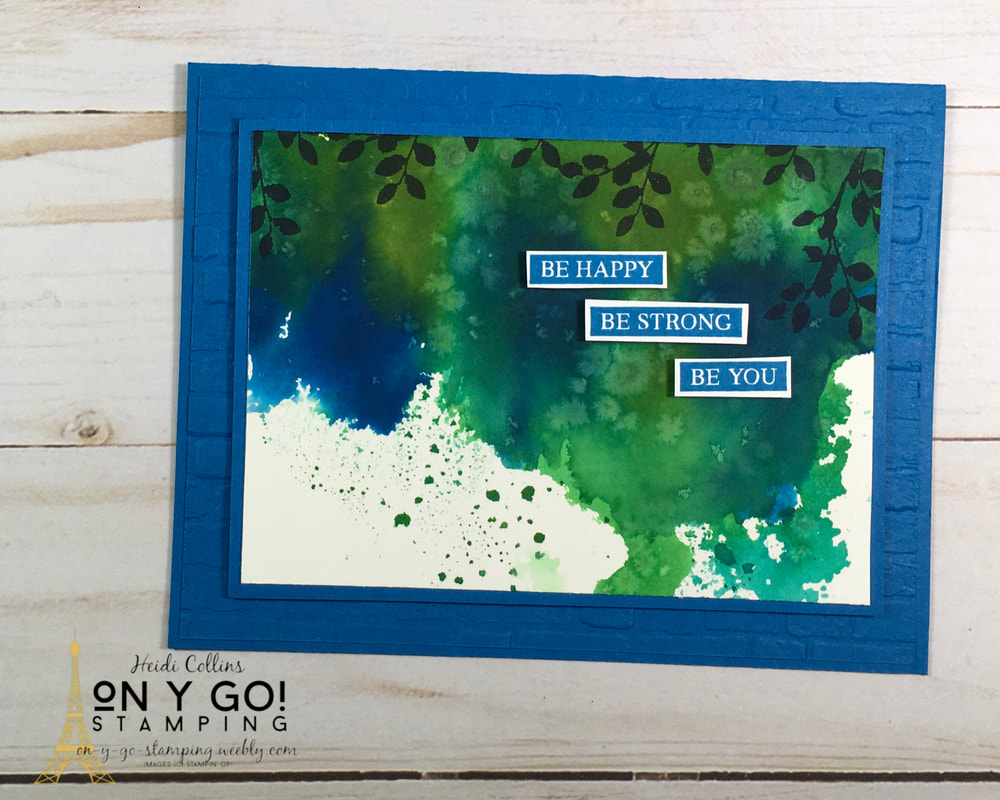
I just can't stop with the smooshing technique! Since I made another background in the video for the last post, I went ahead and finished it off into this dramatic thank you card using the new Life is Beautiful stamp set. This stamp set will be available starting tomorrow in the 2020 August-December Mini Catalog. ​
Picture
I'm also posting this as part of Kylie Bertucci's International Blog Highlights. If you like my card, I hope you'll pop over there an vote for it! Click the button to the right to head over to her blog and vote. While you're there, check out all the other awesome designers as well. 
​
I love the way the smooshed background on this card creates the image of a dense forest on a sunny day. There are bits of light coming through, but the lush greens are everywhere.
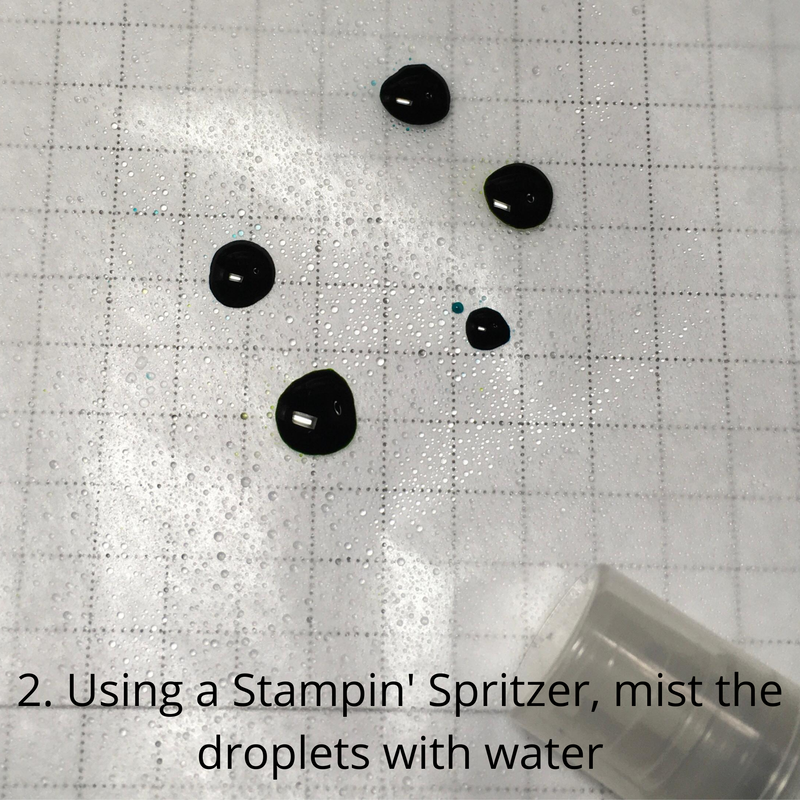
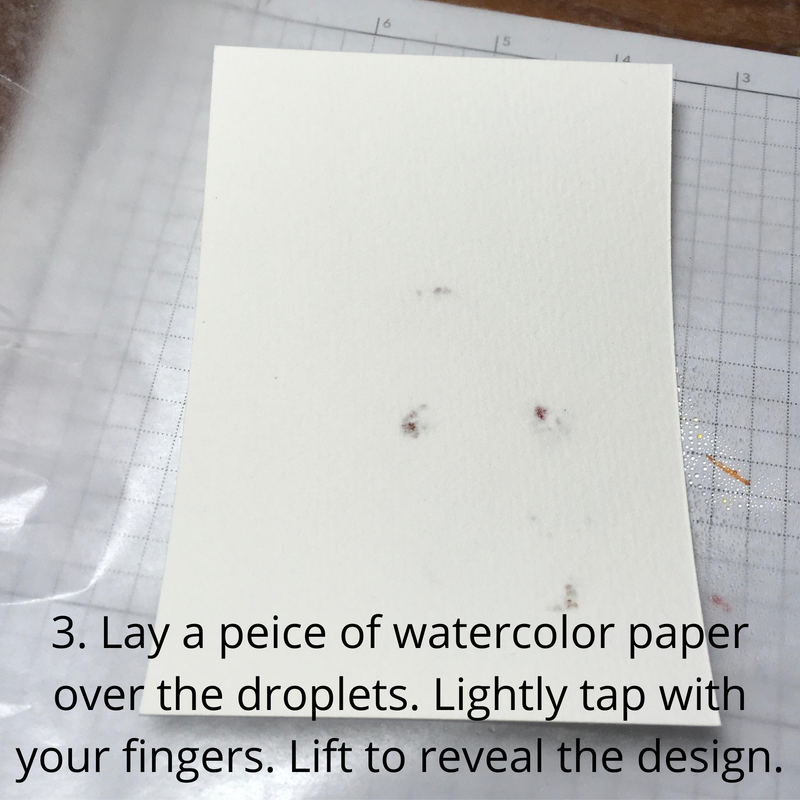
Here is a summary of the technique. For a more complete explanation, see my other cards using the smooshing technique or watch this instructional video. 
Picture
Picture
Picture
Additional Smooshing Post
Instructional Video
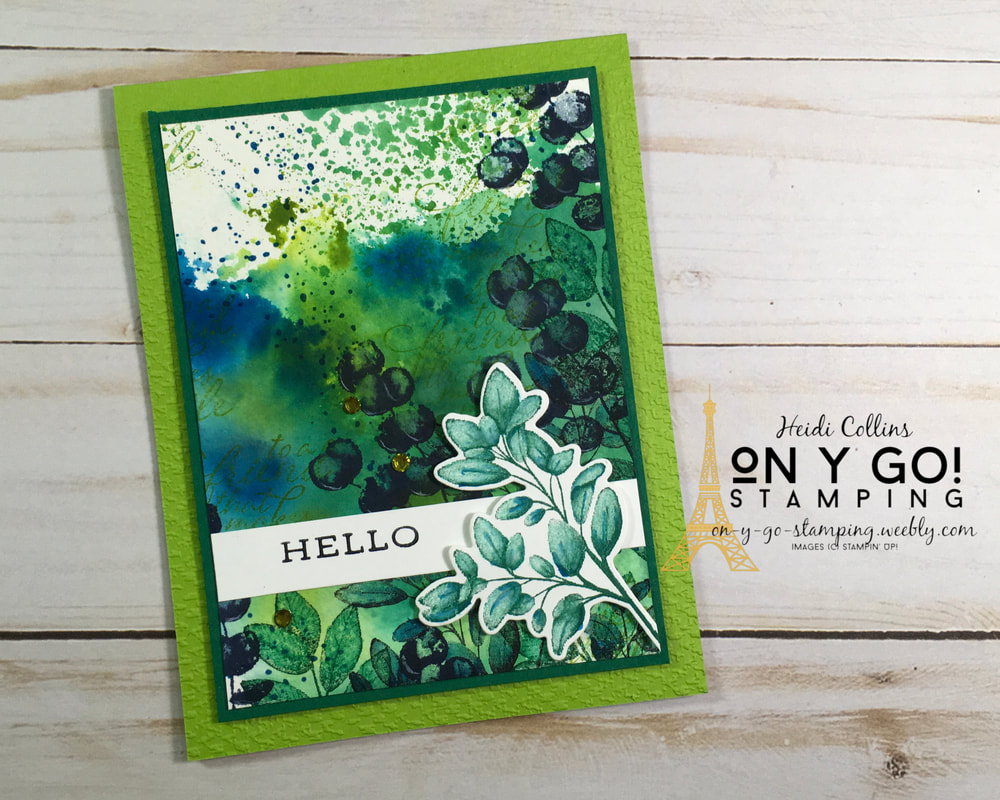
For this card, I stamped the circles from the Life is Beautiful set in Granny Apple Green and Coastal Cabana randomly on the background piece, but I didn't stamp them all over. I think the circles add to the blotchy-ness of the smooshed background. On top of that, I stamped the trees with Jet Black Stazon ink. 

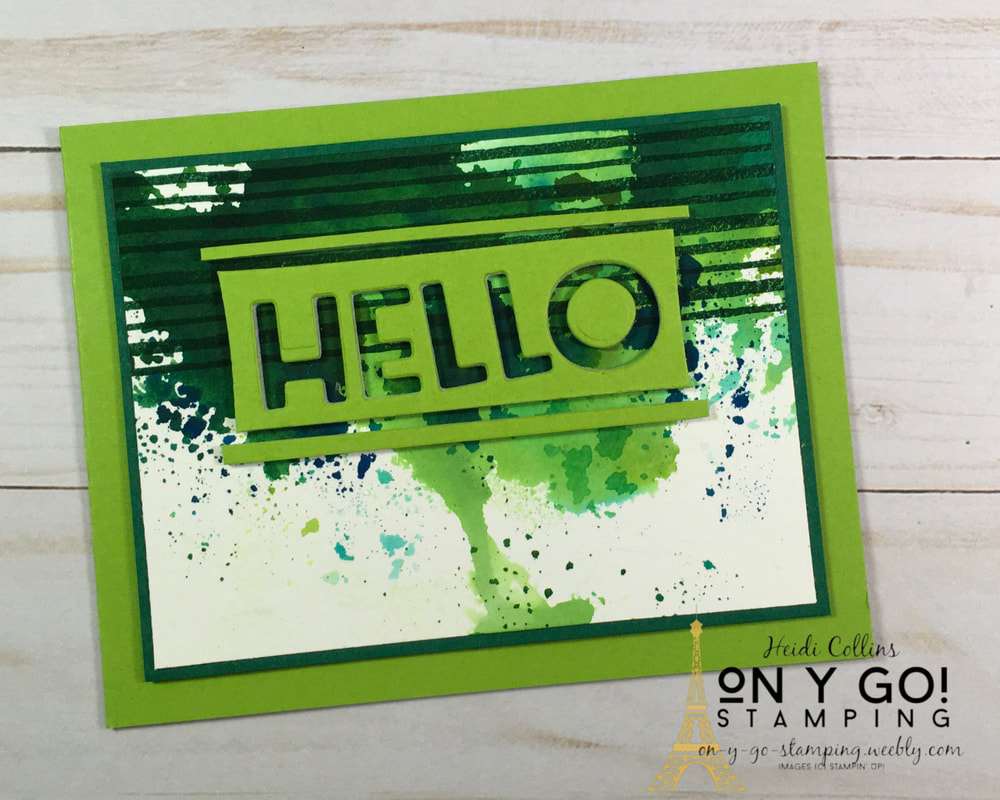
For the greeting, I cut the thank you using the Well Written dies from Granny Apple Green and Basic Black cardstock. I cut two black ones and one green. I stacked the die-cuts on top of each other off-setting the green from the black a little bit to create a shadow effect.

To finish the card, I tied the front with a piece of black baker's twine that I swiped from an old Paper Pumpkin kit. I mounted the smooshed background on Basic Black cardstock and then again on a Basic Black card base using black Stampin' Dimensionals.

Product List
Life Is Beautiful Photopolymer Stamp Set
[154871]
$17.00
Fluid 100 Watercolor Paper
[149612]
$9.00
Granny Apple Green 8-1/2" X 11" Cardstock
[146990]
$8.75
Granny Apple Green Classic Stampin' Ink Refill
[147163]
$3.75
Coastal Cabana Classic Stampin' Ink Refill
[131164]
$3.75
Basic Black 8-1/2" X 11" Cardstock
[121045]
$8.75
Granny Apple Green Stampin' Pad
[147095]
$7.50
Coastal Cabana Classic Stampin' Pad
[147097]
$7.50
Well Written Dies
Well Written Dies
[151816]
$40.00
Black Stampin' Dimensionals Combo Pack
[150893]
$6.00
Jet Black Stāzon Ink Pad
[101406]
$10.00
Multipurpose Liquid Glue
[110755]
$4.00
Clear Block F
Clear Block F
[118483]
$17.00
Paper Trimmer
Paper Trimmer
[152392]
$25.00
4 Comments

Fun Watercolor Background Technique: Smooshing

8/3/2020

0 Comments

 
Picture
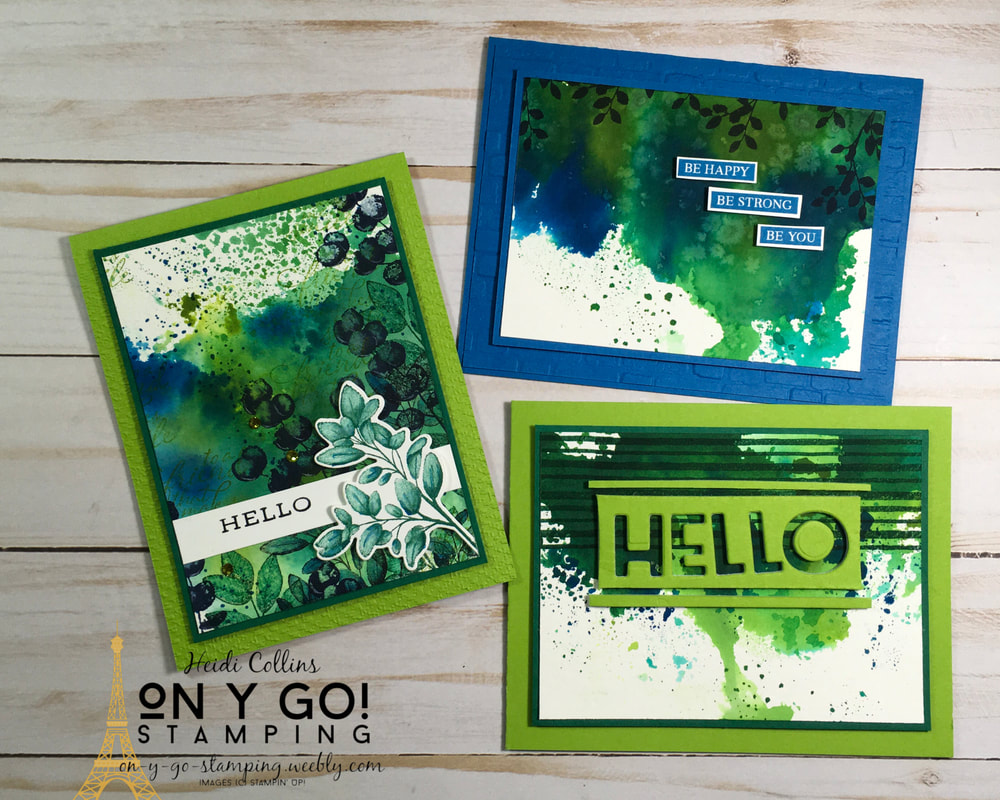
I have another watercolor technique to share with you today - smooshing! It's as fun as the name. In this short video, I shared how I did this technique. Don't worry - it's less messy than it looks! So, on y go! Let's get stamping.
BONUS: Click to check out my other blog post with an additional sample that I made with one of the backgrounds created in the video. 
Picture
For each of these cards, I created the background on Fluid 100 Watercolor Paper and used Granny Apple Green and Pacific Point re-inkers. 

My first sample uses the Forever Fern stamp set and dies. After stamping the leaves in Shaded Spruce and Night of Navy ink, I sent over them with a Water Painter to pull the color through the whole leaf. The Granny Apple Green card base is embossed with the Tasteful Textile 3D embossing folder.
My second sample uses the Rooted in Nature stamp set. I added a few branches at the top with Night of Navy ink. I stamped the greeting with Pacific Point ink and cut it into three pieces. I mounted the pieces to the front with Mini Stampin' Dimensionals. The Pacific Point card front is embossed with the Brick & Mortar 3D embossing folder.
Picture
Picture
For the last card, I stamped the stripes from the Pattern Play stamp set with Shaded Spruce ink. I attached a piece of Foam Adhesive Sheet to a piece of Granny Apple Green cardstock. I cut the letters using the Playful Alphabet and then adhered the negative image to my card front. The smooshed backgound is mounted on Shaded Spruce and Granny Apple Green cardstocks. 
Product List
Fluid 100 Watercolor Paper
[149612]
$9.00
Granny Apple Green Classic Stampin' Ink Refill
[147163]
$3.75
Pacific Point Classic Stampin' Ink Refill
[111840]
$3.75
Granny Apple Green 8-1/2" X 11" Cardstock
[146990]
$8.75
Pacific Point 8-1/2" X 11" Cardstock
[111350]
$8.75
Shaded Spruce 8-1/2" X 11" Cardstock
[146981]
$8.75
Shaded Spruce Classic Stampin' Pad
[147088]
$7.50
Night Of Navy Classic Stampin' Pad
[147110]
$7.50
Water Painters
Water Painters
[151298]
$12.00
Forever Fern Bundle (English)
[154094]
$54.00
Forever Fern Cling Stamp Set (English)
[152559]
$24.00
Forever Flourishing Dies
[152714]
$36.00
Tasteful Textile 3D Embossing Folder
[152718]
$9.00
Whisper White 8-1/2" X 11" Cardstock
[100730]
$9.75
Pattern Play Bundle
Pattern Play Bundle
[154087]
$45.00
Pattern Play Photopolymer Stamp Set (English)
[152523]
$16.00
Playful Alphabet Dies
[152706]
$34.00
Foam Adhesive Sheets
[152815]
$8.00
Rooted In Nature Cling-Mount Stamp Set
[148217]
$42.00
Pacific Point Classic Stampin' Pad
[147098]
$7.50
Mini Stampin' Dimensionals
[144108]
$4.00
Brick & Mortar 3D Embossing Folder
[149643]
$10.00
0 Comments
Forward>>
    Heidi Collins, Independent Stampin' Up! Demonstrator with On Y Go! Stamping
    Get updates and ideas on my Facebook group
    Heidi Collins, Independent Stampin' Up! Demonstrator and Owner of On Y Go! Stamping
    Picture
    Picture
    On Y Go! Stamping YouTube channel with Card Making Videos on how to do rubber stamping, card making, scrapbooking, and paper crafting

    Archives

    May 2025
    April 2025
    March 2025
    February 2025
    January 2025
    December 2024
    November 2024
    October 2024
    September 2024
    August 2024
    July 2024
    June 2024
    May 2024
    April 2024
    March 2024
    February 2024
    January 2024
    December 2023
    November 2023
    October 2023
    September 2023
    August 2023
    July 2023
    June 2023
    May 2023
    April 2023
    March 2023
    February 2023
    January 2023
    December 2022
    November 2022
    October 2022
    September 2022
    August 2022
    July 2022
    June 2022
    May 2022
    April 2022
    March 2022
    February 2022
    January 2022
    December 2021
    November 2021
    October 2021
    September 2021
    August 2021
    July 2021
    June 2021
    May 2021
    April 2021
    March 2021
    February 2021
    January 2021
    December 2020
    November 2020
    October 2020
    September 2020
    August 2020
    July 2020
    June 2020
    May 2020
    April 2020
    March 2020
    February 2020
    January 2020
    December 2019
    November 2019
    October 2019
    September 2019
    August 2019
    July 2019
    June 2019

Proudly powered by Weebly
  • About
  • Online Card Classes
  • Card Making Ideas
  • Stampin' Up! Catalogs
  • Card Tutorials
  • Contact
  • Shopping Rewards
  • Shop
  • Join Stampin' Up!