• About
  • Online Card Classes
  • Card Making Ideas
  • Stampin' Up! Catalogs
  • Card Tutorials
  • Contact
  • Shopping Rewards
  • Shop
  • Join Stampin' Up!
ON Y GO! STAMPING
  • About
  • Online Card Classes
  • Card Making Ideas
  • Stampin' Up! Catalogs
  • Card Tutorials
  • Contact
  • Shopping Rewards
  • Shop
  • Join Stampin' Up!

Sending Sunshine for Cloudy Days

8/20/2020

18 Comments

 
Picture
Picture
Supply List for Sunshine Card and Box
I am excited to be hopping with the Stampin' Friends again. This month, we are sharing projects to brighten someone's day or send them well wishes. If you've been hopping along, you've joined me from Kim Quade's blog. When you're done here, I hope you will continue on to Barbara Welch's. You'll find a complete list of the blog hop links below. 
​
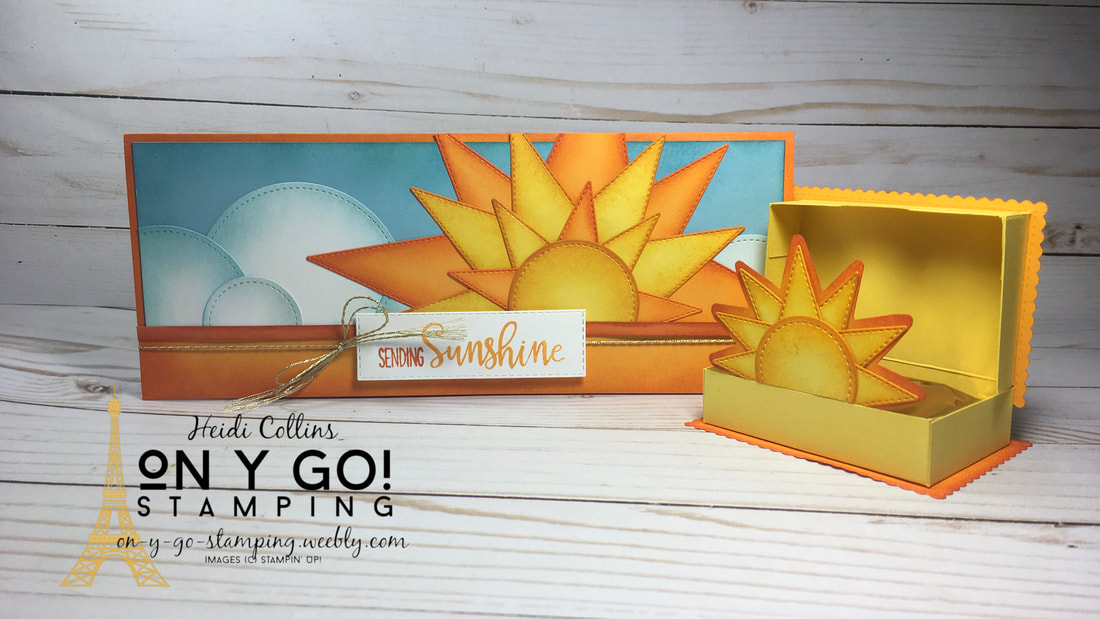
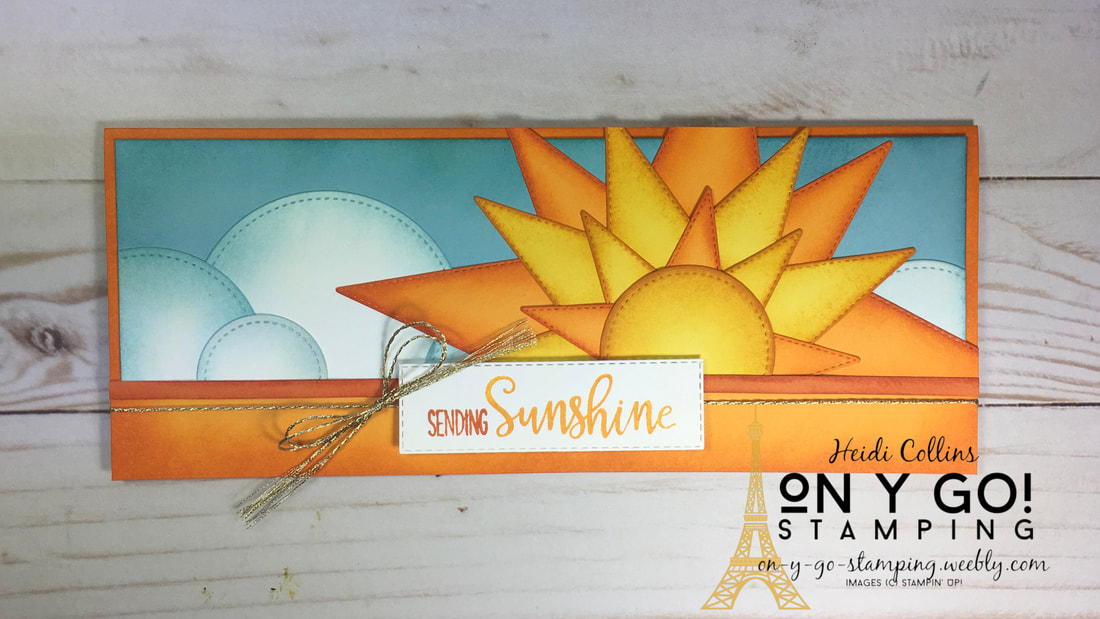
For my projects, I created a card and a mini candy box featuring sun images made by piecing together basic die-cut shapes: triangles and circles. For both of these, I used the Stitched Shapes, Stitched Triangles, and Stitched Rectangle dies. I love the stitching on the edge of these dies as it helps give it a finished edge. To make the die-cut shapes pop even more, I sponged the edges. So, on y go! Let's get stamping.
Picture
Cutting Dimensions:
Mango Melody cardstock: 9 1/4" x 7 1/2", scored at 3 3/4"
Mango Melody cardstock: 3 large triangles, 4 medium triangles, 7 small triangles
Daffodil Delight: 6 medium triangles, 1 circle
Whisper White: 1 large circle, 1 medium large circle, 2 medium small circles, 2 small circles, 1 rectangle
Balmy Blue: 9" x 2 3/4"
​Pumpkin Pie: 9 1/4" x 1/4"
Picture
Picture
Picture
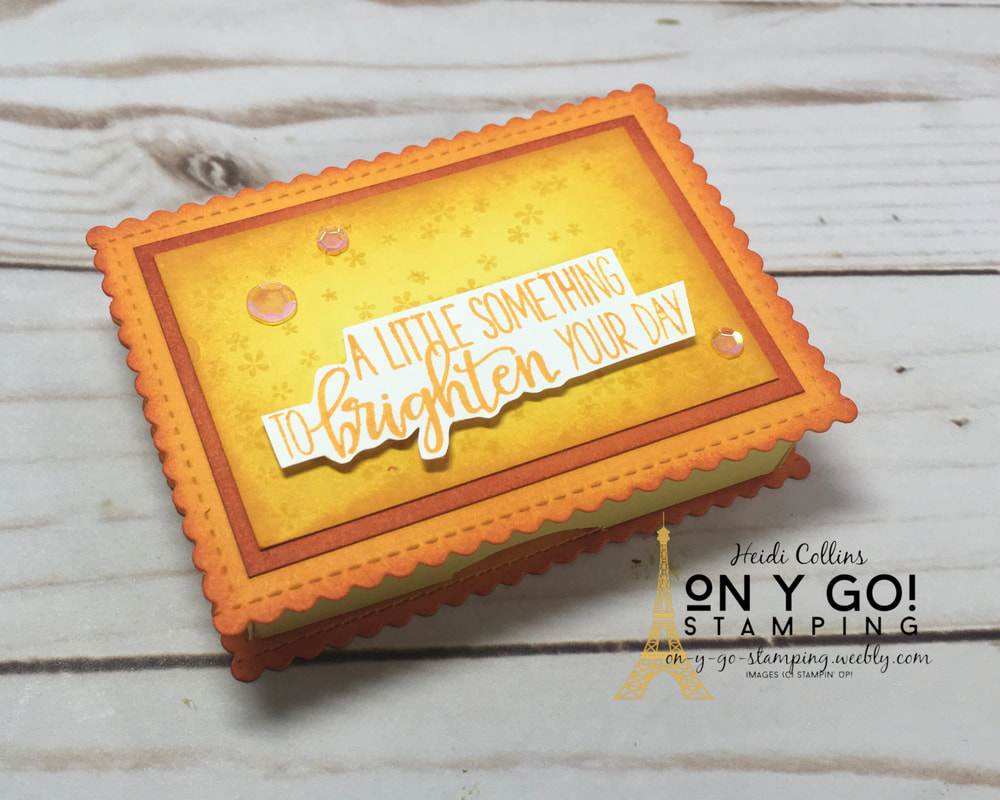
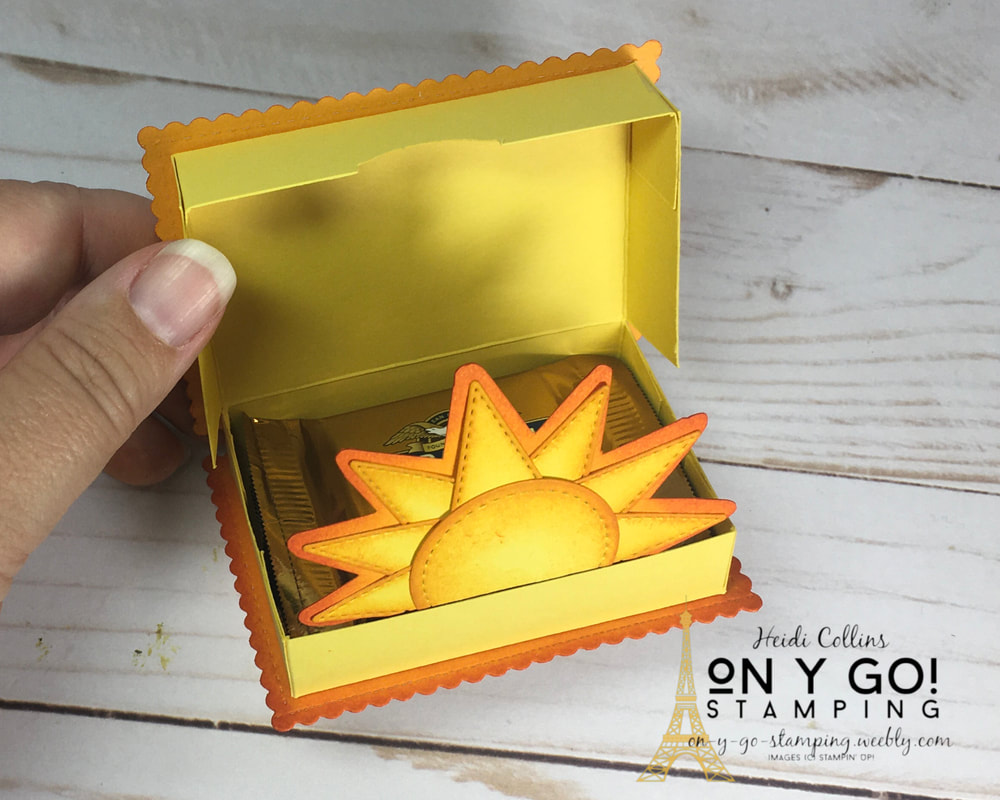
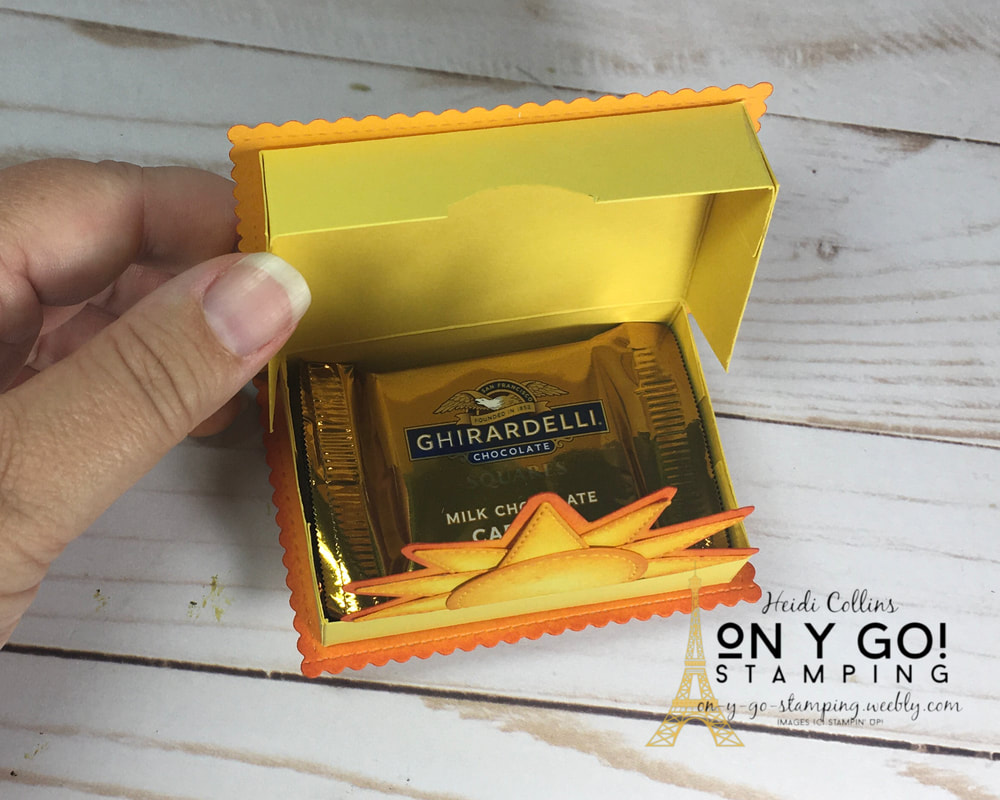
A couple of Ghiradelli chocolates in a sunny box is sure to brighten anyone's day. This box was inspired by one made by Connie Stewart. When you open the box, a sun pops up to reveal two Ghiradelli squares. What a fun and sunny surprise!

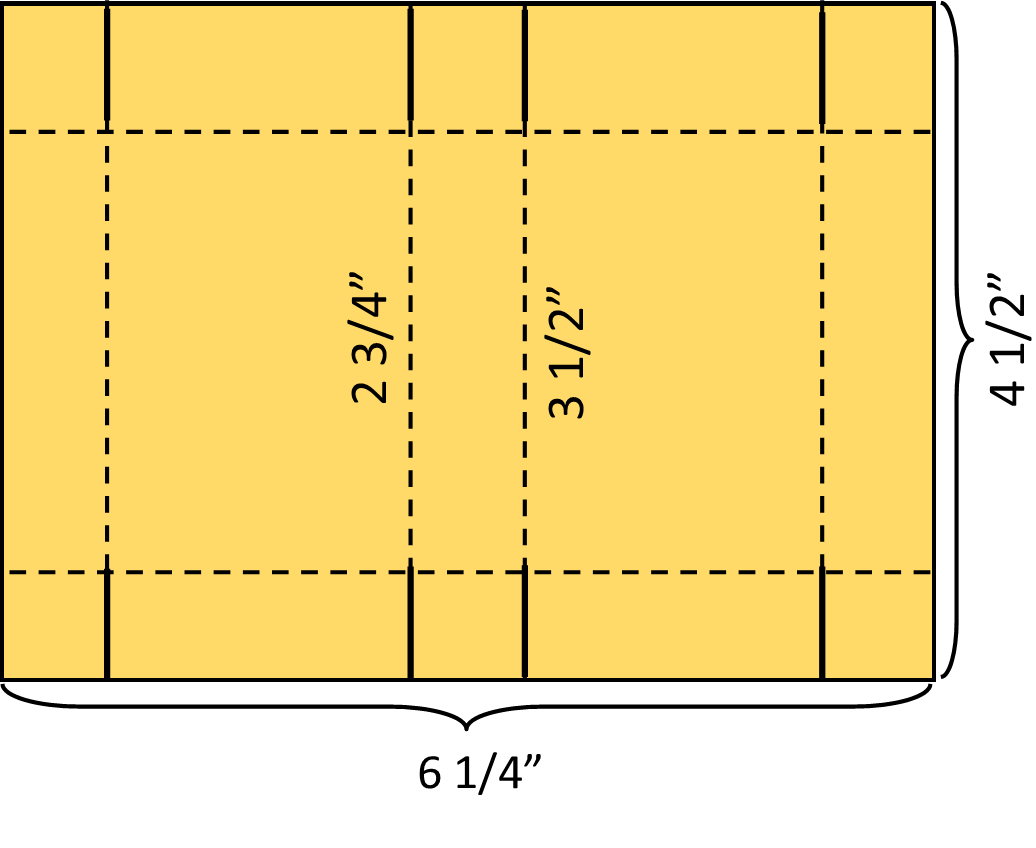
Cutting Dimensions:
Daffodil Delight: 6 1/4" x 4 1/2", score all four sides at 3/4", then score the 6 1/4" direction at 2 3/4" x and 3 1/2"
Daffodil Delight: 7 small triangles, 1 small circle
Daffodil Delight: 1 13/16" x 2 13/16"
Mango Melody: 2 rectangles cut with the Stitched So Sweetly dies
Mango Melody: Scrap
Pumpkin Pie: 2" x 3"
Window Sheet: 3/4" x 1 1/2"

There are complete instructions for cutting and assembling the box in the video. It may be helpful to refer to the cutting diagram to the right. Score on the dotted lines and cut on the solid lines. The outside scored lines are at 3/4" on all sides.

Picture
Thank you for stopping by today to check out my fun sunshiny projects. I hope they have added a little joy to your life and inspired you to create projects to bring joy to others. Please take a moment to check out all of the other awesome designers on the Stampin' Friends blog hop. Below the list of designers, you will find a link to my online store and the supplies needed for these projects. If you are interested in purchasing Stampin' Up! product and are in the US, I hope you'll come back here after you've clicked through the hop. 
Picture

Stampin' Friends Blog Hop Links:
  1. Steph Jandrow
  2. Jo Blackman
  3. Katja Ettig
  4. Rachael Rife
  5. Teri Pocock
  6. Jean Bolen Beaulieu
  7. Sue Vine
  8. Kim Quade
  9. Heidi Collins   <-- YOU ARE HERE
  10. Barbara Welch
  11. Maureen Rauchfuss
  12. Anne Marie Hile
  13. Tiziana Milano 
  14. Kim Lamos​

Project Supplies

When you click below, you will see the list of supplies needed to create these sunny projects. If you need everything, simply click "add to cart." If you need only a few things, uncheck the boxes for anything you don't need, then click "add to cart." Leave a comment or email me with questions. I am happy to help!
Picture
18 Comments

Slim Line Mystery Sketch

8/19/2020

0 Comments

 
Picture
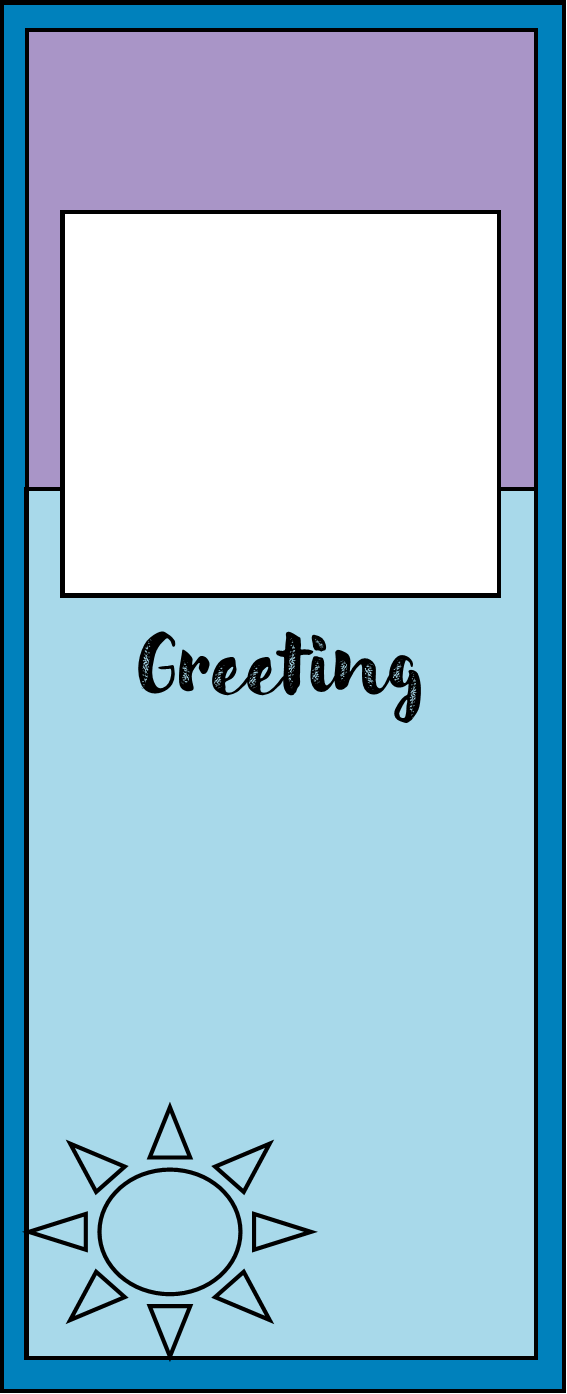
I have decided it is slim line card week this week! Last night we made a slim line card for Mystery Stamping. Here is the sketch for that card. The finished size is 9 1/4" x 3 3/4" and it will fit in a standard #10 business envelope. While the shape is little different, slim line cards can be quick and easy! So, on y go! Let's get stamping.

Cutting Dimensions:
Cardstock (card base): 7 ½ x 9 ¼”, scored at 3 ¾”
Light-colored coordinating cardstock: 3 ½” x 5 ¾”
White or Vanilla cardstock: 2 ¾” x 2 ¾”
Patterned Paper: 3 ½” x 3 ¼”

The cards have an image stamped on the lower left as well as a focal point image at the top of the card. The greeting is also stamped directly on the light colored cardstock on the bottom half of the card. 

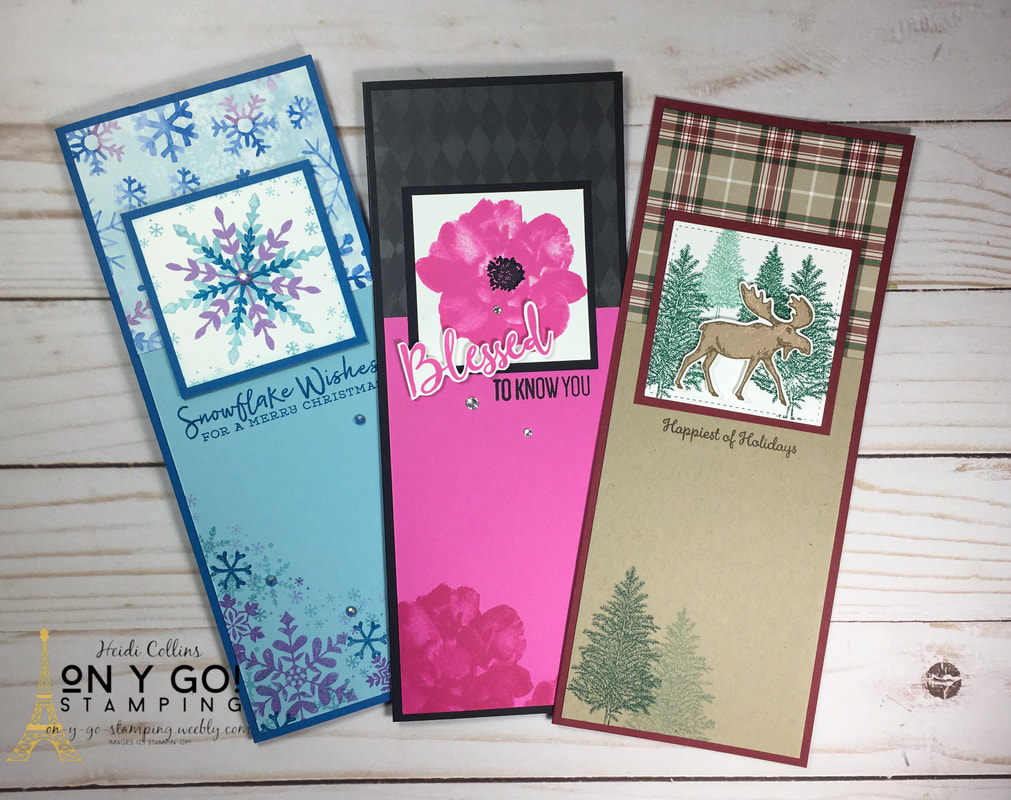
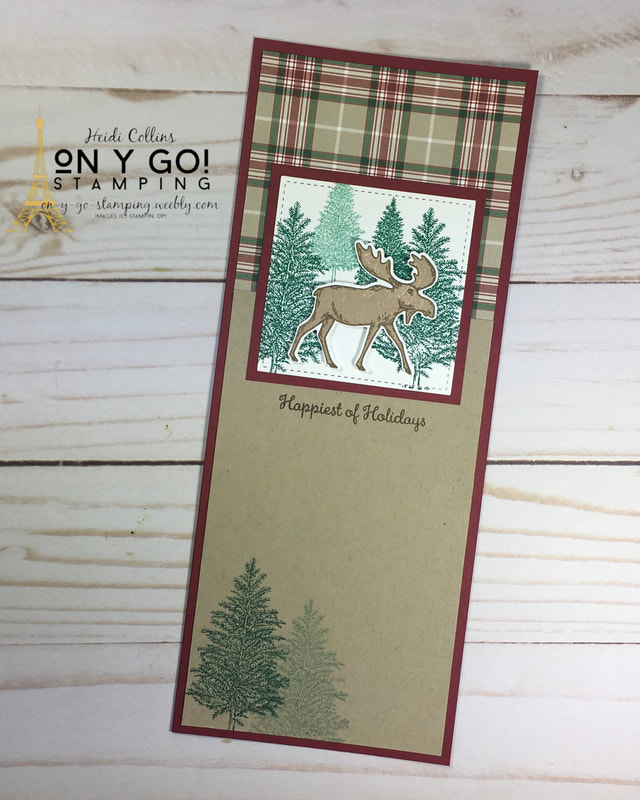
My first card uses the Merry Moose stamp set and Plaid Tidings Designer Series Paper. I stamped the outline of the moose with Soft Suede ink and then the inside with Crumb Cake ink. Then I punched it out using the moose punch and added it to the card front with Stampin' Dimensionals. 
Picture
Picture
Merry Moose Card Supplies
Picture
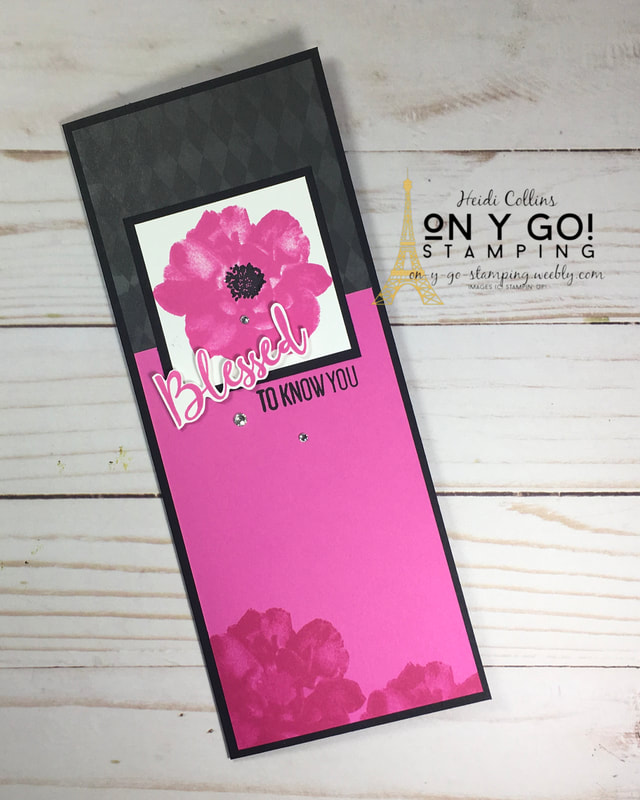
My second card uses the To a Wild Rose stamp set and the Magic in this Night Designer Series Paper. This DSP is designed primarily for Halloween, but I love some of the black prints. Here, it really makes the Magenta Madness pop. I stamped the "Blessed" with Magenta Madness ink on Whisper White cardstock and then fussy cut it and added it with Stampin' Dimensionals on an angle. Finally, because every card needs a little bling, I added some basic rhinestones. 
​
Wild Rose Card Supplies
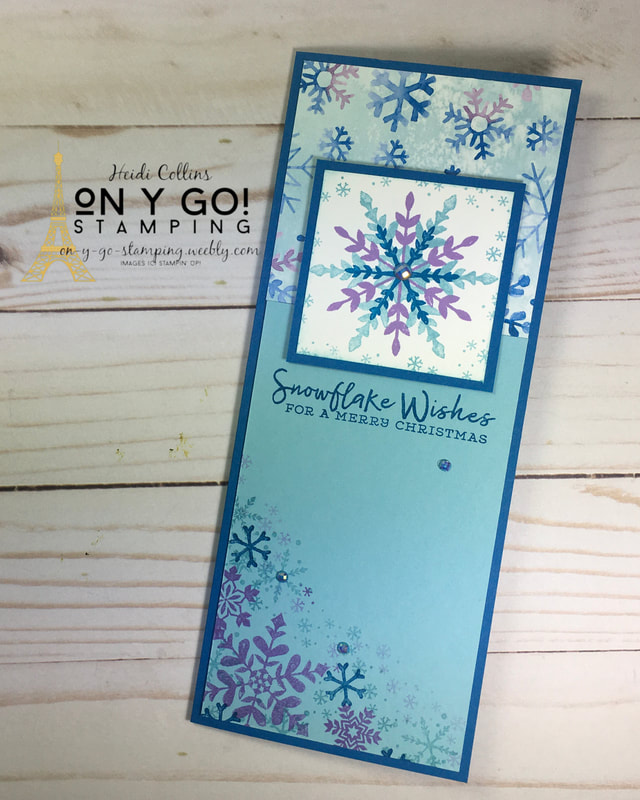
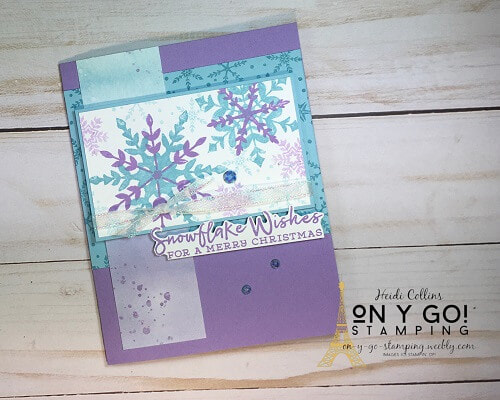
My final card uses the Snowflake Wishes stamp set and the Snowflake Splendor Designer Series Paper from the 2020 August-December Mini Catalog. I pulled the colors from the DSP: Highland Heather, Balmy Blue, and Pacific Point. For the bling, I added some of the Blue Adhesive-Backed Gems.
​
Snowflake Wishes Card Supplies
Picture
0 Comments

Slimline Cards: Triangle Sketch

8/17/2020

1 Comment

 
Picture
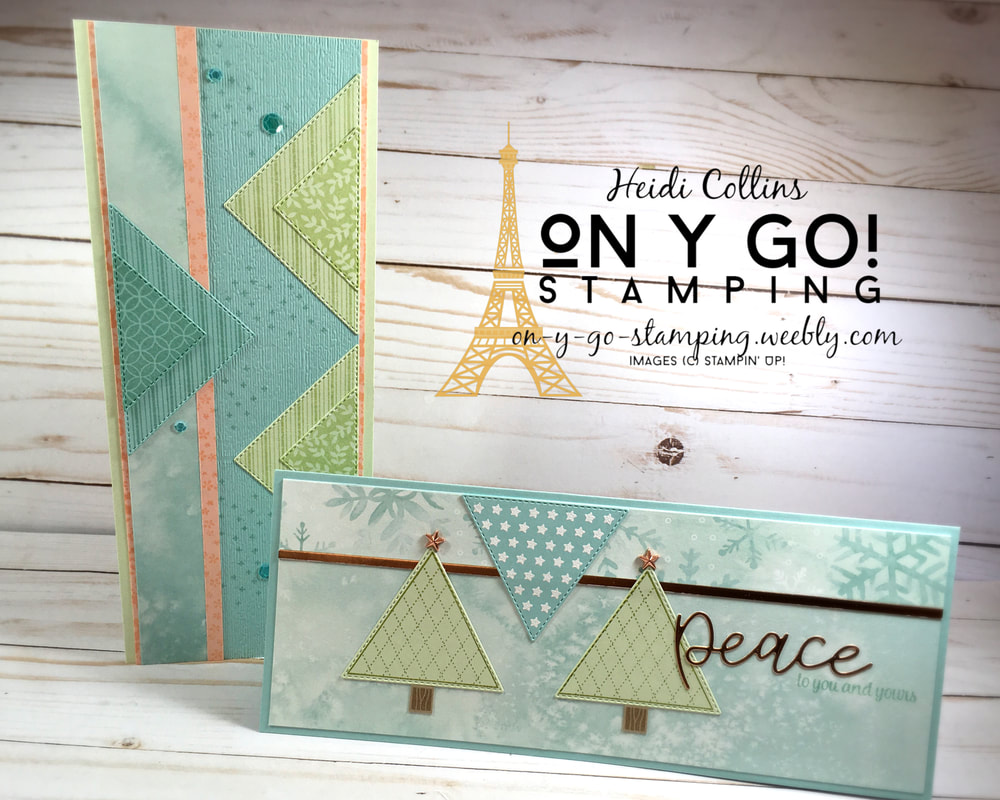
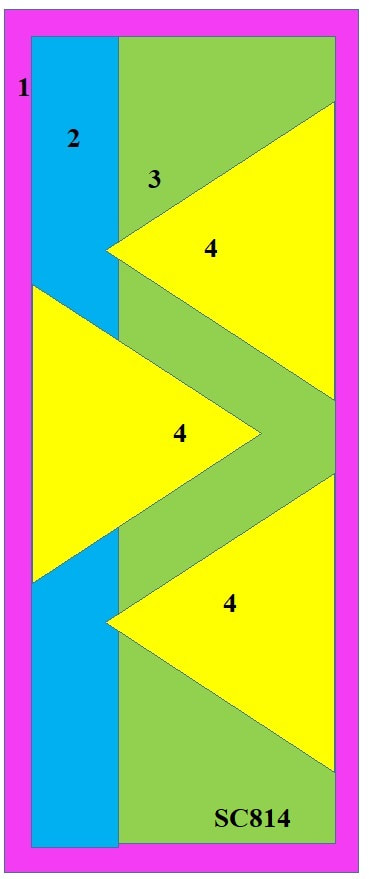
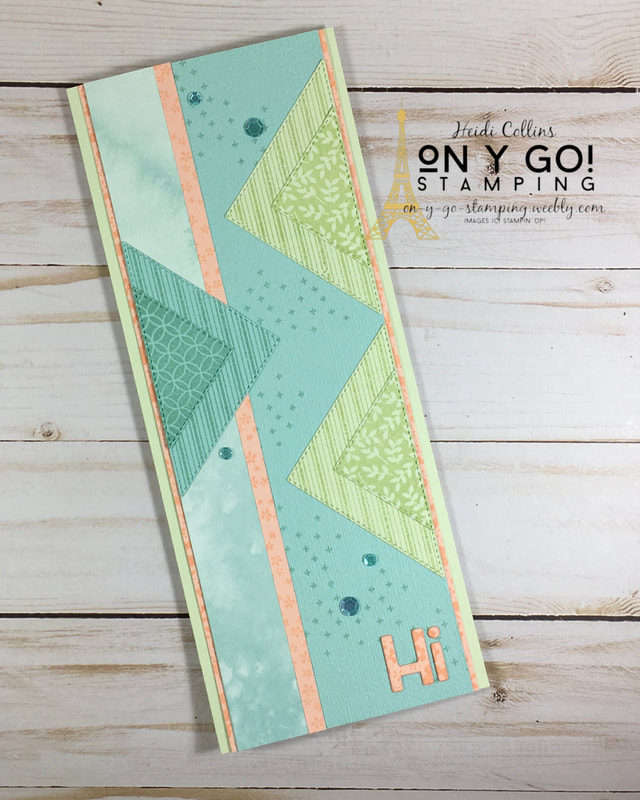
In the last few weeks, slim line cards have seen a huge growth in popularity. So, I decided to play along with the sketch challenge posted on SplitcoastStampers this week which is a slim line card. The sketch features three triangles pointing in from the edges. Let's see how I tackled the challenge. On y go! Let's get stamping.

For both of my cards today, I used the soft color combination of Pool Party, Soft Sea Foam, and a little Petal Pink for the second one. I also added strips of the Snowflake Splendor Designer Series Paper. Just this week, I got the new Stitched Triangles dies and the Right Triangle stamp set, so this sketch seemed like the perfect way to break them in!
Picture
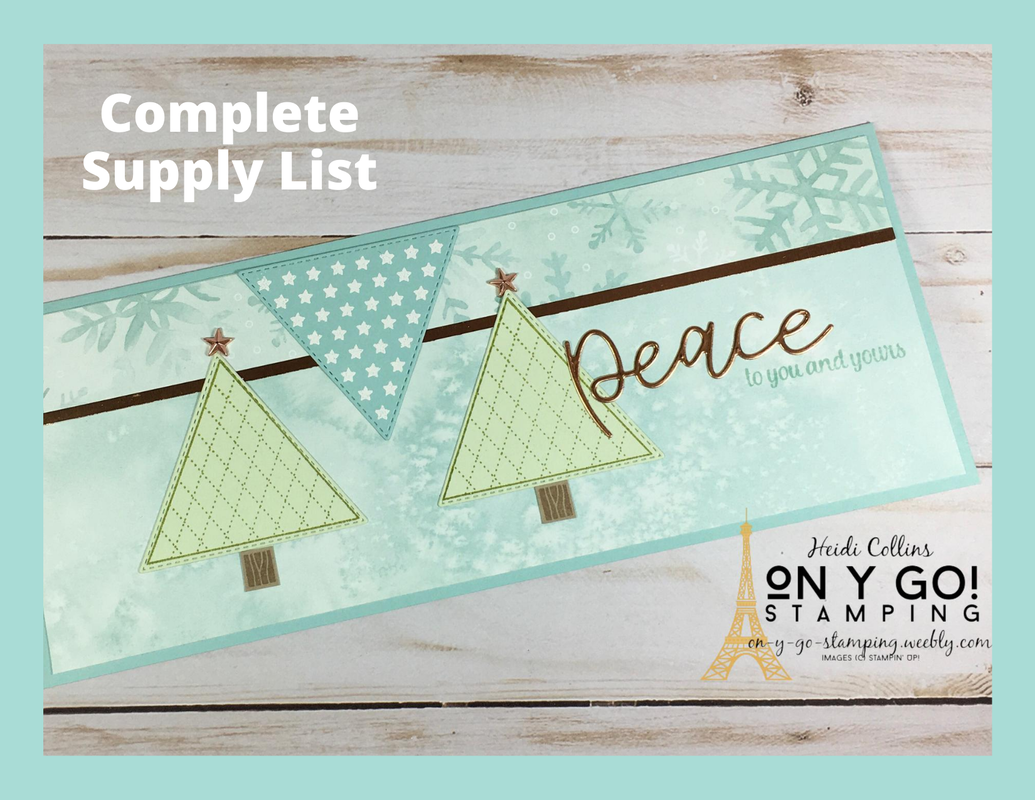
Supply List
Picture
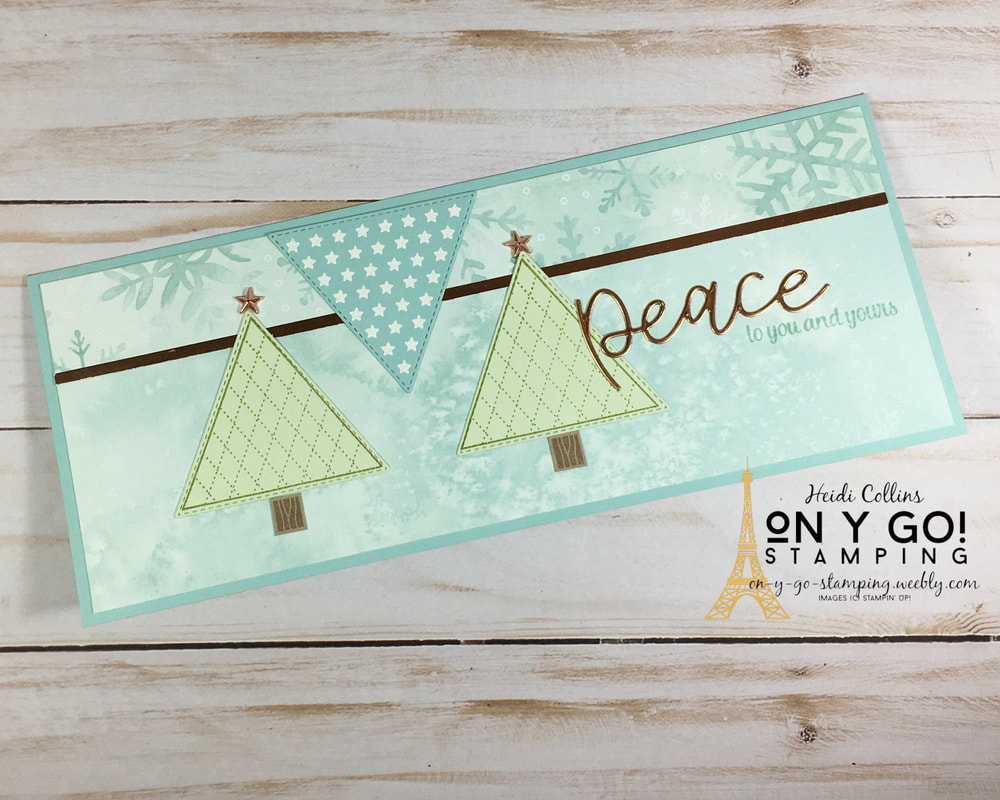
With sketch challenges, I always like to play around a bit with the basic sketch and take some liberties. This is especially true in my first card featuring the new Tree Angle stamp set and Stitched Triangles dies. I flipped the card on its side and created two Christmas trees with a suggestion of a patch of starlit sky between them. I added copper stars to the trees, a line of Copper Foil, and a copper greeting cut with the Joy die set. ​
Picture
Picture
Both of my cards measure 9 1/4" x 3 3/4" and fit nicely into a standard #10 business envelope. The strip of DSP on the left is approximately 1" x 9" for both cards as well and the thin strip of copper on one and Petal Pink on the other is 1/4" x 9". I left these two strips longer than 9" until I adhered them to the front layer. Then, I trimmed the ends. This way, I made sure that all of the layers were exactly the same length.

For my second card, I used the Right Triangle stamp set to stamp designs on the triangles before cutting them with the Stitched Triangle dies. I also stamped a random pattern on the piece of Pool Party cardstcock on the card front. 
I stamped the floral triangle on a piece of Petal Pink cardstock using Petal Pink ink and then cut the word "Hi" using the Playful Alphabet dies. I used the same triangle to stamp along the edges of the piece of Petal Pink cardstock that is the first layer of the card. For a little bling, I finished the card with some of the Artistry Blooms Sequins.
1 Comment

Playful Birthday Cards with lots of Variations

8/14/2020

0 Comments

 
Picture
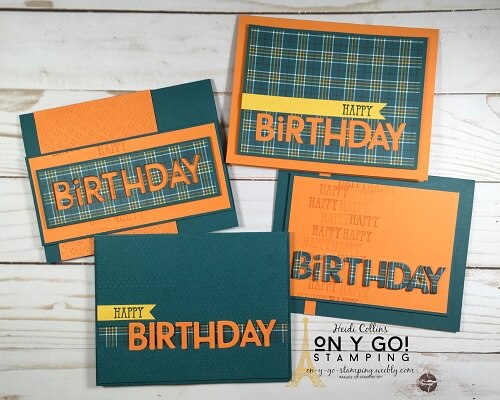
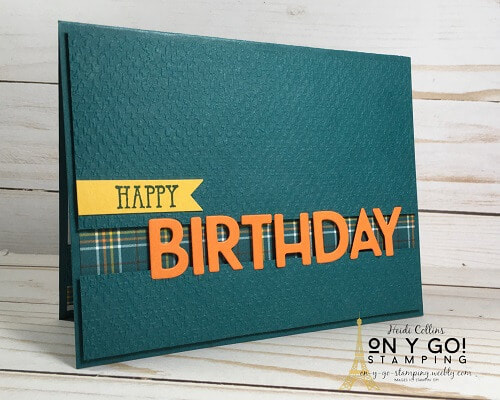
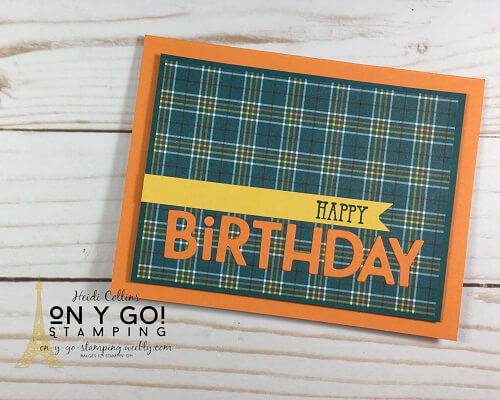
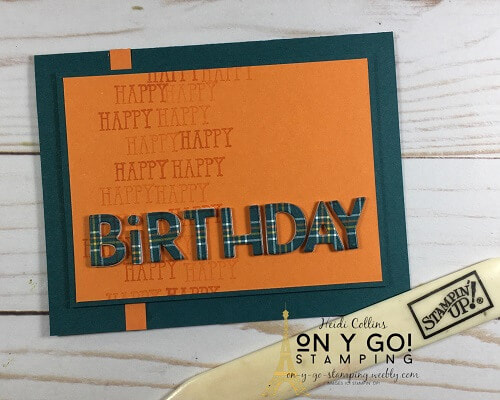
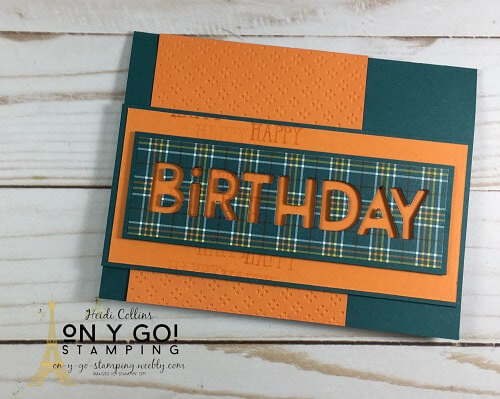
Today, I used the same basic supplies and colors to create four different cards. They all look very similar, but each one is a little different. This is a great way to make different cards quickly. Since you are using all the same materials, you only have to pull them out and clean them up once. So, on y go! Let's get stamping.
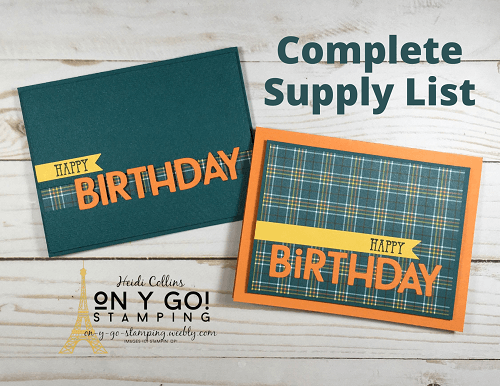
Get the Supply List
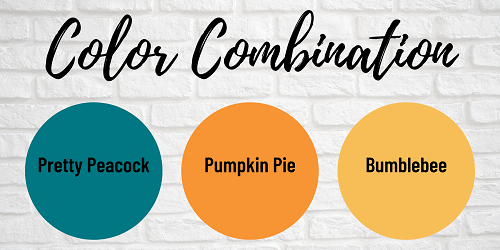
For these cards I used Pretty Peacock, Pumpkin Pie, and Bumblebee inks and cardstocks. I pulled the colors from a piece of the Plaid Tidings Designer Series Paper which is also used on each card. I chose the Well Said stamp set, but paired it with the Playful Alphabet dies instead of its coordinating dies. 
Picture

Picture
Picture
Cardstock Dimensions:
Pretty Peacock:
  • 8 1/2" x 5 1/2", scored at 4 1/4"
  • 2 1/2" x 5 1/4"
  • 1" x 5 1/4"
Plaid Tidings Designer Series Paper: 1 1/4" x 5 1/4"
Pumpkin Pie: 1" x 4 1/2" (or scraps)
Bumblebee: 1/2" x 1 1/2"

For my first card, I started by adhering the strip of Plaid Tidings towards the bottom of my card front leaving about a half inch or so of space towards the bottom. Then, I adhered the two pieces of Pretty Peacock cardstock that I had embossed with the Tasteful Textile 3D embossing folder to the card front using Black Stampin' Dimensionals and leaving a gap so that the Plaid Tidings DSP shows through. I carefully adhered the die-cut letters over the gap by adding a little multipurpose liquid glue to the top and bottom edges of the letters so that they are attached to the edges of the two pieces of Pretty Peacock cardstock but not the Plaid Tidings DSP. 

​Cutting Dimensions:

Pumpkin Pie:
  • 8 1/2" x 5 1/2", scored at 4 1/4"
  • 1" x 4 1/2" (or scraps)
Pretty Peacock: 3 11/16" x 4 15/16"
Plaid Tidings DSP: 3 1/2" x 4 3/4"
​Bumblebee: 1/2" x 4"
Picture
I still cut the "Birthday" greeting with the Playful Alphabet dies, but for this card, I created a longer flag for the "Happy" from the Well Written stamp set. I simply layered this greeting on a piece of the Plaid Tidings DSP and then mounted on Pretty Peacock. This layer is then mounted to the Pumpkin Pie card base using Stampin' Dimensionals. This is a pretty quick and easy card with minimal stamping. 
Picture
Cutting Dimensions:
Pretty Peacock:
  • 8 1/2" x 5 1/2", scored at 4 1/4"
  • 4 13/16" x 4 1/16"
Pumpkin Pie:
  • 4 5/8" x 3 7/8"
  • 5/16" x 4 1/4"
​Plaid Tidings DSP: 1" x 4 1/2" (or scraps)
For my third card, I cut the "Birthday" greeting from the Plaid Tidings DSP. It is mounted on a foam adhesive sheet. Normally, when I mount the letters on the foam adhesive sheet, I adhere the foam to the paper before I cut the letters. This time, I didn't decide that I wanted them popped up until after I'd already cut the letters. But, I found a really good trick for getting the paper letters perfectly placed on the foam letters. The foam letters generally stay put when you take the metal die off. Leave them in the rest of the piece of foam and carefully peal off the sticker side on one of the letters. Apply the paper letter to the foam before punching out the foam. because the foam around the letter will still have the sticker backing, it sticks up a little higher and you can nestle the paper letter into place assuring proper placement on the foam letter. (I hope all that made sense!)

For this card, I also stamped "Happy" with Pumpkin Pie ink on the Pumpkin Pie cardstock. I stamped it 2-3 times before reinking the stamp and varied the placement. As I was putting the card together, it felt like it needed a little something, so I added the thin strip of Pumpkin Pie cardstock between the Pretty Peacock layer and card base.

Cutting Dimensions:
Pretty Peacock:
  • 8 1/2" x 5 1/2", scored at 4 1/4"
  • (layer) 2 9/16" x 5 1/2"
  • (greeting) 1 3/16" x 4 15/16"
Pumpkin Pie:
  • (greeting) 2 3/8" x 5 5/16"
  • (layer) 3 3/8" x 4 1/4"
Plaid Tidings DSP: 1 1/2" 4 3/4"
Picture

For my last card, I used the piece of Plaid Tidings DSP from which I had cut the letters for the previous card. (Actually, I made this card first and then used the letters on the other card.) I started by adhere the piece of Plaid Tidings DSP to the Pretty Peacock mat. Then, I cut the greeting. I popped this up on Stampin' Dimensionals when I adhered it to the Pumpkin Pie background on which I had stamped "Happy" with Pumpkin Pie ink. I embossed the large piece of Pumpkin Pie cardstock in the back with one of the Wrapped in Texture embossing folders. (These come as a 2-pack in the August-December Mini Catalog).

These cards were fun and quick to make. The color combination and basic designs make them a perfect gender neutral card perfect for anyone!
0 Comments

Sketch It Wednesday

8/12/2020

0 Comments

 
Picture
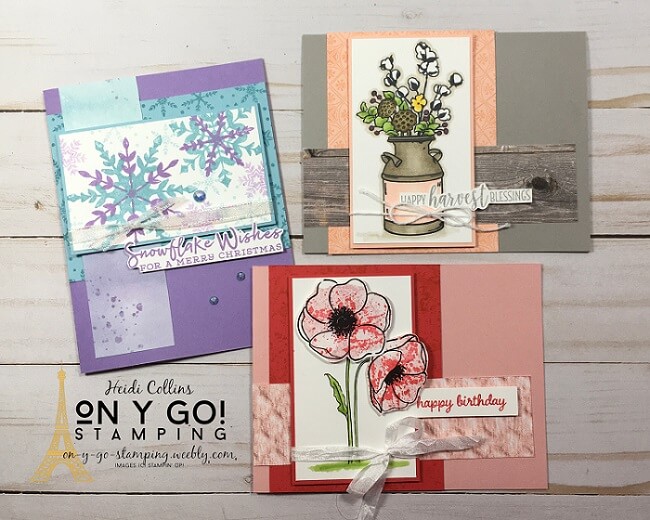
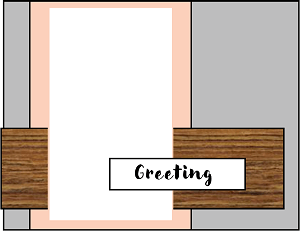
Last night was Mystery Stamping night on my Facebook group which means that I have another sketch for you today. I love sketches because they make it so easy to whip up a card. So, on y go! Let's get stamping. 
Cutting Dimensions:
Cardstock: 5 ½ x 8 ½”, scored at 4 ¼”
Cardstock:
  • 3 ¼” x 4 ¼”
  • 3 7/8” x 2 3/8”
White or Vanilla cardstock:
  • 3 ¾” x 2 ¼”
  • ½” x 5”
Patterned Paper: 1 ½” x 5 ¼”
Picture
Picture
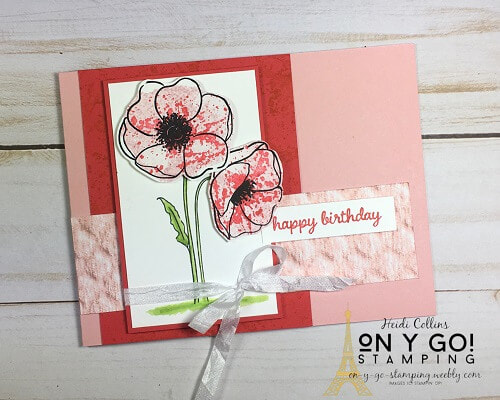
For my first card, I used the Painted Poppies stamp set and a Poppy Parade and Blushing Bride color combination. I used a strip of the In Good Taste Designer Series Paper to coordinate with the Blushing Bride. 
Poppy Supply List
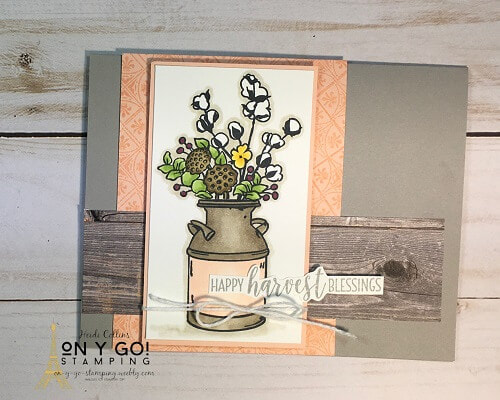
For my second card, I used the Country Home stamp set and colored it with Stampin' Blends. Once again, I used the In Good Taste Designer Series Paper. 
Country Home Supply List
Picture
Picture
My last card uses the new Snowflake Wishes stamp set from the 2020 August-December Mini Catalog along with the Snowflake Splendor Designer Series Paper. I pulled the colors directly from the DSP and used Balmy Blue and Highland Heather. 
Snowflake Supply List
0 Comments
<<Previous
Forward>>
    Heidi Collins, Independent Stampin' Up! Demonstrator with On Y Go! Stamping
    Get updates and ideas on my Facebook group
    Heidi Collins, Independent Stampin' Up! Demonstrator and Owner of On Y Go! Stamping
    Shop for Stampin' Up! stamps, inks, paper, tools, and embellishments with Heidi Collins and earn points towards FREE stamps!
    Picture
    Picture
    On Y Go! Stamping YouTube channel with Card Making Videos on how to do rubber stamping, card making, scrapbooking, and paper crafting

    Archives

    March 2023
    February 2023
    January 2023
    December 2022
    November 2022
    October 2022
    September 2022
    August 2022
    July 2022
    June 2022
    May 2022
    April 2022
    March 2022
    February 2022
    January 2022
    December 2021
    November 2021
    October 2021
    September 2021
    August 2021
    July 2021
    June 2021
    May 2021
    April 2021
    March 2021
    February 2021
    January 2021
    December 2020
    November 2020
    October 2020
    September 2020
    August 2020
    July 2020
    June 2020
    May 2020
    April 2020
    March 2020
    February 2020
    January 2020
    December 2019
    November 2019
    October 2019
    September 2019
    August 2019
    July 2019
    June 2019

Powered by Create your own unique website with customizable templates.
  • About
  • Online Card Classes
  • Card Making Ideas
  • Stampin' Up! Catalogs
  • Card Tutorials
  • Contact
  • Shopping Rewards
  • Shop
  • Join Stampin' Up!