• Home
  • About
  • Contact
  • Shopping Rewards
  • Shop
  • Join Stampin' Up!
  • Stampin' Up! Catalogs
  • Online Card Classes
  • Ideas & Inspiration
  • Tutorial Store
On y go! Stamping
  • Home
  • About
  • Contact
  • Shopping Rewards
  • Shop
  • Join Stampin' Up!
  • Stampin' Up! Catalogs
  • Online Card Classes
  • Ideas & Inspiration
  • Tutorial Store

Z Fold Card Sketch

8/26/2020

0 Comments

 
Z Fold Cards using Forever Fern Stamp Set and Tree Angle Stamp Set
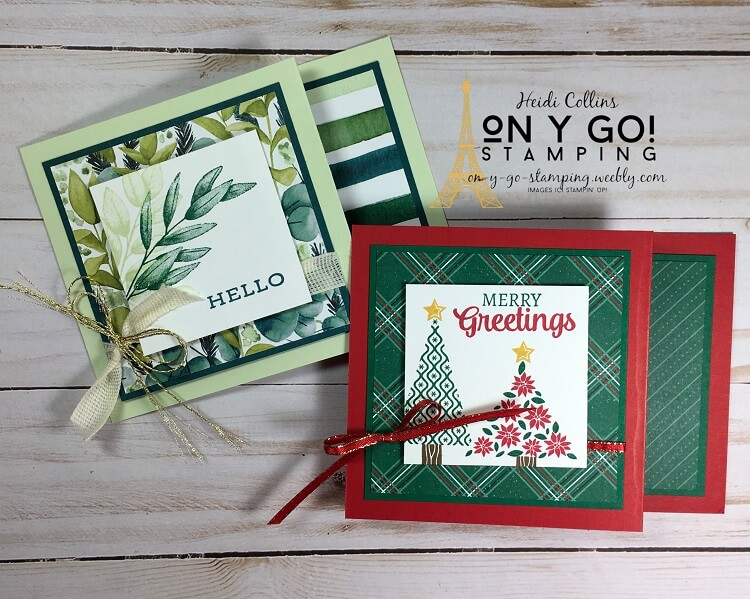
Z Fold Card Samples using the Forever Fern and Tree Angle Stamp Sets
I am loving this fun fold card featuring a z fold. This is a great card making idea for Christmas, birthdays, or any occasion when you want a little something special. I tried it with the Forever Fern and Tree Angle stamp sets and the Forever Greenery and 'Tis the Season Stampin' Up! paper, but it would work with any stamps and patterned paper. It's such a quick and easy card design that shows off all that pretty patterned paper or scrapbooking paper you have hidden in your stash. 
Before I jump into the card samples of this z fold card and the dimensions, I have a couple of Stampin' Up! reminders and announcements.
  • Time is running out to redeem your Bonus Days coupons. If you purchased Stampin' Up! products in July, you probably have some Bonus Days coupons sitting in your email box. Make sure to use those before August 31!
  • Second, the new Cut & Emboss machine will be available September 1. I don't have mine - yet - but, I've heard this die cutting machine is amazing. For the time being, only the standard size is available. You'll also be able to get replacement plates including the Specialty plate that you need to use with the new 3D embossing folders. This plate will work in the new machine and your old Big Shot and replaces the old blue plate for your die cut machine.
  • Finally, watch for details coming soon about a new joining promotion coming in September. If you have ever thought about joining Stampin' Up!, I would love for you to join my team whether you want to make some extra money or simply buy at a discount as a Stampin' Up! Demonstrator. And, I'll be here for you every step of the way whether you want hands-on support or just an occasional cheerleader.
Redeem Bonus Days Coupon Graphic
Click to redeem your bonus days coupons. You'll find the coupons in your email box.
Stampin' Up! New Die Cutting Machine - the Cut & Emboss Machine
Stampin' Up! Cut & Emboss Machine - the new die cutting machine
Enough of chatter, let's get to the details on these awesome z fold cards! On y go! Let's get stamping.

Read More
0 Comments

Slim Line Mystery Sketch

8/19/2020

0 Comments

 
Picture
I have decided it is slim line card week this week! Last night we made a slim line card for Mystery Stamping. Here is the sketch for that card. The finished size is 9 1/4" x 3 3/4" and it will fit in a standard #10 business envelope. While the shape is little different, slim line cards can be quick and easy! So, on y go! Let's get stamping.

Cutting Dimensions:
Cardstock (card base): 7 ½ x 9 ¼”, scored at 3 ¾”
Light-colored coordinating cardstock: 3 ½” x 5 ¾”
White or Vanilla cardstock: 2 ¾” x 2 ¾”
Patterned Paper: 3 ½” x 3 ¼”

The cards have an image stamped on the lower left as well as a focal point image at the top of the card. The greeting is also stamped directly on the light colored cardstock on the bottom half of the card. 

My first card uses the Merry Moose stamp set and Plaid Tidings Designer Series Paper. I stamped the outline of the moose with Soft Suede ink and then the inside with Crumb Cake ink. Then I punched it out using the moose punch and added it to the card front with Stampin' Dimensionals. 
Picture
Picture
Merry Moose Card Supplies
Picture
My second card uses the To a Wild Rose stamp set and the Magic in this Night Designer Series Paper. This DSP is designed primarily for Halloween, but I love some of the black prints. Here, it really makes the Magenta Madness pop. I stamped the "Blessed" with Magenta Madness ink on Whisper White cardstock and then fussy cut it and added it with Stampin' Dimensionals on an angle. Finally, because every card needs a little bling, I added some basic rhinestones. 
​
Wild Rose Card Supplies
My final card uses the Snowflake Wishes stamp set and the Snowflake Splendor Designer Series Paper from the 2020 August-December Mini Catalog. I pulled the colors from the DSP: Highland Heather, Balmy Blue, and Pacific Point. For the bling, I added some of the Blue Adhesive-Backed Gems.
​
Snowflake Wishes Card Supplies
Picture
0 Comments

Slimline Cards: Triangle Sketch

8/17/2020

1 Comment

 
Picture
In the last few weeks, slim line cards have seen a huge growth in popularity. So, I decided to play along with the sketch challenge posted on SplitcoastStampers this week which is a slim line card. The sketch features three triangles pointing in from the edges. Let's see how I tackled the challenge. On y go! Let's get stamping.

For both of my cards today, I used the soft color combination of Pool Party, Soft Sea Foam, and a little Petal Pink for the second one. I also added strips of the Snowflake Splendor Designer Series Paper. Just this week, I got the new Stitched Triangles dies and the Right Triangle stamp set, so this sketch seemed like the perfect way to break them in!
Picture
Supply List
Picture
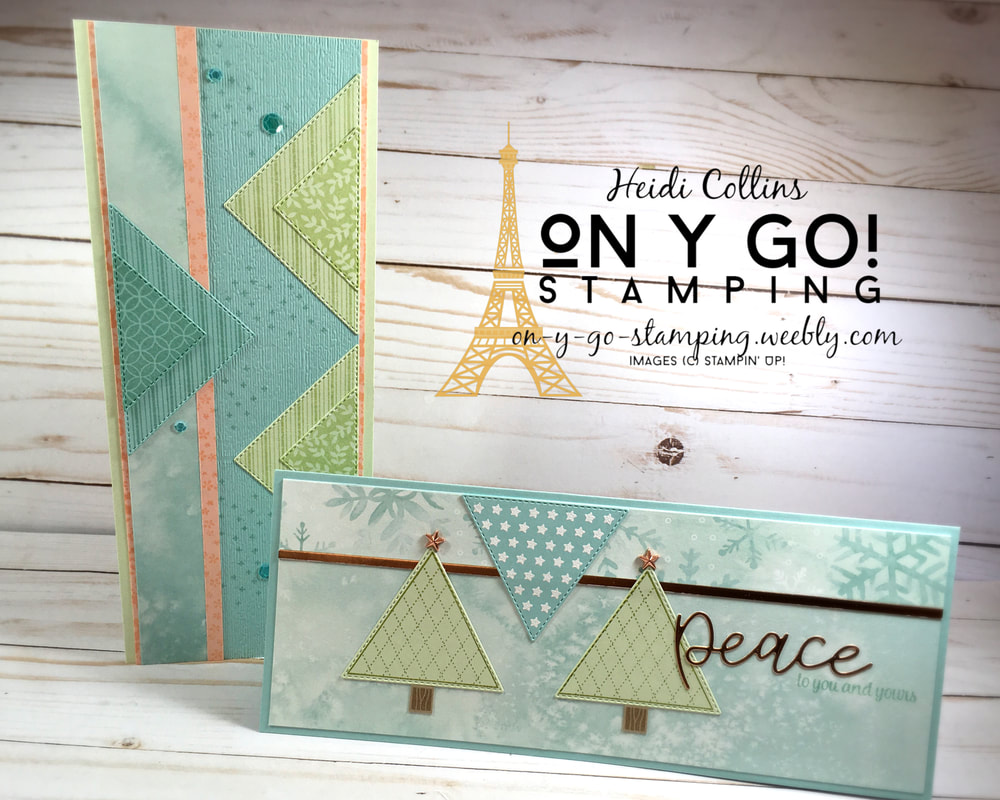
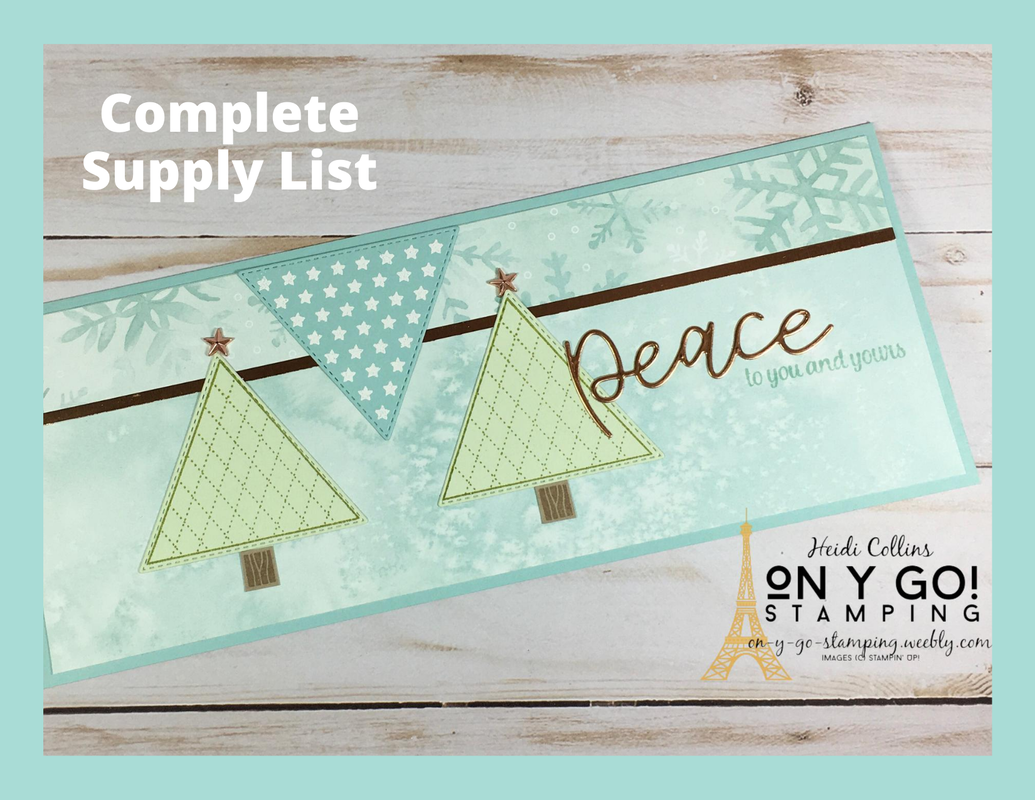
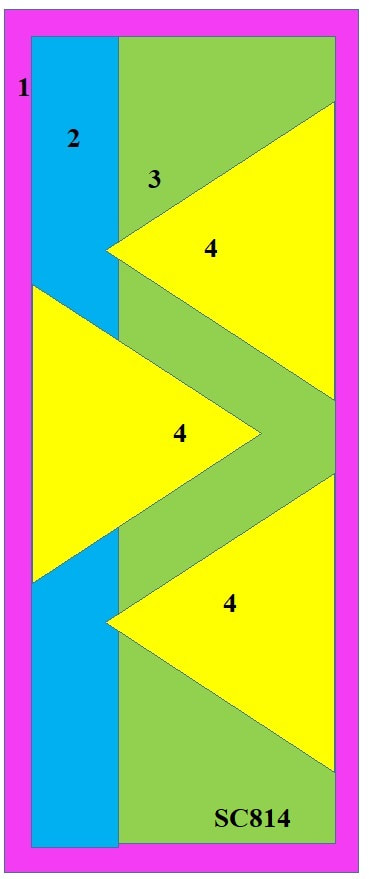
With sketch challenges, I always like to play around a bit with the basic sketch and take some liberties. This is especially true in my first card featuring the new Tree Angle stamp set and Stitched Triangles dies. I flipped the card on its side and created two Christmas trees with a suggestion of a patch of starlit sky between them. I added copper stars to the trees, a line of Copper Foil, and a copper greeting cut with the Joy die set. ​
Picture
Picture
Both of my cards measure 9 1/4" x 3 3/4" and fit nicely into a standard #10 business envelope. The strip of DSP on the left is approximately 1" x 9" for both cards as well and the thin strip of copper on one and Petal Pink on the other is 1/4" x 9". I left these two strips longer than 9" until I adhered them to the front layer. Then, I trimmed the ends. This way, I made sure that all of the layers were exactly the same length.

For my second card, I used the Right Triangle stamp set to stamp designs on the triangles before cutting them with the Stitched Triangle dies. I also stamped a random pattern on the piece of Pool Party cardstcock on the card front. 
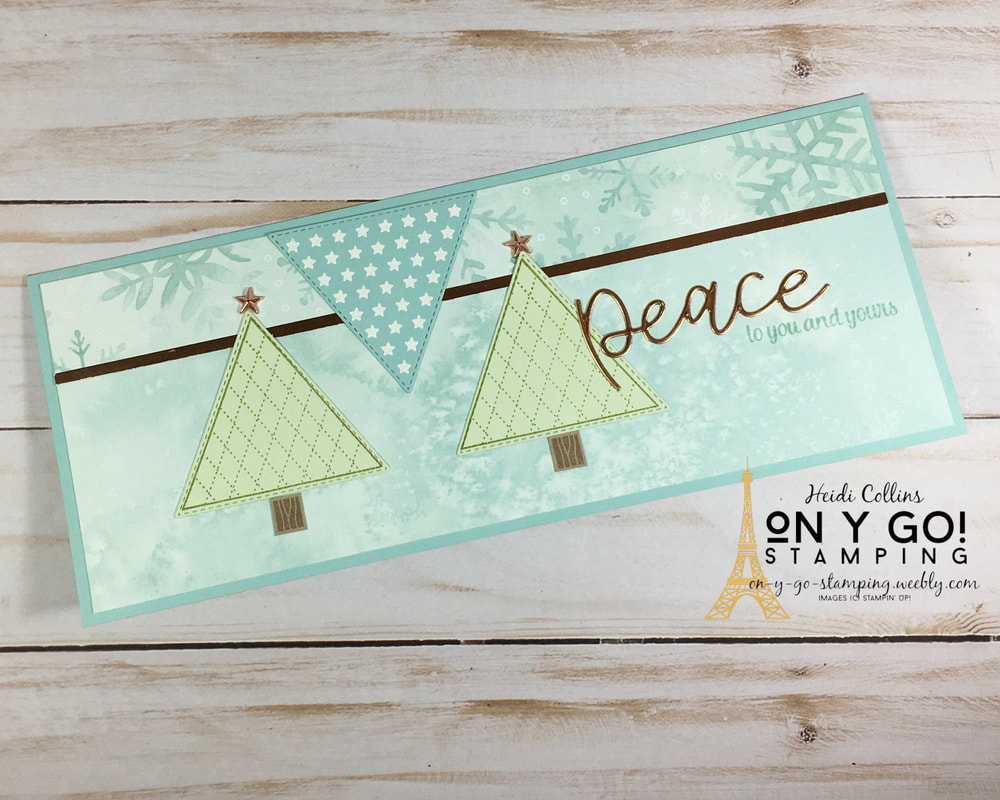
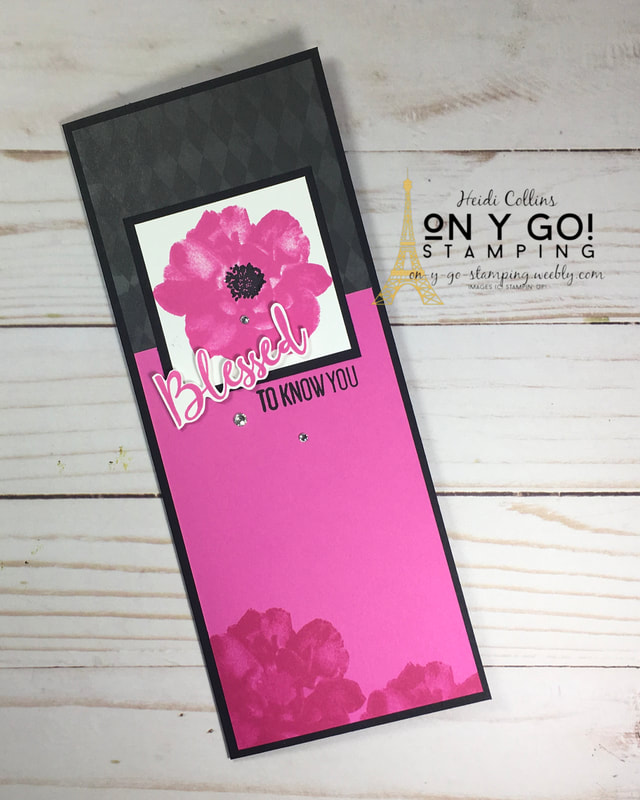
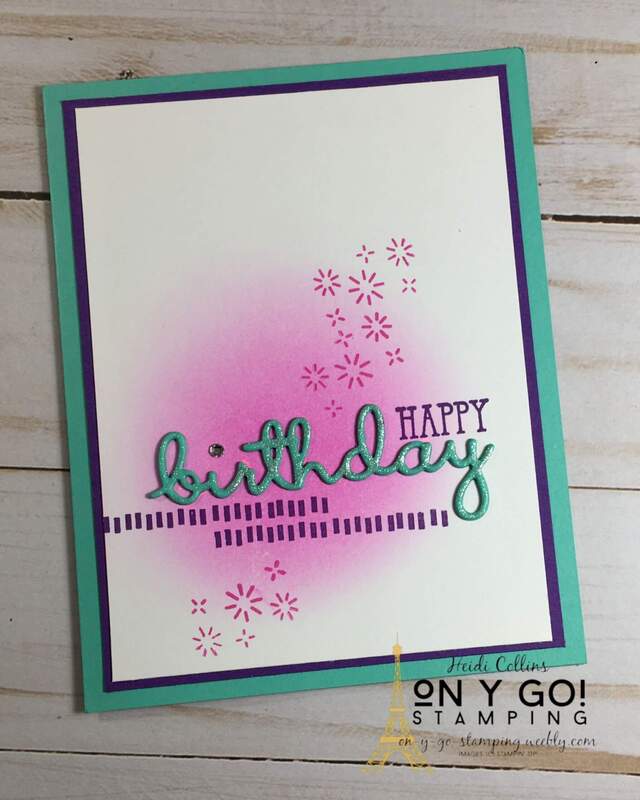
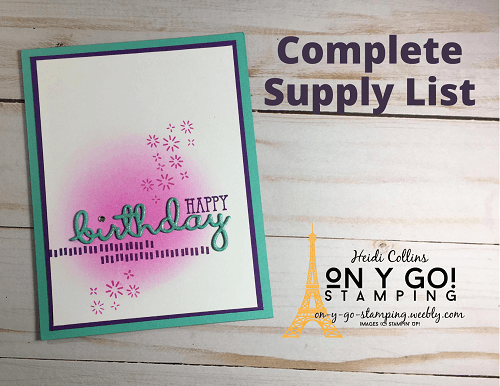
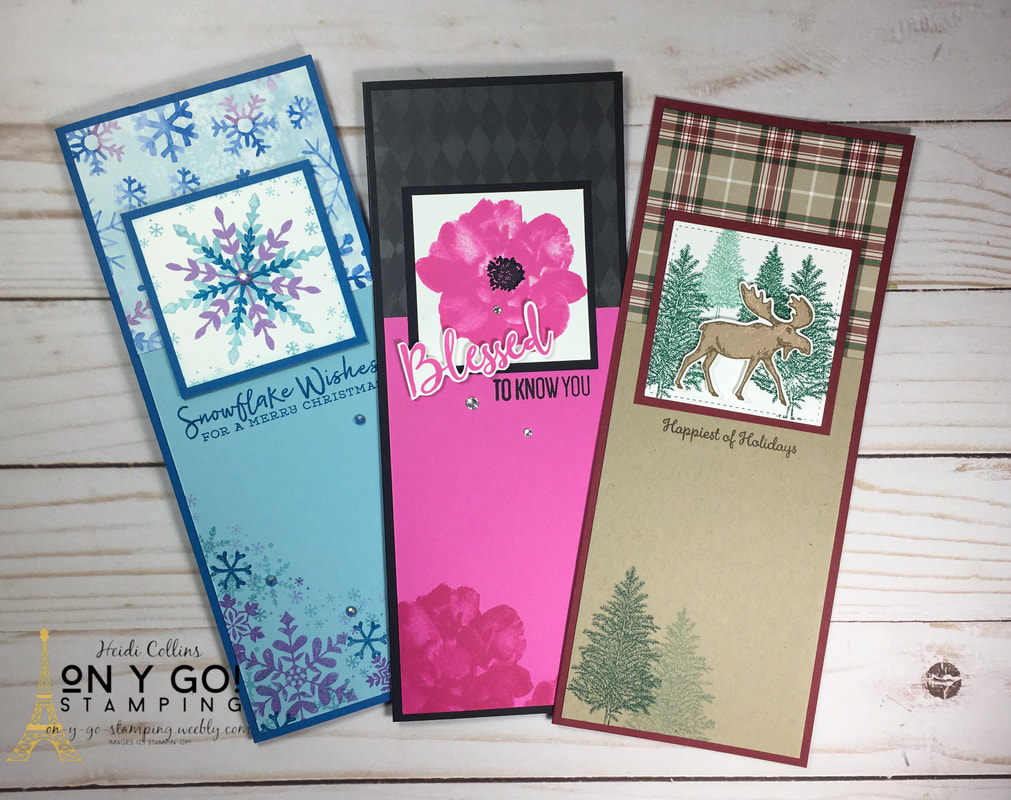
I stamped the floral triangle on a piece of Petal Pink cardstock using Petal Pink ink and then cut the word "Hi" using the Playful Alphabet dies. I used the same triangle to stamp along the edges of the piece of Petal Pink cardstock that is the first layer of the card. For a little bling, I finished the card with some of the Artistry Blooms Sequins.
1 Comment

Ink Blending with Stampin' Up! Dye Inks

8/10/2020

0 Comments

 
Picture
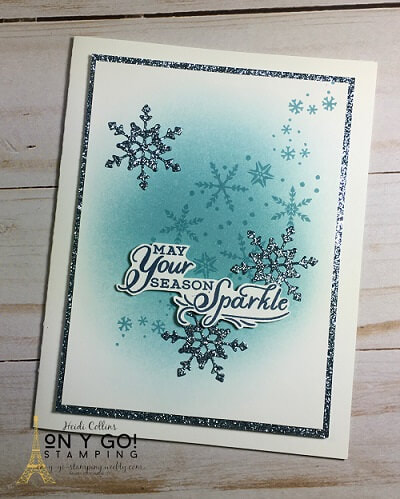
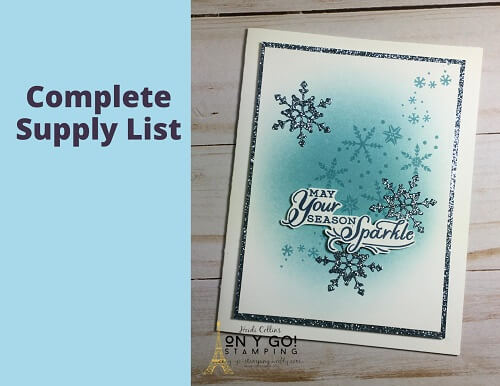
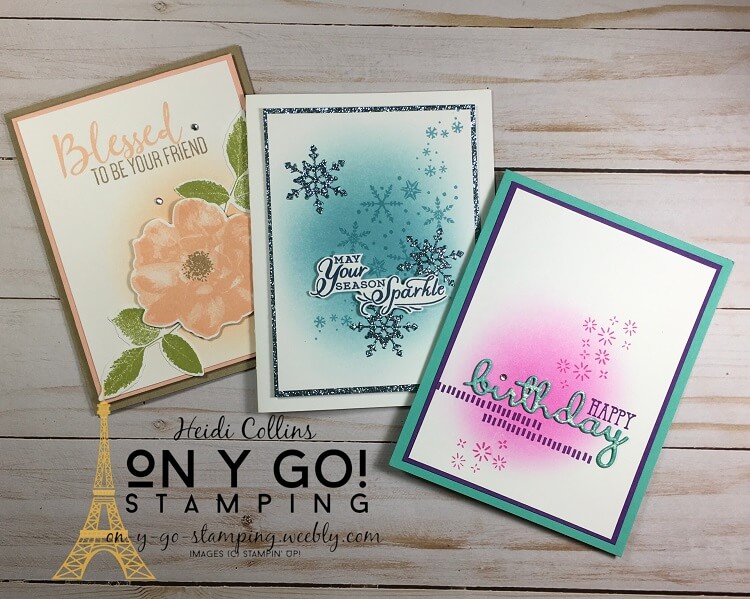
For quite a while now, I have been trying to make the perfect cloud or puff of ink as a background on my card fronts. I kept ending up with blotchy, streaky messes. Finally, I realized I was using the wrong tool. I'm very excited to share with you today how I successfully got these beautiful clouds of ink in the middle of my card fronts. So, on y go! Let's get stamping. 
You can watch this short video tutorial to learn the technique. Then, find more info about each sample card below. 
Snowflakes on a Cloud:
My first card uses the new Snowflake Wishest stamp set and So Many Snowflakes dies from the 2020 August-December Mini Catalog. I made my cloud of ink using Balmy Blue ink with Balmy Blue snowflakes stamped on top. I added some snowflakes cut from the new Balmy Blue Glimmer Paper and stamped the greeting with Misty Moonlight ink. Such a sparkly and easy holiday card. Tip: Cut the center from the Balmy Blue Glimmer paper and cut your snowflakes from it.

Picture
Cutting Dimensions:
Whisper White: 
  • 8 1/2" x 5 1/2", scored at 4 1/4"
  • 3 1/2" x 4 3/4"
  • Scrap
Balmy Blue Glimmer Paper: 3 11/16" x 4 15/16"
Snowflake Supply List
Picture
Picture
Picture
Birthday on a Cloud:
My second card uses the Pattern Play and Well Said stamp sets and the Well Written dies. My poof of ink is Magenta Madness for this card. I cut three "birthdays" from Coastal Cabana cardstock and stacked them to create a more dimensional greeting. Then, to add a little bling, I went over the die-cut with my Wink of Stella Glitter Brush and added a rhinestone dot to the i. 

Cutting Dimensions:
Coastal Cabana: 
  • 8 1/2" x 5 1/2", scored at 4 1/4"
  • Scraps
Whisper White: 3 3/4" x 5"
Gorgeous Grape: 3 15/16" x 5 3/16"
Birthday Supply List
Rose on a Cloud:
For my last card, I used the To a Wild Rose stamp set. I created a Petal Pink cloud and layered a Petal Pink rose on top of it using Stampin' Dimensionals. I love the soft glow the extra poof of ink gives behind the rose. 
Picture
Picture
Rose Supply List
0 Comments

1 Card, 3 Ways: Peace & Joy

8/7/2020

0 Comments

 
Picture
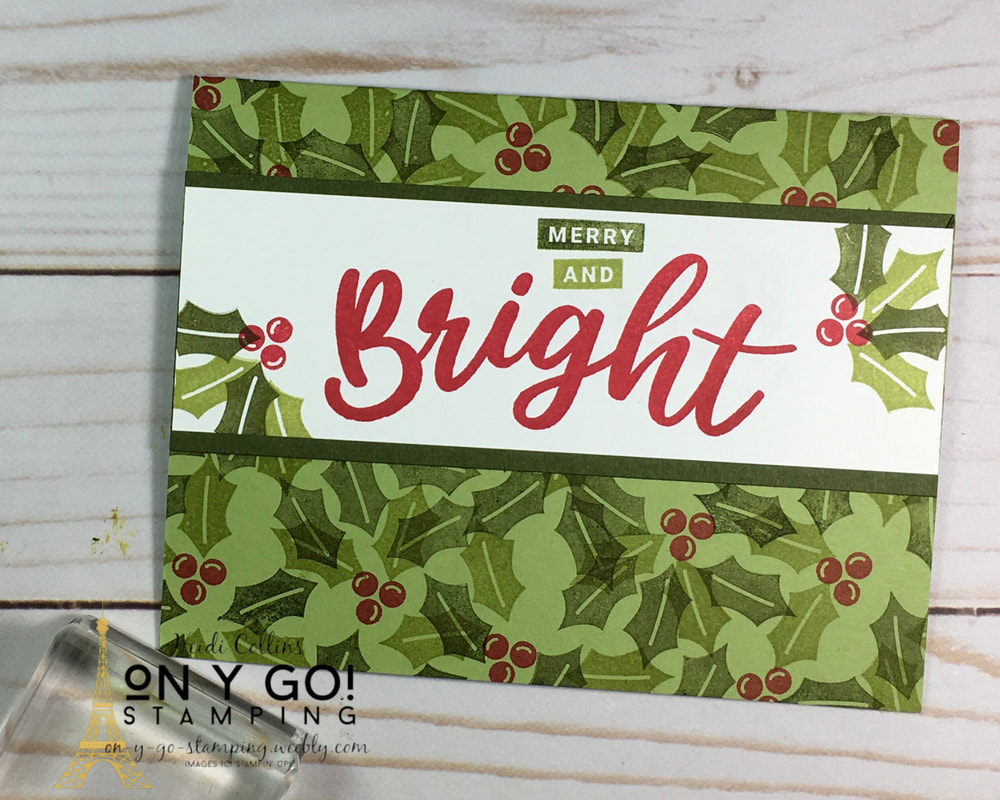
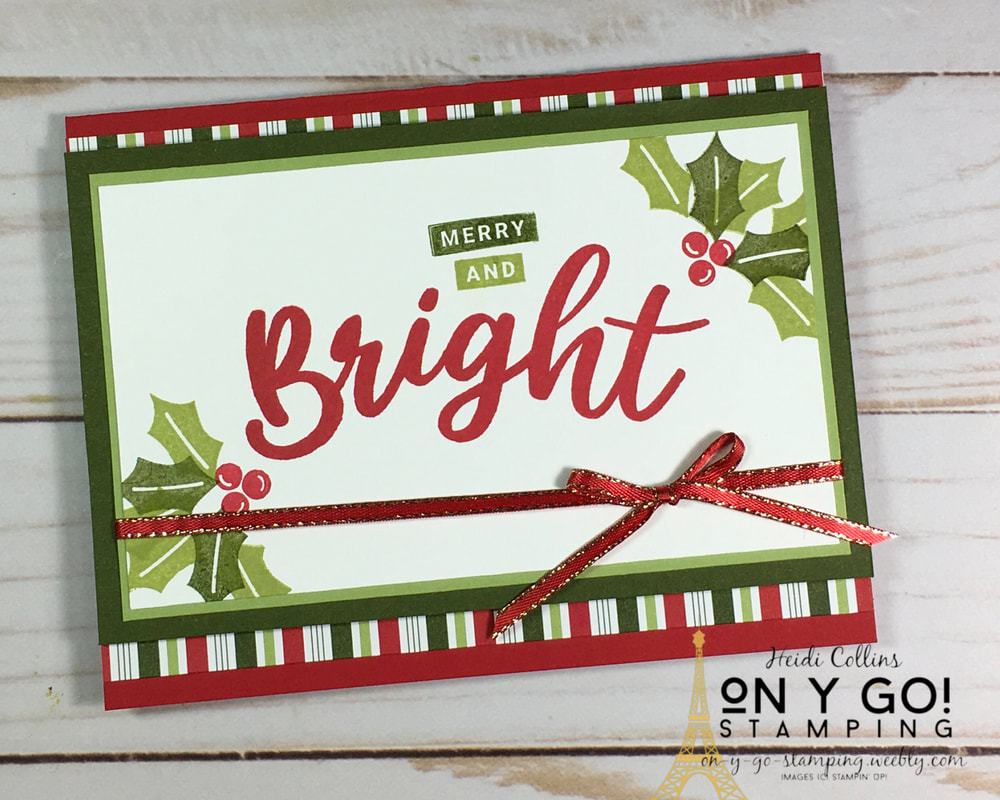
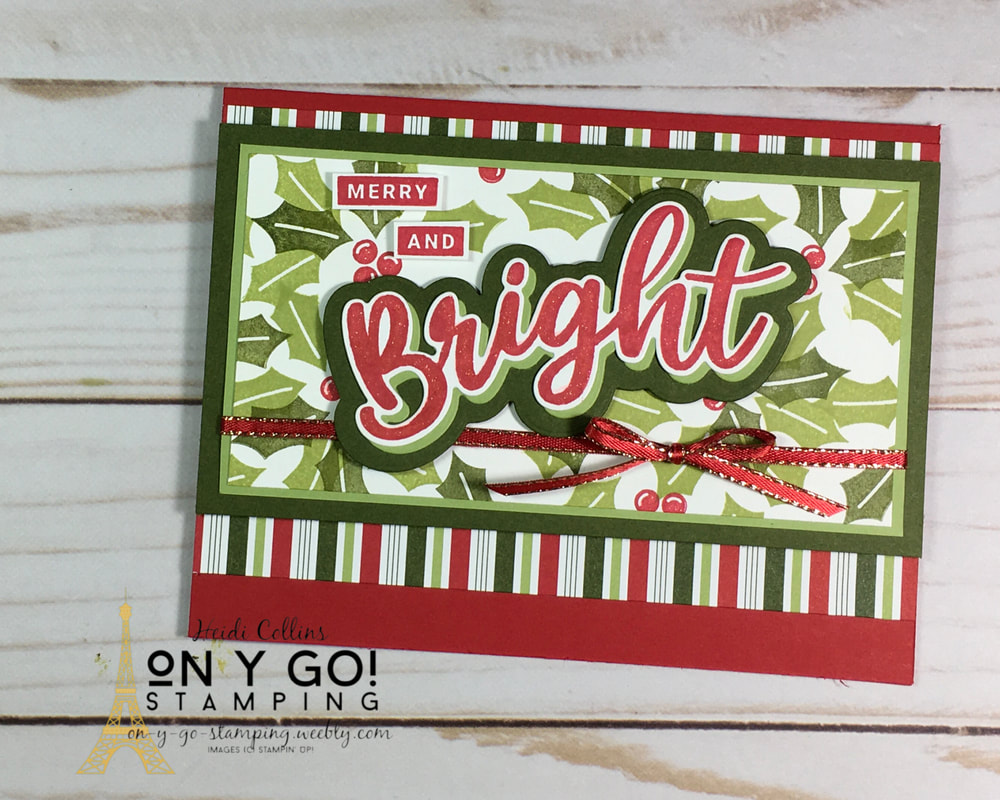
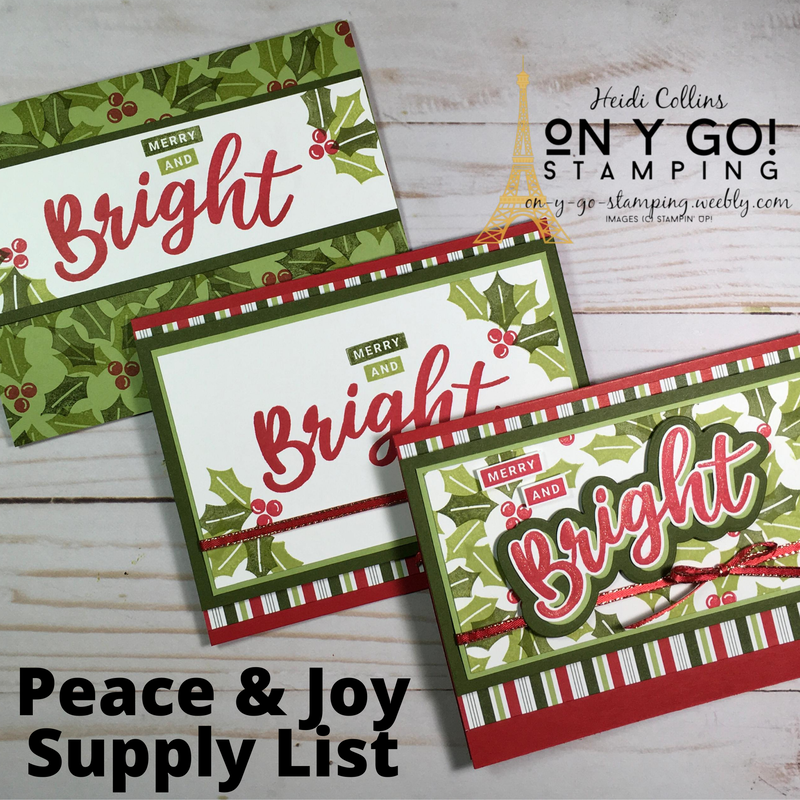
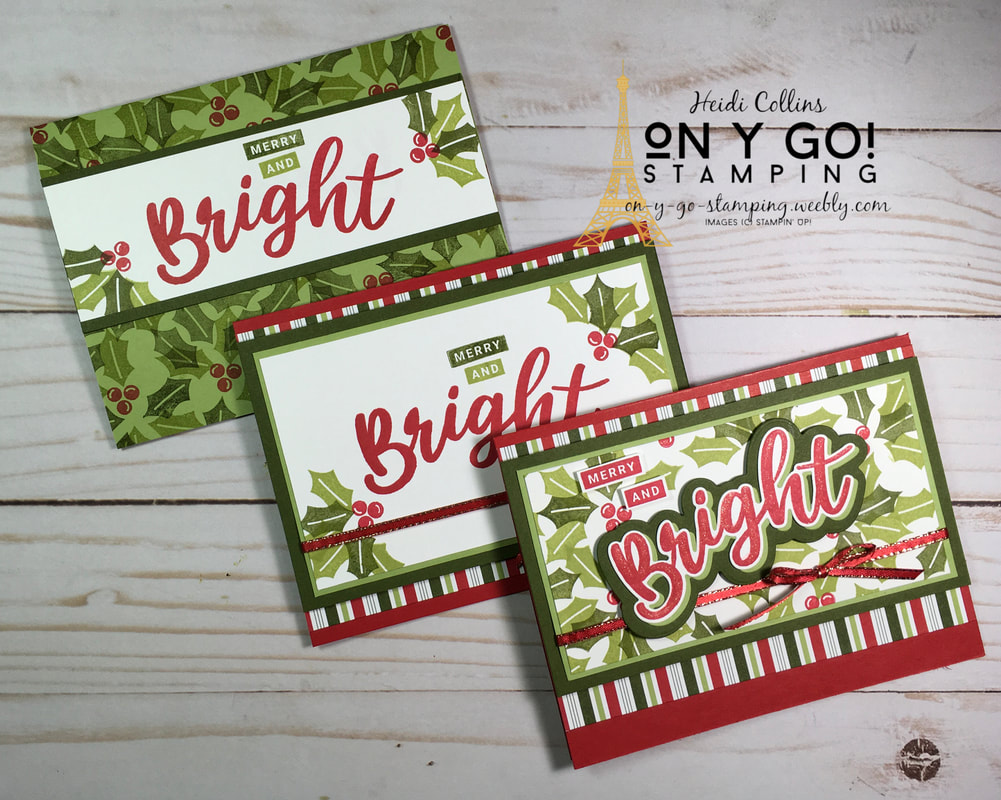
It's only August, but Christmas will be here before you know it! So, it's never to early to start making Christmas Cards. Today, I have three cards for you using the new Peace & Joy stamp set from Stampin' Up! I started with a very simple card that uses only stamping and minimal layering. Then, I stepped it up using a little ribbon and some Heartwarming Hugs Designer Series Paper. Finally, I stepped it up again by using the coordination Joy dies. Whether you want a super quick and easy card or something fancy, there's a design for you! So, on y go! Let's get stamping.

Easy Card:
For this card, I used a Pear Pizzazz base and covered it in holly leaves stamped in Pear Pizzazz and Mossy Meady. Then, I added a simple strip of Whisper White cardstock with the greeting stamped on it. 

Dimensions:
Pear Pizzazz: 8 1/2" x 5 1/2", scored at 4 1/4"
Whisper White: 1 3/4" x 5 1/2"
Mossy Meadow: 2" x 5 1/2"
Picture
Picture
Casual Card:
For my second card, I still stamped the greeting on Whisper White cardstock, but I mounted it on Pear Pizzazz before adding it on Mossy Meadow. I also added a piece of red ribbon from the all the Trimmings Ribbon Combo Pack. For the DSP, I cut 3/4" strips and adhered them to the Real Red cardstock. Then, I added the main image with Stampin' Dimensionals.
Casual Card Dimensions:
Real Red: 8 1/2" x 5 1/2", scored at 4 1/4"
Heartwarming Hugs DSP: (2) 3/4" x 5 1/2"
Whisper White: 3" x 5"
Pear Pizzazz: 3 3/16" x 5 3/16"
​Mossy Meadow: 3 1/2" x 5 1/2" 

Fancy Card:
For my final card, I stamped "Bright" with Real Red ink on Whisper White cardstock and cut it with the Joy dies. Then, I cut a piece of Pear Pizzazz cardstock using the same die. I layered this under the stamped "Bright" slightly offsetting it so that it would show on the bottom and right. Finally, I mounted this on a piece of Mossy Meadow cardstock cut with the shadow die. 
Picture

I stamped a piece of Whisper White cardstock with Mossy Meadow and Pear Pizzazz holly leaves with Real Red berries. I added a piece of the All the Trimmings Ribbon and the "Merry" and "and" portions of the greeting using Stampin' Dimensionals. 

Fancy Card Dimensions:
Real Red: 8 1/2" x 5 1/2"
Heartwarming Hugs DSP: (2) 3/4" x 5 1/2"
Mossy Meadow: 3" x 5 1/2"
Pear Pizzazz: 2 11/16" x 5 3 1/6"
Whisper White: 2 1/2" x 5"
Picture
Click to see a complete supply list and order. 
0 Comments
<<Previous
    Heidi Collins, Independent Stampin' Up! Demonstrator with On Y Go! Stamping
    Get updates and ideas on my Facebook group
    Heidi Collins, Independent Stampin' Up! Demonstrator and Owner of On Y Go! Stamping
    Online card class featuring the Let's Set Sail stamp set and punch from Stampin' Up!
    Get a 6 x 6 sample of all of the new patterned papers from the 2022-2023 Annual Catalog. Plus, a free invitation to a Sneak Peek Virtual Pajama Party to see card making demonstrations using all new products.
    Shop for Stampin' Up! stamps, inks, paper, tools, and embellishments with Heidi Collins and earn points towards FREE stamps!
    On Y Go! Stamping YouTube channel with Card Making Videos on how to do rubber stamping, card making, scrapbooking, and paper crafting

    Archives

    May 2022
    April 2022
    March 2022
    February 2022
    January 2022
    December 2021
    November 2021
    October 2021
    September 2021
    August 2021
    July 2021
    June 2021
    May 2021
    April 2021
    March 2021
    February 2021
    January 2021
    December 2020
    November 2020
    October 2020
    September 2020
    August 2020
    July 2020
    June 2020
    May 2020
    April 2020
    March 2020
    February 2020
    January 2020
    December 2019
    November 2019
    October 2019
    September 2019
    August 2019
    July 2019
    June 2019

Powered by Create your own unique website with customizable templates.
  • Home
  • About
  • Contact
  • Shopping Rewards
  • Shop
  • Join Stampin' Up!
  • Stampin' Up! Catalogs
  • Online Card Classes
  • Ideas & Inspiration
  • Tutorial Store