0 Comments
Whether your style is quick and easy or a bit more snazzy, this easy card idea and the NEW Clever Cats stamp set are purrfect for you! I took the same basic design and create three different cards to show how you can take a simple design and step it up. So, on y go! Let's get stamping. 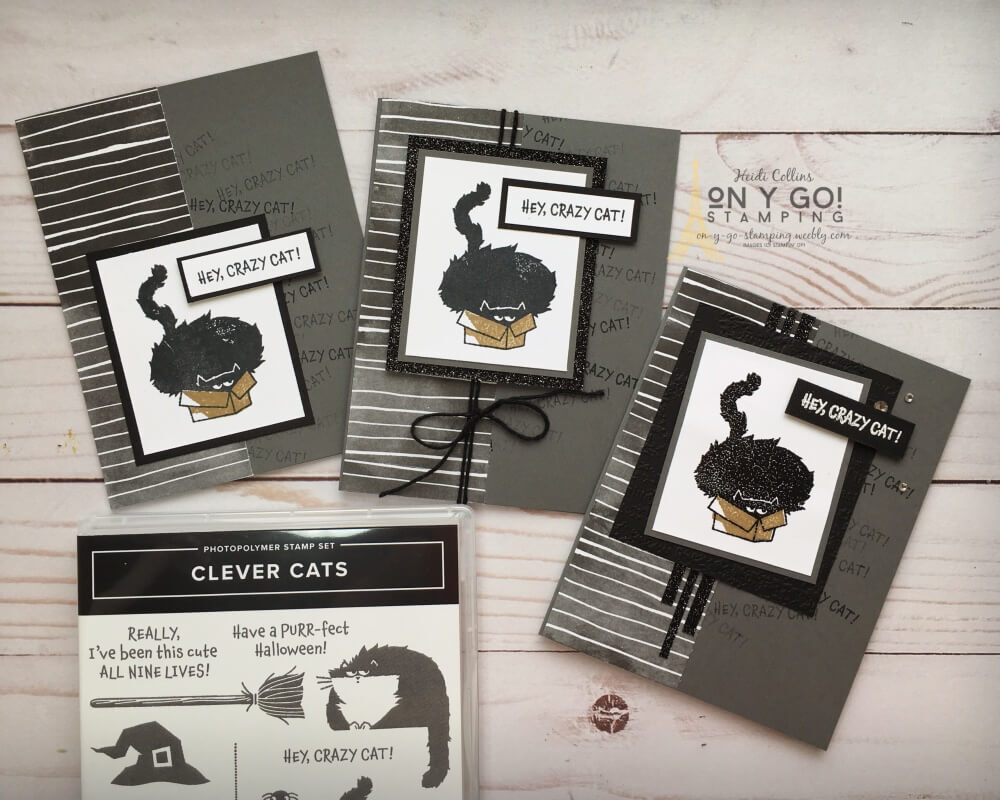 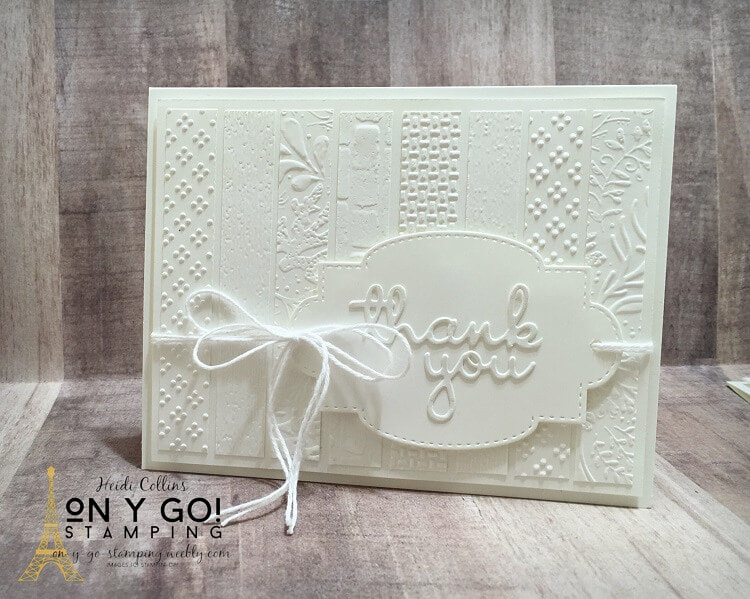
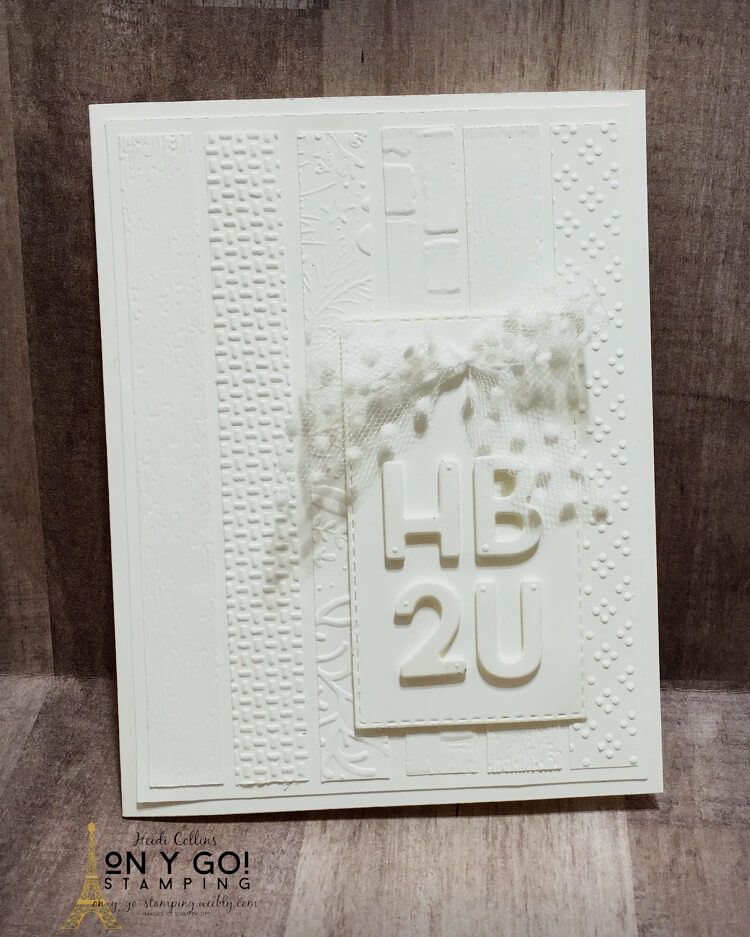
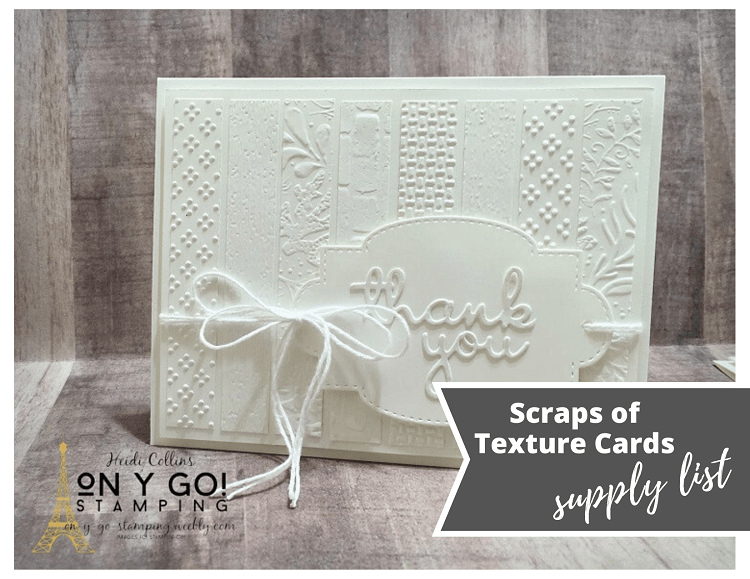
Today's cards are all about texture! I have lots and lots of half-inch strips of white cardstock. When I trim Whisper White cardstock for the inside of my cards it results in half-inch leftover. I put these in a bin and use them for sentiment strips. But there's no hope of ever using them all up. So today, I decided to come up with card making ideas that use half-inch strips of white paper scraps. The resulting card designs are white on white with lots and lots of texture!
Be sure to go all the way through my post and look for the list of participants at the end. Then hop over to their blogs as well to see their gorgeous designs! It's such an honor to be hopping with this amazing group of designers. So, on y go! Let's get stamping.
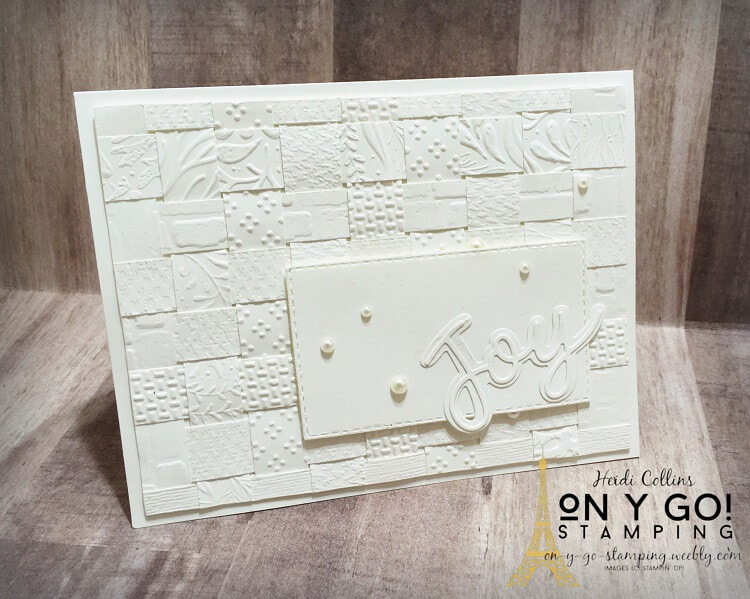
For my final card, I took longer strips, which I had also embossed, and created a basket weave. I adhered this to a piece of 5 1/4" x 4" Whisper White cardstock. Then, I trimmed the edges of the strips of cardstock to match the edge of the piece of 5 1/4" x 4" cardstock. I also glued the ends of the flaps on the front of the card so that everything would stay neatly woven together. Then, I glued this to a standard Whisper White card base (8 1/2" x 5 1/2", scored at 4 1/4").
For the greeting, I used the Joy dies and adhered the cut pieces to another rectangle cut using the Stitched Rectangles dies. I added a few pearls for a little shine.

Starting at 5:00 PM eastern (New York time), Kylie Bertucci's International Blog Highlights Winners Hop will be going live! I hope you'll take a moment to check out all of these fabulous designers!
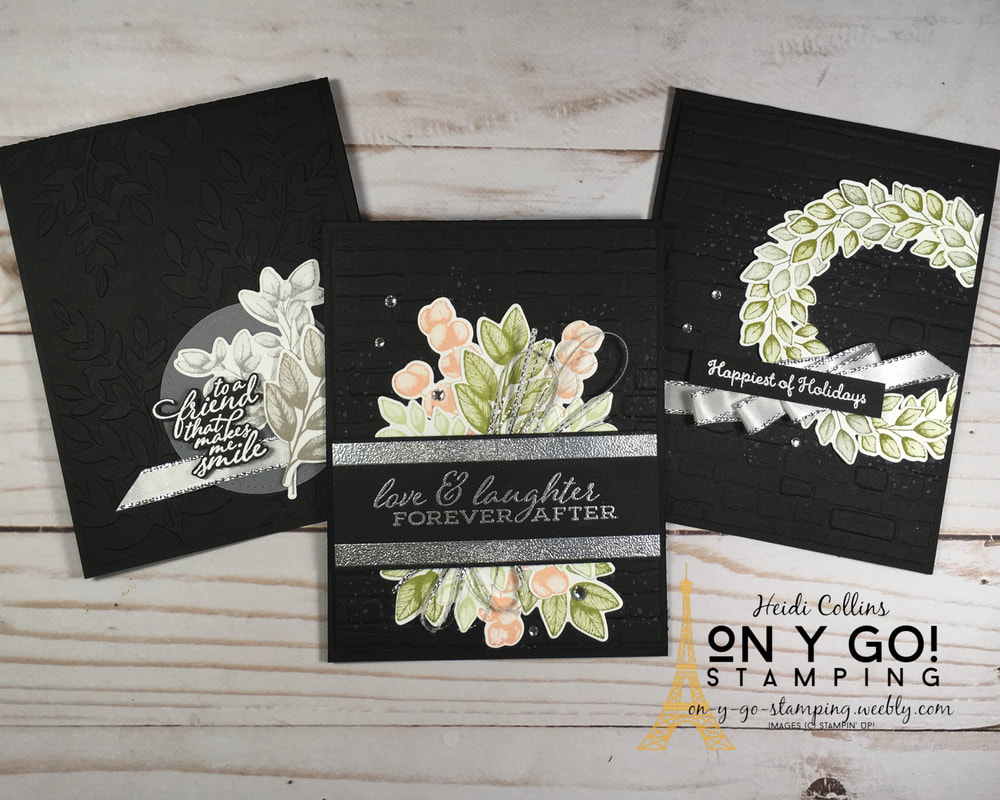
I love the look of simple images on a white card with lots of white-on-white texture which led me to wonder what would happen if I used the same design ideas but did them on black instead of white. The results are dramatic cards that are simple and elegant. For these cards, I used the Forever Fern stamp set from Stampin' Up! It is new in the 2020-2021 Annual Catalog and has an entire suite of products including some really yummy Designer Series Paper. But for these cards, I focused solely on the stamps and dies. So, on y go! Let's get stamping.
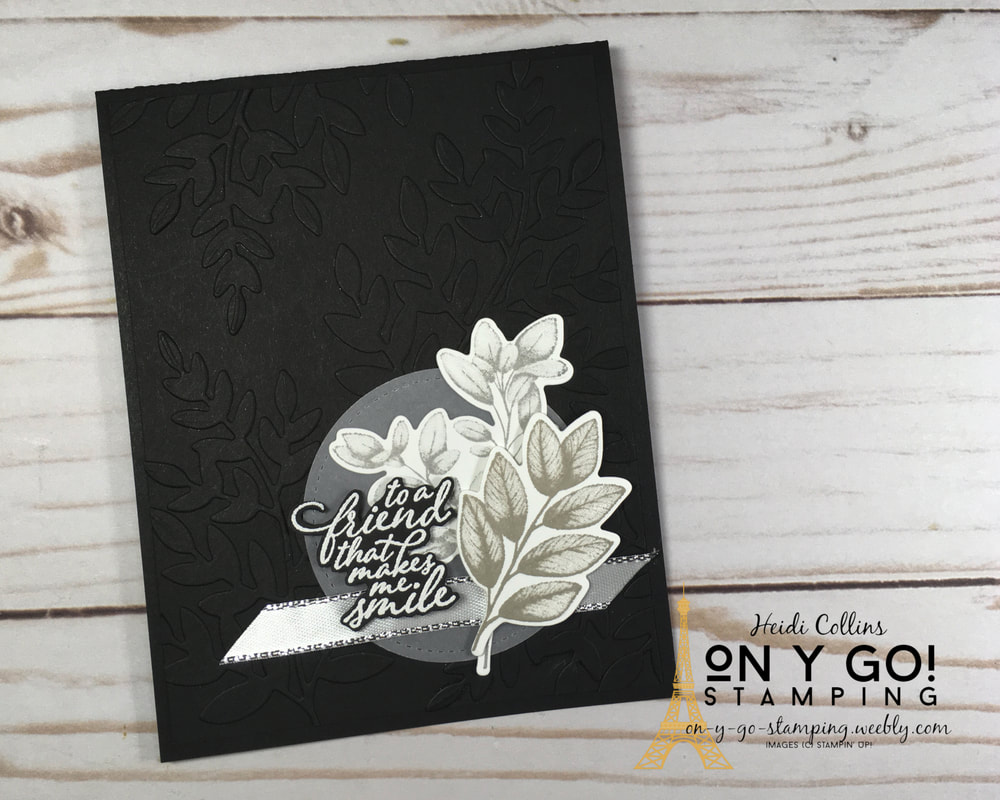
For my first card, I challenged myself to use only black, white, and gray. I created the background by adhering black die-cut ferns to a black card front. I love, love, love the subtle texture this creates. For the focal image, I used a circle of vellum cardstock with Smoky Slate and Granite Gray leaf clusters. I added a length of metallic-edged ribbon and I embossed the sentiment with white embossing powder on Basic Black cardstock and fussy cut it.
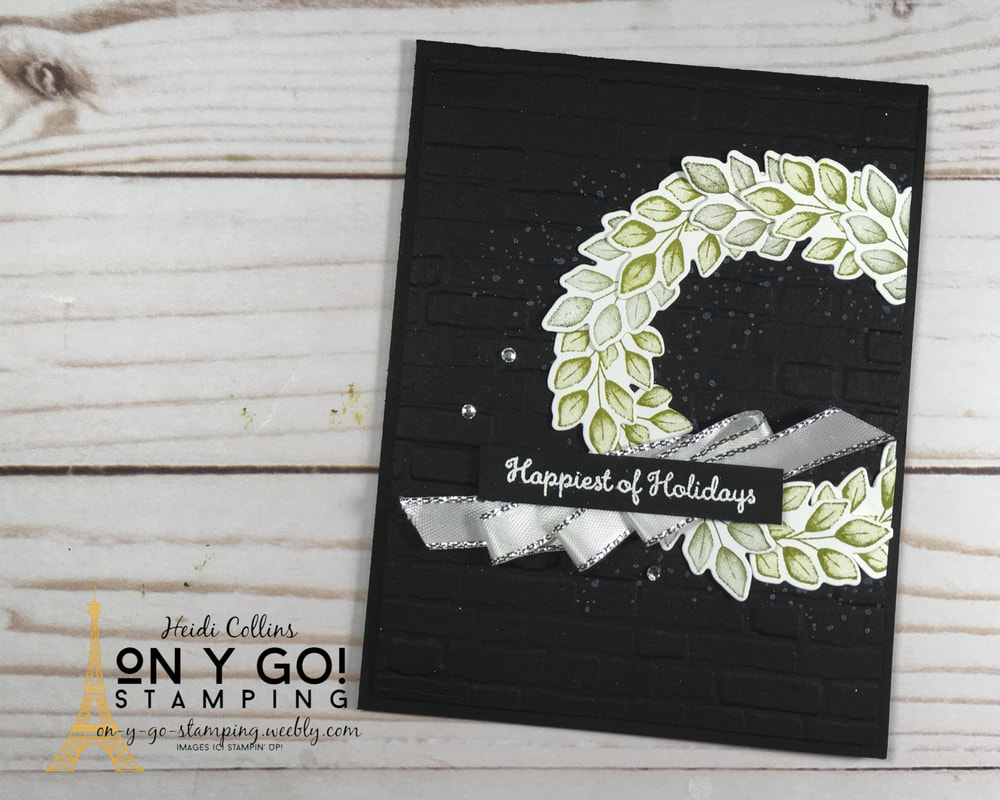
Christmas will be here in only a few short months. Ok, maybe 6. But if you're making your own Christmas cards, it's never to early to start! Black isn't a very traditional Christmas color, but I think this card has a quiet elegance to it that reminds me of snowy night. I stamped the leaves in Old Olive and Mossy Meadow. I added the speckles behind the wreath with the speckle stamp from the set stamped with White Craft ink. I swiped the greeting from the Merry Moose stamp set. I really wanted a greeting that was a little bigger and bolder, but my new Christmas sets aren't arriving until tomorrow.

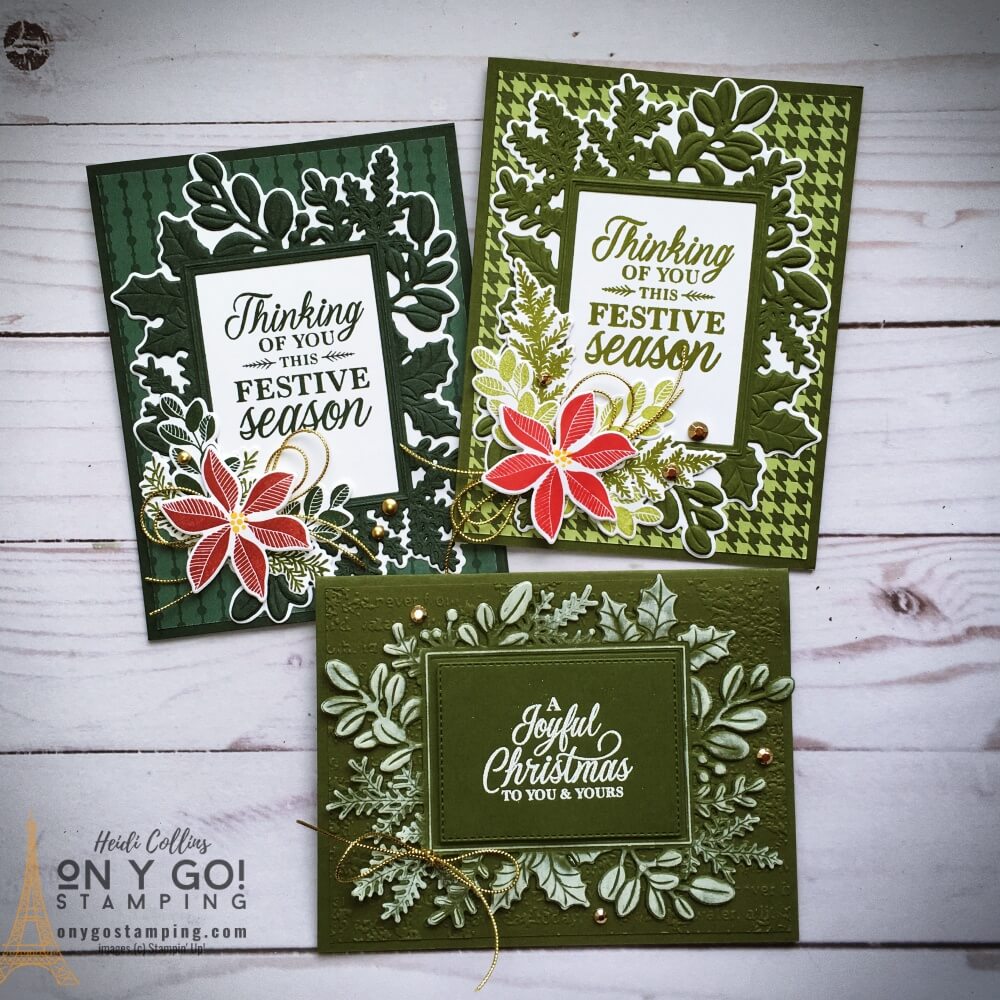
My final card pulls in a little Petal Pink with Soft Sea Foam and Pear Pizzazz leaves. I've been wanting to try this stamp set with some non-traditional colors, so this seemed like a good time to try the pink. I embossed the greeting with silver embossing powder. For the lines, I added strips of Tear & Tape to hold the embossing powder. I love the dramatic effect of the silver lines. For the hints of ribbon, I carefully cut the edge off of a length of the metallic-edged ribbon. I layered it under the greeting and once it was taped in place, I unraveled it a little more to get the wisps of silver thread.
One last tip, when you're making cards with a black base like these, the black Stampin' Dimensionals are amazing! I often forget to use them. But, with the black-on-black cardstocks, it's sooooo nice to not have the distracting white of the regular Stampin' Dimensionals when the card is turned sideways to open it. I hope you have found these little black cards inspiring. You'll find all of the products I used listed below. Each one links to my online store. If you have any questions or need help ordering Stampin' Up! product, leave a comment or send me an e-mail. I'd love to help you however I can!
Product List
")


")


Since I am focusing on using up my stash in the month of April, I will also be talking about some issues that come up with really old supplies. My first topic: the shelf life of embossing powder. Does embossing powder go bad? This question is raised often in various rubber stamping communities and the opinions vary. Some people will say that embossing powder absolutely goes bad after a couple years. Personally, I have found that it depends. I have a number of powders and many of them are from 2005-2010. Most of these powders are generally fine. However, as I've delved back into stamping, I did notice that I was getting poor results from my white embossing powder. I finally purchased a new jar so I can share some comparisons with you. 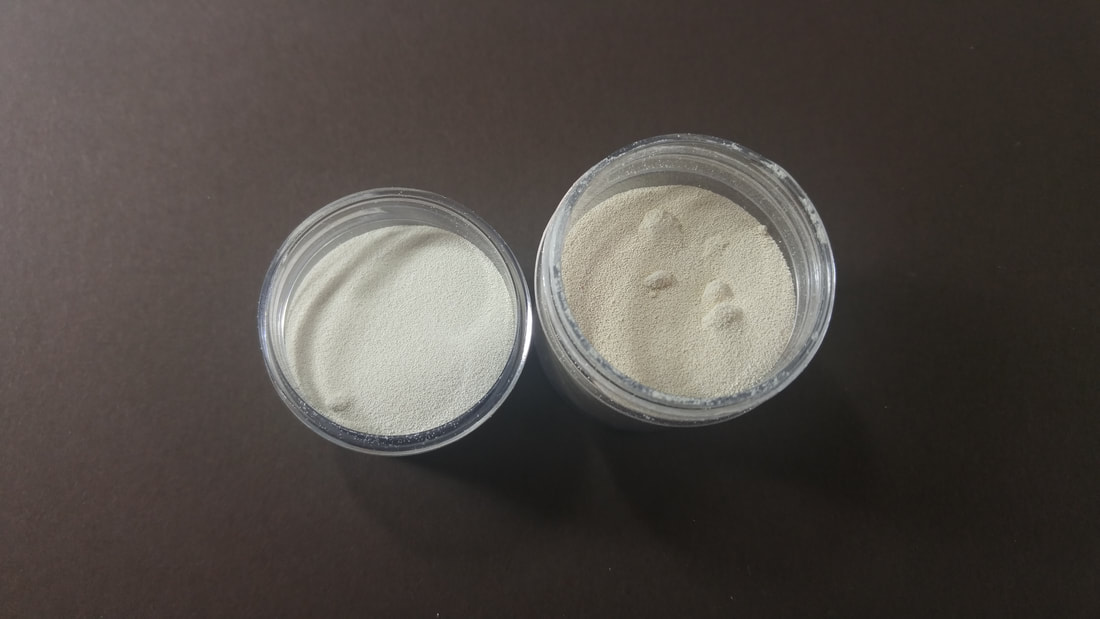 The jar on the left is my new jar and the jar on the right is my old jar of white embossing powder. It is hard to see in the picture, but there is a definite difference in color. The older powder has a yellowed look to it. You can also see that the older powder is clumpier. Now, often embossing powder will clump and it's not a big deal. However, I think the extra clumps in my older powder represent the general clumpiness of it, to the point that it does stick evenly to my image when I apply it.  In this picture, the top image uses my new embossing powder and the bottom uses the old embossing powder. Again, you can see a difference in color between the two. However, you can also see the difference in coverage. While it is normal to have an uneven application when using a bold stamp, the one on the bottom has much larger spaces that aren't covered and just looks lumpier. This is representative of the way this older embossing powder has been acting for me since I have started stamping again.
My final decision is that while some powders may still work fine after years, others may not. If your embossing powder isn't acting the way you expect it to or isn't giving you as nice of images as your other powders, you may want to consider replacing it. |


Archives
April 2024
|
")


