• About
  • Online Card Classes
  • Card Making Ideas
  • Stampin' Up! Catalogs
  • Card Tutorials
  • Contact
  • Shopping & Rewards
  • Join Stampin' Up!
  • Color Picker
ON Y GO! STAMPING
  • About
  • Online Card Classes
  • Card Making Ideas
  • Stampin' Up! Catalogs
  • Card Tutorials
  • Contact
  • Shopping & Rewards
  • Join Stampin' Up!
  • Color Picker

Double Easel Card with to a Wild Rose

7/24/2020

0 Comments

 
Picture
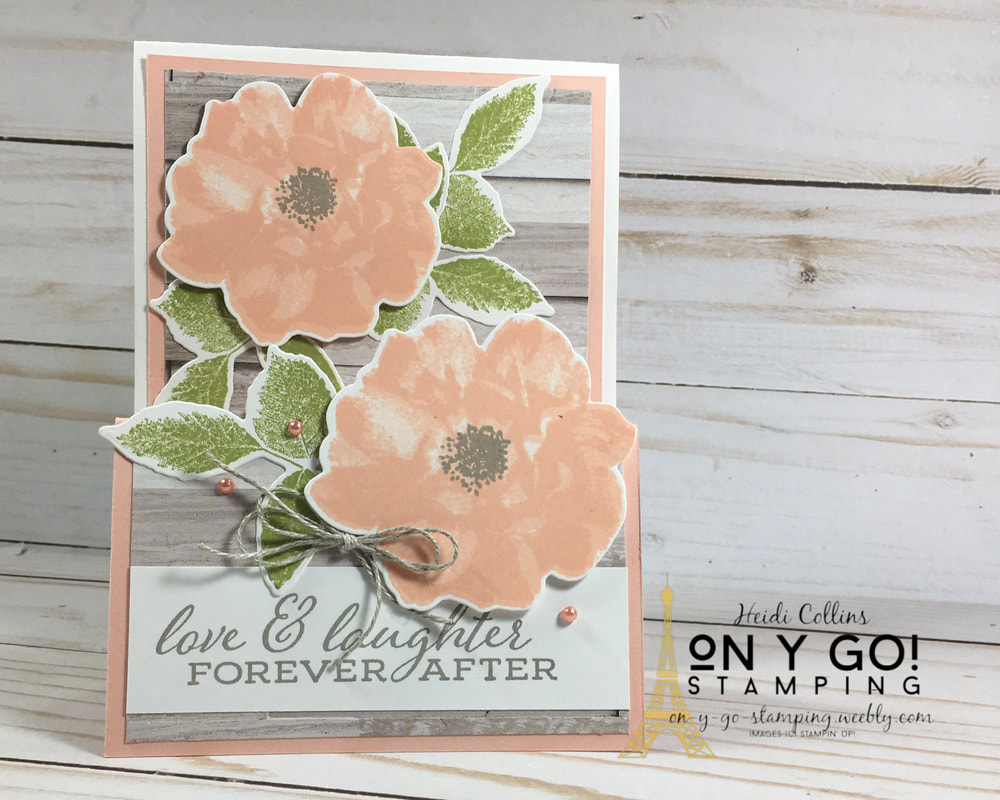
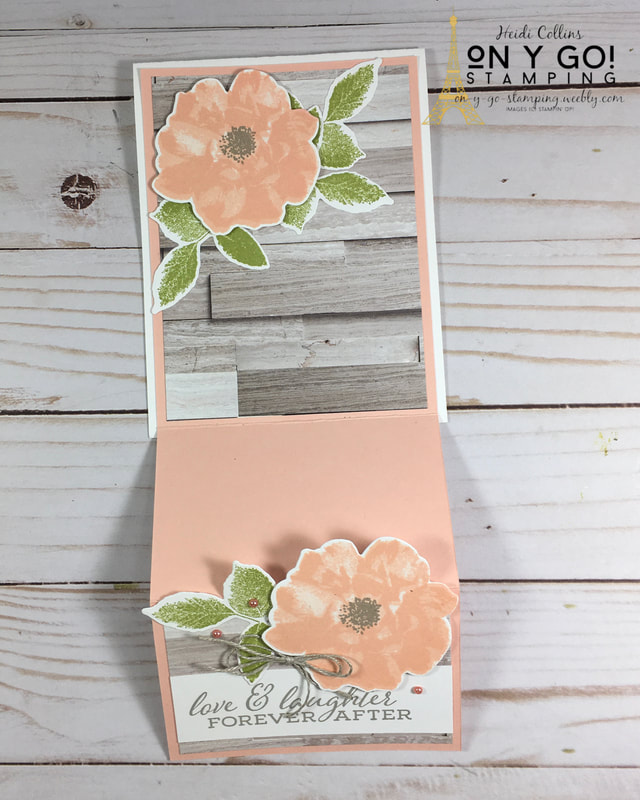
Today I have a beautiful double easel card to share with you featuring the To a Wild Rose stamp set. These double easel cards are easy to make. While they don't take a lot of time, they have a stunning effect and definitely have that little something extra that is so special for the recipient. So, on y go! Let's get stamping. 
Picture
Picture
Cutting Dimensions:
Whisper White Thick cardstock: 4 1/4" x 11", scored at 5 1/2"
Petal Pink cardstock: 4" x 10 1/4", scored at 2 1/2" and 5"
In Good Taste Designer Series Paper:
  • 3 3/4" x 5"
  • 3 3/4" x 2 1/4"
Whisper White cardstock: 
  • 3 3/4" x 1"
  • Scraps
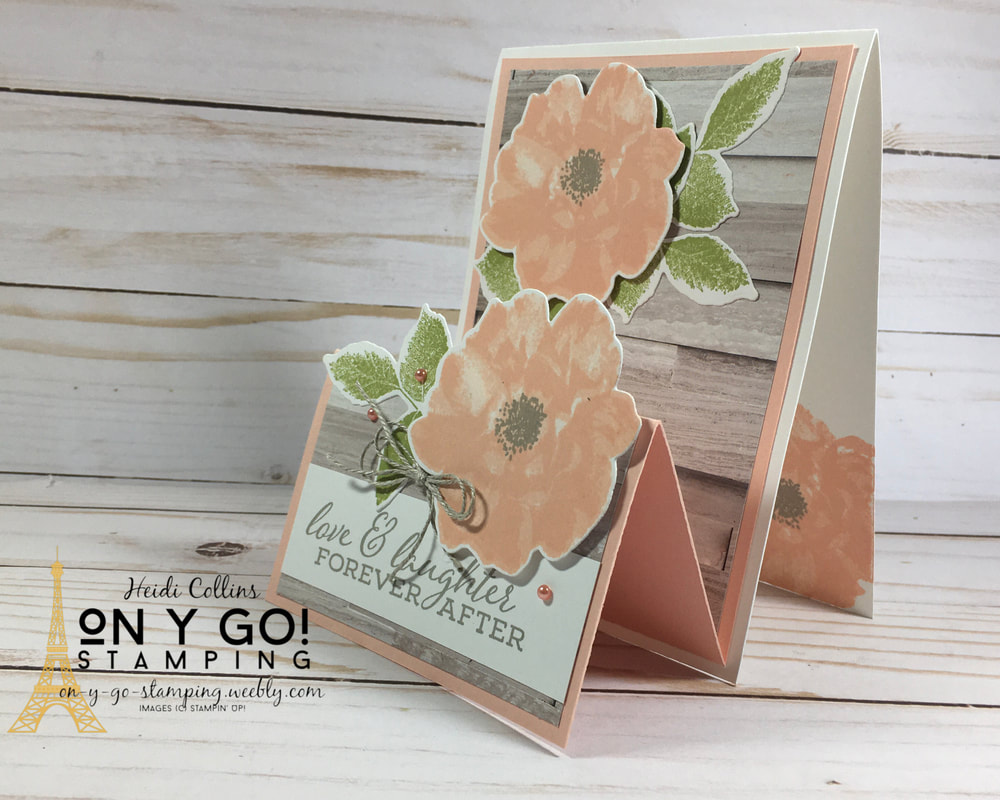
Start by folding the piece of Whisper White Thick cardstock in half along the score line. Fold the piece of Petal Pink cardstock as an accordian. Adhere it as shown to the front of your folded card. The white card base should open on top and the first fold of the Petal Pink should be on the bottom. 

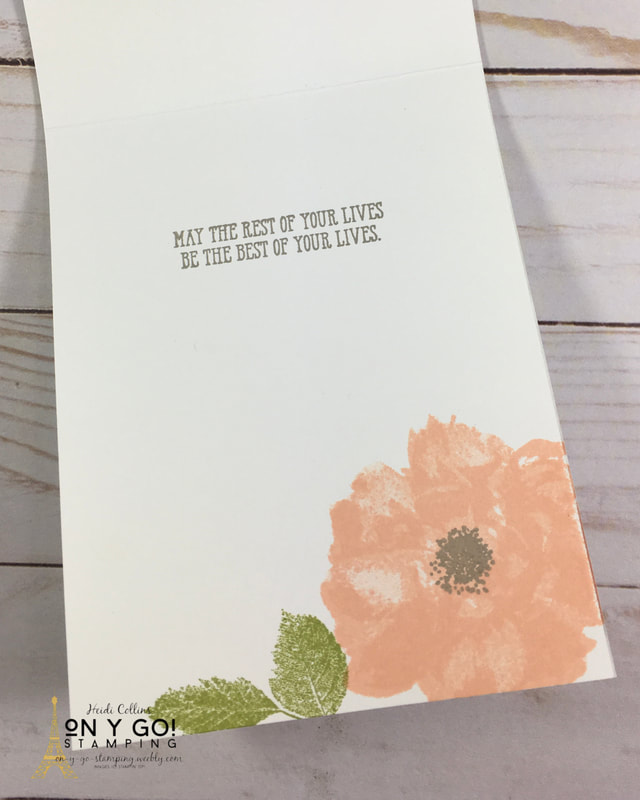
Stamp the roses from the To a Wild Rose stamp set with Petal Pink ink. I used only the two inside stamps for these roses. Stamp the centers with Crumb Cake ink. Stamp the leaves with Pear Pizzazz ink. For these leaves, I only used one detail stamp - the one with the stems. Cut the images with the Rose dies. 
​
Stamp the sentiment from the Forever Fern stamp set with Crumb Cake ink on your strip of Whisper White Cardstock. Adhere the In Good Taste Designer Series Paper to the Petal Pink cardstock as shown. Add the greeting strip and the flowers to the front of your card. One set of flowers and leaves is adhered to the back piece of DSP. The other set of flowers is adhered to the smallest panel on the front. Because it sticks off the top of this panel, be careful to only put glue where it touches the front panel. 
​
Picture
Picture
I added a bow made with two piece of Linen Thread by using a mini glue dot on the back of the knot. For a finishing touch, I added 3 self-adhesive pearls from the retired Share What You Love Artisan Pearls. 

​On the inside of the card, I stamped an additional rose and a greeting from the Well Said stamp set. 

This would make a beautiful wedding card for someone special. Or, with a change of greetings, it could be used for a birthday, thank you, or almost any other occasion. 
Product List
To A Wild Rose Photopolymer Stamp Set
[149452]
$26.00
Wild Rose Dies
Wild Rose Dies
[149547]
$34.00
Forever Fern Cling Stamp Set (English)
[152559]
$24.00
Well Said Cling Stamp Set
[148796]
$45.00
Whisper White 8-1/2" X 11" Thick Cardstock
[140272]
$8.25
Whisper White 8-1/2" X 11" Cardstock
[100730]
$9.75
Petal Pink 8-1/2" X 11" Cardstock
[146985]
$8.75
Petal Pink Classic Stampin' Pad
[147108]
$7.50
Crumb Cake Classic Stampin' Pad
[147116]
$7.50
Pear Pizzazz Classic Stampin' Pad
[147104]
$7.50
In Good Taste Designer Series Paper
[152494]
$21.00
Linen Thread
Linen Thread
[104199]
$5.00
Paper Trimmer
Paper Trimmer
[152392]
$25.00
Multipurpose Liquid Glue
[110755]
$4.00
Stampin' Dimensionals
[104430]
$4.00
Mini Glue Dots
Mini Glue Dots
[103683]
$5.25
Share What You Love Artisan Pearls
[146927]
$6.00
0 Comments

Your comment will be posted after it is approved.


Leave a Reply.

    Heidi Collins, Independent Stampin' Up! Demonstrator with On Y Go! Stamping
    Get updates and ideas on my Facebook group
    Heidi Collins, Independent Stampin' Up! Demonstrator and Owner of On Y Go! Stamping
    Picture
    Picture
    On Y Go! Stamping YouTube channel with Card Making Videos on how to do rubber stamping, card making, scrapbooking, and paper crafting

    Archives

    June 2025
    May 2025
    April 2025
    March 2025
    February 2025
    January 2025
    December 2024
    November 2024
    October 2024
    September 2024
    August 2024
    July 2024
    June 2024
    May 2024
    April 2024
    March 2024
    February 2024
    January 2024
    December 2023
    November 2023
    October 2023
    September 2023
    August 2023
    July 2023
    June 2023
    May 2023
    April 2023
    March 2023
    February 2023
    January 2023
    December 2022
    November 2022
    October 2022
    September 2022
    August 2022
    July 2022
    June 2022
    May 2022
    April 2022
    March 2022
    February 2022
    January 2022
    December 2021
    November 2021
    October 2021
    September 2021
    August 2021
    July 2021
    June 2021
    May 2021
    April 2021
    March 2021
    February 2021
    January 2021
    December 2020
    November 2020
    October 2020
    September 2020
    August 2020
    July 2020
    June 2020
    May 2020
    April 2020
    March 2020
    February 2020
    January 2020
    December 2019
    November 2019
    October 2019
    September 2019
    August 2019
    July 2019
    June 2019

Proudly powered by Weebly
  • About
  • Online Card Classes
  • Card Making Ideas
  • Stampin' Up! Catalogs
  • Card Tutorials
  • Contact
  • Shopping & Rewards
  • Join Stampin' Up!
  • Color Picker