|
If you're following the Stampin' Friends Blog Hop, you've reached me from Anne Marie Hile's wonderful blog. I hope after looking at my projects, you'll continue on to Melissa Thomas's and all the way through the rest of the hop.
This month's theme for the Stampin' Friends Blog Hop is Masculine or My Guy. The Rooted in Nature stamp set from Stampin' Up! has the perfect stamps for some more masculine looking cards, and with Father's Day coming up in a month, it's the perfect time to get started on some gifts for Dad. So, on y go! Let's get stamping.
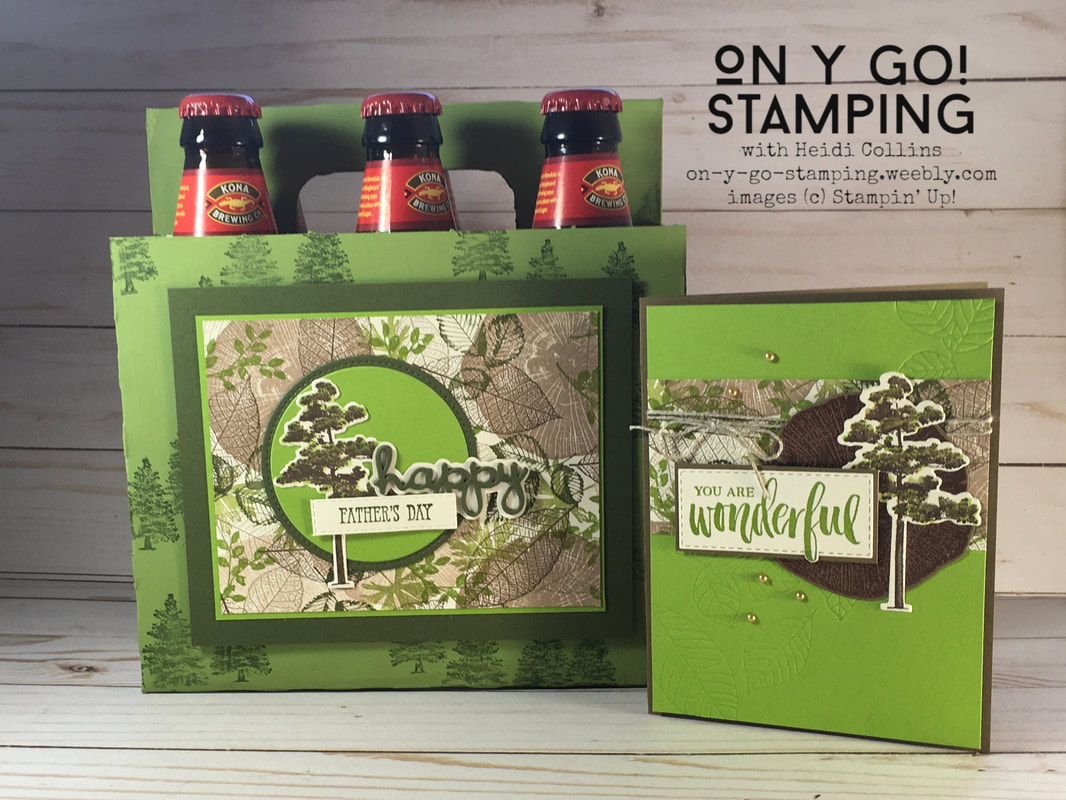
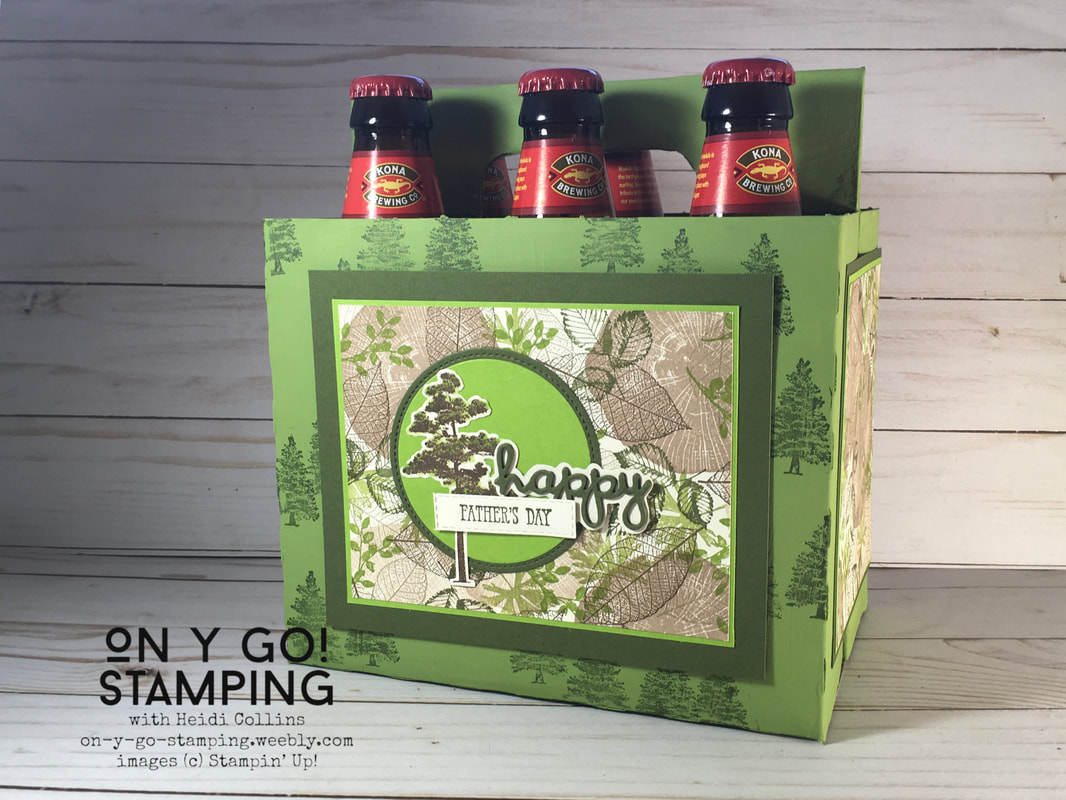
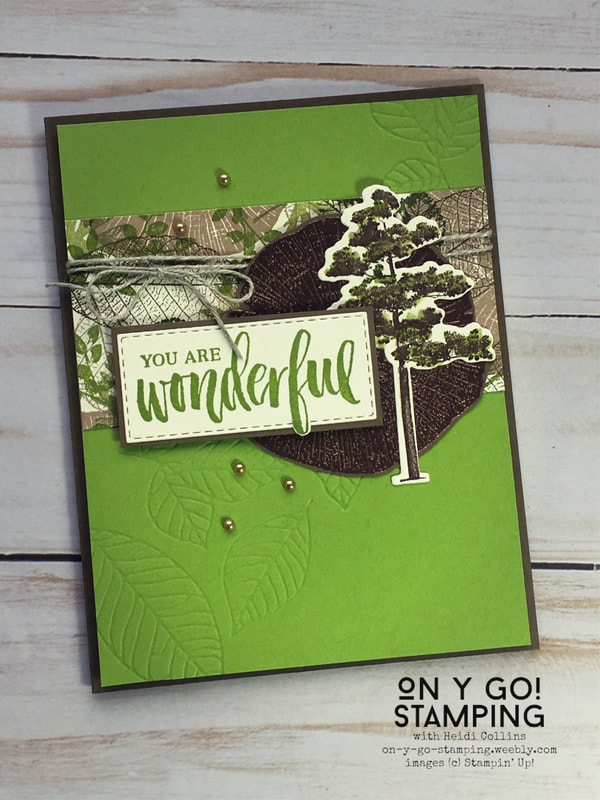
Finding gifts for guys always seems to be a challenge, but I know for my guy, I can't go wrong with some beer. (He's pretty easy to please!) So, to make this six-pack extra special, I added some personalized decoration. To go with the six-pack, I created a card to tell him just how wonderful he is to me and the kids.
For both of these projects, I created my own patterned paper with the different leaf images from the Rooted in Nature stamp set. I started by stamping the tree rings with Crumb Cake ink. I stamped it off first on a piece of scratch paper to make it a little lighter, and then, I stamped it twice on my paper. I stamped these fairly close together all over a piece of 8 1/2" x 11" Very Vanilla cardstock. After my page was filled with tree rings, I stamped the various leaves in Granny Apple Green, Mellow Moss, Soft Suede, and Crumb Cake inks. I overlapped images and stamped multiple times before re-inking. When creating your own background paper, it is very important to get the images to really cover the page. Since you will be cutting the paper apart into smaller sections, you often need to place the images closer together than you normally would. Once you trim the pieces of cardstock into the sizes you want, you may need to go back and stamp a few more partial images around the edge.
I layered a piece of my handmade patterned paper on Granny Apple Green and Mossy Meadow cardstock. I added layered circles of each of these colors as well. On top of that, I added a tree image from the stamp set that I had stamped in Soft Suede ink. I colored over the needles of the tree with a Granny Apple Green Stampin' Blend. Then I fussy cut the tree and adhered it on top of the circles.
The words were cut with the Well Written dies and stamped with the Well Said stamp set. To create the outline for happy, I traced around the outside of the die on a piece of Very Vanilla cardstock and very carefully cut just within my pencil mark. Then, I layered the cut "happy" pieces on top of the vanilla piece I had cut.
I stamped the greeting with Granny Apple Green ink on Very Vanilla cardstock and cut it out with a Stitched Rectangle die. To let the "f" flow out of the rectangle, I trimmed out just the very bottom of the "f" before die-cutting the sentiment. When I placed my rectangle die, I lifted the tail of the edge so that it rested on top of the die instead of underneath it. This way, the bottom of the "f" was not cut with the rest of the rectangle.
To finish the card, I added some linen thread and a few Gold Metallic Pearls. The greeting is mounted on Soft Suede cardstock and adhered with Stampin' Dimensionals. Likewise, the entire card front is attached to a Soft Suede card base with Stampin' Dimensionals. This special card is filled with texture and dimension. The perfect gift for a wonderful guy! Thanks again for visiting the On Y Go! Stamping blog. I hope you will continue on to Melissa Thomas's amazing blog and then on through the rest of the blog. Here's a complete list of bloggers: 1. Jean Bolen Beaulieu 2. Teri Pocock 3. Katja Ettig 4. Steph Jandrow 5. Tiziana Milano 6. Kim Quade - US 7. Kim Lamos 8. Maureen Rauchfuss - US 9. Anne Marie Hile - US 10. Heidi Collins <--- YOU ARE HERE 11. Melissa Thomas 12. Rachael Rife
10 Comments
Steph
5/21/2020 09:40:19
WOW WOW WOW this is just awesome!!! SO creative and you've inspired me to use this set again!! Thanks so much for sharing!
Reply
Jean Beaulieu
5/21/2020 11:25:59
I recognize that tree! Love the way you have reused the beer container. I am glad this set is included in the new catalog.
Reply
5/21/2020 17:56:20
OMG - I LOVE this - what a great presentation for the beer - going to case it for sure. Love your projects - TFS
Reply
5/23/2020 01:32:50
What a great way to dress up a beverage! I love all the colors you chose!
Reply
5/24/2020 16:40:58
Love your projects, Heidi! Dressing up that 6-pack holder is such a fun idea and I love the coordinating card. Love the mix of colors, too. Thanks for the awesome inspiration this month, yet again!
Reply
Melissa Thomas
5/24/2020 17:47:17
Well done! This set reminds me of my hubby too! The trees look like the ones at Pebble Beach, a place we have been several times... So peaceful! And I love the fonts in that set.
Reply
Your comment will be posted after it is approved.
Leave a Reply. |
Archives
July 2024
|
