• About
  • Online Card Classes
  • Card Making Ideas
  • Stampin' Up! Catalogs
  • Card Tutorials
  • Contact
  • Shopping Rewards
  • Shop
  • Join Stampin' Up!
ON Y GO! STAMPING
  • About
  • Online Card Classes
  • Card Making Ideas
  • Stampin' Up! Catalogs
  • Card Tutorials
  • Contact
  • Shopping Rewards
  • Shop
  • Join Stampin' Up!

Ink Blending Tips and Techniques with Stampin' Up!'s Blending Brushes

1/18/2021

0 Comments

 
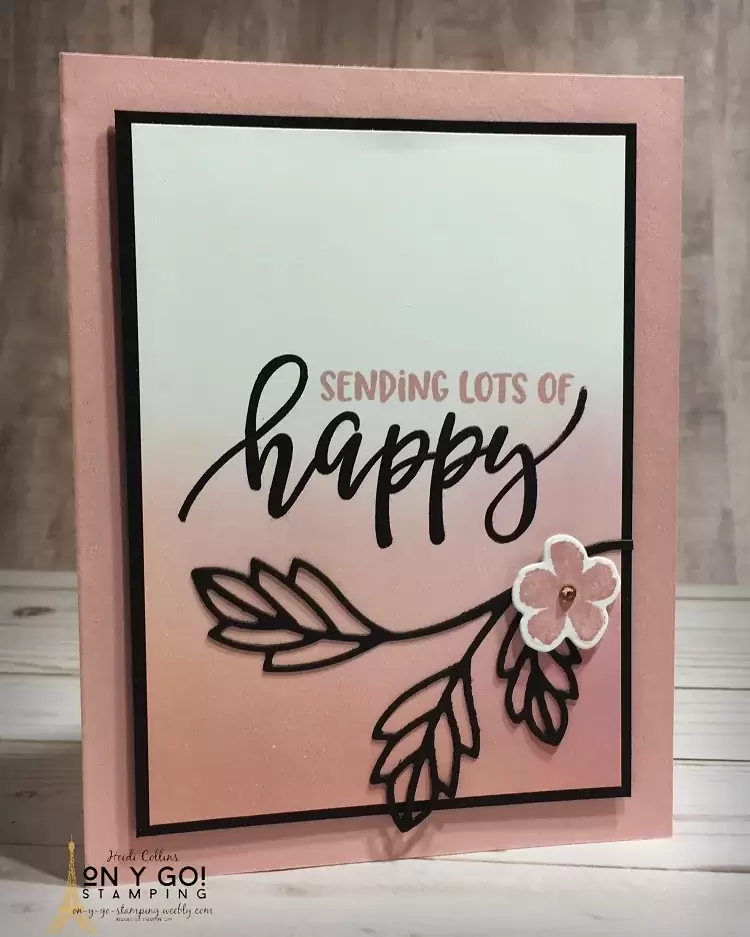
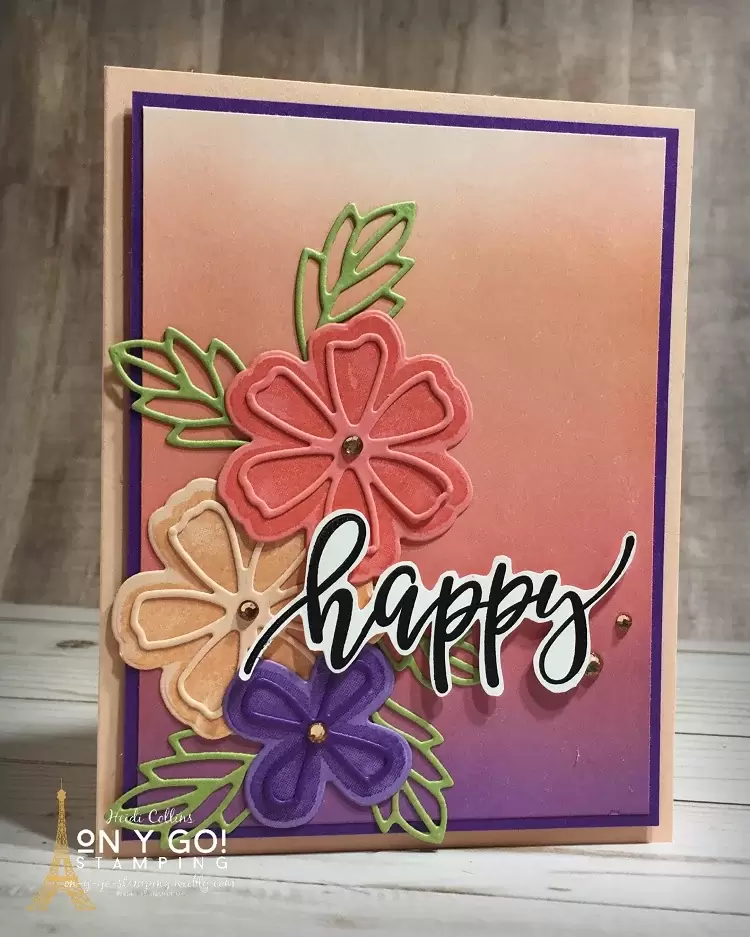
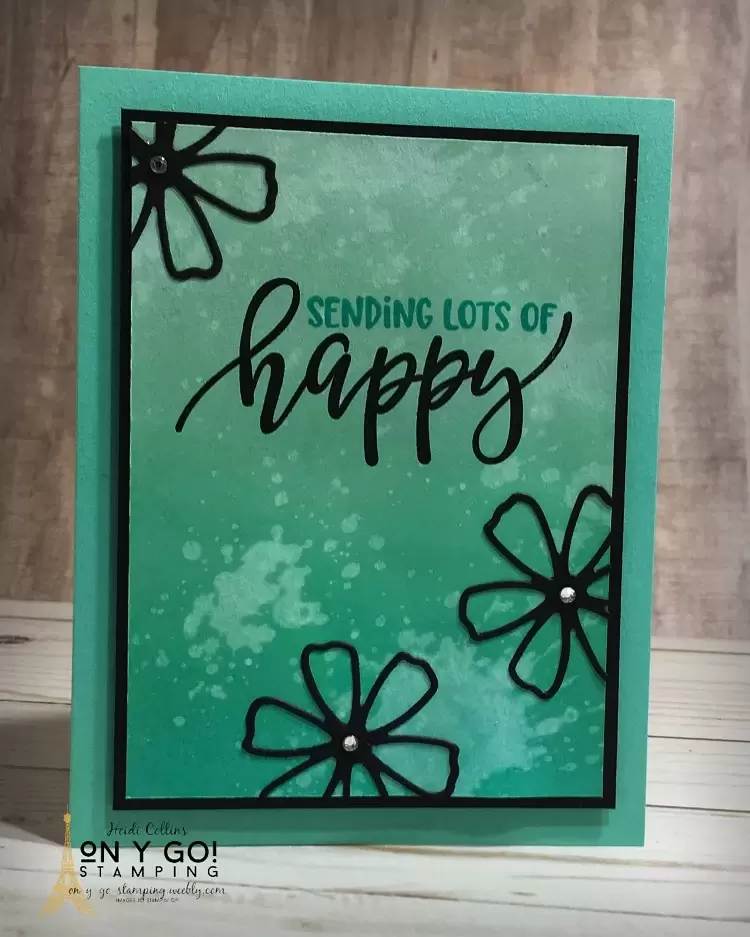
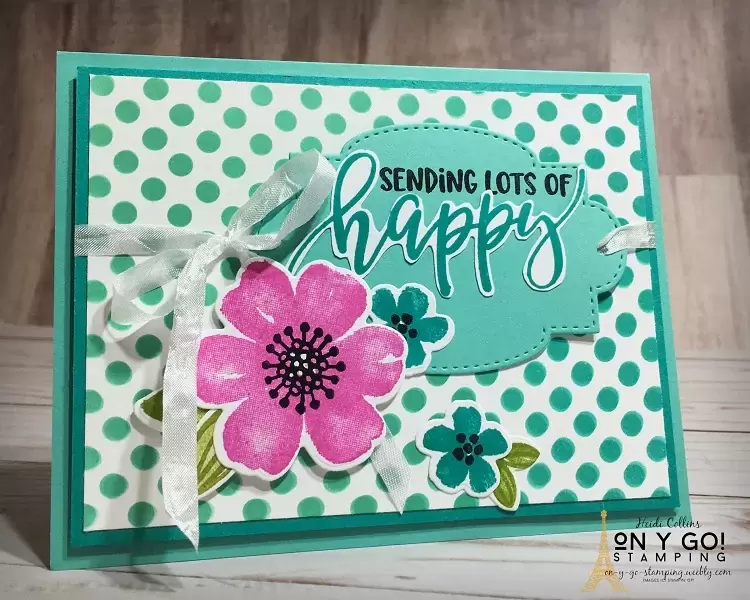
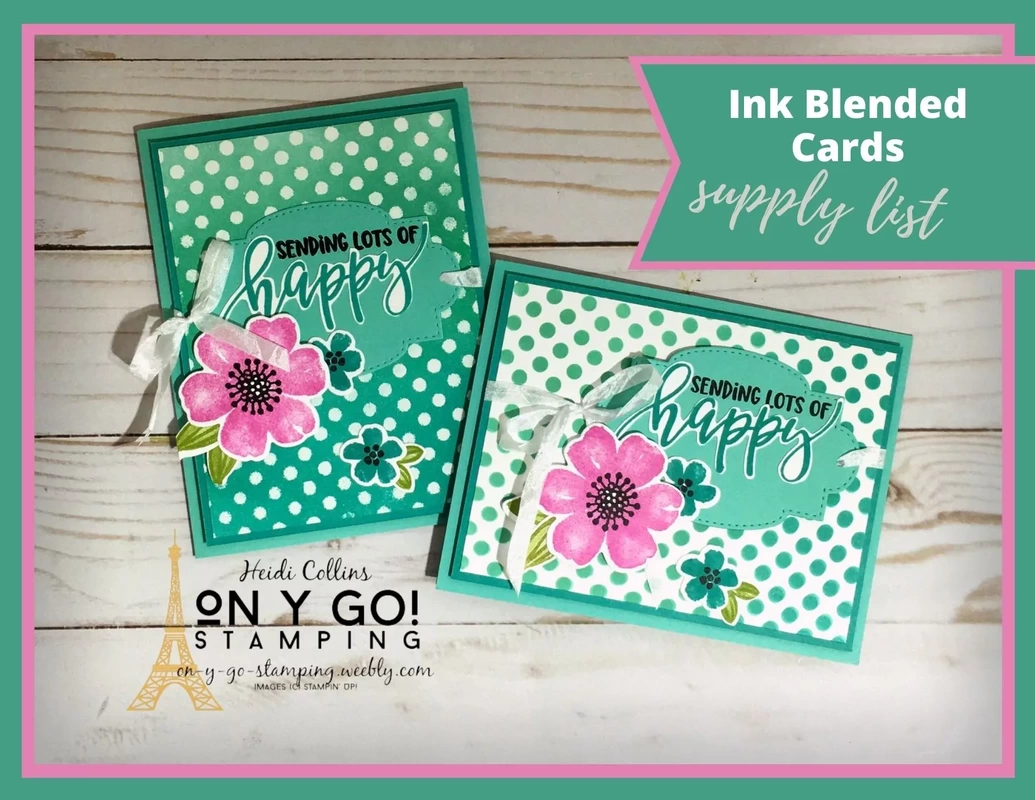
Stampin' Up!'s new Blending Brushes might be the new item from the January-June Mini Catalog that I am most excited about. If you remember, a few months ago, I shared how to do ink blending using make-up brushes. These new blending brushes are so much better! So, I had to make a new video to show you some of the fun things you can do with them. Plus I have lots of sample cards! So, on y go! Let's get stamping.
2 Card ideas with ink blended backgrounds made with the new Blending Brushes from Stampin' Up! and the Pretty Perennials stamp set and dies from the 2021 January-June Mini Catalog.
Supply List for these Ink Blended Cards

Sample Cards with the Pretty Perennials Stamp Set and ink Blending

All of my sample cards use the new Pretty Perennials stamp set and coordinating dies. I love the bold flowers and greetings in this stamp set. They are just so happy! And it's a big stamp set and huge set of dies! Plus, some of the smaller dies, like leaves and small flowers, have multiple dies of the same shape so that you can cut multiples in the same pass through the Stampin' Cut & Emboss. 

DHow to Create a Puff of ink on a Card Front

My first technique is create a small puff of ink in the center of a piece of cardstock. Because the Blending Brushes have a domed shape, they are fabulous for making this type of ink cloud on your card front. Here, I've used Pool Party to create a soft cloud under the Bermuda Bay and Gorgeous Grape flowers.
Birthday card idea using blending brushes to create a puff of ink. Images from the new Pretty Perennials stamp set from Stampin' Up!

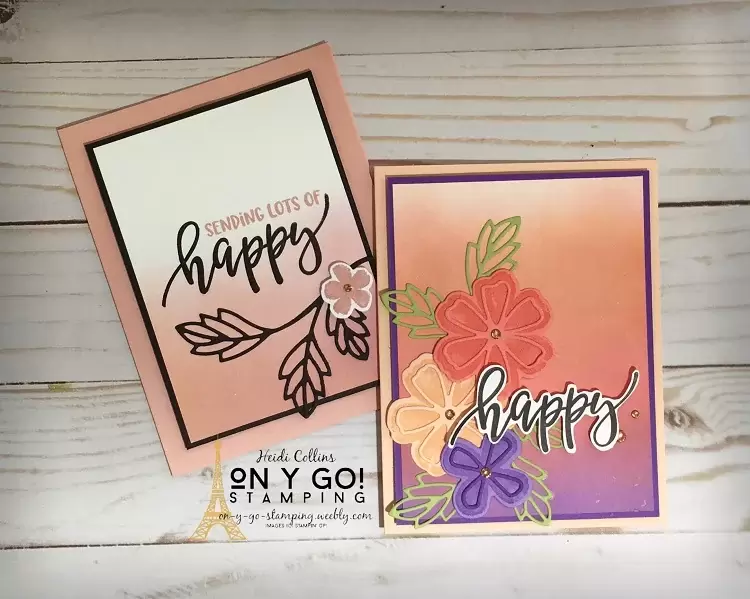
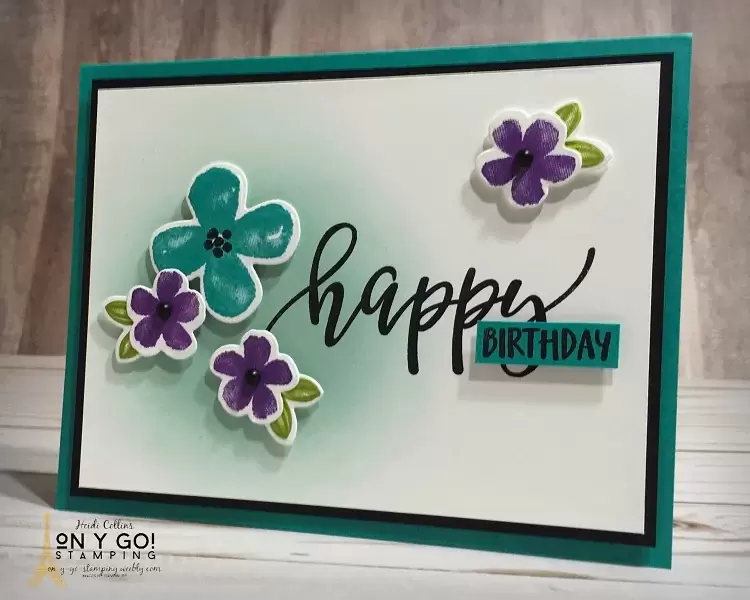
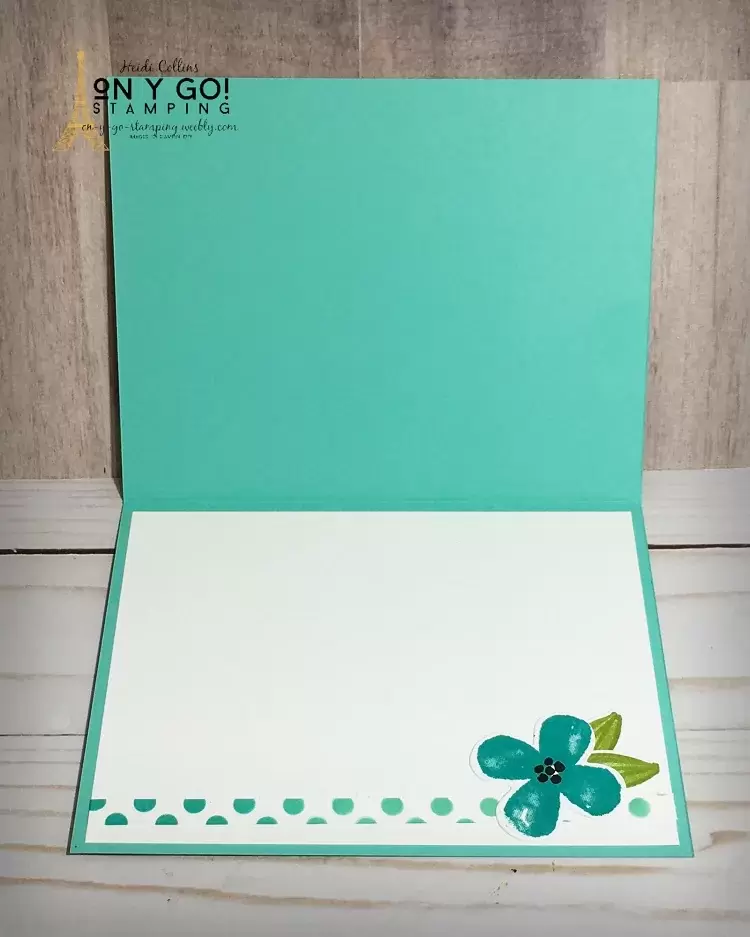
Dimensions for this simple birthday card design

Bermuda Bay cardstock:
  • 8 1/2" x 5 1/2", scored at 4 1/4"
  • 3/8" x 1 1/8'
Basic Black cardstock: 5 3/16" x 3 15/16"
Basic White cardstock: 5" x 3 3/4" & Scraps
Create an ombre background using blending brushes from Stampin' Up! This simple card idea uses the Pretty Perennials stamp set and dies from the 2021 January-June Mini Catalog.

Ombre Card Design

When you first try ink blending, it's best to start with a single color. Here, I've used Blushing Bride to create an ombre effect on the bottom portion of my card front. 

Dimensions for this ombre card

Blushing Bride cardstock: 8 1/2" x 5 1/2", scored at 4 1/4"
Basic Black cardstock: 4 15/16" x 3 11/16" & scraps
Basic White cardstock: 4 3/4" x 3 1/2" & scraps

Multi-Color Ombre Card Design

Once you have mastered a single color ombre, you're ready to move on to multi-color effects. Here, I used Petal Pink, Flirty Flamingo, and Highland Heather. It's best to choose colors that are next to one another on the color spectrum. If you try mixing red and green, you might wind up with brown!

Dimensions for this Multi-Color Card Idea

Petal Pink cardstock: 8 1/2" x 5 1/2", scored at 4 1/4" & scraps
Gorgeous Grape cardstock: 5 3/16" x 3 15/16" & scraps
Basic White cardstock: 5" x 3 3/4" & scraps
Flirty Flamingo cardstock: scraps
Highland Heather cardstock: scraps
Pear Pizzazz: scraps
Card idea with an ink blended background made with blending brushes from Stampin' Up! This card also features the new Pretty Perennials stamp set and dies from the January-June Mini Catalog.
Birthday card idea with water spots on an ink blended ombre background. This fun card idea uses the new Pretty Perennials stamp set and dies from Stampin' Up!

Creating Water spots on Ombre Ink Blending

Create this fun effect by spritzing water on the cardstock after doing the ink blending. Here, I used Pool Party, Coastal Cabana, and Bermuda Bay inks. Then, I spritzed the water, let it sit for 20-30 seconds and blotted it off with a paper towel. 

Cutting Dimensions for this Water-spotted Card Idea

Bermuda Bay cardstock: 8 1/2" x 5 1/2", scored at 4 1/4"
Basic Black cardstock: 4 15/16" x 3 11/16" & scraps
Basic White cardstock: 4 3/4" x 3 1/2"

Stencils and Blending Brushes

My last two cards use the Basic Pattern Decorative Masks, which is a fancy way to say stencil. I chose the polka dot one. The blending brushes are fabulous for adding ink with a stencil. I did the same ombre effect as the water-spotted card, but this time over the polka dot stencil. 

Cutting Dimensions for this Polka Dot Card

Coastal Cabana cardstock:
  • 8 1/2" x 5 1/2", scored at 4 1/4"
  • 3 1/2" x 2 1/2" cut with the Stitched So Sweetly Dies
Bermuda Bay cardstock: 5 3/16" x 3 15/16"
Basic White cardstock: 5" x 3 3/4" & scraps

Since I started with a piece of 5 1/2" x 4 1/4" Basic White cardstock to do the stenciling, I trimmed it down to 5" x 3 3/4". I added a piece of the trimmed front to the interior of the card to add a fun polka dot. 
Lots of Happy card idea using ink blending over a stencil. This polka dot card uses the new Pretty Perennial stamp set and dies from the 2021 January-June Mini Catalog from Stampin' Up!
Picture
Birthday card idea featuring the emboss resist technique and ink blending. Card sample uses the new Pretty Perennials stamp set and dies from Stampin' Up!'s January-June Mini Catalog.

Emboss Resist and Blending Brushes

My final card also uses a stencil, but this time, I've embossed the polka dots. I placed the stencil over the cardstock and inked over it with a Versamark ink pad. Then, I embossed it with white embossing powder and heat embossed it. Finally, I used the blending brushes to do the same ombre effect with Pool Party, Coastal Cabana, and Bermuda Bay ink. When I was done, I wiped the top with a paper towel to remove any excess ink from the embossed areas.

The cutting dimensions for this emboss resist card are the same as the ones above.

Supply List for these Ink Blended Cards

Click here to see the supply list for these ink blended card ideas. If you need any of the supplies to recreate these cards, simply check the items you need and click "Add to Cart." On the next screen, be sure to add this month's host code under the pink "Checkout" button to earn Frequent Shopper Points.
Supply list for these ink blended card ideas
0 Comments

Your comment will be posted after it is approved.


Leave a Reply.

    Heidi Collins, Independent Stampin' Up! Demonstrator with On Y Go! Stamping
    Get updates and ideas on my Facebook group
    Heidi Collins, Independent Stampin' Up! Demonstrator and Owner of On Y Go! Stamping
    Shop for Stampin' Up! stamps, inks, paper, tools, and embellishments with Heidi Collins and earn points towards FREE stamps!
    Picture
    Picture
    On Y Go! Stamping YouTube channel with Card Making Videos on how to do rubber stamping, card making, scrapbooking, and paper crafting

    Archives

    March 2023
    February 2023
    January 2023
    December 2022
    November 2022
    October 2022
    September 2022
    August 2022
    July 2022
    June 2022
    May 2022
    April 2022
    March 2022
    February 2022
    January 2022
    December 2021
    November 2021
    October 2021
    September 2021
    August 2021
    July 2021
    June 2021
    May 2021
    April 2021
    March 2021
    February 2021
    January 2021
    December 2020
    November 2020
    October 2020
    September 2020
    August 2020
    July 2020
    June 2020
    May 2020
    April 2020
    March 2020
    February 2020
    January 2020
    December 2019
    November 2019
    October 2019
    September 2019
    August 2019
    July 2019
    June 2019

Powered by Create your own unique website with customizable templates.
  • About
  • Online Card Classes
  • Card Making Ideas
  • Stampin' Up! Catalogs
  • Card Tutorials
  • Contact
  • Shopping Rewards
  • Shop
  • Join Stampin' Up!