• About
  • Online Card Classes
  • Card Making Ideas
  • Stampin' Up! Catalogs
  • Card Tutorials
  • Contact
  • Shopping Rewards
  • Shop
  • Join Stampin' Up!
ON Y GO! STAMPING
  • About
  • Online Card Classes
  • Card Making Ideas
  • Stampin' Up! Catalogs
  • Card Tutorials
  • Contact
  • Shopping Rewards
  • Shop
  • Join Stampin' Up!

Scrap Bin Saturday

1/18/2020

0 Comments

 
Picture
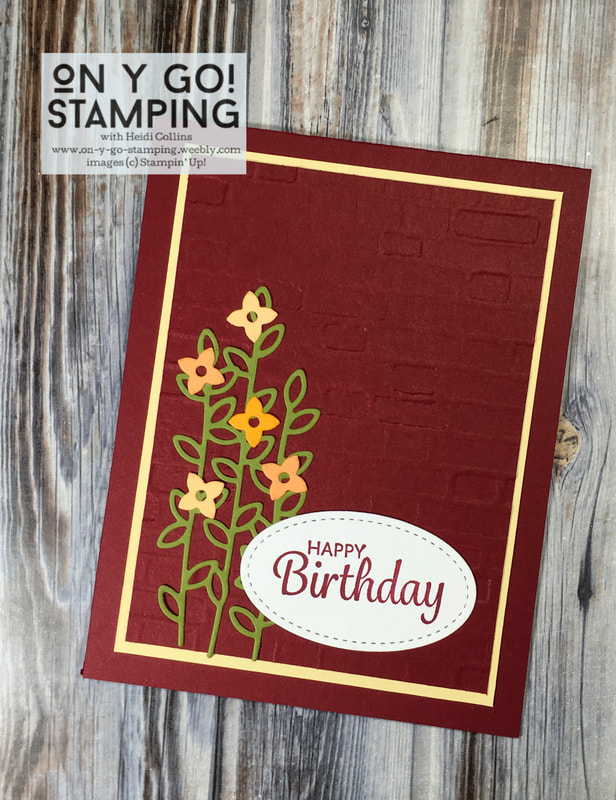
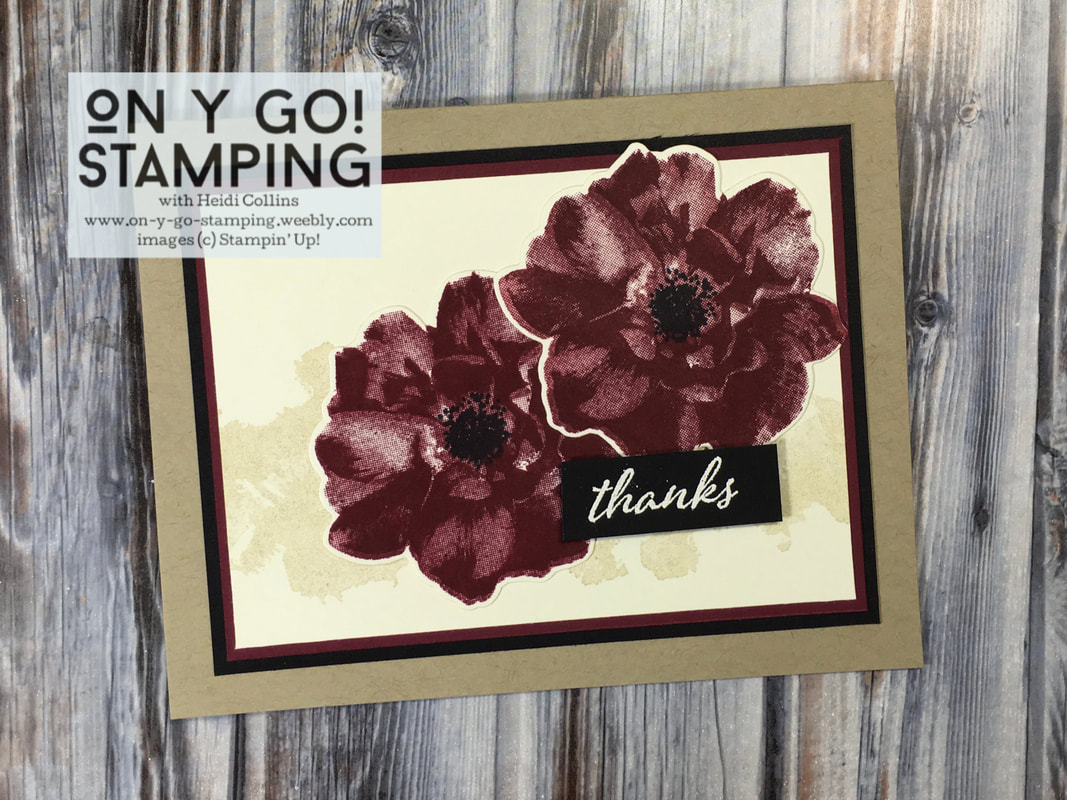
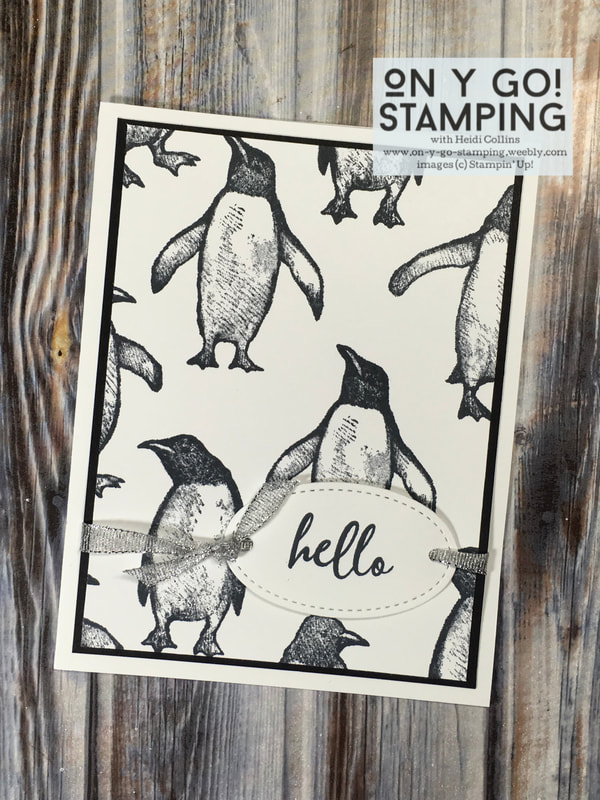
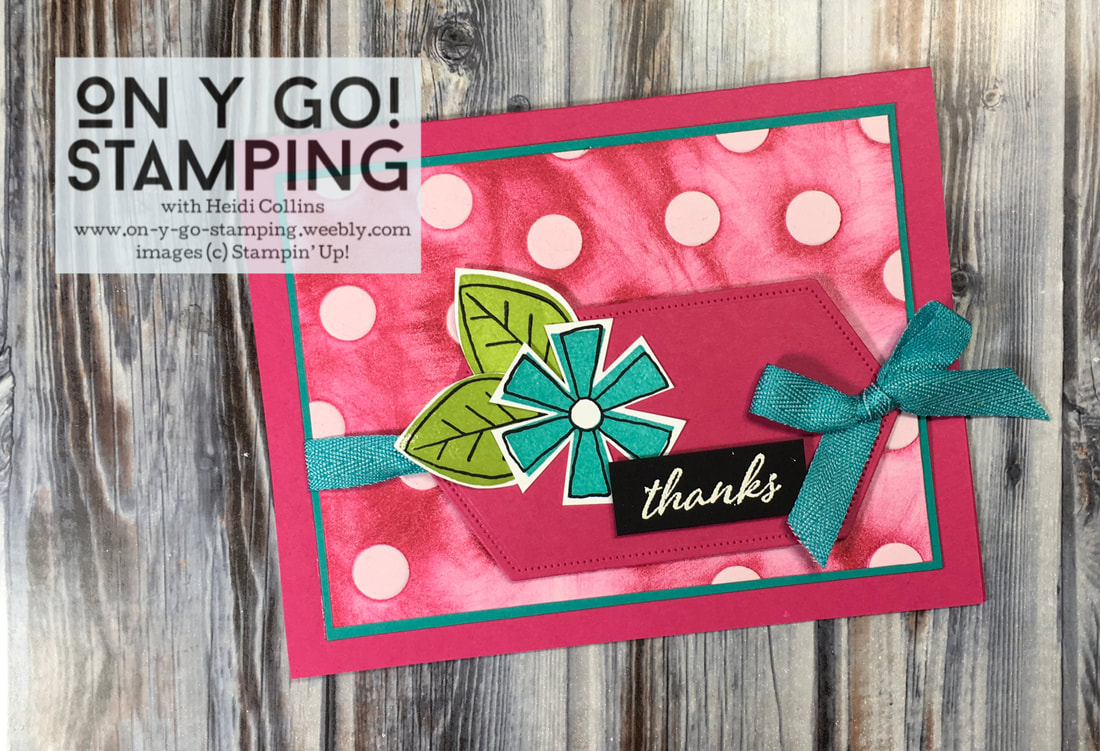
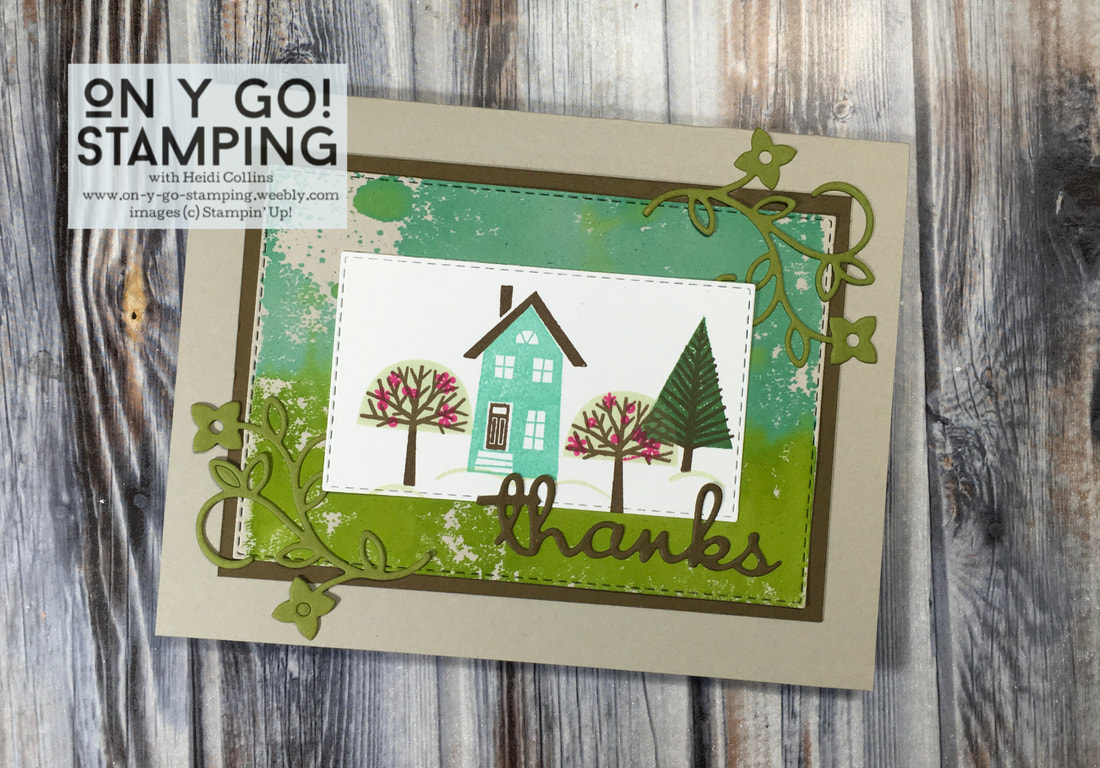
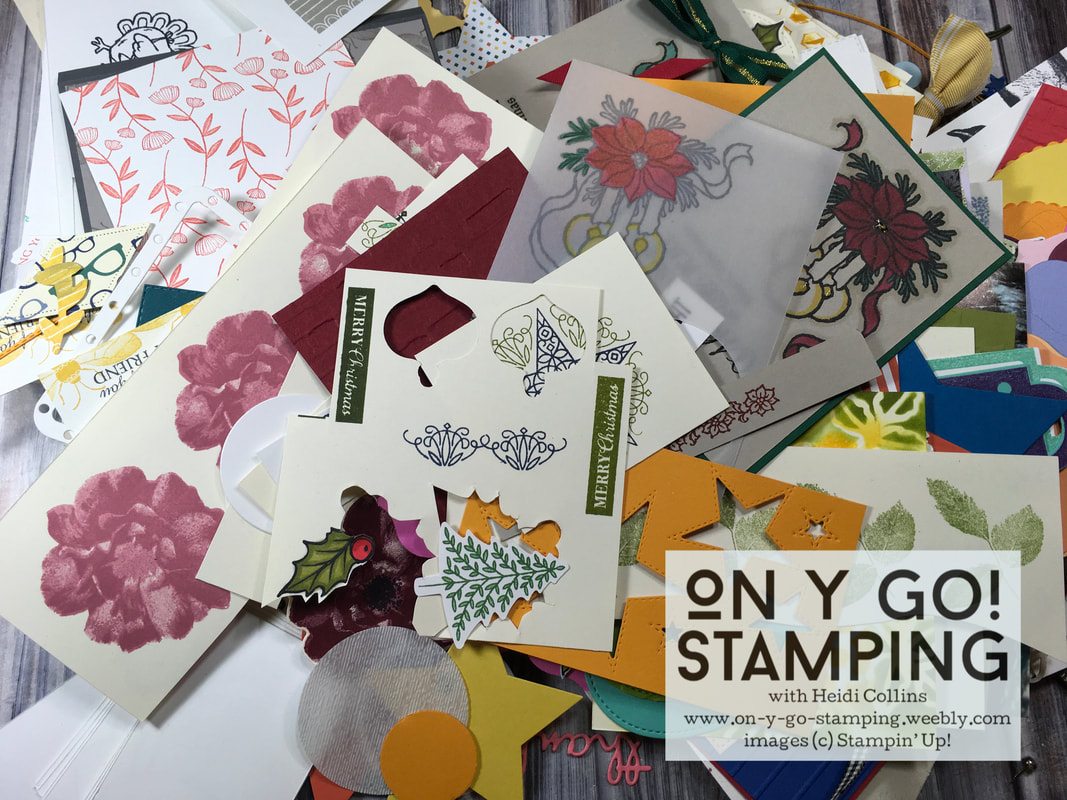
My scrap bin was bursting with discarded images and shapes, and this snowy weekend seemed like the perfect time to turn them from trash to treasure!

Whenever I am stamping, I put any stamped images or die-cut shapes that I decide not to use for whatever reason into a small tub. My thought is that someday, I will come back and do something useful with those pieces. Today was that day. 

I started by dumping out the contents of my scrap bin on my stamp table. I sorted through everything by putting like shapes and images together. I also started putting aside bits and pieces that I was most interested in working with. I put a few things neatly back in the tub right away, knowing that it was not yet time to transform them into a beautiful card. Then, I got to work. 
Picture
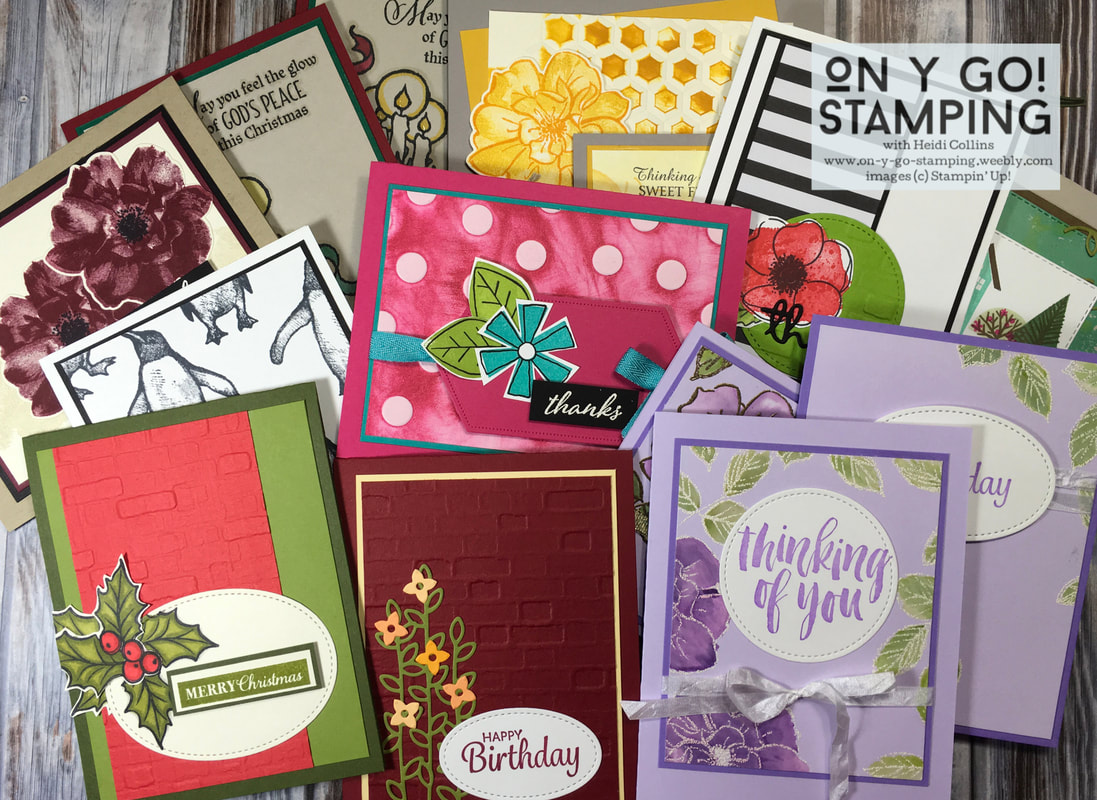
I quickly made over a dozen cards. I'm going to showcase a few below and others will be the subject of upcoming blog posts. So, if you see a card you like that's not explained below, be sure to subscribe to my newsletter to get updates about my blog. 
​
Picture
For this birthday card, I used die cuts from the Well Written stamp set to create flowers growing on a brick wall. I embossed the Cherry Cobbler cardstock with the Brick and Mortar 3D embossing folder. The greeting is from the Here's a Card stamp set and is stamped with Cherry Cobbler ink on a piece of Whisper White cardstock cut with the Stitched Shapes dies. The brick background is mounted on a piece of So Saffron cardstock. The vine is Old Olive cardstock and the flowers are cut from various colors of retired yellow cardstocks. 
This thank you card features flowers from the To a Wild Rose stamp set stamped with Merry Merlot ink. They were cut with the Wild Rose dies. The background is stamped in Crumb Cake ink with stamps from the retired Beautiful Blizzard stamp set. The "thanks" is embossed with White embossing powder and comes from the Here's a Card stamp set. The card uses Very Vanilla, Merry Merlot, Crumb Cake, and Basic Black cardstocks.
Picture
Picture
This card features the now retired Playful Penguins stamp set from the Holiday 2019 catalog. I stamped them with Tuxedo Black Memento ink on Whisper White cardstock. The greeting is from the To a Wild Rose stamp set and is stamped on an oval cut with the Stitched Shapes dies. The silver ribbon is some very old, retired Stampin' Up grosgrain ribbon. 
Most of the items on this card retired years ago like the Shapes and Shadows stamp set. The Bermuda Bay ribbon and Polka Dot embossing folder retired more recently. But, the inks and papers are mostly current.

To create the background, I dabbed my Melon Mambo ink pad on the Polka Dot embossing folder before using it to emboss a piece of retired pink cardstock. The images are stamped with Bermuda Bay and Granny Apple Green ink. The shape under the flower was cut with the Stitched Nested Labels dies. The greeting is from the Here's a Card stamp set and is embossed with White embossing powder on Basic Black cardstock. The card front is mounted on Bermuda Bay and Melon Mambo cardstock.
Picture
Picture
The last card I have to show today uses the now retired From Our House to Yours stamp set from the 2019 Holiday Catalog. The images are stamped with Coastal Cabana, Soft Suede, Soft Sea Foam, Melon Mambo, and Garden Green ink. The greeting and vines are cut with the Well Written dies. The card uses Sahara Sand, Soft Suede, Whisper White, and Old Olive cardstock. 

To create the background, I took a clear acrylic block and applied ink directly to the block. I put Granny Apple Green on one side and Coastal Cabana on the other. I spritzed it with water and let the inks run together a bit. Then I stamped the acrylic block directly on the cardstock and let it dry. I cut it using the Stitched Rectangle dies. 

Even after putting together over a dozen cards, my scrap bin is still full! I'll need to spend some more time crafting with my leftovers. Do you have a scrap bin? I'd love to hear about your creations in the comments below.
Purchase Stampin' Up! Product (January Host Code: 64VNA3YR)
0 Comments

Your comment will be posted after it is approved.


Leave a Reply.

    Heidi Collins, Independent Stampin' Up! Demonstrator with On Y Go! Stamping
    Get updates and ideas on my Facebook group
    Heidi Collins, Independent Stampin' Up! Demonstrator and Owner of On Y Go! Stamping
    Shop for Stampin' Up! stamps, inks, paper, tools, and embellishments with Heidi Collins and earn points towards FREE stamps!
    Picture
    Picture
    On Y Go! Stamping YouTube channel with Card Making Videos on how to do rubber stamping, card making, scrapbooking, and paper crafting

    Archives

    March 2023
    February 2023
    January 2023
    December 2022
    November 2022
    October 2022
    September 2022
    August 2022
    July 2022
    June 2022
    May 2022
    April 2022
    March 2022
    February 2022
    January 2022
    December 2021
    November 2021
    October 2021
    September 2021
    August 2021
    July 2021
    June 2021
    May 2021
    April 2021
    March 2021
    February 2021
    January 2021
    December 2020
    November 2020
    October 2020
    September 2020
    August 2020
    July 2020
    June 2020
    May 2020
    April 2020
    March 2020
    February 2020
    January 2020
    December 2019
    November 2019
    October 2019
    September 2019
    August 2019
    July 2019
    June 2019

Powered by Create your own unique website with customizable templates.
  • About
  • Online Card Classes
  • Card Making Ideas
  • Stampin' Up! Catalogs
  • Card Tutorials
  • Contact
  • Shopping Rewards
  • Shop
  • Join Stampin' Up!