• Home
  • About
  • Contact
  • Shopping Rewards
  • Shop
  • Join Stampin' Up!
  • Stampin' Up! Catalogs
  • Online Card Classes
  • Ideas & Inspiration
  • Tutorial Store
On y go! Stamping
  • Home
  • About
  • Contact
  • Shopping Rewards
  • Shop
  • Join Stampin' Up!
  • Stampin' Up! Catalogs
  • Online Card Classes
  • Ideas & Inspiration
  • Tutorial Store

Timeless Tulips while I Dream of Spring

1/20/2020

0 Comments

 
Picture
Picture
Even though the snow keeps falling outside my window, I can't help but think of spring when I am stamping with the new Timeless Tulips stamp set from the 2020 January-June Mini Catalog. This beautiful stamp set features three different tulips, stems, leaves, and a variety of greetings. It is a Dist-INK-tive stamp set which means that the images have a photo-realistic quality to them. From birthday to sympathy to Mother's Day, this set is perfect for a bouquet of greetings. 
This first card is a quick and easy one! I stamped the largest tulip along the bottom of a piece of Very Vanilla cardstock in Pumpkin Pie and Crushed Curry ink with stems and leaves in Old Olive. Then, I stamped the greeting in Gray Granite. I layered the card front on Crushed Curry and Gray Granite cardstock and just like that, I had a perfect card to send to someone this Easter. 
Picture
Picture
My second card today is also quick and easy. It uses the same color scheme but has an added twist. I stamped the tulips in Pumpkin Pie ink with Old Olive stems and leaves on Very Vanilla cardstock.

Then I filled a Stampin' Spritzer with water and a couple of drops of Crushed Curry ink. I spritzed the the tulips. This caused the ink in the tulips to run a little and gave the image a watercolored look. It also added a light yellow background. To give it just a little something extra, I took a wet watercolor brush and swirled it in Gray Granite ink. Then, I flicked it onto the card to create a slight splatter. 

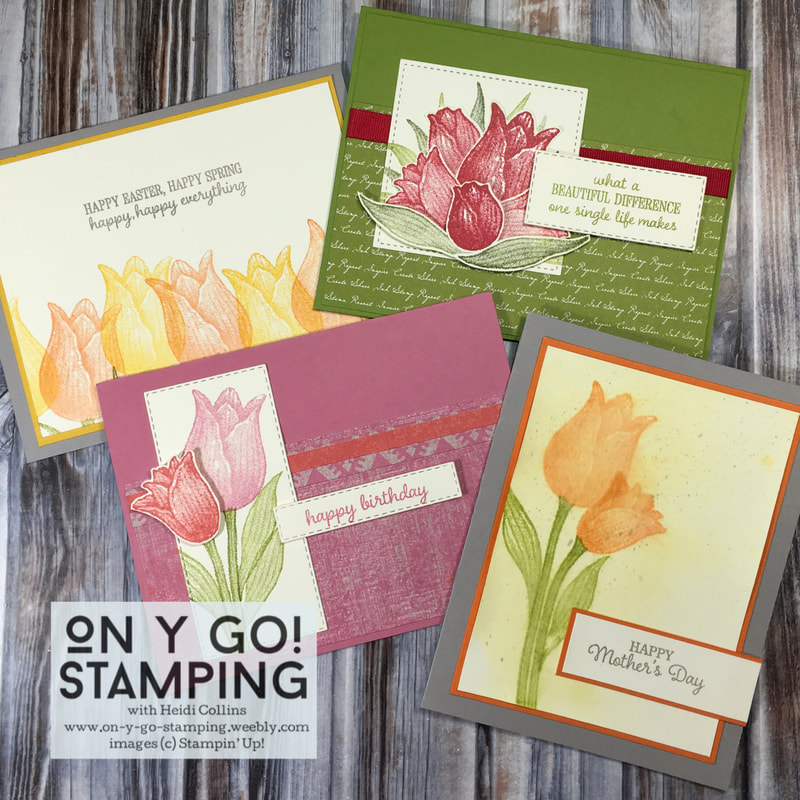
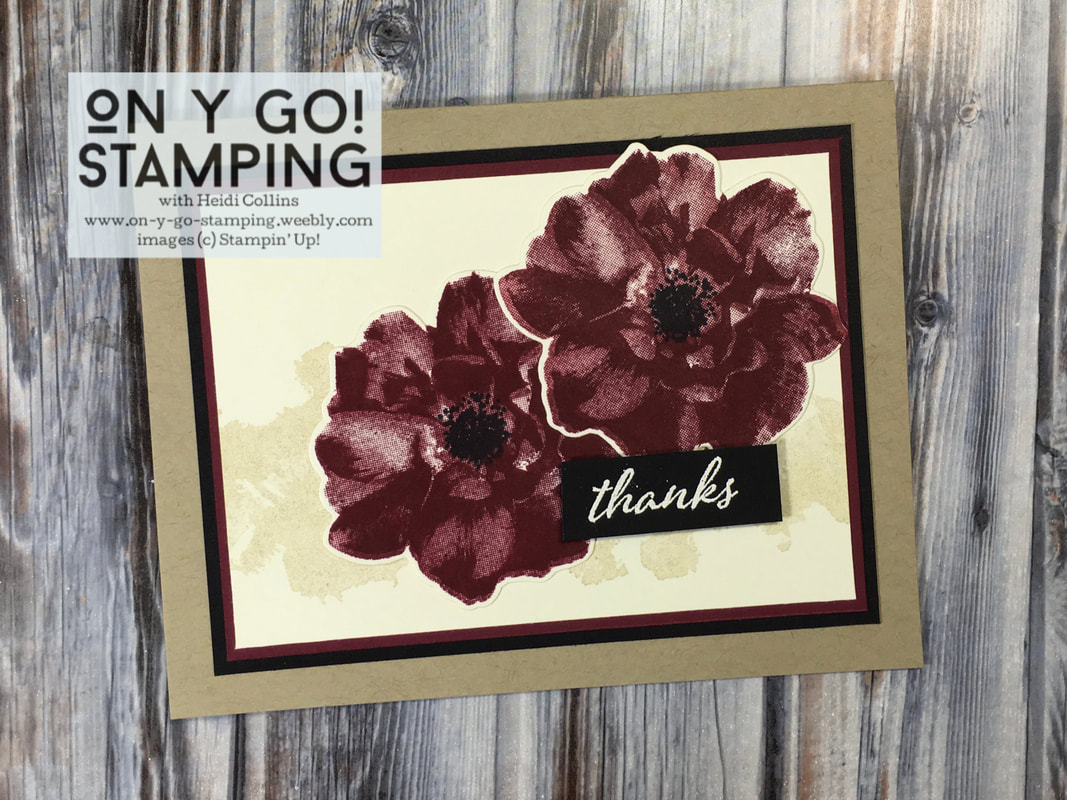
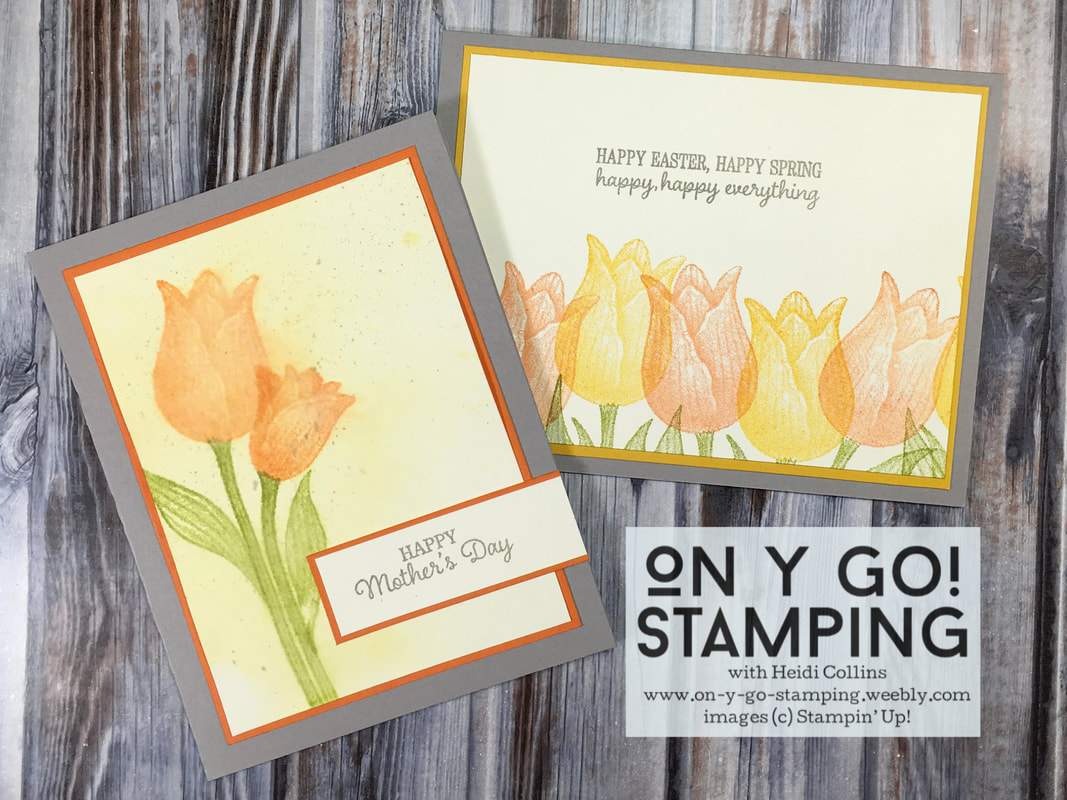
To finish the card, I layered the image on Pumpkin Pie and Gray Granite cardstock. I also stamped the greeting on small strip of Very Vanilla cardstock with Gray Granite ink. I layered it on Pumpkin Pie cardstock before adding to the card front. Once again, a quick and easy card that is perfect for Mother's Day. 

The next card took a little more time to create, but wasn't difficult. I stamped a variety of leaves on Very Vanilla cardstock using Old Olive and Mossy Meadow ink. I created a cluster of leaves plus two additional ones. Using the Stitched Shapes dies, I cut the cluster of leaves out.

Then, I stamped the tulips on Very Vanilla cardstock with Real Red ink. I cut out the tulips and layered them over the leaves. I also cut out the two additional leaves. I attached the smallest tulip bud and the two extra leaves using dimensionals on the front of the cluster of tulips. 
Picture

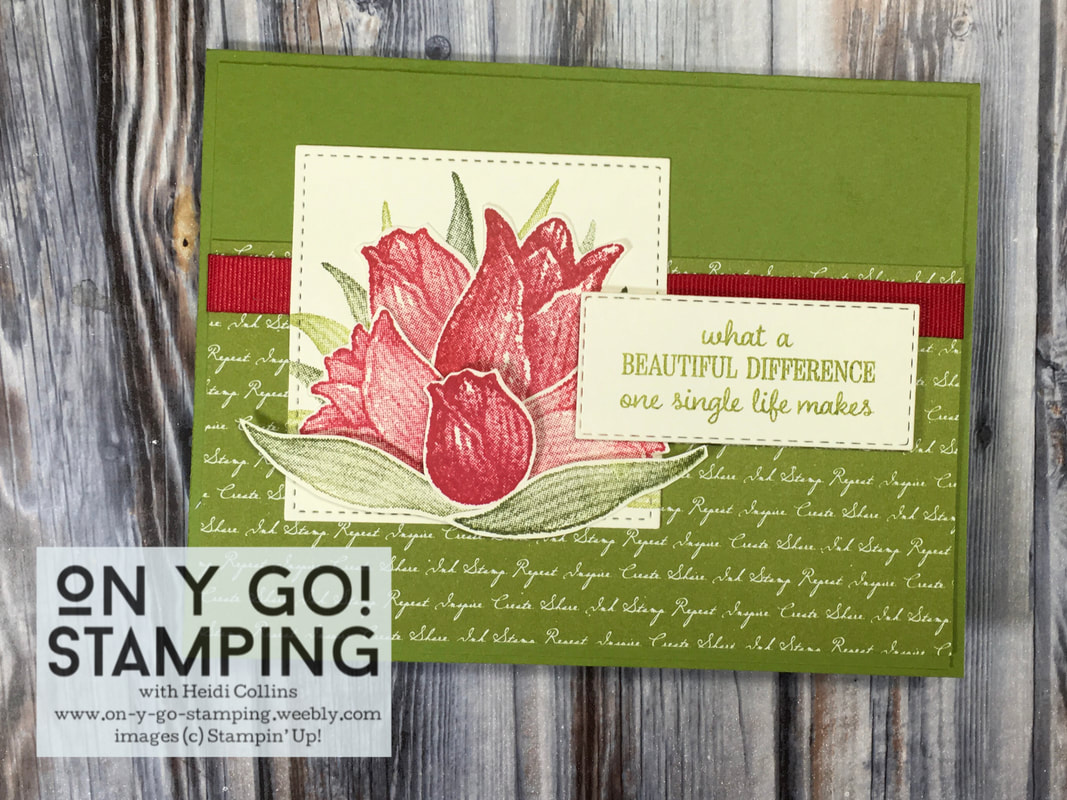
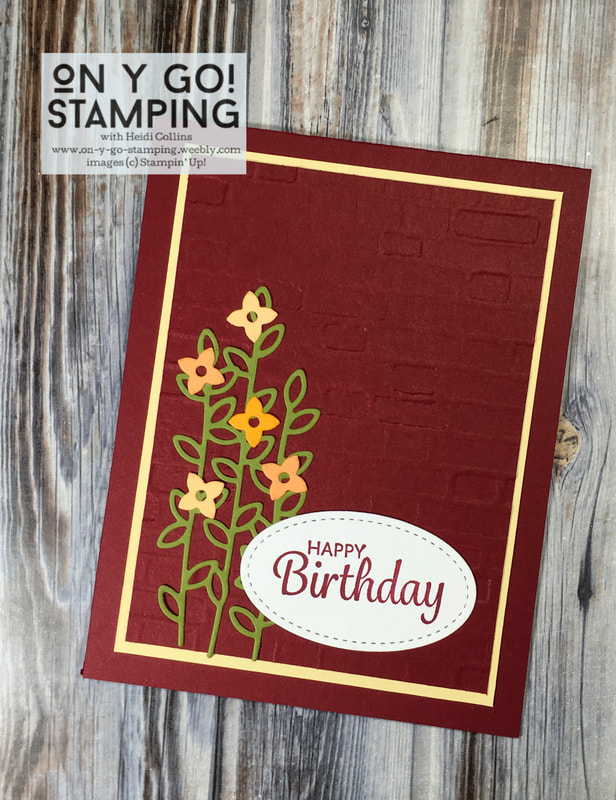
I layered a piece of Old Olive patterned paper from the 6" x 6" Regals Designer Series Paper pack on a piece of Old Olive cardstock. Then, I attached a piece of Real Red ribbon across the DSP. I attached this to an Old Olive card base. I adhered the tulip cluster to the front. Then, I stamped the greeting in Old Olive ink on Very Vanilla cardstock and cut it using the Stitched Rectangle dies. 
Picture
The final card uses two of the 2019-2021 In Colors - Rococo Rose and Terracotta Tile. I stamped the larger tulip in Rococo Rose and the stems in Old Olive ink on a piece of Very Vanilla cardstock. I cut this out using the Stitched Rectangle dies. I stamped the smaller tulip in Terracotta Tile on a separate piece of cardstock. I cut it out and adhered it to the main image using dimensionals. 
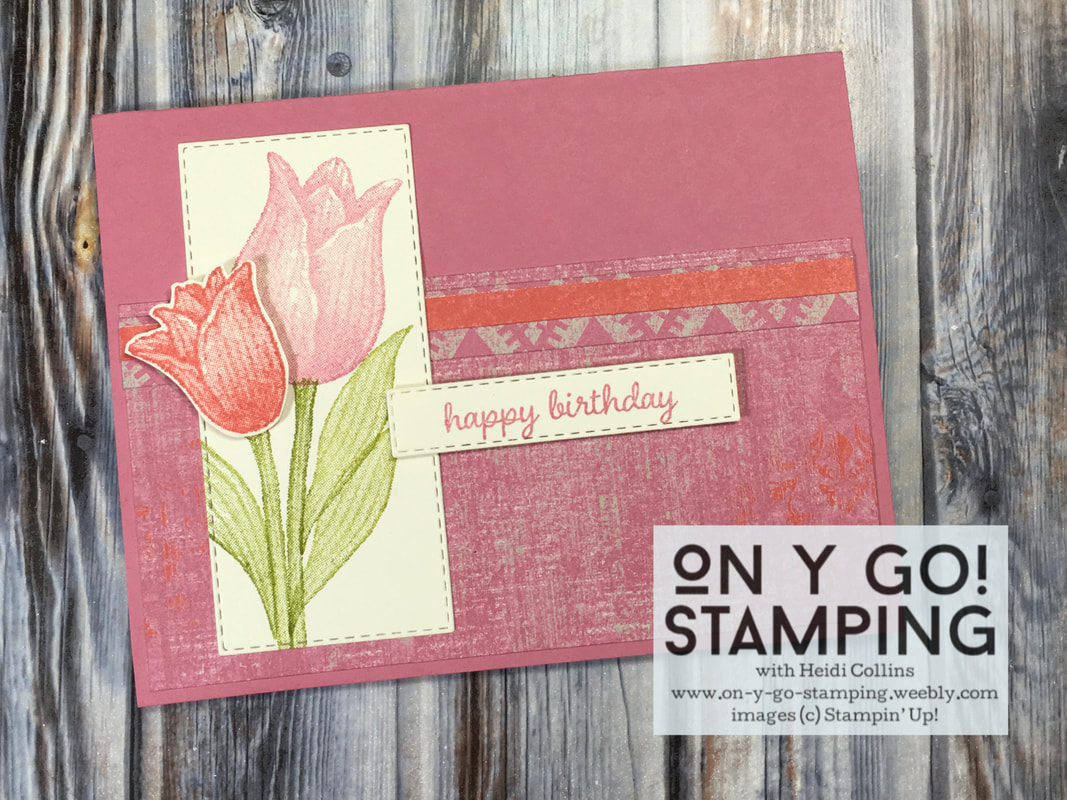
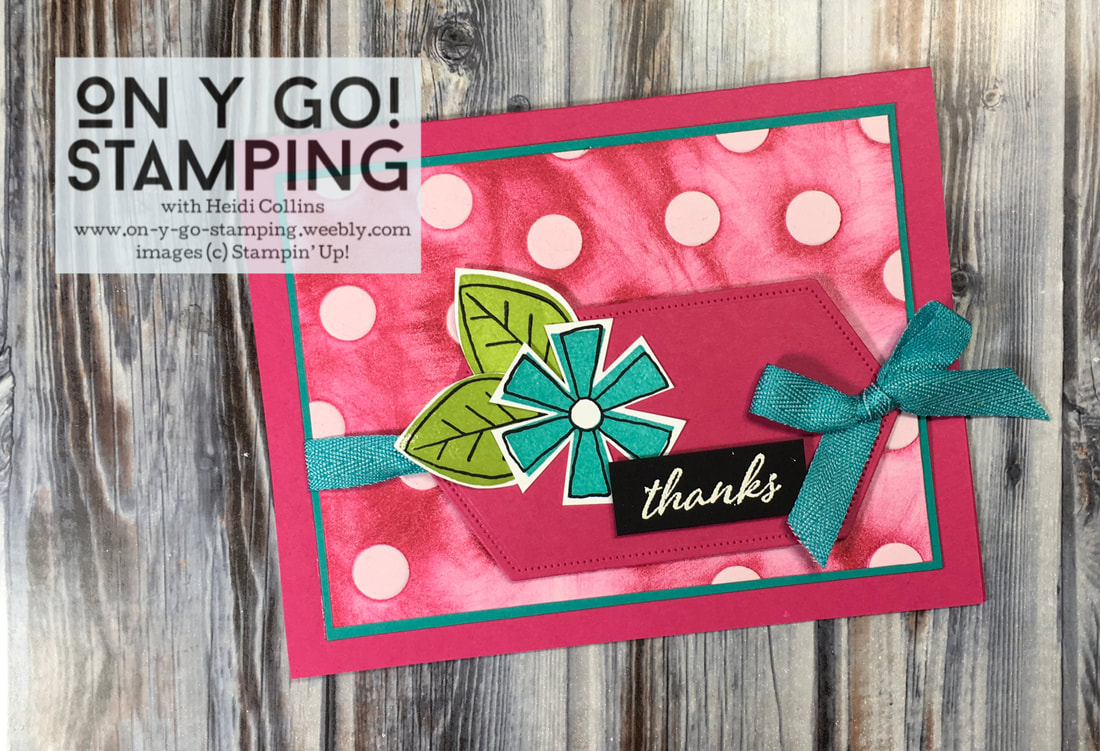
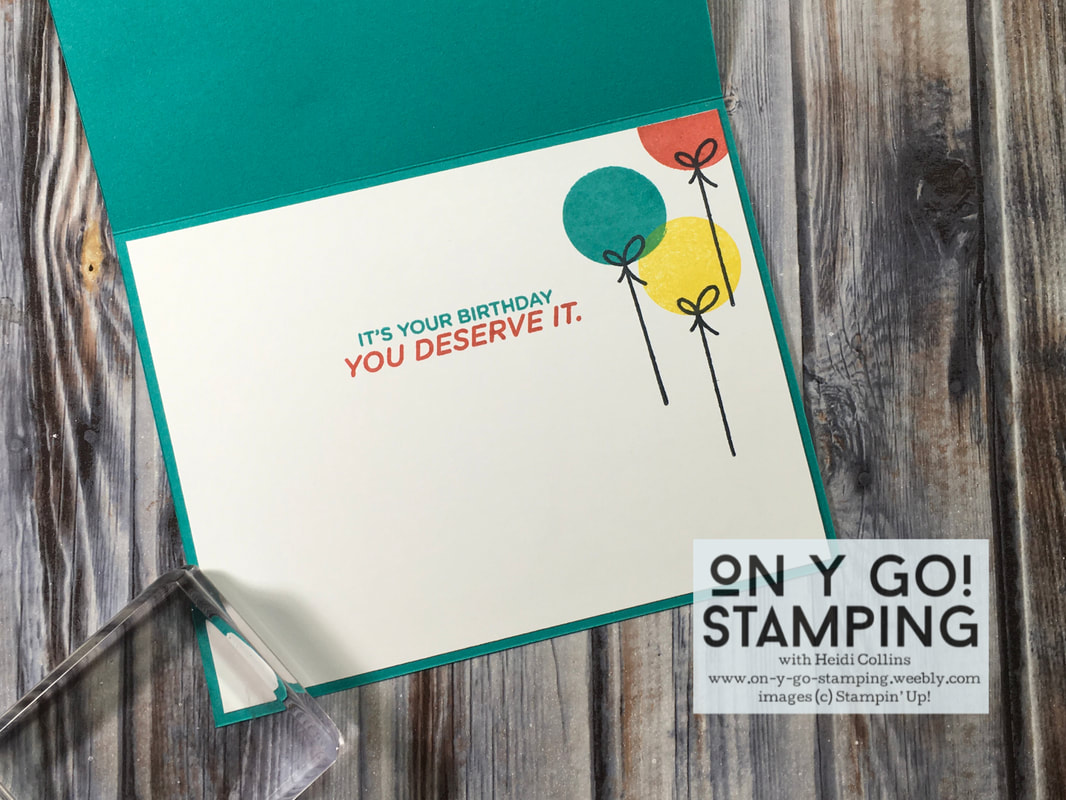
On a card base made from Rococo Rose cardstock, I adhered a piece of the Woven Threads Designer Series Paper. For this card, I didn't have ribbon to match. Instead, I used small strips of coordinating pieces of the Woven Threads DSP to give the same effect as ribbon. 

I finished the card off by stamping the "happy birthday" greeting in Rococo Rose ink and cutting it using another die from the Stitched Rectangle dies. I attached it with dimensionals to help it pop off the page. 
​
Order Stampin' Up! Products (January host code: 64VNA3YR)
0 Comments

Scrap Bin Saturday

1/18/2020

0 Comments

 
Picture
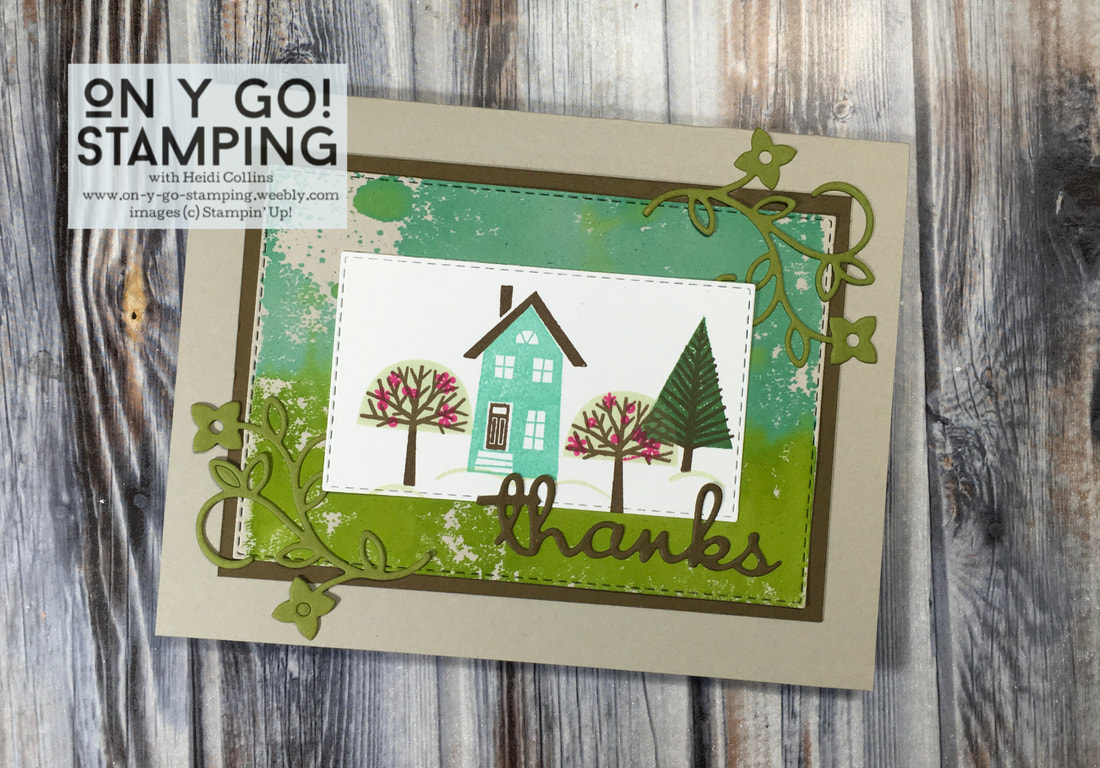
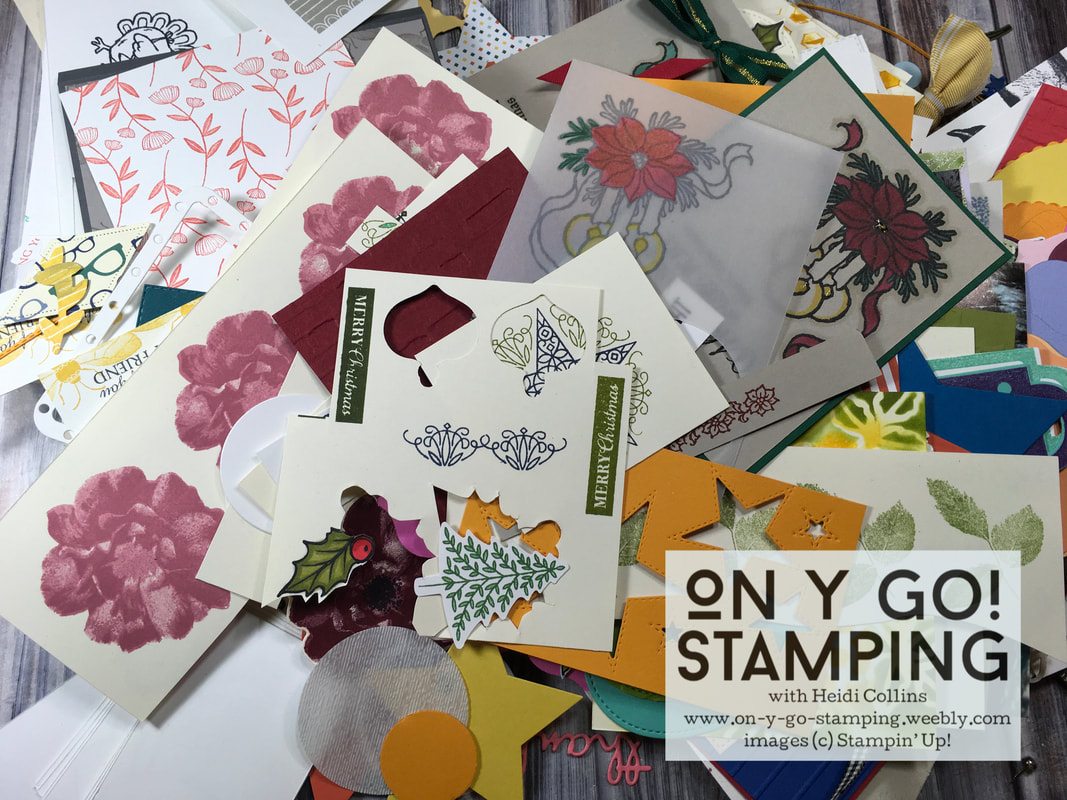
My scrap bin was bursting with discarded images and shapes, and this snowy weekend seemed like the perfect time to turn them from trash to treasure!

Whenever I am stamping, I put any stamped images or die-cut shapes that I decide not to use for whatever reason into a small tub. My thought is that someday, I will come back and do something useful with those pieces. Today was that day. 

I started by dumping out the contents of my scrap bin on my stamp table. I sorted through everything by putting like shapes and images together. I also started putting aside bits and pieces that I was most interested in working with. I put a few things neatly back in the tub right away, knowing that it was not yet time to transform them into a beautiful card. Then, I got to work. 
Picture
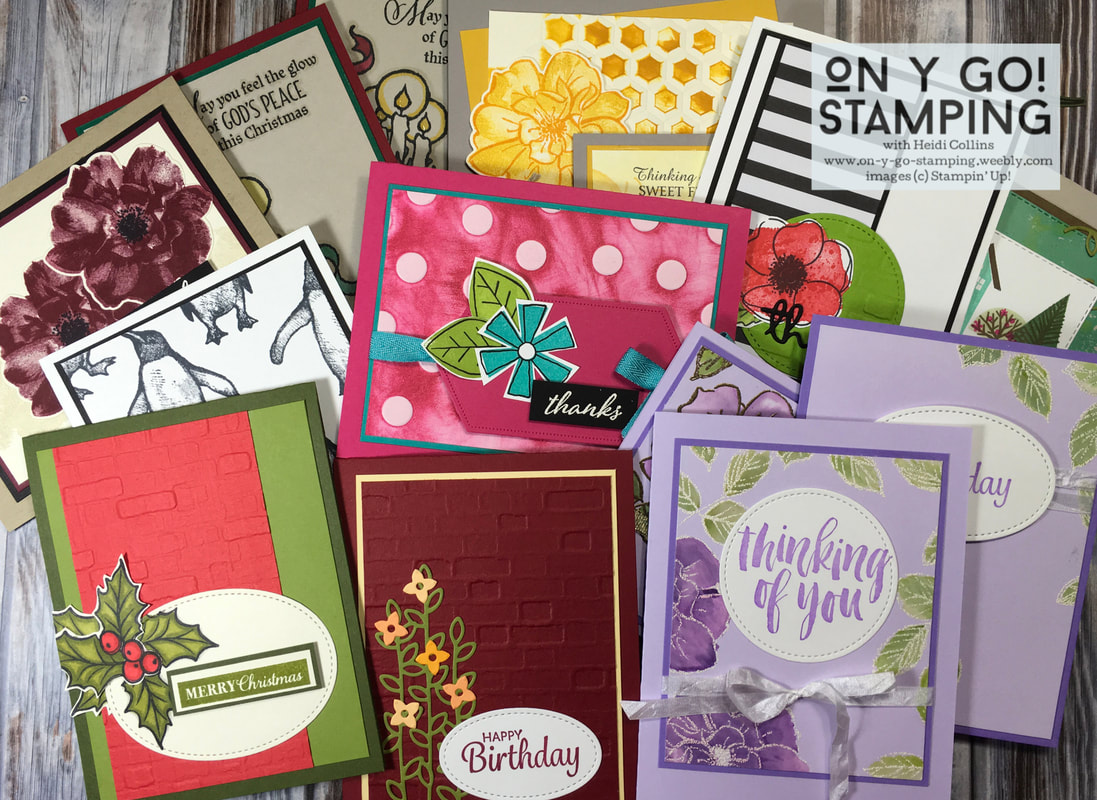
I quickly made over a dozen cards. I'm going to showcase a few below and others will be the subject of upcoming blog posts. So, if you see a card you like that's not explained below, be sure to subscribe to my newsletter to get updates about my blog. 
​
Picture
For this birthday card, I used die cuts from the Well Written stamp set to create flowers growing on a brick wall. I embossed the Cherry Cobbler cardstock with the Brick and Mortar 3D embossing folder. The greeting is from the Here's a Card stamp set and is stamped with Cherry Cobbler ink on a piece of Whisper White cardstock cut with the Stitched Shapes dies. The brick background is mounted on a piece of So Saffron cardstock. The vine is Old Olive cardstock and the flowers are cut from various colors of retired yellow cardstocks. 
This thank you card features flowers from the To a Wild Rose stamp set stamped with Merry Merlot ink. They were cut with the Wild Rose dies. The background is stamped in Crumb Cake ink with stamps from the retired Beautiful Blizzard stamp set. The "thanks" is embossed with White embossing powder and comes from the Here's a Card stamp set. The card uses Very Vanilla, Merry Merlot, Crumb Cake, and Basic Black cardstocks.
Picture
Picture
This card features the now retired Playful Penguins stamp set from the Holiday 2019 catalog. I stamped them with Tuxedo Black Memento ink on Whisper White cardstock. The greeting is from the To a Wild Rose stamp set and is stamped on an oval cut with the Stitched Shapes dies. The silver ribbon is some very old, retired Stampin' Up grosgrain ribbon. 
Most of the items on this card retired years ago like the Shapes and Shadows stamp set. The Bermuda Bay ribbon and Polka Dot embossing folder retired more recently. But, the inks and papers are mostly current.

To create the background, I dabbed my Melon Mambo ink pad on the Polka Dot embossing folder before using it to emboss a piece of retired pink cardstock. The images are stamped with Bermuda Bay and Granny Apple Green ink. The shape under the flower was cut with the Stitched Nested Labels dies. The greeting is from the Here's a Card stamp set and is embossed with White embossing powder on Basic Black cardstock. The card front is mounted on Bermuda Bay and Melon Mambo cardstock.
Picture
Picture
The last card I have to show today uses the now retired From Our House to Yours stamp set from the 2019 Holiday Catalog. The images are stamped with Coastal Cabana, Soft Suede, Soft Sea Foam, Melon Mambo, and Garden Green ink. The greeting and vines are cut with the Well Written dies. The card uses Sahara Sand, Soft Suede, Whisper White, and Old Olive cardstock. 

To create the background, I took a clear acrylic block and applied ink directly to the block. I put Granny Apple Green on one side and Coastal Cabana on the other. I spritzed it with water and let the inks run together a bit. Then I stamped the acrylic block directly on the cardstock and let it dry. I cut it using the Stitched Rectangle dies. 

Even after putting together over a dozen cards, my scrap bin is still full! I'll need to spend some more time crafting with my leftovers. Do you have a scrap bin? I'd love to hear about your creations in the comments below.
Purchase Stampin' Up! Product (January Host Code: 64VNA3YR)
0 Comments

Stampin' Friends Blog Hop: Birthday Bash!

1/16/2020

32 Comments

 
Picture
I'm so excited to be participating in the Stampin' Friends Blog Hop this year! Our first hop of 2020 is a Birthday Bash. All of the bloggers have created some amazing projects to share with you that are perfect for celebrating birthdays. I hope you'll click through and check them all out! The next blogger on the hop is Maureen Rauchfuss. So, when you're done here, hop over to her blog to see the projects she's created!

Picture
Today, I have this fun box that is perfect for holding a gift card and some other surprises! Plus, there's an additional card after the instructions for this project, so be sure to scroll all the way through.

Before you read any further, check out this short YouTube video to see the box being opened! I'll wait...
Picture
Isn't that super fun?!? I love the excitement of sliding out the box bottom and having the four interior boxes pop out everywhere! It's a great way to add a little pizzazz to giving a gift card or a birthday message. I found this neat project in a blog post by Krystal of Red Hot Stampers. I have rewritten and adapted parts of her tutorial, but you might want to jump over there and see her take on it. 
Supplies needed:
  • 3 sheets of cardstock
  • Strong adhesive (Sticky strip, Tear & Tape, etc.)
  • 4 medium-ish rubber bands
Picture
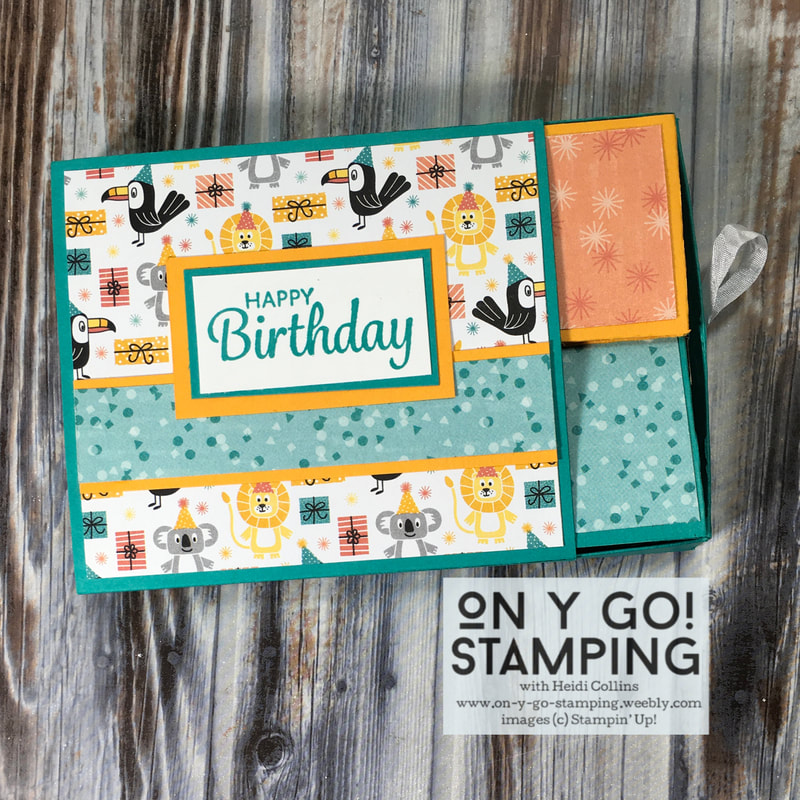
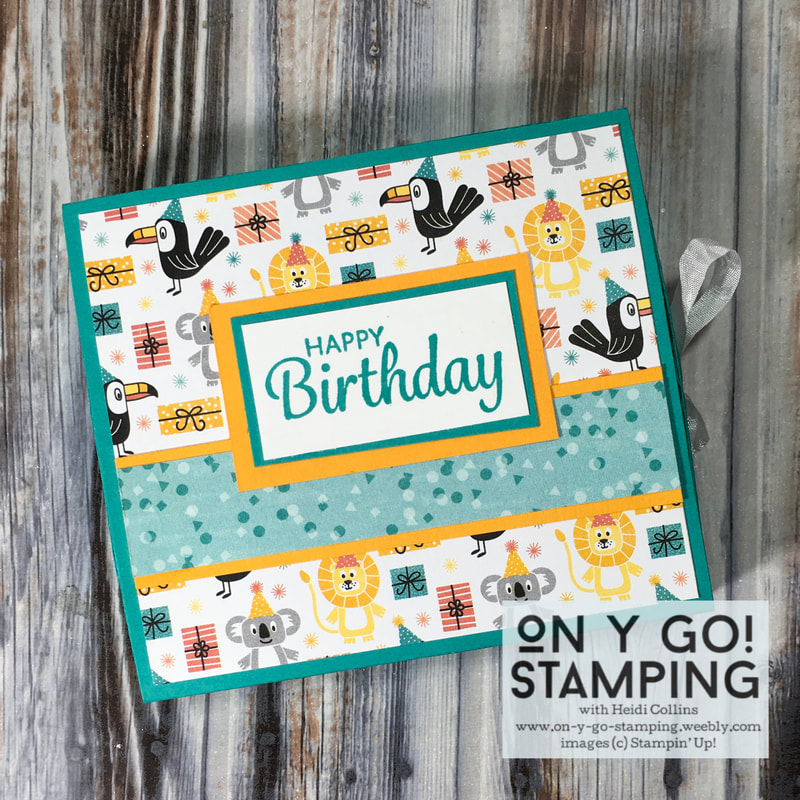
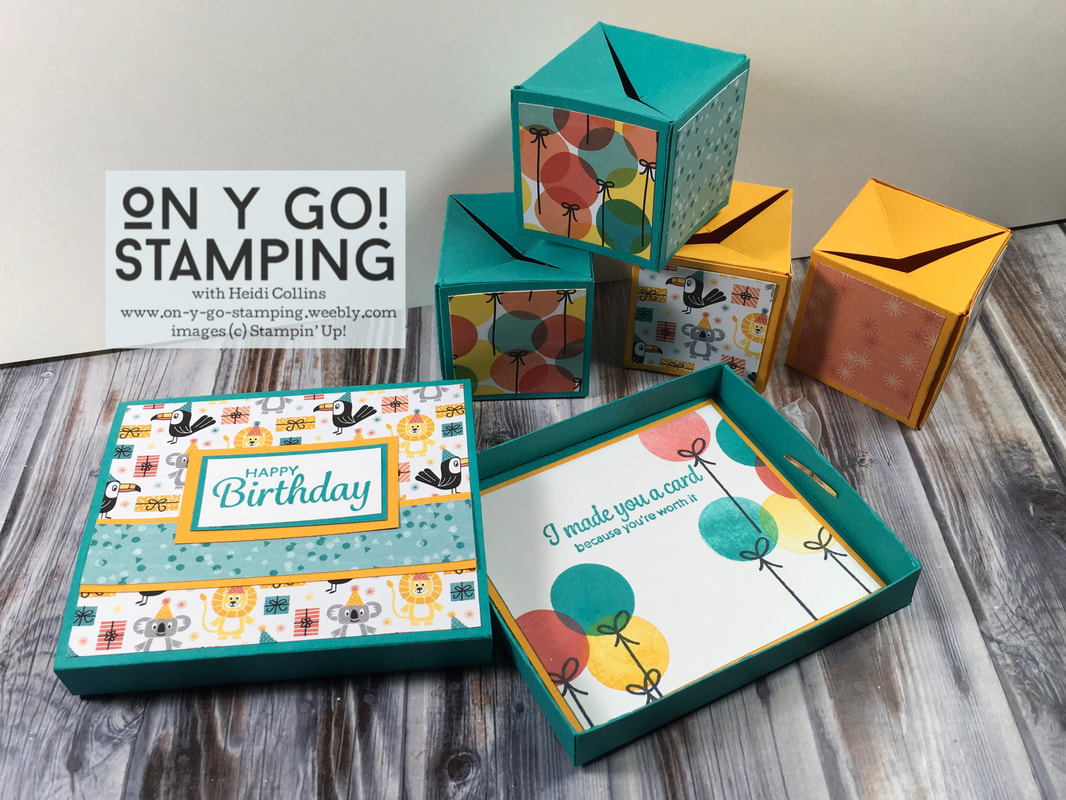
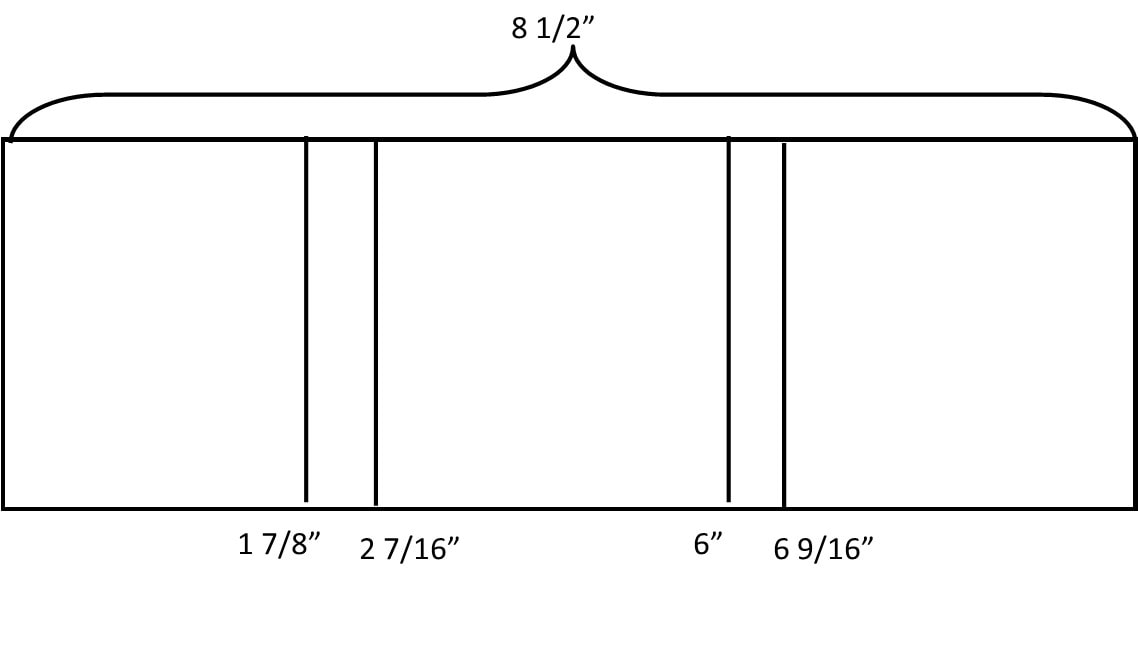
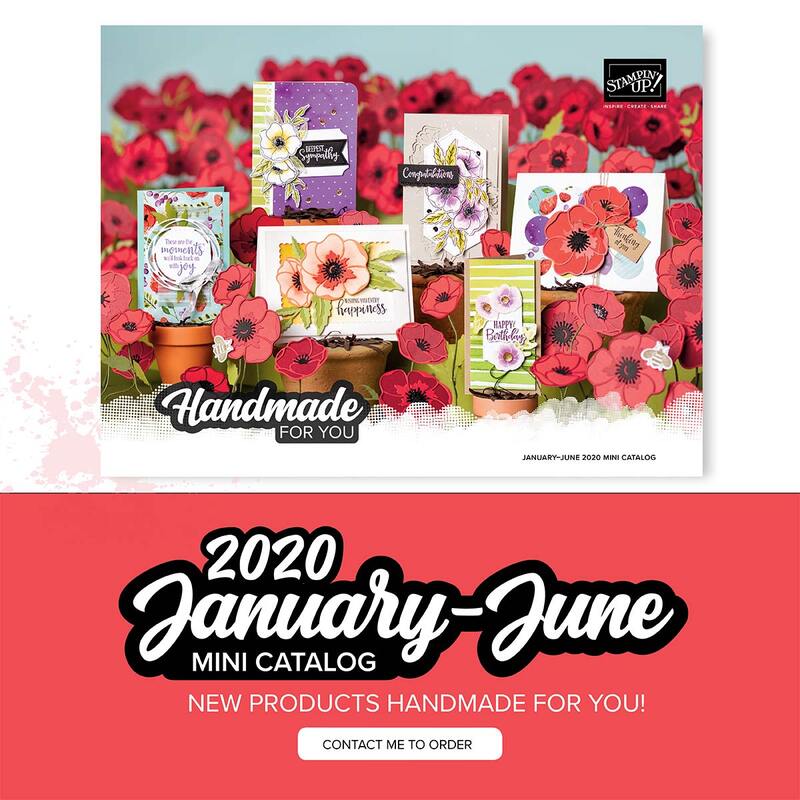
I've decorated my box with the Birthday Bonanza Designer Series Paper from the January - June 2020 Mini Catalog and the Here's a Card stamp set. On the inside of the box bottom, I used the Broadway Birthday stamp set. The cardstock is Mango Melody and Bermuda Bay. I used these same colors for the ink as well as Terracotta Tile and Tuxedo Black Memento ink.
Video tutorial for completing the Pop-Out Boxes
There are three parts to this project: The box bottom, the band that goes around the box bottom, and the four pop-out boxes.
​

Picture
Picture
Picture
For the box bottom:
  1. Cut 1 piece of cardstock in half at 5 1/2" (like you would for a basic card base)
  2. Trim one piece to 5 1/2" x 6"
  3. Score each of the 4 sides at 1" and slightly under 1/2"
  4. Trim each corner like the photo to the left. 
  5. Fold the edges towards the inside.
  6. Then, add adhesive to the outside of the corner tabs and the inside of outermost edges. (See the 2nd and 3rd photos to the left.)
  7. Fold the tabs in and secure them.
  8. Then, fold the edges over the sides and secure.
  9. Add decoration to the inside box.
  10. Optional: Secure a piece of ribbon with a brad to the right side to help with sliding the box out. 
For the outer band:
  1. With the other half of the cardstock you used to make the box, trim it down to 4" x 8 1/2".
  2. Score along the 8 1/2" side (the long side) at 1 7/8", 2 7/16", 6", and 6 9/16".
  3. Decorate as you wish!
  4. Crease all of the lines with a bone folder.
  5. Wrap the band around the box. Make sure it's not too tight so that you can easily slide the box bottom out. Adhere the overlapping flap at the back.
Picture
Picture
For the Pop-Out Boxes:
  1. Cut 2 pieces of cardstock into two pieces that are 5 1/4" x 8 1/2".
  2. Score along the 5 1/4" side (the shorter side) at 1 3/4" and 3 1/2".
  3. Score along the 8 1/2" side (the longer side) at 1 3/4", 2", 2 1/4", 4", 5 3/4", 6", 6 1/4", and 8".
  4. The four pieces of cardstock should have score lines that look like the picture to the left.

Picture
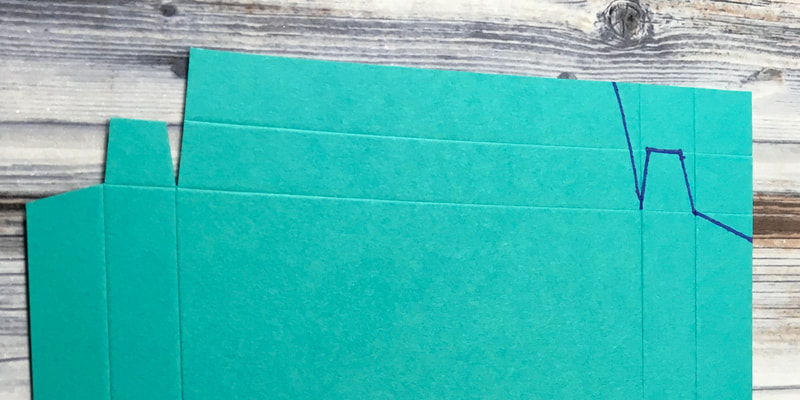
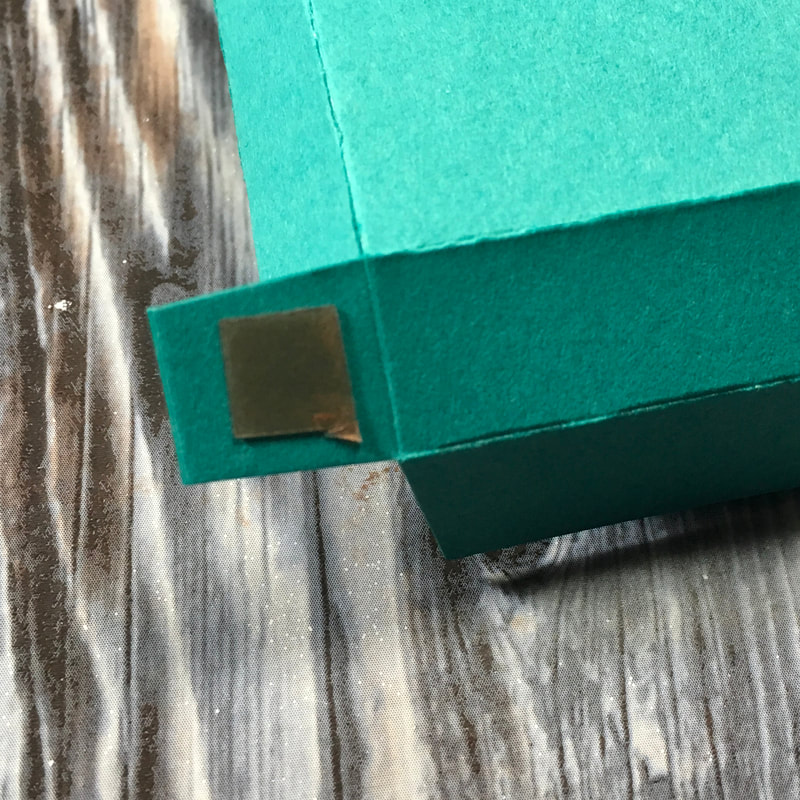
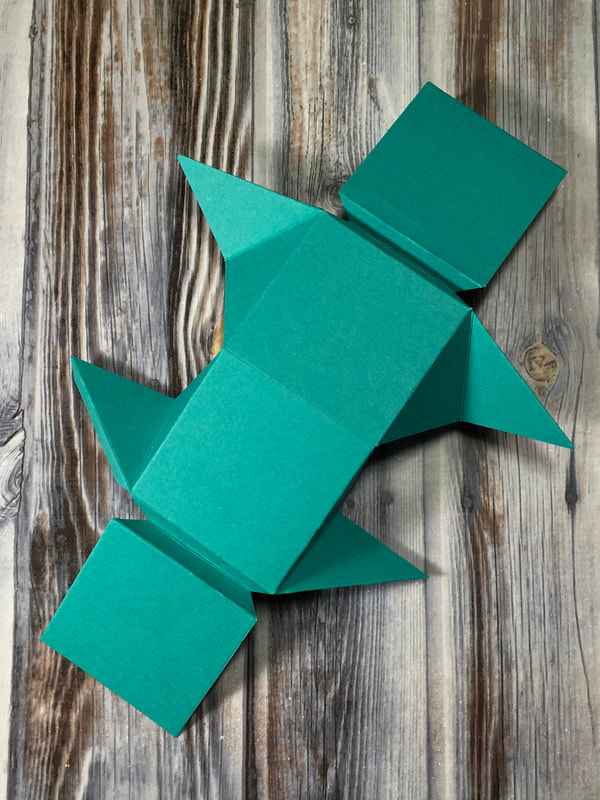
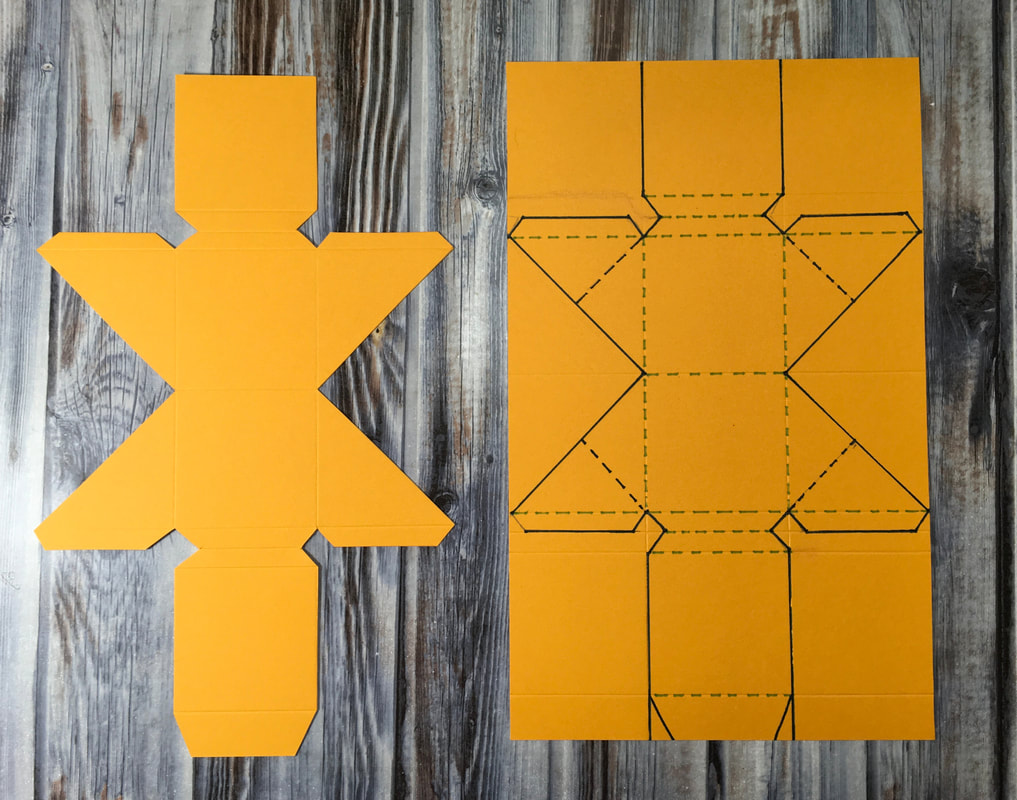
5. Cut the corners out like the picture above. The solid blue lines are the cut lines. The dotted green lines are fold lines that you have already scored.
6. You will notice there are dotted blue lines that create triangles inside the triangular shapes at the sides. You will need to score these. I find the middle of the diagonal line and then score from that point to the opposite corner of the triangle. 

7. Now fold on all of the score lines. Make a good crease with a bone folder. Where there are three score lines in a row together, you are going to create a small accordion. The triangular areas also make a sort of accordion with the folds going opposite directions. Your piece of cardstock should look like the photo to the right when you have creased it. 

8. If you'd like, you can jump over to my video on YouTube to see how I put the boxes together. 

9. Take your rubber band and put it into one of the accordion folds on the side. Then, adhere the two triangles on that side. 
​
Picture
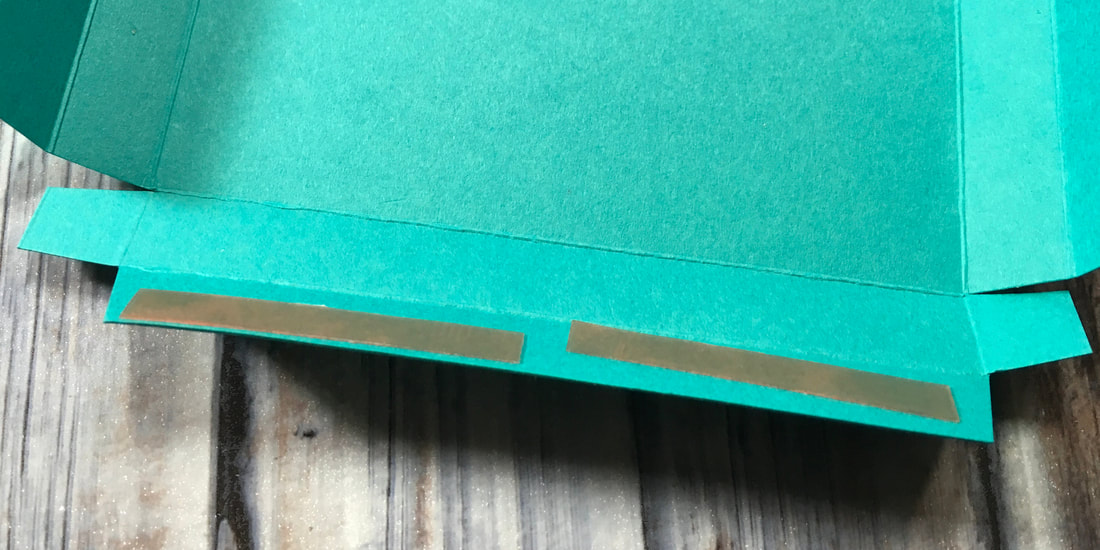
10. Twist the rubber band and slide it over the other side and into the accordion groove. Then, adhere the two sides of the triangles on that side.

11. Finally, adhere the flap on the end to close the box. 

12. Decorate the outside of the boxes as you wish. I used the Birthday Bonanza Designer Series Paper from the January - June 2020 Mini Catalog. ​

13. Collapse the pop-out boxes by pinching the sides and close them inside the slide-out box bottom and sleeve. 

14. Give to a friend and wait for the surprise!   
Picture
While the Birthday Bonanza patterned paper was created to match Bonanza Buddies stamp set from the January-June 2020 Mini Catalog, I love that it perfectly matches the balloons in the Broadway Birthday stamp set from the Annual Catalog. For this card, I used cardstock and ink in Bermuda Bay, Daffodil Delight, and Terracotta Tile. I colored over the die-cut "Wish" with my Wink of Stella pen to give it a dazzling shimmer. Quick and easy!
​
Picture
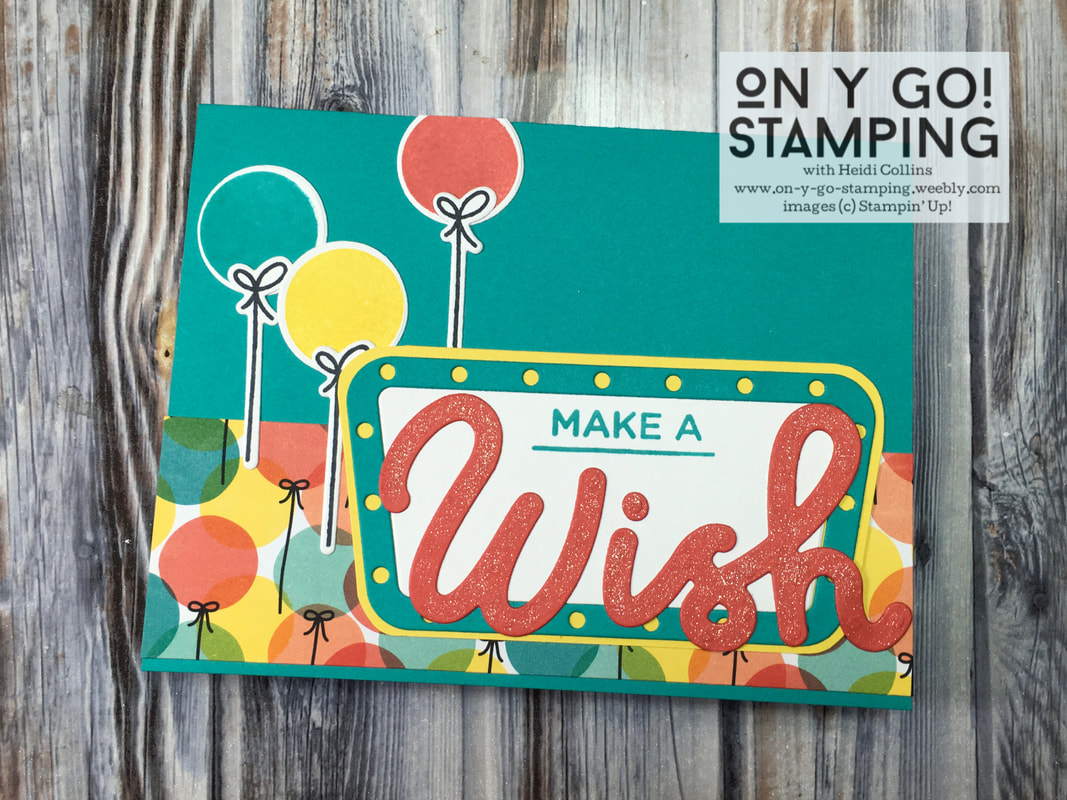
I hope you've enjoyed this box project and card as much as I do! Thanks for visiting the blog today and make sure to go take a look at all the projects on this month's hop!

1. Rachel Rife
​
2. Kim Lamos
3. Teri Pocock

4. ​Cheryl Taylor
5. Jo Blackman
6. Steph Jandrow
7. Katja Ettig
8. Lisa Ann Bernard 
9. Kim Quade
10. Heidi Collins <-- You Are Here!
11. Maureen Rauchfuss
12. Jean Bolen Beaulieu
13. Anne Marie Hile
14. Barbara Welch 
15. Melissa Thomas
16. Sue Vine
Picture
If you'd like to purchase any of the products in this post (or other stamping supplies!), please visit my Stampin' Up! online store. 
On Y Go! Stamping Online Store
The host code this month is: 64VNA3YR. Every order over $35 using this code receives a special gift from me! 

As always, I love to answer questions or help other stampers, so leave me a message or send me an email. 
32 Comments

Painted Poppies Virtual Stamp Class

1/12/2020

0 Comments

 
Picture
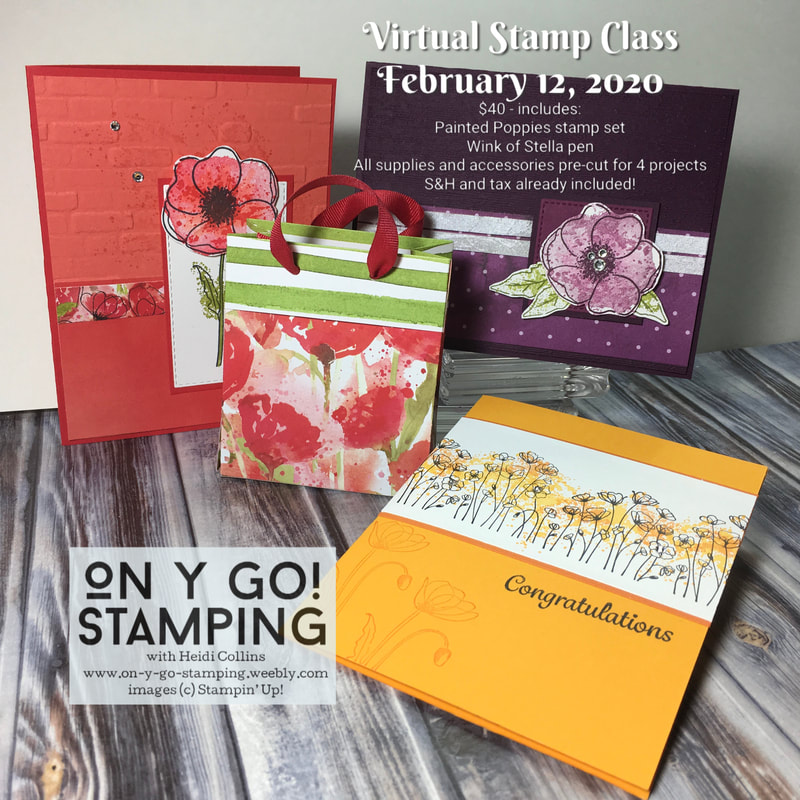
I will be doing a Virtual Stamp Class as a Facebook Live event on February 12. Through a series of live Facebook videos, I will be demonstrating these four projects. There will also be specials, games, and all the fun stuff of a stamp class! If you'd like to join me, please RSVP to my Facebook event. 
Facebook Event Page
If you'd like to stamp along with me during the class (or after), you can order a Make-n-Take kit for only $40. The kit includes the Painted Poppies stamp set, a Wink of Stella pen, and all of the cardstock and accessories to make all four projects. Be sure to order by January 25, 2020 to have your kit in time for the Facebook Live event. You can find more details on the Card Classes by Mail page. 
E-Mail me to Order the Make-n-Take Kit
0 Comments

2020 January - June Mini Catalog is Live!

1/5/2020

0 Comments

 
Picture
The new 2020 January-June Mini Catalog from Stampin' Up! is now available. If you are in the US and haven't received one, and would like one, please let me know. I would be happy to send you one! Or click the link below to see the catalog online.
2020 January-June Mini Catalog
There are so many beautiful stamps, accessories, and samples in this catalog! I think it is one of my favorite mini catalogs ever.
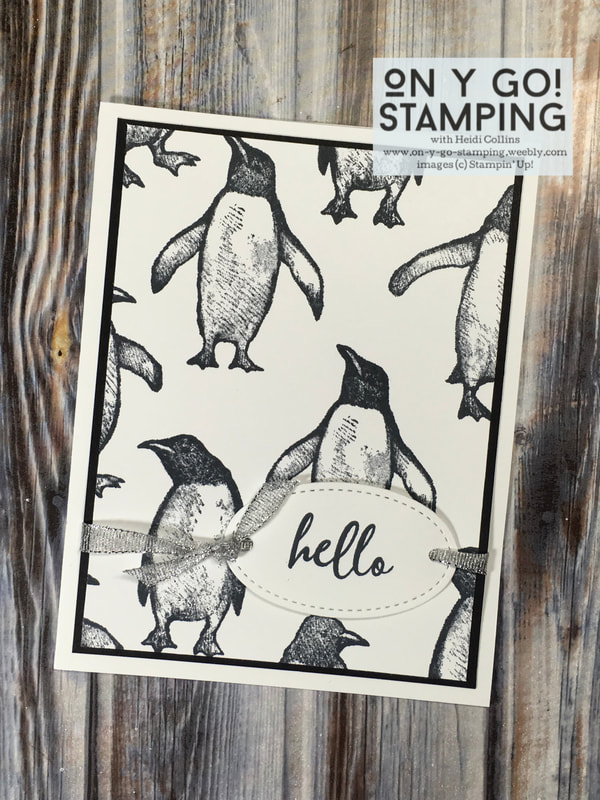
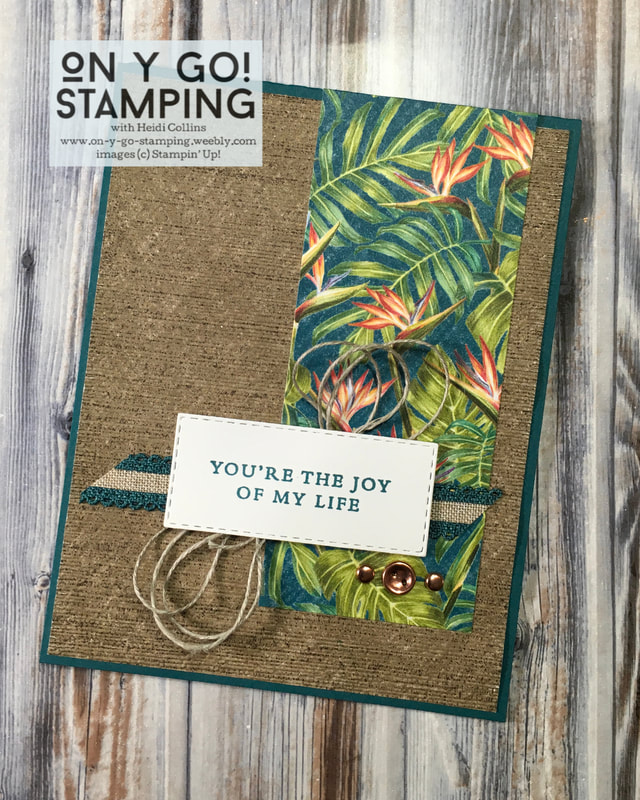
I finally got a chance to sit down and play with some new Designer Series Paper yesterday. Sometimes, the patterned paper is so pretty that all it needs is the addition of a sentiment to create a beautiful card. That is what I did here.

I combined the Tropical Oasis Designer Series Paper with a greeting from the Parisian Beauty stamp set. The Soft Suede background is a piece of the patterned paper. To give it even more texture, I embossed it with the Subtle 3D embossing folder. The photo fails to really capture the depth this gives the card.

I added another strip of the patterned paper on the right hand side. I stamped the sentiment with Pretty Peacock ink on Whisper White cardstock and cut it with one of the Stitched Rectangle dies. 
Picture
Using dimensionals, I layered the sentiment on ribbon and linen thread from the Annual Catalog. I also added three copper brads below the sentiment. The whole card front is attached to a Pretty Peacock card base. This truly is a quick and easy card that still has loads of texture and interest!
0 Comments
<<Previous
Forward>>
    Heidi Collins, Independent Stampin' Up! Demonstrator with On Y Go! Stamping
    Get updates and ideas on my Facebook group
    Heidi Collins, Independent Stampin' Up! Demonstrator and Owner of On Y Go! Stamping
    Get a 6 x 6 sample of all of the new patterned papers from the 2022-2023 Annual Catalog. Plus, a free invitation to a Sneak Peek Virtual Pajama Party to see card making demonstrations using all new products.
    Shop for Stampin' Up! stamps, inks, paper, tools, and embellishments with Heidi Collins and earn points towards FREE stamps!
    Picture
    On Y Go! Stamping YouTube channel with Card Making Videos on how to do rubber stamping, card making, scrapbooking, and paper crafting

    Archives

    June 2022
    May 2022
    April 2022
    March 2022
    February 2022
    January 2022
    December 2021
    November 2021
    October 2021
    September 2021
    August 2021
    July 2021
    June 2021
    May 2021
    April 2021
    March 2021
    February 2021
    January 2021
    December 2020
    November 2020
    October 2020
    September 2020
    August 2020
    July 2020
    June 2020
    May 2020
    April 2020
    March 2020
    February 2020
    January 2020
    December 2019
    November 2019
    October 2019
    September 2019
    August 2019
    July 2019
    June 2019

Powered by Create your own unique website with customizable templates.
  • Home
  • About
  • Contact
  • Shopping Rewards
  • Shop
  • Join Stampin' Up!
  • Stampin' Up! Catalogs
  • Online Card Classes
  • Ideas & Inspiration
  • Tutorial Store