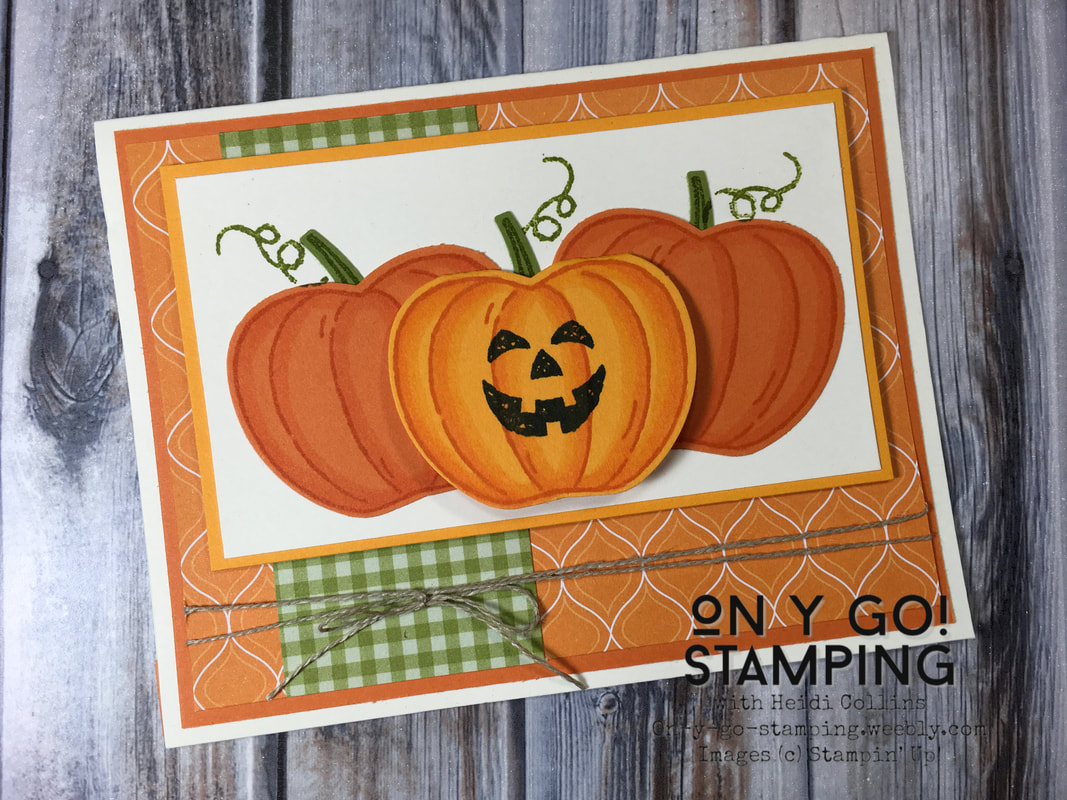
 Last month, I showed you how to make a pumpkin tag using the Apple Builder punch and the Harvest Hellos stamp set in this blog post. Today, I used the same tag on the front of a card to effectively create a mini-card on a card.
The two pumpkins in the back are from Pumpkin Pie cardstock while the one in the front is on Mango Melody cardstock. This helps the pumpkins stand out from one another. The cute little jack o' lantern in front has a smile and flips up to say "You make me smile." I used Regals 6" x 6" Designer Series Paper to finish off the card front and a piece of linen thread. This card ended up so cute and so easy to complete!
0 Comments
 I know this is way late since not only has Rosh Hashanah already passed, so has Yom Kippur. However, earlier this week, I offered to send cards to any of my friends who wanted one as part of World Card Sending Week. A friend of mine who is Jewish requested that I make a card for Rosh Hashanah. Not being Jewish myself, and knowing only the basics of the holiday, and not really having any Jewish stamps, this is what I came up with.
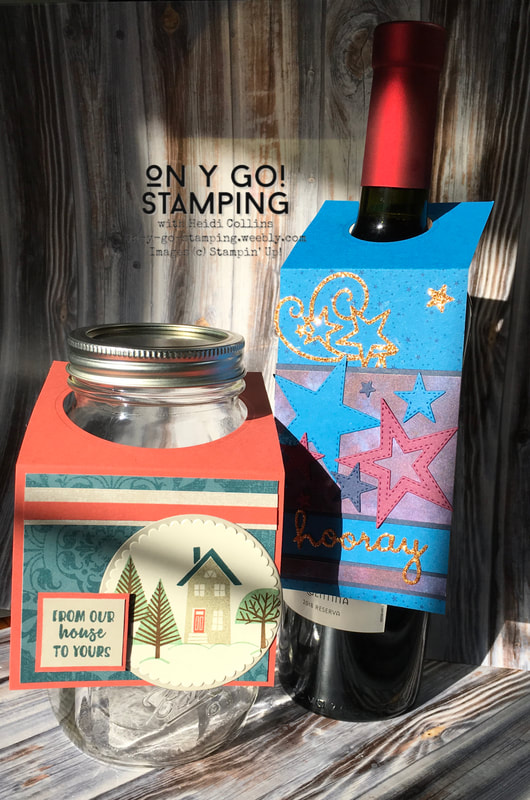
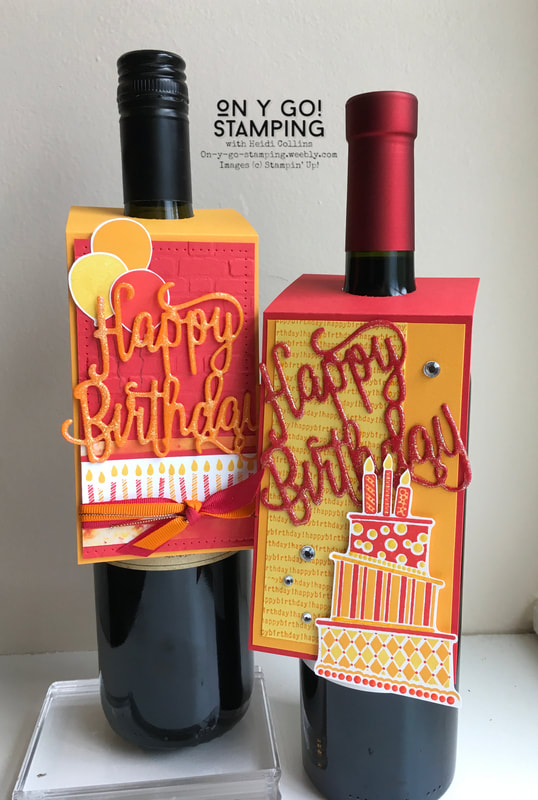
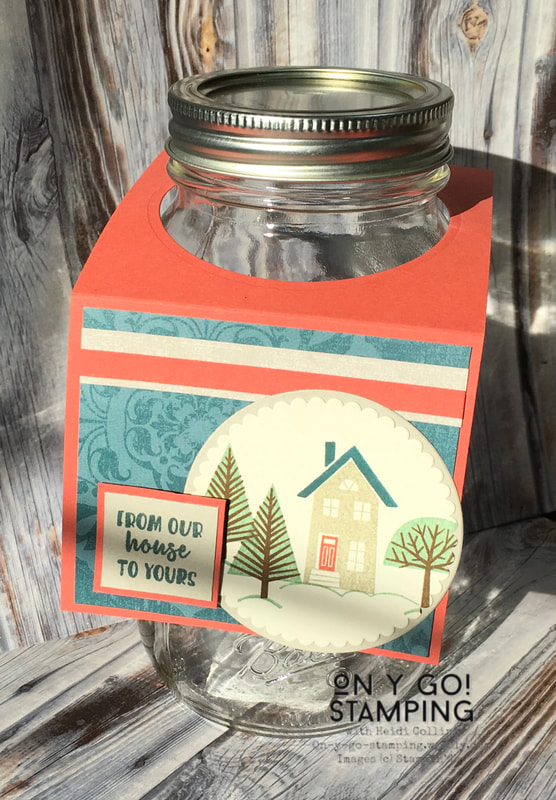
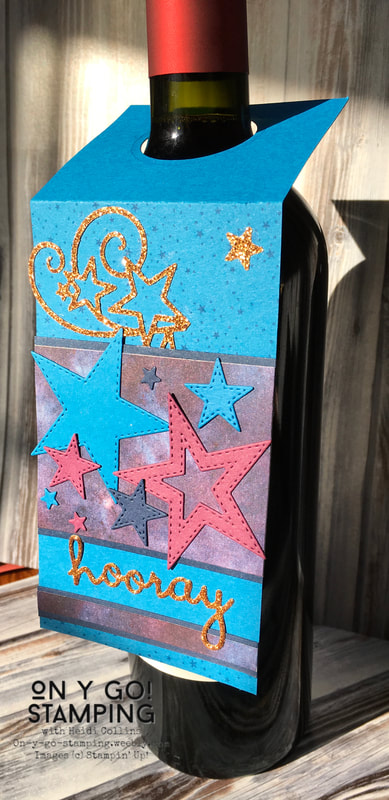
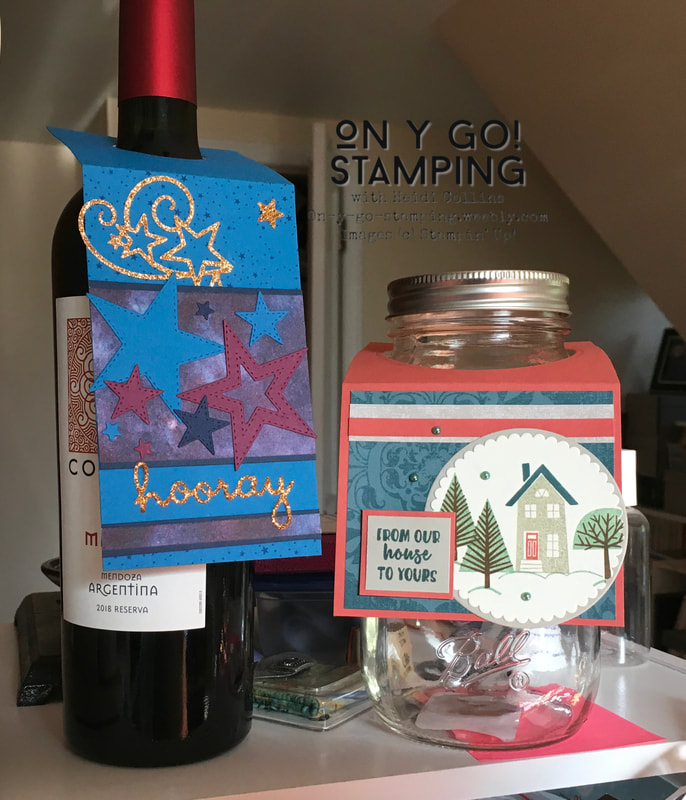
Fast forward to this weekend, my own Mother saw pictures of the tags and mentioned that she wanted to make similar tags for some home-canned items, but she needed directions. So, I decided to see what I could do to help her out. Both of these tags are easy to make. Simply cut a rectangle of cardstock, score where you want the tag to flop over, and cut a hole. Wine Bottle Tag:
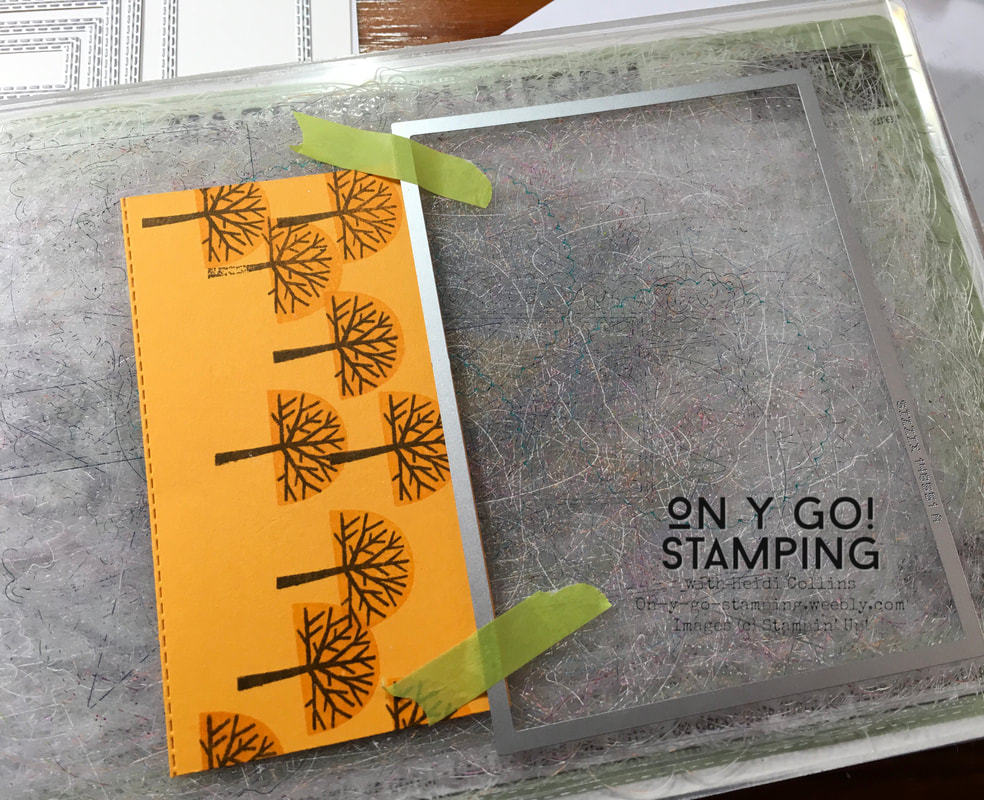
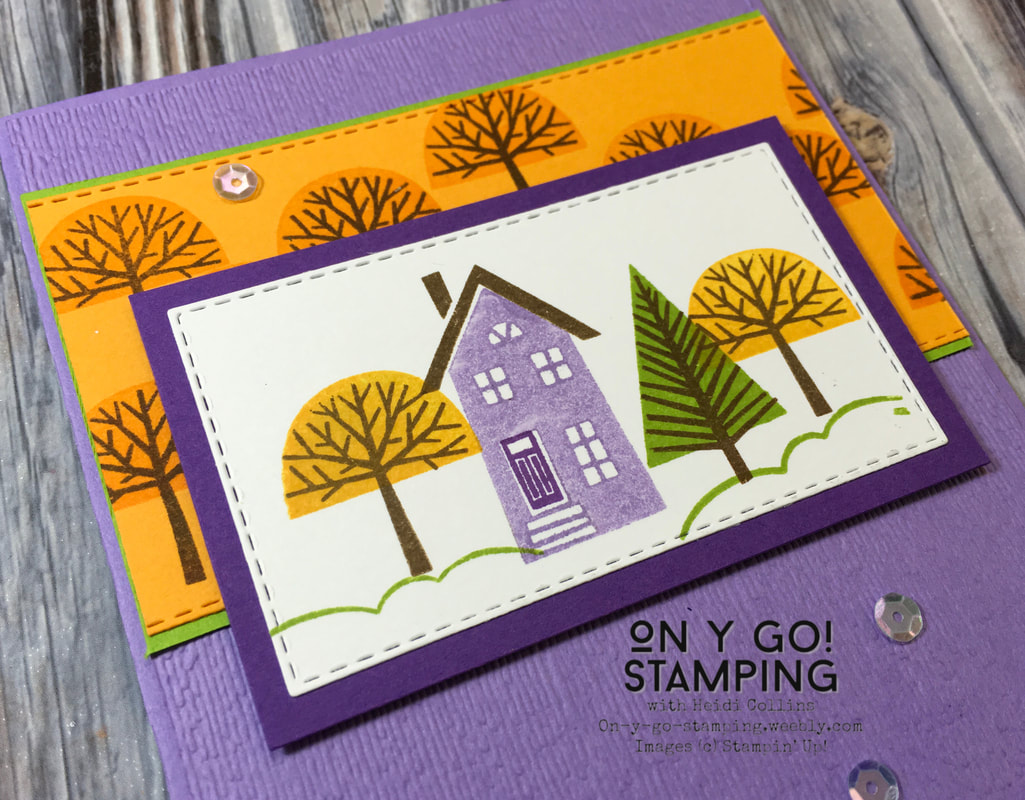
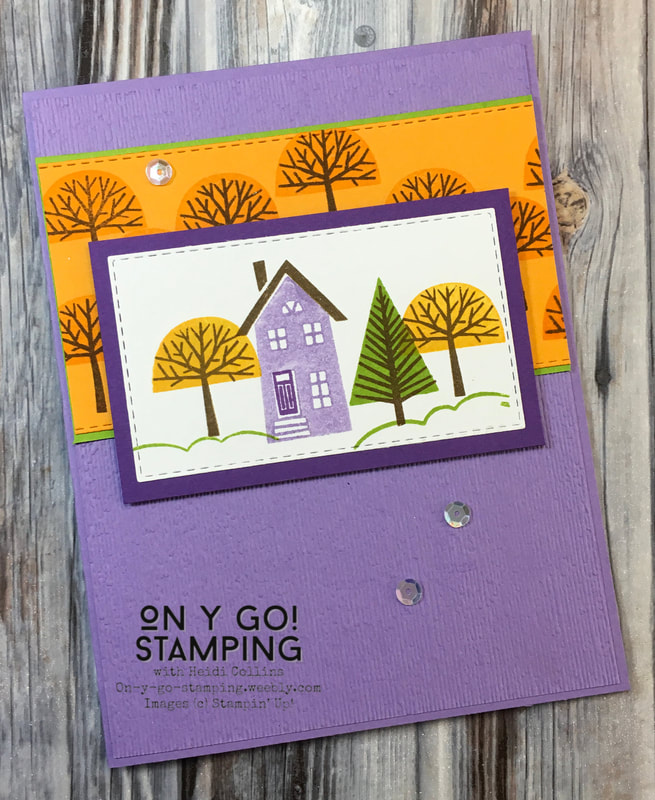 I'm getting my week started and my creative juices flowing with another color challenge from Color Throwdown (ctd563). This week the challenge was to use orange, lavender, purple, and green. Definitely not your typical color scheme! So, I pulled out Mango Melody, Highland Heather, Gorgeous Grape, and Granny Apple Green to create this fun fall card.
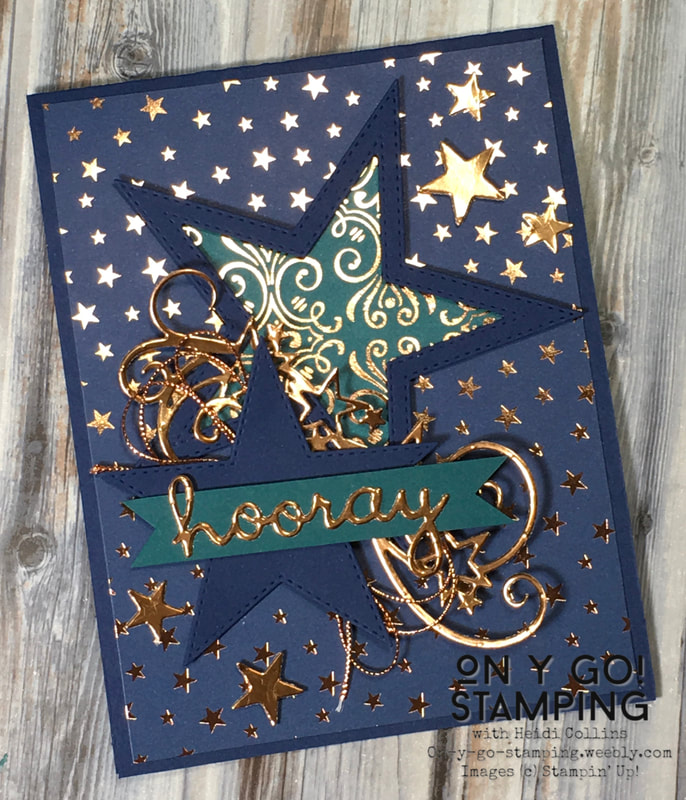
I love the look of the card on the left with a frame around a piece of Designer Series Paper stamped with "I LOVE YOU." I chose to use the Stitched Stars dies and the Brightly Gleaming Designer Series Paper for my card. The Stitched Stars dies are perfect for creating frames similar to the one in the inspiration photo because there are so many sized stars to choose from that nest inside one another. Another advantage of the Stitched Stars dies is that they have "stitching" on both sides of the cut line. This means, when you cut the interior star for the frame, it leaves a stitch line on the star frame. This way, your star frame has stitching on the outside and inside edges.
I used the star I cut for the inside of the frame under the greeting. I also cut the star swirl from copper foil and used the stars that were cut out as accents on the card. I twisted some copper cord from my stash under the greeting that I had cut from copper foil using the Well Written dies. The copper foil matches the Brightly Gleaming Specialty Designer Series Paper perfectly. This card is so sparkly that it was hard to photograph without getting a glare. I love the shine and glamour for a truly special card to celebrate an amazing accomplishment. |


Archives
July 2024
|