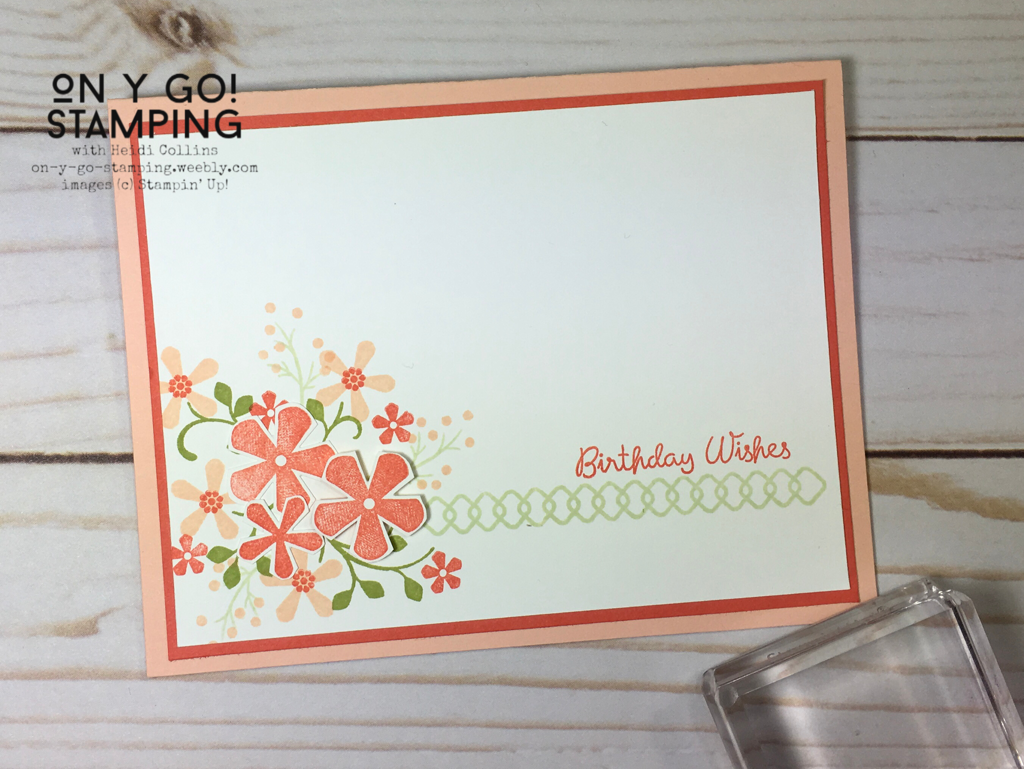
 Spring has sprung! Even though it doesn't feel like it yet here in Michigan. To celebrate, I made three cards using the Thoughtful Blooms Sale-A-Bration stamp set. From Simple using only stamps, inks, and paper, to Chic using punches and ribbon, all the way to Oh là là adding the Stitched So Sweetly dies. All of the cards use cardstock in Petal Pink, Calypso Coral, and Whisper White as well as Petal Pink, Calypso Coral, Soft Sea Foam, Pear Pizzazz, and So Saffron ink.
0 Comments
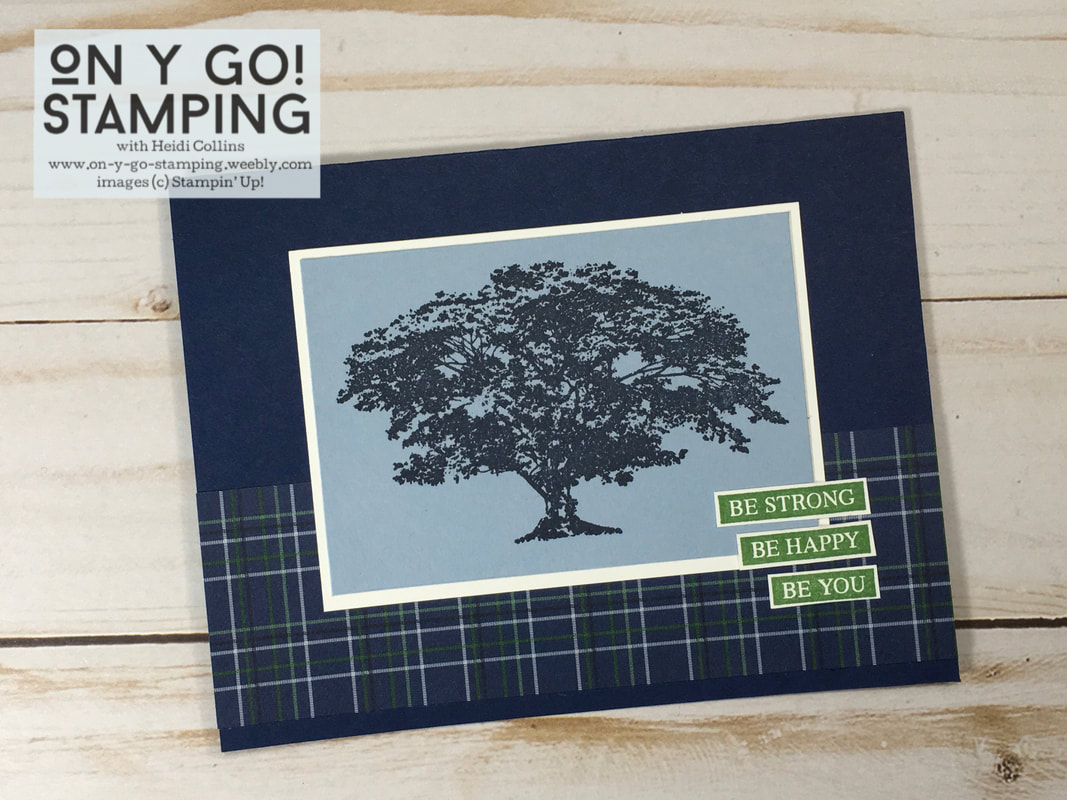
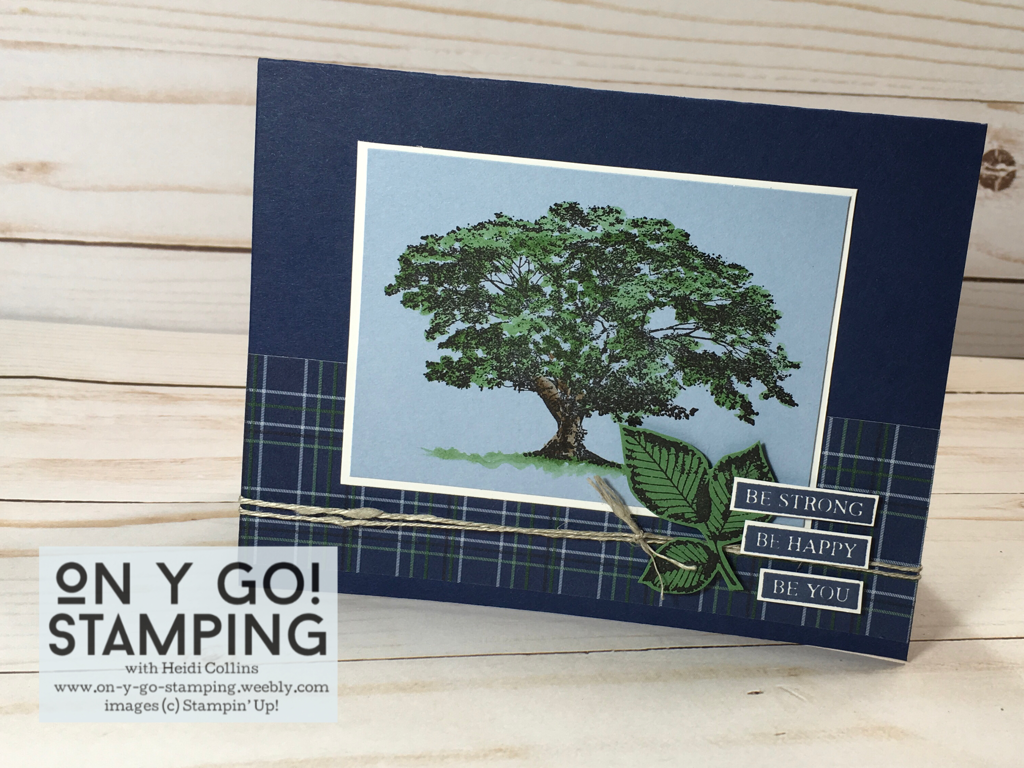
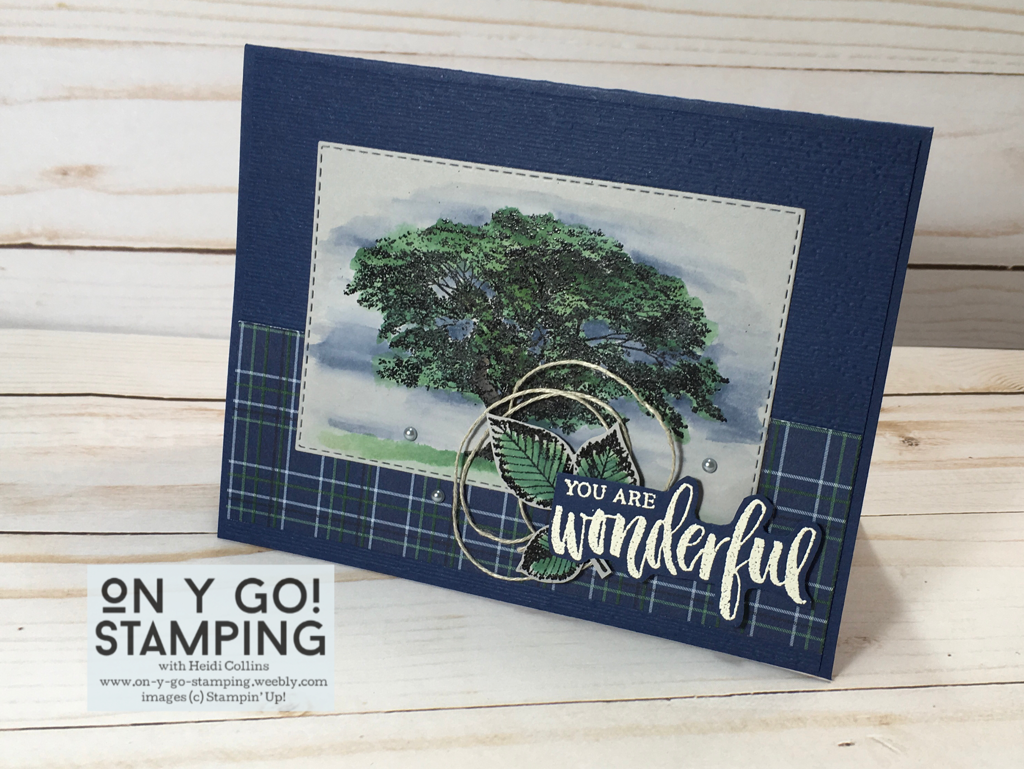
 Whether you're new to rubber stamping and card making or you're a seasoned pro, Rooted In Nature is a gorgeous stamp set that is perfect for making elegant cards for all occasions. Because I'm stuck on plaids right now, I used with a blue plaid patterned paper from the Country Club Designer Series Paper pack. I created three cards that use the same basic layout and go from simple to oh là là!
Tips:
Tips:
Tips:
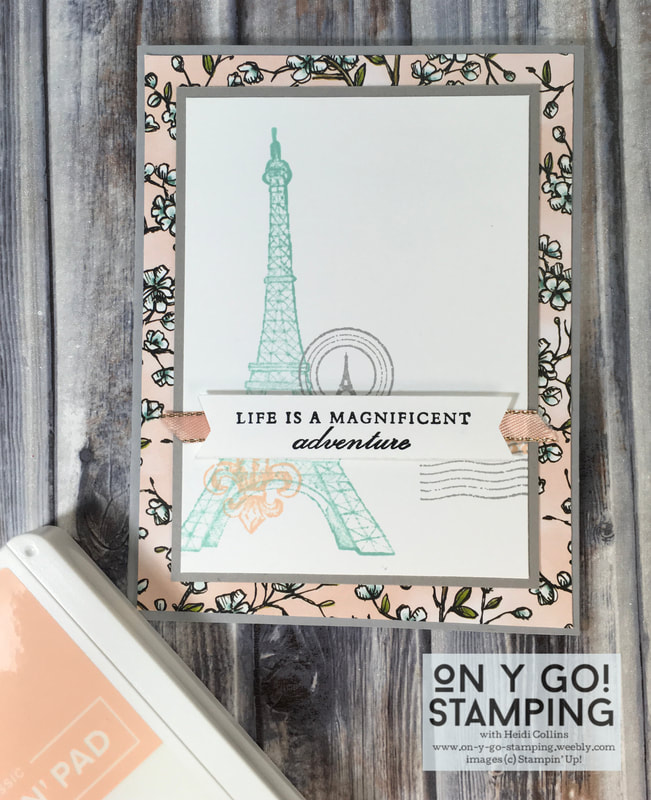
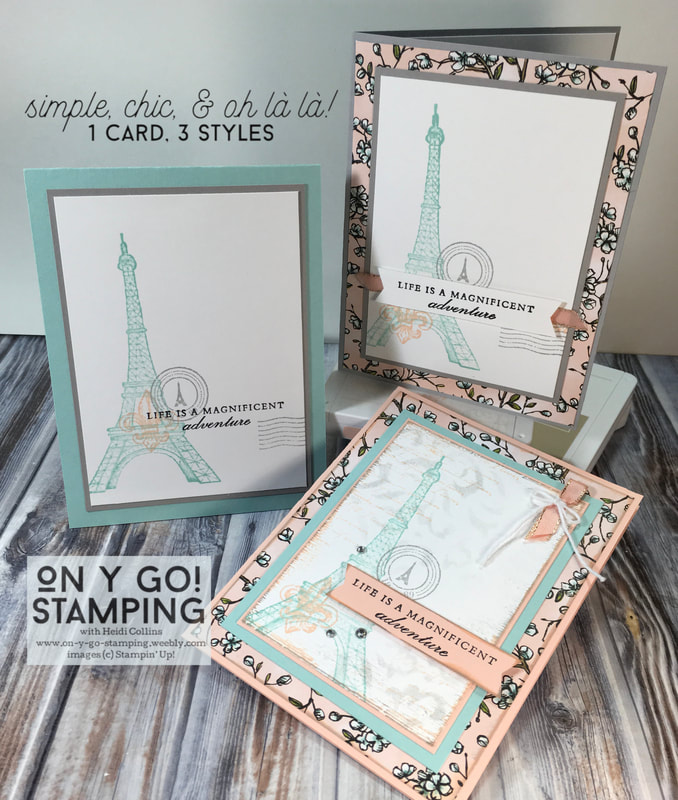 As a Francophile, the new Parisian Beauty stamp set was a must have! It will be available in the new January - June 2020 Mini Catalog, but I just couldn't wait to sit down and have a play with it. And then I couldn't wait to share the results with you! I used this stamp set to create three cards, one that is very simple but elegant, one that has a few more layers or what I like to call chic, and the last one where I pulled out all the bells and whistles, or embossing folders and masks, to create an over-the-top, Oh là là! card. For all three cards, I used a color combination of Pool Party, Petal Pink, and Smoky Slate.
The second card, my chic card, follows the same basic pattern as the simple card, but it has a few more layers. This time, I started with a piece of Whisper White cardstock that was 3 1/4" x 4 1/2". I stamped the same images in the same colors, but I spread out the fleur-de-lis and the circular image slightly so that they would both show up when I added the saying that I had stamped on a separate piece of Whisper White cardstock (5/8" x 3"). I trimmed the ends using the Tailored Tag punch.
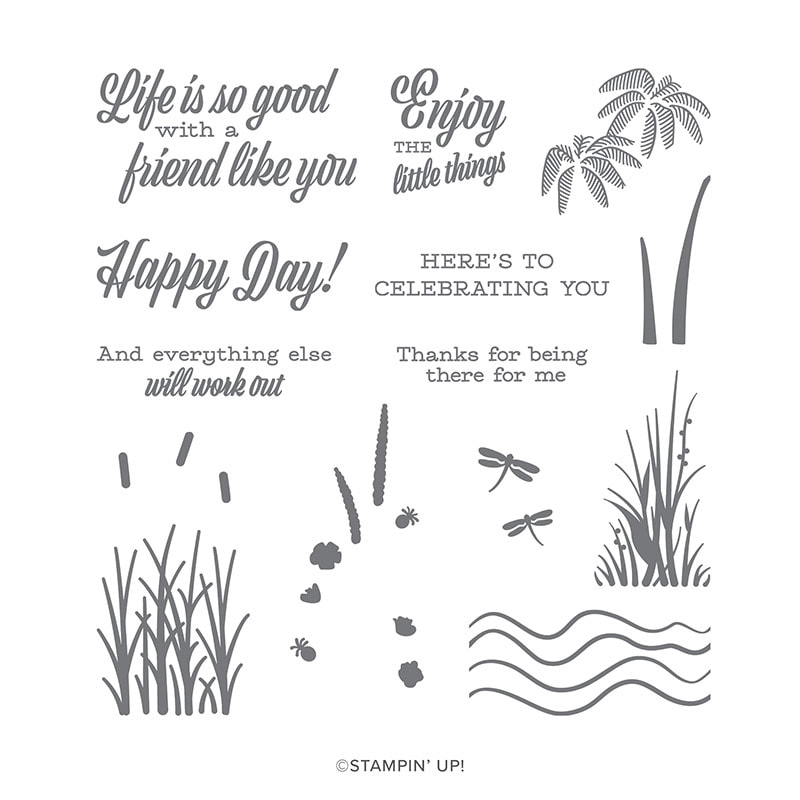
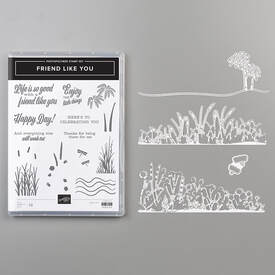
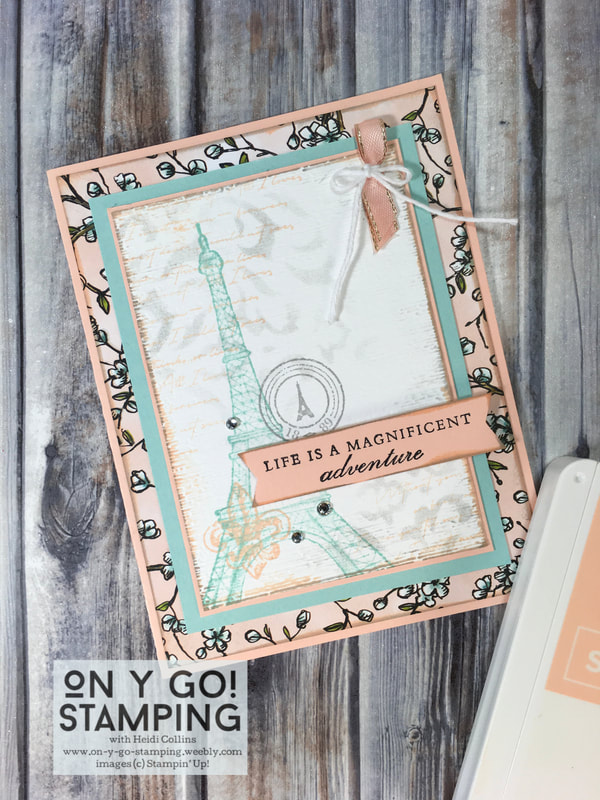 Finally, I pulled out all the stops for my Oh là là! card. Although, as you can see, it still has the same basic imagery stamped on the front, but there is a lot of other stuff going on as well. This time I started with an even smaller piece of Whisper White cardstock (3" x 4 1/4"). I started by using a mask from the set of Basic Pattern Decorative Masks found on page 35 of the Holiday Catalog. I used a sponge dauber to lightly sponge Smoky Slate ink in the upper left and lower right corners. Over this, I stamped the long, hard-to-read sentiment from the stamp set in Petal Pink ink. I stamped off before stamping it each time. Then, I stamped the other images as I had on the previous two cards. I ran this stamped piece of Whisper White through my Big Shot using the Subtle 3D embossing folder. Then I swiped my Smoky Slate and Petal Pink ink pads along the edges to give it a distressed look. I layered it on a piece of Petal Pink cardstock (3 1/8" x 4 3/8"), a piece of Pool Party cardstock (3 7/8" x 4 5/8"), a piece of Bird Ballad DSP (4 1/16" x 5 5/16") whose edges I had also swiped in Smoky Slate and Petal Pink ink, and finally onto my Petal Pink Card Base. I stamped the greeting in black on a small piece of Petal Pink cardstock, clipped the ends with the Tailored Tag punch, and swiped the edges with gray and pink ink. I adhered this to my card with Stampin' Dimensionals so that it was somewhat off-center and across multiple layers. I added three Basic Rhinestones near the greeting, and in the upper right corner, I took a small piece of Petal Pink Metallic-edged Ribbon, folded it in half, tied a piece of White Baker's Twine in a bow around it, and adhered it in place with a glue dot and a little Snail adhesive. This card was definitely not quick, but like the chic card, it wasn't difficult either. It just took a little more time and fussing. The end results were completely worth it though! I can't wait to make more cards with this beautifully elegant stamp set. Did I mention it has matching dies as well? Hopefully, those will be coming to my stamp studio soon! 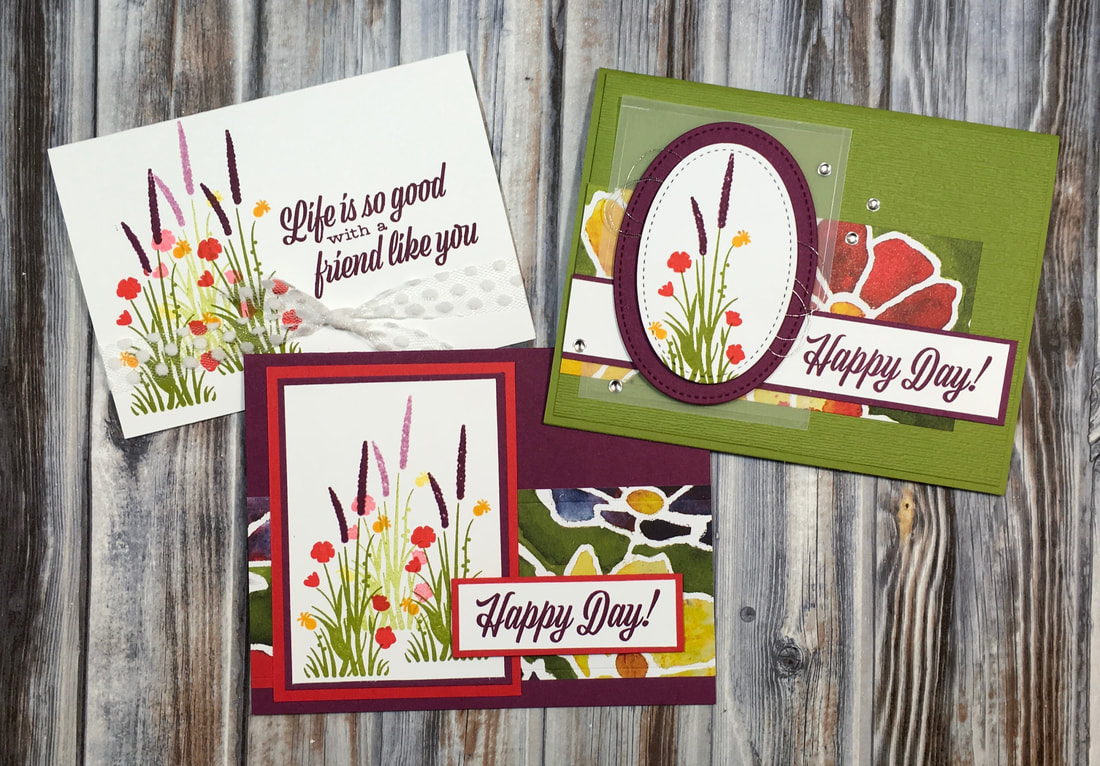 I recently received the beautiful Friend Like You stamp set from a fellow stamper. I was so excited when it arrived in the mail, but I was knee deep in some other projects at the time and had to set it at the back of the stamp table. But today I pulled it out and made three awesome cards that go from simple to Wow! All stamps and supplies used for these cards are available from Stampin' Up! If you are not already working with a demonstrator, I would love to help you purchase these supplies for your own craft room. Just send me a note.
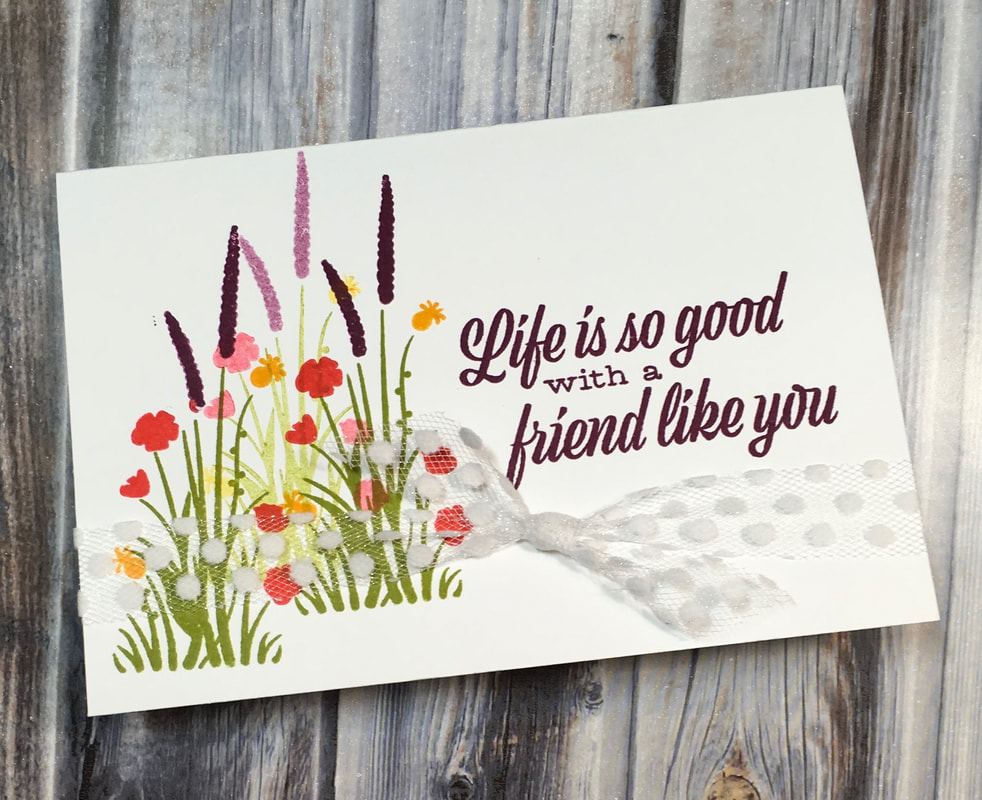
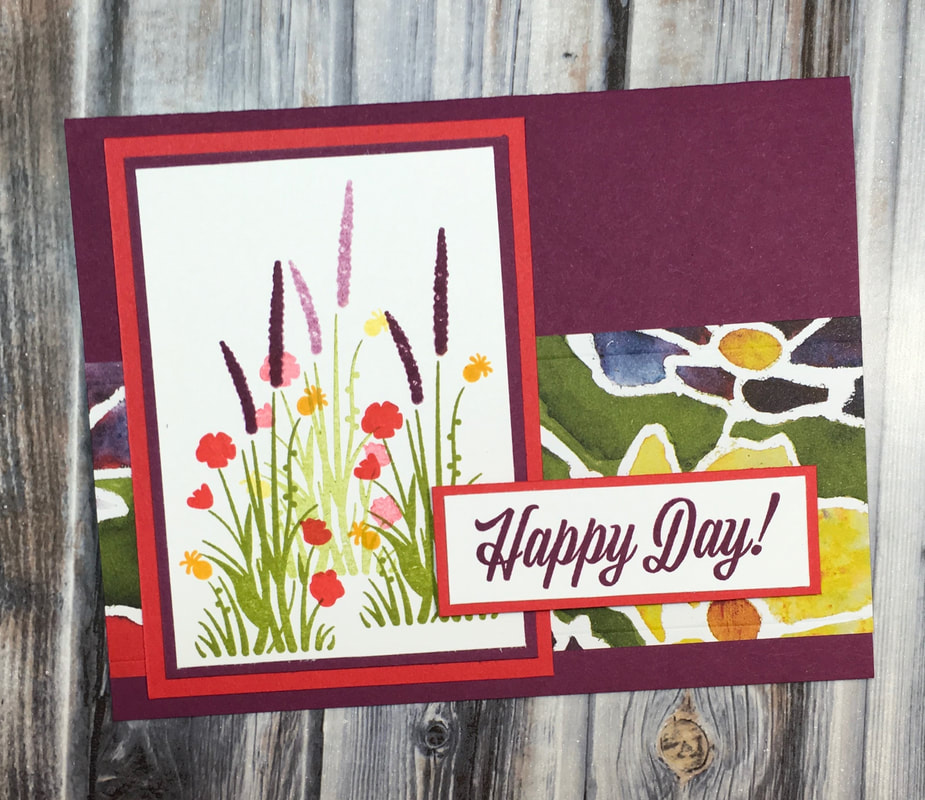
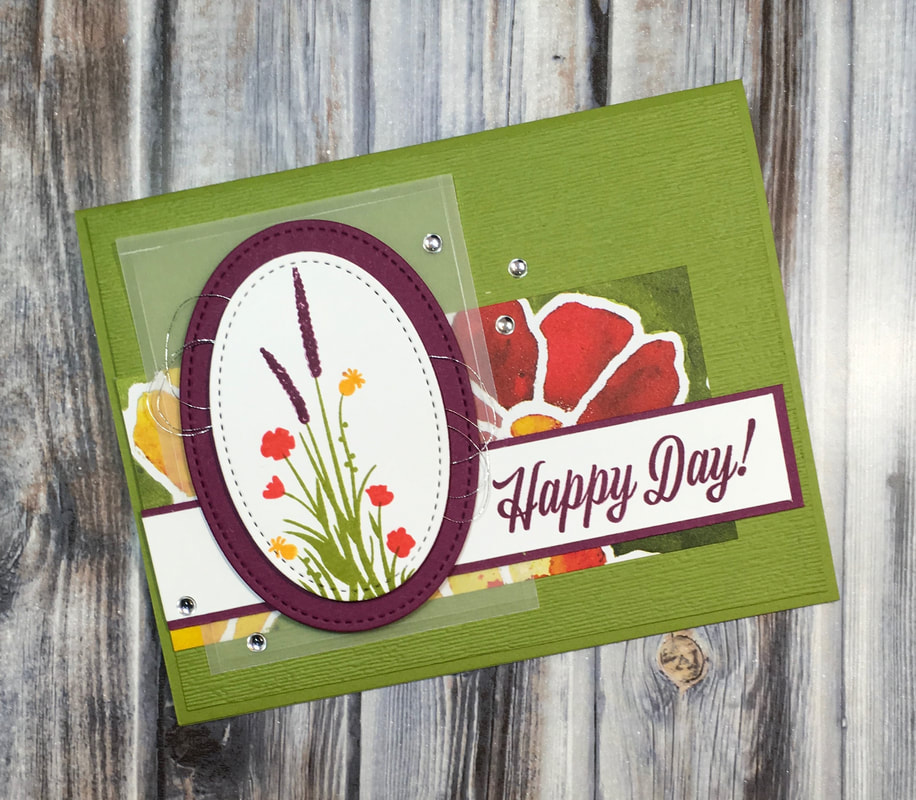
First, I stamped the clump of leaves and stems using Old Olive ink. I stamped once and then stamped a second time further up and to the right to create a more faded image. Then I re-inked the stamp and stamped a third time, again, further to the right, but this time at a height between the first two. To ink the flowers, I very carefully used the corner of my ink pad to ink the flowers in the desired color. This seems tricky, but with this set, it was pretty easy and I didn't experience trouble with ink on the wrong flowers. However, I don't think you could use this technique to get the flowers that are the same color in the samples in two different colors. They are just too close together. I carefully lined up the images over the leaves I had already stamped. Since these are clear photopolymer stamps, it's easy to see through them to get perfect - or nearly perfect - placement. This stamp set is very forgiving, and if the flowers and the stems don't line up exactly, you won't really notice. Like the leaves, I stamped the flowers a second time to get the more pastel version you see in the back. Then I re-inked and stamped a third time. Finally, I added the greeting in Rich Razzleberry and tied on a little ribbon. The polka dot tulle adds a great touch and is very easy to tie. I absolutely love it and find it works on so many projects.
I used a 8.5 x 5.5 inch piece of cardstock folded in half for the base. Then, I layered a 2.25 inch piece of DSP. I stamped the flowers and trimmed the card stock. The Rich Razzleberry layer is 3/16 inch longer and wider than the trimmed floral image, and the Poppy Parade layer is 5/16 inch longer and wider than the Rich Razzleberry.
The DSP and the greeting strip are trimmed to match the edge of this embossed cardstock on the left. As you can see, on the right, they are staggered in length.
On the piece of vellum, I very carefully scored a line 1/4 inch from each side. Then I flattened the vellum back out because it tended to curl up. This left a very subtle line framing the outside of the layer. Whether you're short on time or supplies or you want to go all out and make a Wow! card, the Friend Like You stamp set is a perfect vehicle for you creative juices! |


Archives
April 2024
|