I'm so excited to be participating in the Stampin' Friends Blog Hop this year! Our first hop of 2020 is a Birthday Bash. All of the bloggers have created some amazing projects to share with you that are perfect for celebrating birthdays. I hope you'll click through and check them all out! The next blogger on the hop is Maureen Rauchfuss. So, when you're done here, hop over to her blog to see the projects she's created!
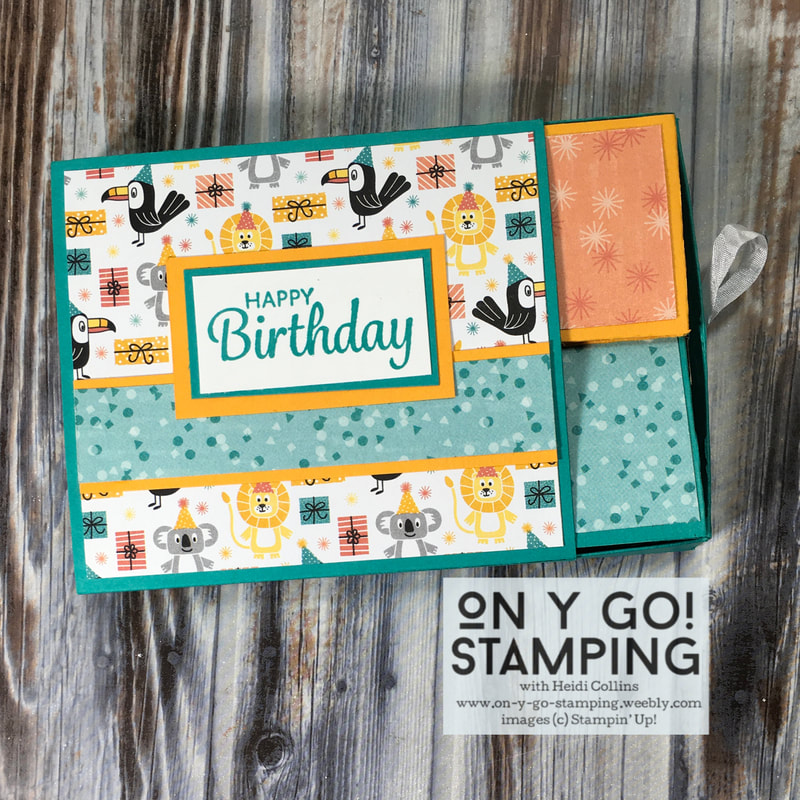
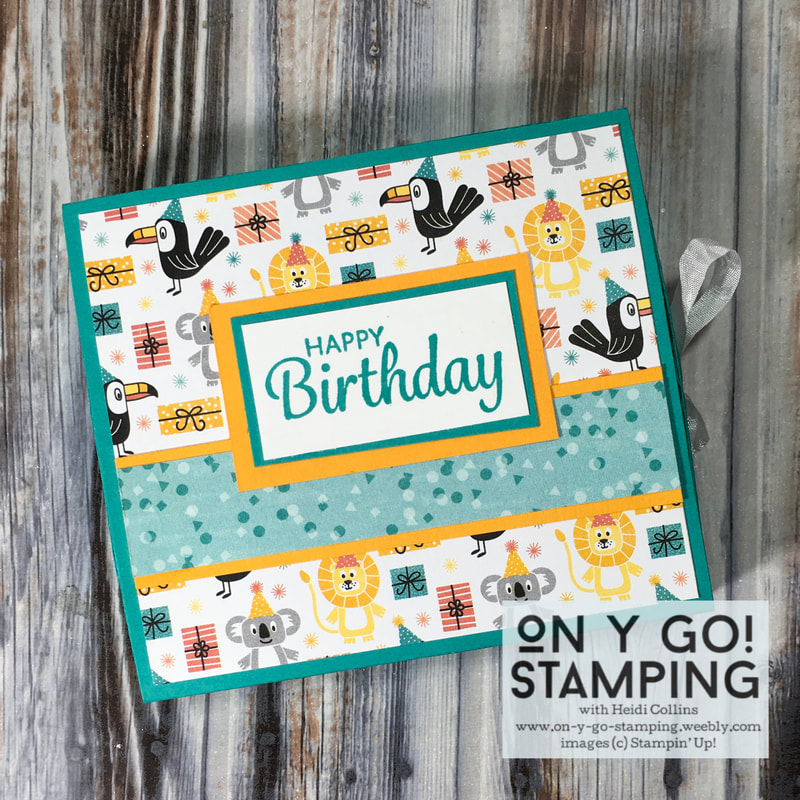
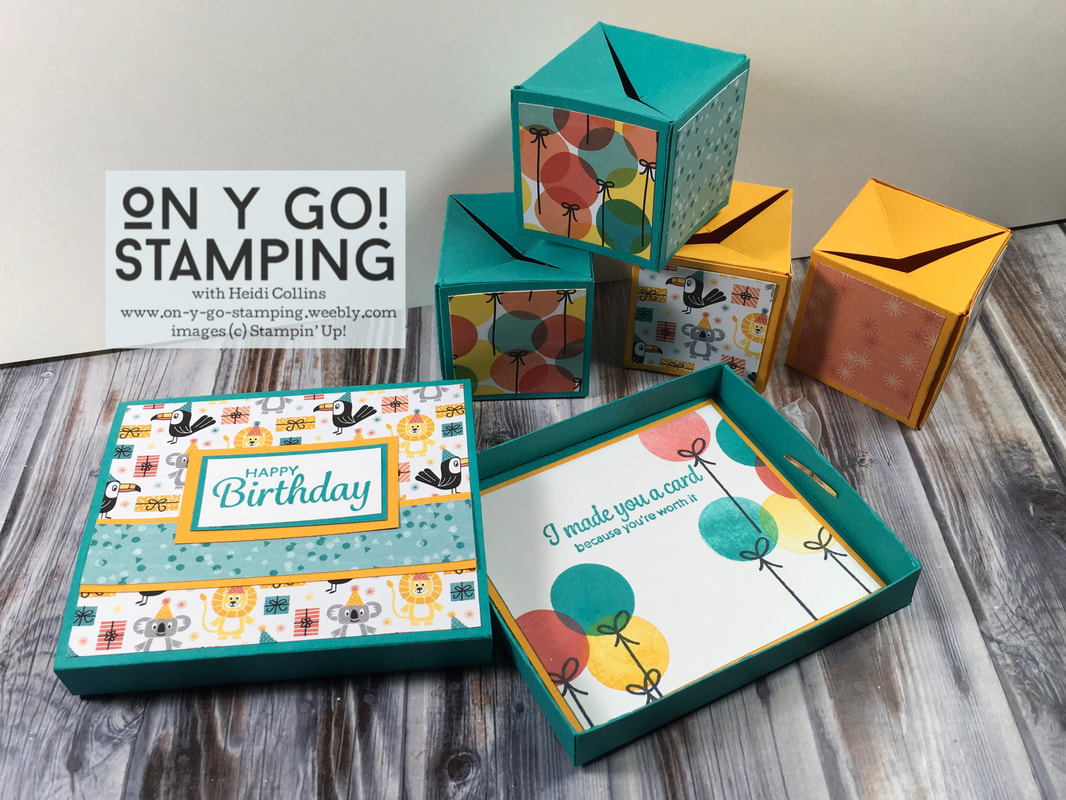
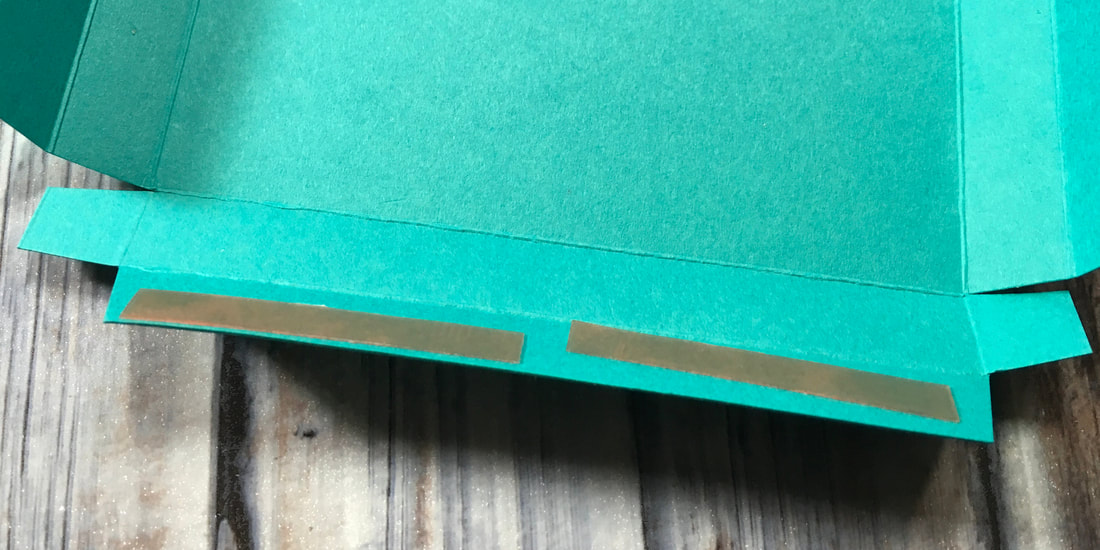
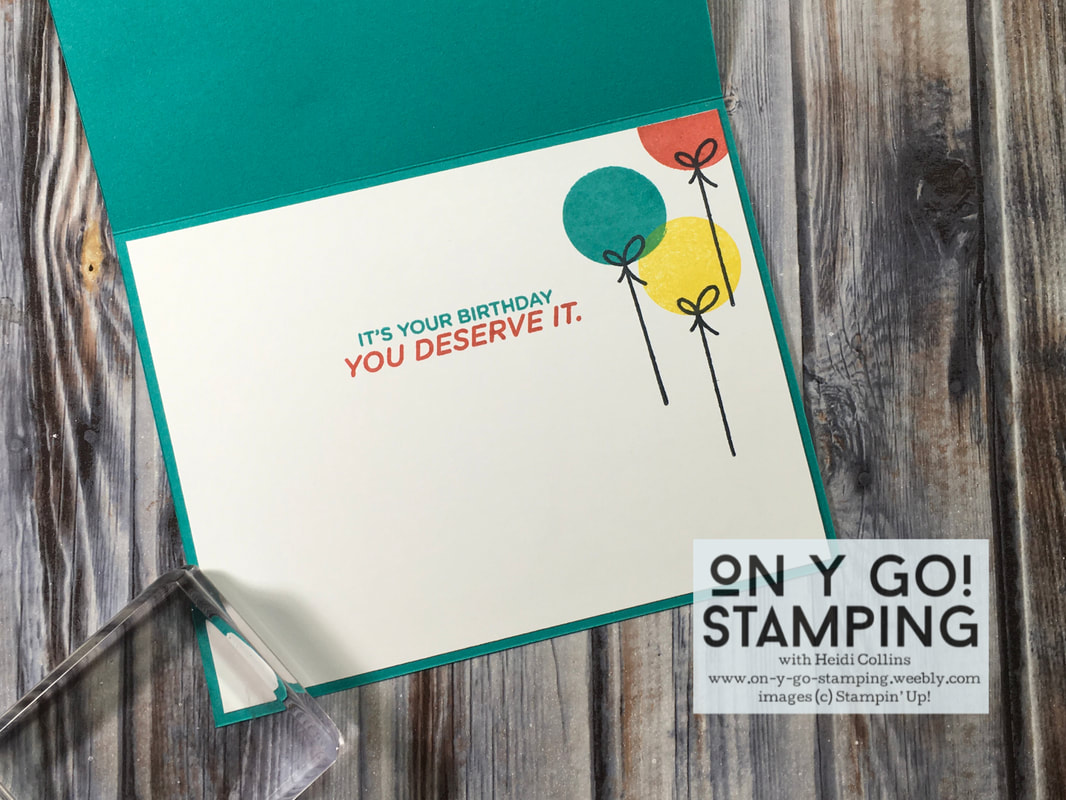
I've decorated my box with the Birthday Bonanza Designer Series Paper from the January - June 2020 Mini Catalog and the Here's a Card stamp set. On the inside of the box bottom, I used the Broadway Birthday stamp set. The cardstock is Mango Melody and Bermuda Bay. I used these same colors for the ink as well as Terracotta Tile and Tuxedo Black Memento ink. There are three parts to this project: The box bottom, the band that goes around the box bottom, and the four pop-out boxes.
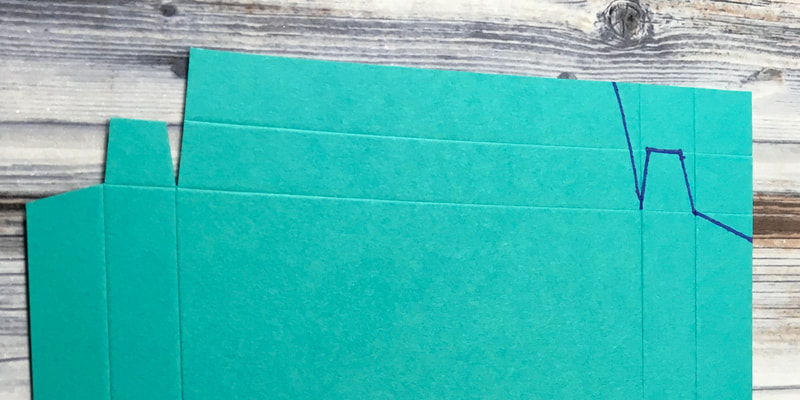
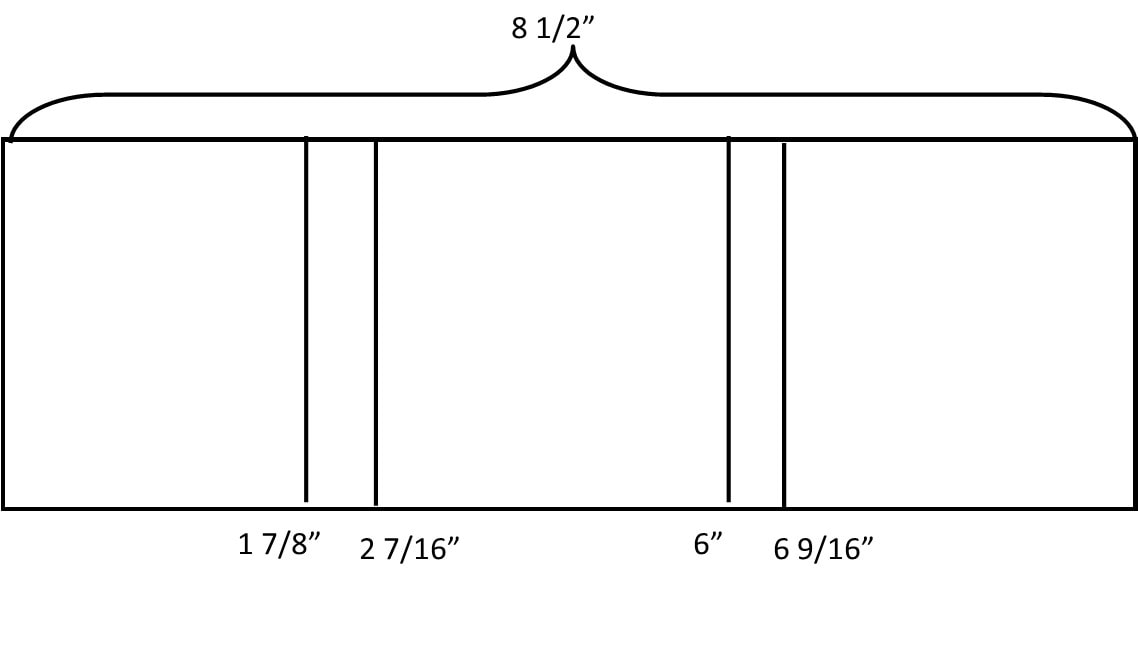
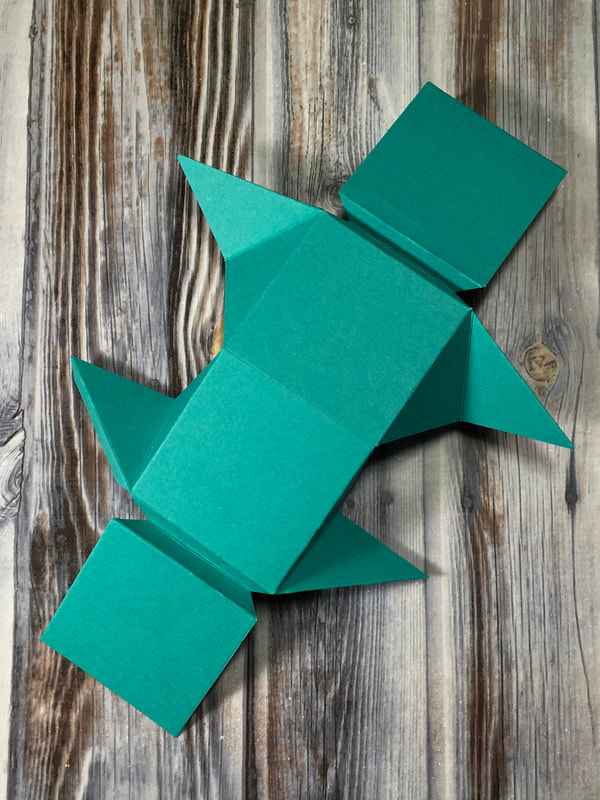
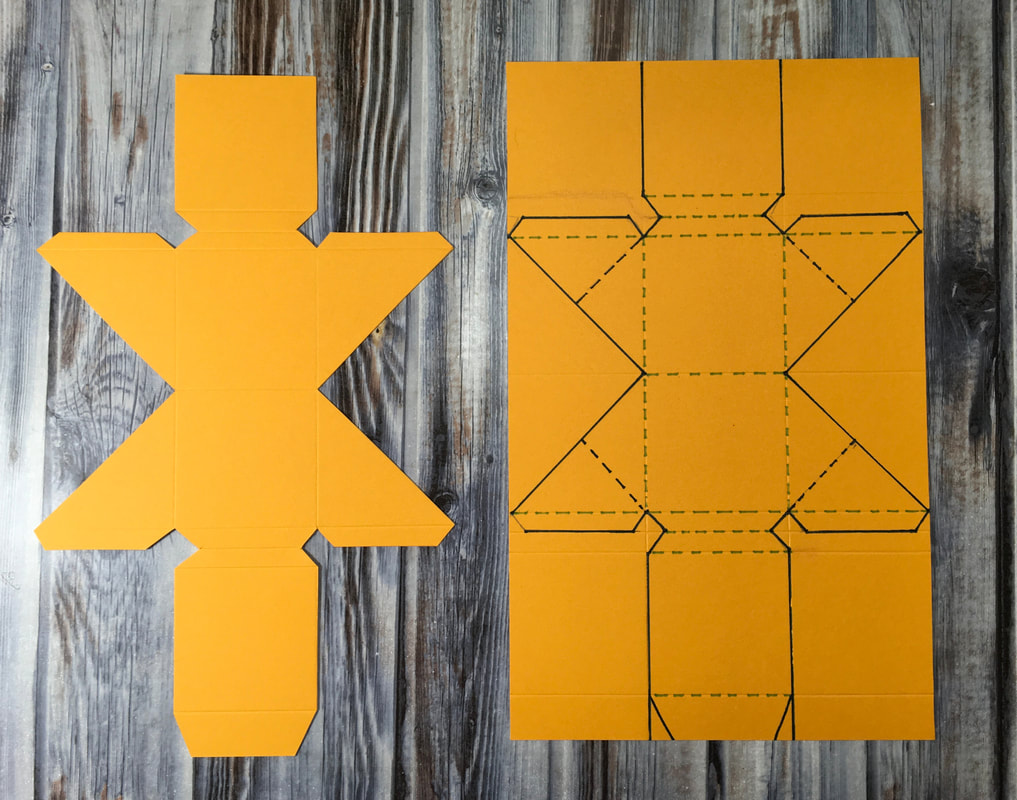 5. Cut the corners out like the picture above. The solid blue lines are the cut lines. The dotted green lines are fold lines that you have already scored. 6. You will notice there are dotted blue lines that create triangles inside the triangular shapes at the sides. You will need to score these. I find the middle of the diagonal line and then score from that point to the opposite corner of the triangle.
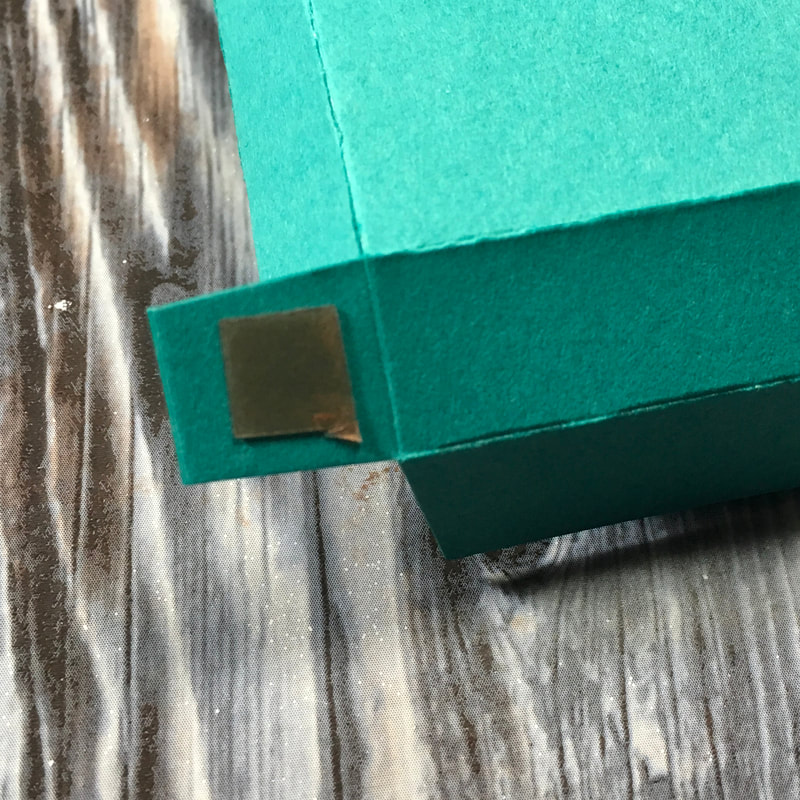
10. Twist the rubber band and slide it over the other side and into the accordion groove. Then, adhere the two sides of the triangles on that side. 11. Finally, adhere the flap on the end to close the box. 12. Decorate the outside of the boxes as you wish. I used the Birthday Bonanza Designer Series Paper from the January - June 2020 Mini Catalog. 13. Collapse the pop-out boxes by pinching the sides and close them inside the slide-out box bottom and sleeve. 14. Give to a friend and wait for the surprise! 
I hope you've enjoyed this box project and card as much as I do! Thanks for visiting the blog today and make sure to go take a look at all the projects on this month's hop! 1. Rachel Rife 2. Kim Lamos 3. Teri Pocock 4. Cheryl Taylor 5. Jo Blackman 6. Steph Jandrow 7. Katja Ettig 8. Lisa Ann Bernard 9. Kim Quade 10. Heidi Collins <-- You Are Here! 11. Maureen Rauchfuss 12. Jean Bolen Beaulieu 13. Anne Marie Hile 14. Barbara Welch 15. Melissa Thomas 16. Sue Vine
32 Comments
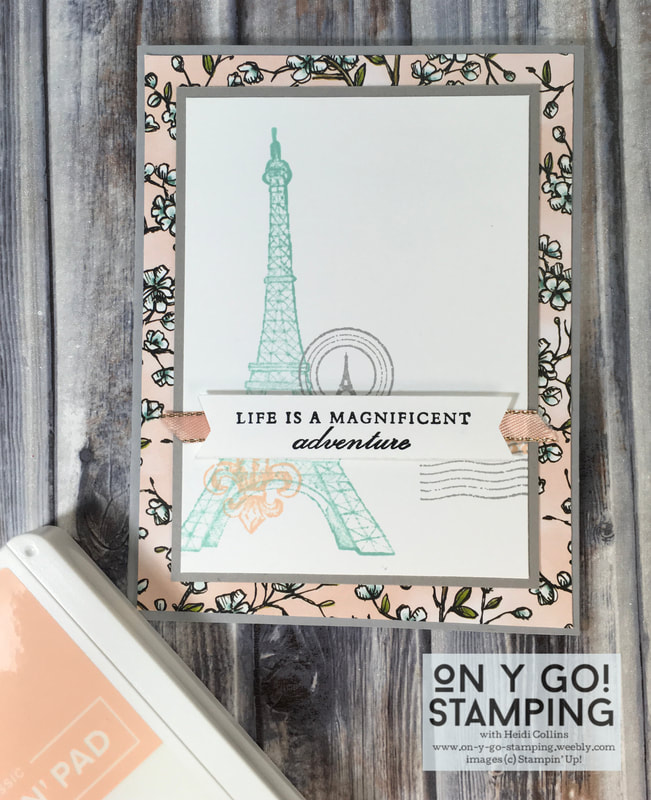
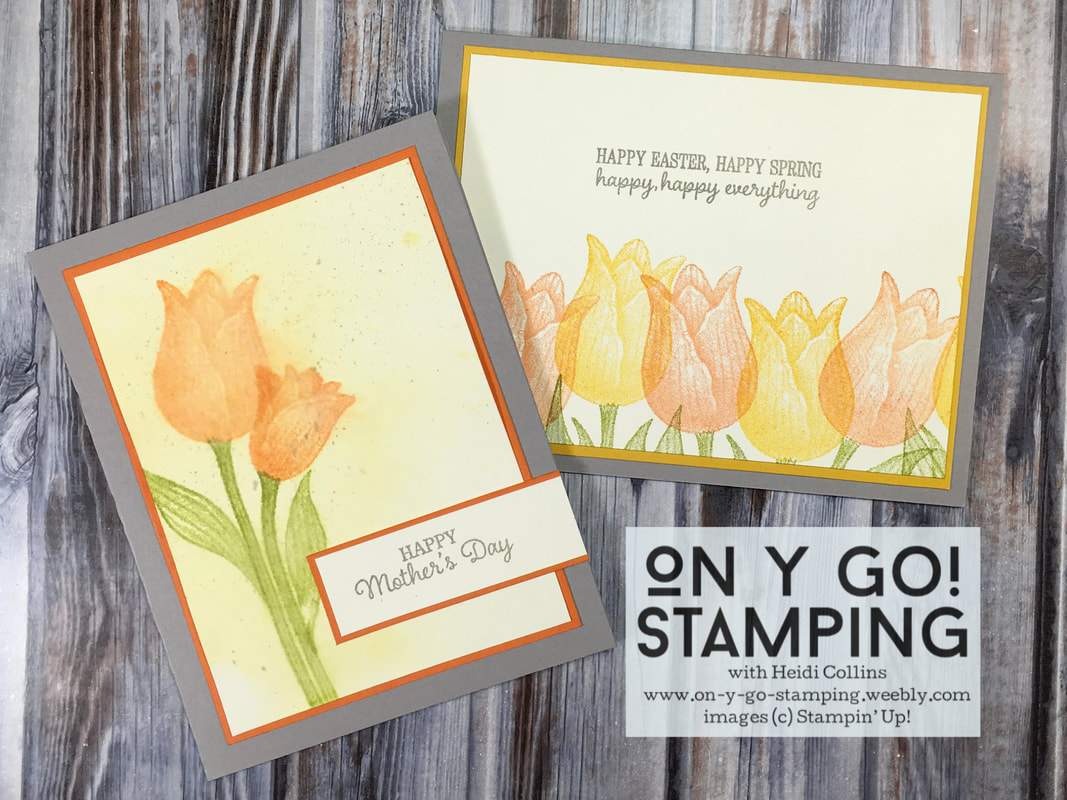
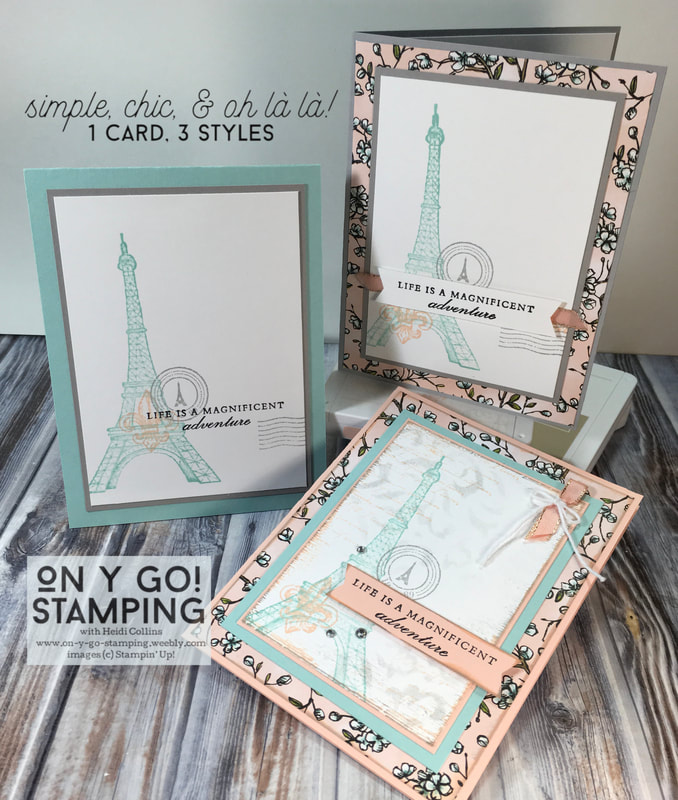 As a Francophile, the new Parisian Beauty stamp set was a must have! It will be available in the new January - June 2020 Mini Catalog, but I just couldn't wait to sit down and have a play with it. And then I couldn't wait to share the results with you! I used this stamp set to create three cards, one that is very simple but elegant, one that has a few more layers or what I like to call chic, and the last one where I pulled out all the bells and whistles, or embossing folders and masks, to create an over-the-top, Oh là là! card. For all three cards, I used a color combination of Pool Party, Petal Pink, and Smoky Slate.
The second card, my chic card, follows the same basic pattern as the simple card, but it has a few more layers. This time, I started with a piece of Whisper White cardstock that was 3 1/4" x 4 1/2". I stamped the same images in the same colors, but I spread out the fleur-de-lis and the circular image slightly so that they would both show up when I added the saying that I had stamped on a separate piece of Whisper White cardstock (5/8" x 3"). I trimmed the ends using the Tailored Tag punch.
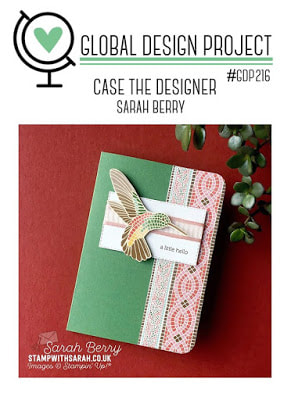
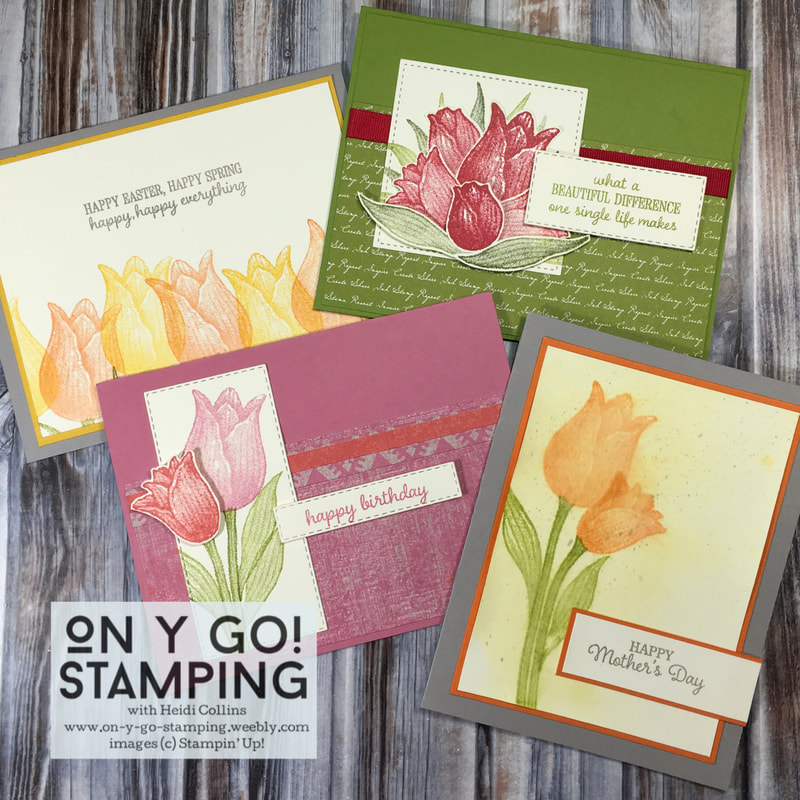
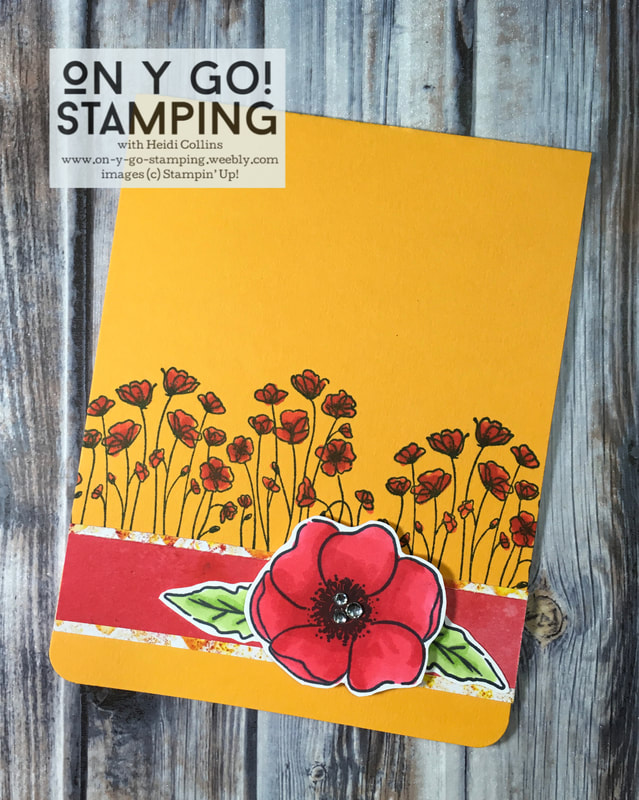
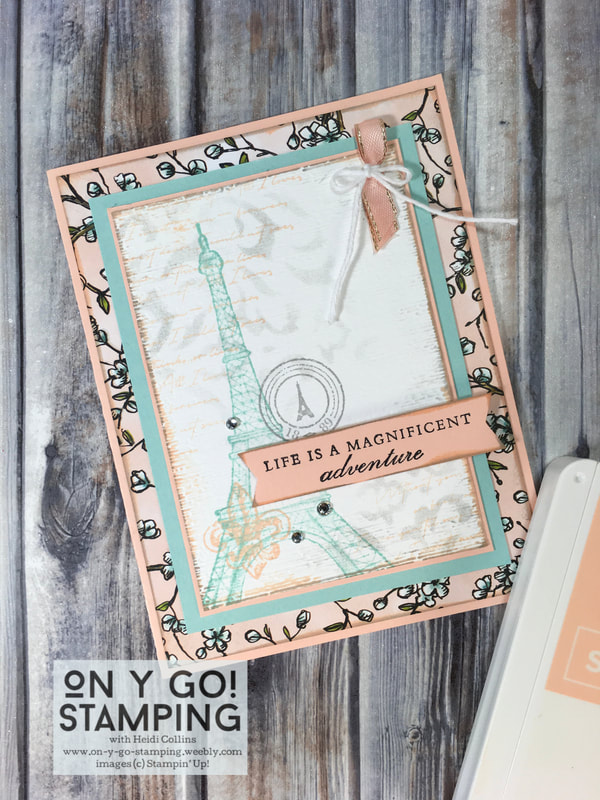 Finally, I pulled out all the stops for my Oh là là! card. Although, as you can see, it still has the same basic imagery stamped on the front, but there is a lot of other stuff going on as well. This time I started with an even smaller piece of Whisper White cardstock (3" x 4 1/4"). I started by using a mask from the set of Basic Pattern Decorative Masks found on page 35 of the Holiday Catalog. I used a sponge dauber to lightly sponge Smoky Slate ink in the upper left and lower right corners. Over this, I stamped the long, hard-to-read sentiment from the stamp set in Petal Pink ink. I stamped off before stamping it each time. Then, I stamped the other images as I had on the previous two cards. I ran this stamped piece of Whisper White through my Big Shot using the Subtle 3D embossing folder. Then I swiped my Smoky Slate and Petal Pink ink pads along the edges to give it a distressed look. I layered it on a piece of Petal Pink cardstock (3 1/8" x 4 3/8"), a piece of Pool Party cardstock (3 7/8" x 4 5/8"), a piece of Bird Ballad DSP (4 1/16" x 5 5/16") whose edges I had also swiped in Smoky Slate and Petal Pink ink, and finally onto my Petal Pink Card Base. I stamped the greeting in black on a small piece of Petal Pink cardstock, clipped the ends with the Tailored Tag punch, and swiped the edges with gray and pink ink. I adhered this to my card with Stampin' Dimensionals so that it was somewhat off-center and across multiple layers. I added three Basic Rhinestones near the greeting, and in the upper right corner, I took a small piece of Petal Pink Metallic-edged Ribbon, folded it in half, tied a piece of White Baker's Twine in a bow around it, and adhered it in place with a glue dot and a little Snail adhesive. This card was definitely not quick, but like the chic card, it wasn't difficult either. It just took a little more time and fussing. The end results were completely worth it though! I can't wait to make more cards with this beautifully elegant stamp set. Did I mention it has matching dies as well? Hopefully, those will be coming to my stamp studio soon! 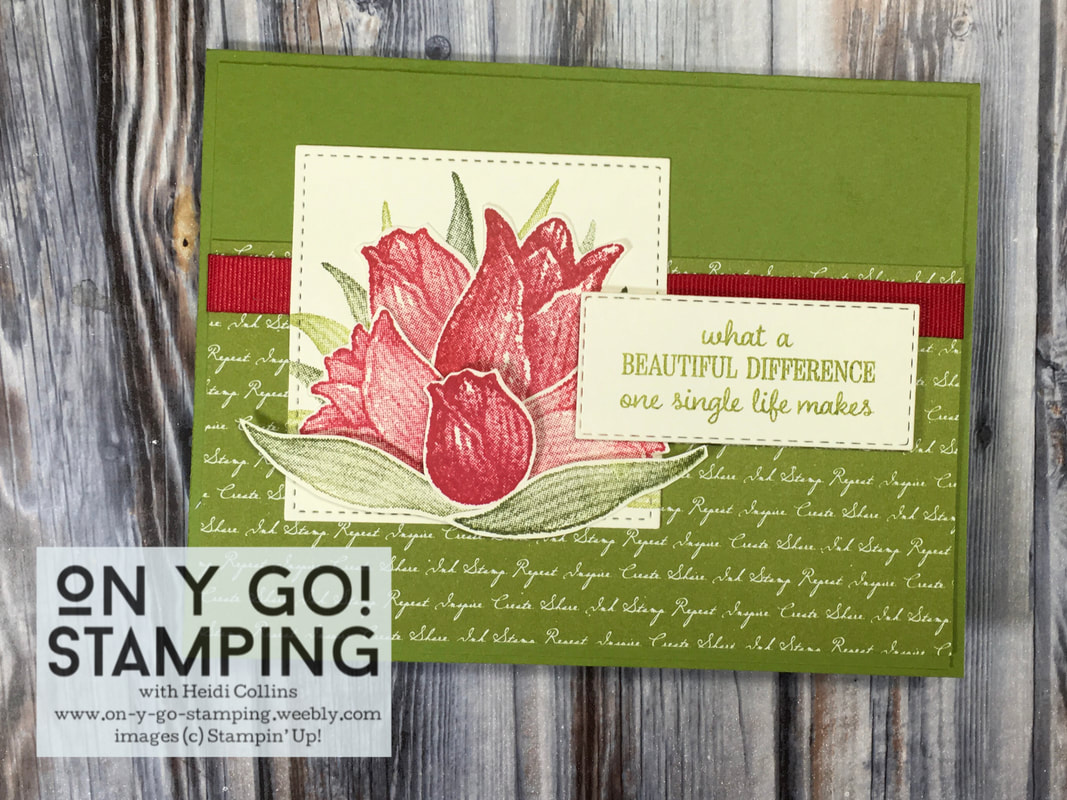 I just couldn't resist playing with these poppies some more! I decided to make a set of four blank cards. These are perfect for sending a note to a friend just because you're thinking of them. I was inspired by the Global Design Project #216 to CASE (Copy and Selectively Edit) the Designer.
The Painted Poppy stamp set will be available in the new Mini Catalog coming in January! If you'd like to receive one, please leave me a message or send me an email (stampin_heidi@yahoo.com) and I will get one out to you! |


Archives
May 2024
|